
F# Succinctly®

CHAPTER 6
Simulations and Graphics
I like to break the art of putting pixels on the screen into two parts:
- Low-level graphics programming, in which the programmer is responsible for the algorithms that control the geometry of what appears on the screen. An example of this might be creating a game, where the programmer is directly responsible for drawing the various elements that appear on the screen.
- High-level user interface creation, in which the programmer is responsible for composing together common elements, such as labels and text boxes, to quickly create practical user interfaces.
F# can be used to do both of these parts. In this chapter we’ll look at how to create graphics in F#, and in the next chapter we’ll look at how to put together forms and other higher-level user interfaces.
I’ve paired the creation of graphics in F# with the creation of simulations. This is because it’s likely that the graphics you’ll want to show will be the result of some kind of simulation. In this case, to keep the examples simple, I’ve chosen to create a simulation of a bouncing ball. There are many other simulations that might interest you, from Conway’s game of life to many kinds of fractals. These could be implemented in a way similar to the bouncing ball simulation discussed in this chapter. Even the implementation of games in F# could borrow heavily from the techniques described in this chapter.
The bouncing ball simulation itself will be a short F# module that just generates the raw data of the simulation. We’ll then show how this can be rendered in both WPF and Silverlight.
By creating the application in this way we have good separation of concerns. The simulation is responsible for the mathematical part of the application—although the math is very simple in this case—and the graphics layer is just responsible for rendering the data produced by the simulation.
The Bouncing Ball Simulation
The bouncing ball simulation we’re going to look at is probably the simplest simulation you could imagine. Our aim is simply to model a ball that bounces infinitely between an area defined by four walls. To start our ball simulation, we need to choose a way of representing the ball. To do this, we must decide what information about the ball is important for the simulation. In this case we care about two things: the position of the ball and its velocity. As this is a 2-D simulation, these values can be represented by four numbers in X and Y coordinates: two to represent the position, and two to represent the ball's velocity. We could include many other details about the ball, for example a friction coefficient to help calculate how much drag the ball experiences, or details about the ball's spin direction and speed to help determine how the ball would move when it hits an object, but our simulation is simple enough that these details just aren’t relevant, so we don’t include them. The ball can be represented by a simple F# record:
/// Represents a ball by its position and its velocity.
type Ball =
{ X: float
Y: float
XVel: float
YVel: float }
It’s often useful to provide a static method that constructs a new instance of the object. This provides a convenient shorthand for creating a new instance of an object. In this case this would look like:
/// Convenient function to create a new instance of a ball.
static member New(x: float, y: float, xVel: float, yVel: float) =
{ X = x
Y = y
XVel = xVel
YVel = yVel }
Now that we have a representation of our ball, it’s time to think about how the ball will move. We’ll implement this as a function that creates a new updated version of the ball: the X and Y coordinates will be updated according the ball's direction of travel, and the velocity values will be updated if the ball hits a wall. To do this we need one additional set of data: the dimensions of the area the ball is travelling around. These will be passed as parameters to the function that calculates the ball's movement.
The calculation we need to make is very simple. We update the ball's position, and if the ball is outside of the bounds we reverse the direction of travel and again update the position. Otherwise, we just move the ball to its new position. I have implemented this algorithm as a member method of the Ball type and called the Move method. The Move method accepts four parameters: xMin, yMin, xMax, and yMax. These define the area in which the ball is moving. It’s convenient to implement it as a member function with information about the environment passed as individual numbers since the simulation is simple. A more complex simulation would probably change in two ways. First, an environment type which grouped the information about the environment in which the ball was moving would be passed to the functions instead of individual numbers. Secondly, it might be necessary to have a centralized function in a module for coordinating the different elements of the simulation. As the simulation is simple, we’ll stick to the convenience of a member and individual parameters:
/// Creates a new ball that has moved one step by its velocity within
/// the given bounds. If the bounds are crossed, the ball velocity
/// is inversed.
member ball.Move(xMin: float, yMin: float, xMax: float, yMax: float) =
// Local helper to implement the logic of the movement.
let updatePositionAndVelocity pos vel min max =
let pos' = pos + vel
if min < pos' && pos' < max then
pos', vel
else
pos - vel, -vel
// Get the new position and velocity.
let newX, newXVel =
updatePositionAndVelocity ball.X ball.XVel xMin xMax
let newY, newYVel =
updatePositionAndVelocity ball.Y ball.YVel yMin yMax
// Create the next ball.
Ball.New(newX, newY,newXVel, newYVel)
Notice how there is really only one calculation to make, but we need to make it twice, for both the X and Y coordinates. To achieve this without repetition, we define a local helper function updatePositionAndVelocity which encapsulates the calculation of updating a coordinate. We can then call this function, pass it the relevant details for the X and Y coordinates, and the function will return the updated position and velocity. The final thing the function needs to do is create the new ball definition and return it.
This nicely illustrates the use of some simple but important features of F#, namely using local functions to avoid repetition and using tuples to return multiple values. In a language without local functions it may be tempting to just repeat the calculation of the position since it’s fairly short and simple. However, any repetition can lead to the definitions diverging over time as the code is maintained, and this is likely to result in bugs. The ability to return multiple values via tuples also helps in this process. If we weren’t able to do this, the alternative would be to directly update the variables from within our calculations. This would make the code less flexible as it would be coupled to the variable definitions that it was updating.
Now that we have a model which defines how the ball will move, we need to test the model to ensure we have the behavior we expect.
Testing the Model
One of the advantages of this model-based approach is that it makes testing very simple. The model consumes and produces data, so it’s very easy to create the required inputs and verify that the model outputs the values we expect. Using F# provides the added convenience of using F# Interactive to create test scripts that we can execute with a single key stroke.
There are four cases we would like to test:
- The ball does not hit the wall in the X or the Y direction so no bounce occurs.
- The ball hits the wall in the X direction but not the Y direction so a bounce occurs in the X direction.
- The ball does not hit the wall in the X direction but does in the Y direction so a bounce occurs in the Y direction.
- The ball hits the wall in both the X and Y directions so a bounce in both directions occurs.
All tests will share the same structure; only the data and assertions will change, so we can write one generic test and use it to test all four scenarios. But first, to start off our testing we need to add a new F# script and add a couple of commands to load the code to be tested:
#load "BallModel.fs"
open FsSuccinctly.BouncingBall
The first line loads the file containing the ball model into F# Interactive, and the next opens the namespace defined in the BallModel.fs file to give easy access to the types and functions contained within it. Now that we have access to our types and functions that need testing, we can write this generic test function:
let genericBallTest name x y shouldBounceX shouldBounceY =
// Create a ball.
let ball = Ball.New(x, y, 1., 1.)
// Move the ball.
let ball' = ball.Move(0., 0., 100., 100.)
// Verify we have the movement we expect.
let xOp = if shouldBounceX then (-) else (+)
let yOp = if shouldBounceY then (-) else (+)
if xOp ball.X ball.XVel <> ball'.X then failwith "X value not updated correctly"
if yOp ball.Y ball.YVel <> ball'.Y then failwith "Y value not updated correctly"
// Notify the user that the test has passed.
printfn "passed - %s" name
This function takes five parameters: name, which defines the name of the test and allows us to write a meaningful message when the test passes; x and y, which define the position of the ball for the test; and finally shouldBounceX and shouldBounceY, which define whether we expect the ball to bounce and are used during the test assertions. After that, the structure of the test is very simple. First we create an instance of our ball object to be tested, and then we call our move function to create the updated ball. Next, we verify that the ball has moved correctly, and finally we print a success message if the ball has moved as expected. The only complicated bit of the test is verifying if the ball has moved correctly. To do this, we test the shouldBounceX and shouldBounceY parameters to see whether the ball’s velocity should be added or subtracted, and then we perform the addition or subtraction operation ourselves and test it against the actual result. If the result is not as we expect, we call the failwith function—a nice shorthand way of creating an exception with an appropriate error message—otherwise we continue. The calculation of whether the ball is in the correct position is easy to make as we have access to both the original ball, which is immutable and therefore unchanged, and the updated ball instance.
Now that we have the function for running our tests, it’s easy to create the tests we need for each of the four cases we are interested in. We know that each test takes place on a 100-by-100 grid, so we just need to start the ball in the appropriate position. Here are the four functions that will test each of the cases:
let testNoneBounce() =
genericBallTest "testNoneBounce" 10. 10. false false
let testBounceX() =
genericBallTest "testBounceX" 99. 10. true false
let testBounceY() =
genericBallTest "testBounceY" 10. 99. false true
let testBounceBoth() =
genericBallTest "testBounceBoth" 99. 99. true true
To execute these tests, we need to make a call to each function from the top level:
testNoneBounce()
testBounceX()
testBounceY()
testBounceBoth()
When these tests are executed interactively, the results we would expect to see are:
passed - testNoneBounce
passed - testBounceX
passed - testBounceY
passed - testBounceBoth
Testing in this basic way has a few disadvantages when compared to using a unit testing framework, such as NUnit. The two main disadvantages are the need to explicitly call the function you want to test and that all tests will stop at the first error. However the main advantage of this testing method is that there’s no need to take a dependency on an external framework. Plus, the two approaches are not incompatible—I often find I start off testing a project just using F# Interactive directly and then migrate my tests to a unit testing framework as the project matures.
Drawing the Simulation’s Results
Now that we’re sure our simulation behaves as expected, it’s time to draw the results on the screen. We’re going to do this using WPF, and then using Silverlight. Although the controls available in WPF and Silverlight are similar, the low-level APIs differ significantly, so this will be an interesting exercise in porting the simulation between GUI libraries.
WPF has a nice set of methods for drawing shapes. To get access to these methods, the programmer simply needs to create a type that derives from System.Windows.FrameworkElement and override the OnRender method which is passed a DrawingContext parameter. We’ll create a type, BallRender, which will be responsible for running the simulation and rendering the results. This is how we’ll declare the type:
type BallRender() as br =
inherit FrameworkElement()
To render the results of our simulation we need to scale them. We have chosen to simulate the ball bouncing on a 100-by-100 grid with the ball having a width of just one point. If we tried to render this without scaling, even on today’s lowest resolution screens it would appear tiny. This is exactly the sort of geometric calculation that the UI should be taking care of. The simulation should be free to use values and representations that are convenient for making the simulation. It is the GUI’s responsibility to translate this into something that would be appealing to the end user. To make these calculations we’ll need some constants relating to the layout of the control, so we’ll declare these next in the class’ implicit constructor directly after the type definition:
// Ball size and limits.
let size = 5.0
let xMax = 100.0
let yMax = 100.0
// Offset to give a nice board.
let offset = 10.0
We’ll also need some pen and brush objects to define how our lines and filled areas will look:
// Pen and brush objects.
let brush = new SolidColorBrush(Colors.Black)
let pen = new Pen(brush,1.0)
To run the simulation we’ll need two things: a reference to the current ball object, whose position will be updated over time, and a timer that will be responsible for executing the simulation and updating the ball's position. The current ball will be held in a reference cell. A reference cell is a mutable type built into F# to support values that can change over time. A reference cell is created by the ref function:
// A reference cell that holds the current ball instance.
let ball = ref (Ball.New(50., 80., 0.75, 1.25))
For the timer we’ll use WPF’s DispatcherTimer. This is a timer whose Tick event executes on the GUI thread so there is no need to worry about marshaling the data from the simulation back to the GUI thread. This works well for our simple simulation where the calculation will execute so quickly that executing the Tick events on a background thread would actually harm performance as the overhead of thread synchronization would be more costly than the cost of the simulation itself. This will be the case for many of the simulations you create; however, as the complexity and execution time of a simulation grows, it can become necessary to run it on a background thread to keep the GUI responsive. When a simulation becomes so costly that running it requires a background thread, it’s probably worth introducing a new abstraction—usually a new class—to run it. However, for many situations, a simple time will be fine and this can be declared as a class member as shown in the following sample:
// Timer for updating the ball's position.
let timer = new DispatcherTimer(Interval = new TimeSpan(0,0,0,0,50))
To create a smooth animation you’ll need at least 12 frames per second, so the ball’s position must be updated at least 12 times every second. Initialize the timer to run every 50 milliseconds. This should give us 20 frames per second, so we should always have nice, smooth animation.
The final thing we need to do in the constructor is adjust the control's size to correspond to the size of the area we’re drawing and initialize the timer’s Tick event. To do this, create an inner function init() and call it at the end of the constructor:
// Helper function to do some initialization.
let init() =
// Set the control's width and height.
br.Width <- (xMax * size) + (offset * 2.0)
br.Height <- (yMax * size) + (offset * 2.0)
// Set up the timer.
timer.Tick.Add(fun _ ->
// Move the current ball to its next position.
ball := ball.Value.Move(0.,0., xMax,yMax)
// Invalidate the control to force a redraw.
br.InvalidateVisual())
timer.Start()
do init()
Let’s take a close look at the initialization of the timer’s Tick event. This is initialization by adding an anonymous lambda function to the event. Within this function, we first move the ball to its new position by calling Move on the current ball, and then store the resulting ball in the ball reference cell. Second, we call the control's InvalidateVisual() method—this will cause the control to be redrawn so that the user can see the ball’s new position.
To allow us to draw on the control, we need to override its OnRender method. This will give us access to a DrawingContext parameter which has a nice set of methods for drawing primitives such as lines, rectangles, and ellipses. This makes drawing the ball very straightforward. It’s just a matter of calculating its current position by multiplying the output of the simulation by the appropriate scale factor, and then adding the offset for the border. We can then draw the ball by calling the DrawEllipse method. We also draw a border to make it easier for the user to see the area in which the ball is moving:
/// The function that takes care of actually drawing the ball.
override x.OnRender(dc: DrawingContext) =
// Calculate the ball's position on the canvas.
let x = (ball.Value.X * size) + offset
let y = (ball.Value.Y * size) + offset
// Draw the ball and an outline rectangle.
dc.DrawEllipse(brush, pen, new Point(x, y), size, size)
dc.DrawRectangle(null, pen, new Rect(offset, offset, size * xMax, size * xMax))
The code that is required to see the control is now complete. All that remains is a little WPF plumbing to create a window that will host the control and to create an event loop that will show the window:
module Main =
// Create an instance of the new control.
let br = new BallRender()
// Create a window to hold the control.
let win = new Window(Title = "Bouncing Ball",
Content = br,
Width = br.Width + 20.,
Height = br.Height + 40.)
// Start the event loop and show the control.
let app = new Application()
[<STAThread>]
do app.Run win |> ignore
Here we see that the first let binding creates a new instance of our ball rendering control, and the next creates a window that will host the control, setting a few properties of the window as it is created. Finally, we create a new instance of the WPF application class and use this to start a WPF event loop by calling its run method. The most important thing to note about this is that we attach a STAThread attribute to the call to the run method to ensure that the correct threading model is used for the event loop. The following image shows what the window will look like when the program is executed:

Figure 3: Bouncing Ball Simulation
Now we will take a quick look at how the control can be ported to Silverlight to take advantage of Silverlight’s ability to be easily downloaded and executed in web browsers, allowing the simulations or games you create to be easily distributed to users.
The low-level interfaces to Silverlight are different than those of WPF; there are no APIs for drawing. If you want to create custom shapes, it’s best to write the shapes to a writeable bitmap and then use a user control to show the bitmap.
Visual Studio 2012 comes with a template for creating an F# Silverlight application already installed. However, it’s easier to create a Silverlight application using one of the templates available online. I based this sample on the F# Web Application (Silverlight) by Daniel Mohl, which can be downloaded from http://visualstudiogallery.msdn.microsoft.com/f0e9a557-3fd6-41d9-8518-c1735b382c73 or found by searching online in the New Project dialog as shown in the following figure:
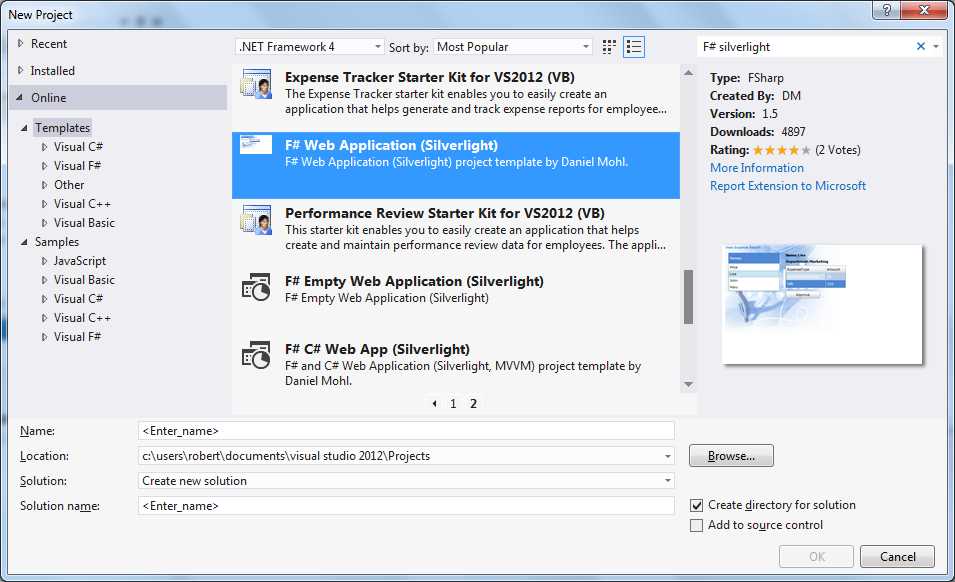
Figure 4: F# Web Application
This application comes with a number of predefined XAML pages that you will need to remove. Keep only the bare bones of the AppLogic.fs file that also comes with the template.
We’ll structure the code similarly to what we did for the WPF version. We’ll create a control that is responsible for rendering the bouncing ball, and then add the boilerplate code that is required to show this in Silverlight. The ball rendering control starts by declaring a new type that inherits from UserControl:
type BallRender() as br =
inherit UserControl()
Then we’ll add some constants that will control to how the overall control will appear:
// Ball size and limits.
let size = 5.0
let xMax = 100.0
let yMax = 100.0
// Offset to give a nice board.
let offset = 10.0
// Calculate total width and height of the area.
let xTotalWidth = (xMax * size) + (offset * 2.0) |> int
let yTotalWidth = (yMax * size) + (offset * 2.0) |> int
Next we’ll need to declare a writable bitmap on which we will draw our bouncing ball, and the bitmap will need to be wrapped in an image control so it can be shown:
// The writable bitmap which will allow us to draw pixels onto it.
let bitmap = new WriteableBitmap(xTotalWidth,
yTotalWidth)
// The image control that holds the bitmap.
let image = new Image(Source = bitmap)
Unfortunately, the writable bitmap doesn’t support any easy way of writing to it; it has only a flat array of integers that represent the colors of the bitmap. To make drawing on the bitmap easier, we need a couple of abstractions to allow us to set the pixels of the bitmaps more easily. This takes the form of two functions: a function to convert a Silverlight Color value to a System.Int32, and a function that can set a pixel’s color by its x-coordinate and y-coordinate rather than its place in the flat array of integers the writable bitmap uses to represent its pixels.
// Convert an RGB color to the int format used by the bitmap.
let colorToInt (c: Color): int =
[c.A, 24; c.R, 16; c.G, 8; c.B, 0]
|> List.sumBy (fun (col, pos) -> (int col) <<< pos)
// Function to set a pixel by its x-coordinate and y-coordinate to the given color.
let setPixel x y c =
bitmap.Pixels.[y * xTotalWidth + x] <- colorToInt c
The colorToInt function takes a Color value and returns an int. The Color value has byte members that represent the alpha, red, green, and blue components of the color. To fit these values into a single integer, each component needs to be shifted by a number of bits—0 for blue, 8 for green, 16 for red, and 24 for alpha. The function does this by creating a list of tuples pairing the alpha, red, green, and blue components of the color with the number of bits by which they have to be shifted. We can then use the List.sumBy function, which takes a function to be applied to each item in the list and then sums the result of the function applied to each element of the list. So, the lambda function passed to List.sumBy performs the bit shift, while List.sumBy accumulates the results into a single integer. The setPixel function takes the x- and y-coordinates of the pixel to be set and the color it is to be set to. The function then uses a simple formula to find the appropriate pixel to set, and then converts the given color to an integer and sets this pixel in the bitmap’s Pixel array property.
Now that we can easily write pixels to our bitmap's surface, we can create a function to draw the ball. The simplest way to do this is to use a template of a list of strings that describe the ball's layout. Each character in the string represents a pixel of the ball. An asterisk (*) means the pixel should be colored. Any other character means it should be left as it is. This may seem an odd thing to do, but it’s a very convenient way to visually describe the ball in the code while obtaining a data structure that is very easy to work with. Once we have defined this ball template, it’s just a matter of creating a function that takes a ball, enumerates the rows of the template, and then enumerates the characters in each row to see which pixels of the ball should be filled in.
// Template that describes what the ball should look like.
let ballTemplate =
[ " "
" *** "
"*****"
" *** "
" " ]
// Draws the ball on the bitmap.
let drawBall ball c =
// Calculate top corner of the ball.
let xBall = (ball.X * size) + offset
let yBall = (ball.Y * size) + offset
// Iterate over the template, setting a
// pixel if there is an asterisk.
ballTemplate
|> Seq.iteri(fun x row ->
row |> Seq.iteri (fun y item ->
if item = '*' then
setPixel (int xBall + x) (int yBall + y) c))
The drawBall function takes a ball and a color to draw it. The function enumerates the ballTemplate using F#’s Seq.iteri function, which enumerates any IEnumerable<T> collection and applies the given function to each member of the collection. The function that is applied to each member is also passed an integer representing the index of the current value (iter is short for iterate, and the i at the end of iteri is short for index). So we enumerate first the rows, then the individual columns, and draw a pixel each time we find an asterisk using the two indexes as an offset from the given ball’s position. You might like to try experimenting with different ball layouts by changing the asterisks in the ball to see if you can find a more pleasing ball shape.
Now that we can draw a ball, we need to be able to draw a border around the area the ball will bounce in. We’ll do this by creating a drawSquare function:
// Draws a square around the border of the area.
let drawSquare c =
// Calculate where sides should end.
let xSize = xMax * size + offset |> int
let ySize = yMax * size + offset |> int
// Convert the offset to an int.
let offset = offset |> int
// Draw the x sides.
for x in offset .. xSize do
setPixel x offset c
setPixel x ySize c
// Draw the y sides.
for y in offset .. ySize do
setPixel offset y c
setPixel xSize y c
Drawing the square is quite easy; we just need to know on what pixel the top-left corner will start and where the bottom-right corner will end. The top-left corner will start at the offset for both the x and y directions, and the bottom-left corner will have coordinates of offset + xMax * size, offset + xMax * size. Once we have calculated these values, we can draw the horizontal lines of the square by iterating from the minimum x-coordinate to the maximum x-coordinate; setting the pixels at the current x, minimum y and current x, maximum y; and then doing the same thing in between the minimum y and maximum y to draw the vertical lines.
We’re now capable of drawing both the ball and the border that will enclose it. Now we must use these two functions to show the ball’s movement over time. To do this, we use the same technique we used for WPF: we create the ball in a reference cell to track the changes over time, and we use a time to update the ball and draw the results. The code to initialize the ball and timer is shown in the following sample.
// A reference cell that holds the current ball instance.
let ball = ref (Ball.New(50., 80., 0.75, 1.25))
// Timer for updating the ball's position.
let timer = new DispatcherTimer(Interval = new TimeSpan(0,0,0,0,50))
The event handler must replace the ball's old position with a black ball, move the ball to its new position, draw the new ball and the border, and finally call the bitmap’s Invalidate() method to cause a redraw. The code to do this is fairly straightforward:
// Handler for the timer's tick event.
let onTick() =
// Write over the old ball.
drawBall !ball Colors.Black
// Move the current ball to its next position.
ball := ball.Value.Move(0.,0.,xMax,yMax)
// Draw ball and square.
drawBall !ball Colors.Red
drawSquare Colors.Red
// Invalidate the bitmap to force a redraw.
bitmap.Invalidate()
All that remains after that is to wire everything together. We’ll define and call an init()function to do that. The init() function will fill the bitmap with the color black, assign the image to the user control’s Content property so it will be seen in the user control, and finally add our onTick function to the timer’s Tick event and start it.
// Helper function to do some initialization.
let init() =
// First color our bitmap black.
Array.fill
bitmap.Pixels
0 bitmap.Pixels.Length
(colorToInt Colors.Black)
// Make the image the user control's content.
br.Content <- image
// Set up the timer.
timer.Tick.Add(fun _ -> onTick())
timer.Start()
do init()
That completes our work on the control to show the bouncing ball. All that remains is the Silverlight plumbing that will show the control when the application starts up. This is very straightforward:
type App() as this =
inherit Application()
do this.Startup.Add(fun _ -> this.RootVisual <- new BallRender())
Of course there’s still a need to create a test HTML page that will load the Silverlight runtime along with the application we just created, but the template we’ve used should take care of that. Viewing the resulting simulation should just be a matter of pressing F5. You can see the simulation running on my machine in the following image.

Figure 5: Bouncing Ball Simulation
Even though Silverlight’s API offers significantly less low-level drawing functionality, we’ve seen that by creating a few simple and easy-to-use abstractions it’s still fairly easy to create applications with custom graphics.
Summary
In this chapter we’ve seen how to approach building a simple simulation in F#, and how to use low-level drawing APIs to create custom graphics in F#.
- 1800+ high-performance UI components.
- Includes popular controls such as Grid, Chart, Scheduler, and more.
- 24x5 unlimited support by developers.