
F# Succinctly®

CHAPTER 8
Creating an Application
In this chapter I want to show what’s involved in writing an application in F#. “Application” is probably too grand a word for what we’re going to implement, but the point is to show F# interacting with other technologies and frameworks in the same way you would have to if you were to create a real-world application.
We’re going to create an autocomplete drop-down in an HTML webpage. The idea is to type in the village, town, or city you’re interested in, and the autocomplete will help you find the correct one in the system. We’re going to use RavenDB as our data storage, and PicoMvc as the MVC web framework to handle the application layer. PicoMvc is an MVC framework that I have created specifically for F#. It was largely inspired by OpenRasta, FubuMvc, and a little bit of ASP.NET MVC, so the example given here will probably be quite easily portable to any of these frameworks if you prefer not to use PicoMvc. RavenDB is a NoSQL database implemented in C#. I like this database not because it is fast and provides good support for scalability through sharding, which it undoubtedly does, but because its implementers have a real focus on making it very easy for developers to use.
Creating an autocomplete drop-down in a HTML form is fairly common these days, and there’s a nice jQuery plugin that takes care of the UI side of things. Loading the data into RavenDB and then exposing a service that will return JSON records corresponding to the user's search will be the focus of this chapter.
The full code of this example is available from the examples directory of PicoMvc itself at https://github.com/robertpi/PicoMvc/tree/master/examples/AutoComplete.
Project Setup
Our Visual Studio solution will have four projects: Common.fsproj, LoadCommunes.fsproj (commune is our generic term for village/town/city), Web.fsproj, and WebHost.csproj.

Figure 8: Autocomplete Project Setup
The Common project contains the definition of our types that will be stored in RavenDB. The common project will be referenced from the LoadCommunes and Web projects. The LoadCommunes project will contain the ETL logic to load the data into RavenDB. The Web project will contain the logic that drives the webpages. The WebHost project is a C# “web project”—it’s just there to hold the HTML parts of the project and make launching the web server for debugging easier.
Now that the projects are set up to our satisfaction, it’s time to look at some actual code in the ETL (extract, transform, and load) part of the application.
The ETL (Extract/Transform/Load)
Since I live in France, we’re going to use data based on French villages, towns, and cities, but the techniques described here will be easily adaptable to wherever you live. First, we need to download the data. I obtained the data from http://www.galichon.com/codesgeo/. You can click the Télécharger la base link under Coordonnées géographiques des villes Françaises, or download the file directly from http://www.galichon.com/codesgeo/data/ville.zip. It’s not the best data source in the world, but it’s the best freely available data source that I’ve found. Once you’ve unzipped the Excel file and converted the file to a CSV, loading it into RavenDB is pretty straightforward.
First we need to design a type to hold the data in the Common project:
type Commune =
{ mutable Id: string
Name: string
Postcode: string }
We’re only going to store the name of the commune and its postcode because that’s all we’re going to search for or show—thus the fields Name and Postcode. RavenDB is pretty robust when it comes to adding or deleting fields, so it’s fine to start with a minimal set of data and add stuff later. The Id field is the unique identifier of the record. It is mutable because this just seems to work better with RavenDB. We could let RavenDB generate this for us, but since INSEE, the French government’s bureau for statics and economic studies, assigns each village its own unique identifier which is included in the file, we’ll use this. In France, several communes can share the same postcode, so this would not be a good candidate for the identifier.
Once we’ve designed the type to store the commune data, the code to load it from the file and store it in RavenDB is fairly simple:
let loadCommuneData() =
use store = DocumentStore.OpenInitializedStore()
let lines = File.ReadLines(Path.Combine(__SOURCE_DIRECTORY__, @"ville.csv"), System.Text.Encoding.Default)
use session = store.OpenSession()
session.Advanced.MaxNumberOfRequestsPerSession <- 30000
lines
|> Seq.skip 1
|> Seq.iteri(fun i line ->
let line = line.Split(';')
match line with
| [| name; nameCaps; postcode; inseeCode; region; latitude; longitude; eloignementf|] ->
let id = sprintf "communes/%s" (inseeCode.Trim())
printfn "Doing %i %s (%s)" i name id
let place: Commune =
{ Id = id
Name = name.Trim()
Postcode = postcode.Trim() }
session.Store(place)
if i % 1000 = 0 then session.SaveChanges()
| line -> printfn "Error in line: %A" line)
session.SaveChanges()
There are a few points worth highlighting:
- We use File.ReadLines to give us an IEnumerable of all the lines in the file. This gives us a nice convenient way to read the file line by line without loading it all into memory.
- Notice we’re passing System.Text.Encoding.Default to File.ReadLines. French communes often have accented characters in their names, so we need to ensure we’re using the right encoding.
- It’s necessary to set the session.Advanced.MaxNumberOfRequestsPerSession because it is limited to 10 by default, meaning that after 10 requests or stores the session would throw an exception. Typically sessions are meant to be short lived, so this exception is meant as an early warning for developers. Since this is an atypical use of a session it’s okay to set this number. However, I think sessions cache the data that they store, so you may want to clear the session after each write to RavenDB. It doesn’t seem to make much difference in this case.
- We enumerate each row in the file using Seq.iteri. This gives us the row plus the row number. We can use the row number to perform a save every 1000 items by calling .SaveChanges(). This seems to be more efficient than either saving after each row or trying to save the whole lot all at once. I haven’t done much experimentation with this number; there may be a more optimal number than 1000.
- The parsing of the file is very simple, we simply call .Split(';') on each row and then pattern match over the resulting array to unpack the relevant items. These are then loaded into the Commune type and stored in RavenDB using the session's Store() method. As mentioned in the previous bullet, these aren’t flushed to the DB until you call .SaveChanges().
And that about wraps it up. The data is in the database, and you can verify this using RavenDB’s administrative console as shown in the following figure.
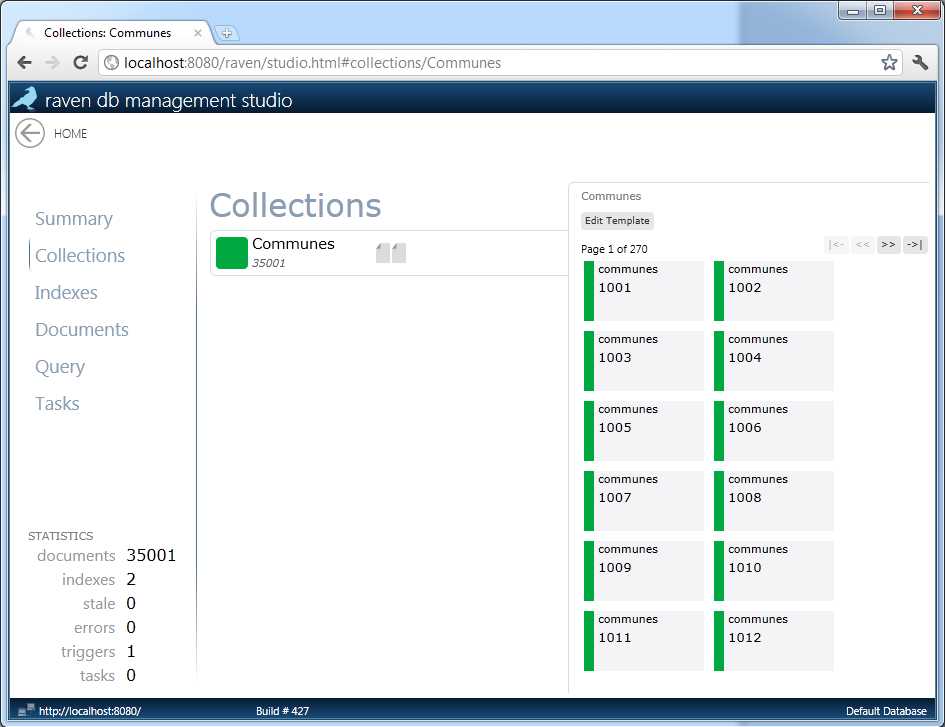
Figure 9: Administrative Console for Database
Code Supporting the Website
Now that we have the data in RavenDB, we’d like to be able to show the data to the user. To do this we need to create a service that will return a JSON document to the client. Implementing the service with PicoMvc and RavenDB is simple enough, but to do it we need to configure PicoMvc and create an index in RavenDB so that we can query it.
PicoMvc is designed to map an F# function to a URL and HTTP verb. The idea is that the basic framework is independent of the web server and host platform, but we provide hooks to allow you to plug PicoMvc into existing platforms. For now, the only hook that exists is the one to plug PicoMvc into the ASP.NET platform, and this is done via a class called PicoMvcRouteHandler, which is an ASP.NET route handler. The idea is that you register this route handler with the ASP.NET runtime, and it provides all the plumbing for mapping the calls the ASP.NET HTTP handler will receive and requests to the handler functions you have defined via PicoMvc.
As PicoMvcRouteHandler is just a normal HTTP handler. It requires that you register it with the ASP.NET runtime in the global.asax:
routes.Add(new Route("{*url}", new PicoMvcRouteHandler("url", routingTables, actions)))
PicoMvcRouteHandler also requires a little configuration. The route handler's first parameter is a string which tells it the name of the URL you matched against when you added the route handler. It will then use this as the URL to resolve which function will be called. The next parameter is a routing table, which holds the information about which functions should be called for which URLs. You can make PicoMvc automatically search all loaded assemblies for F# modules marked with the [<Controller>] attribute by calling the static method LoadFromCurrentAssemblies.
let routingTables = RoutingTable.LoadFromCurrentAssemblies()
The route handler’s third and final parameter tells the route handler how the parameters and return results of the functions that are dynamically invoked should be handled. There are a number of predefined actions in PicoMvc. For example, there is an action which will look up a value in the query string or post variables based on the parameter’s name. This is called ParameterActions.defaultParameterAction. Defining new actions is fairly easy as well. For example, we’ll need an action that returns a reference to the RavenDB document store if ever we see a type of IDocumentStore. This is how we would make it:
let ravenParameterAction =
{ CanTreatParameter = fun _ _ t -> t = typeof<IDocumentStore>
ParameterAction = fun _ _ _ -> !store :> obj }
It’s also necessary to define an index on our data that RavenDB will use in its queries. Since this uses the C# “monadic” syntax, it is closely tied to the C# language. I find it easier to implement this in C#:
public class Communes_Search : AbstractIndexCreationTask
{
public override IndexDefinition CreateIndexDefinition()
{
return new IndexDefinitionBuilder<Commune>
{
Map = communes => from commune in communes select new { commune.Name, commune.Postcode }
}.ToIndexDefinition(this.Conventions);
}
}
It is then simple to load this from our global.asax:
let assem = Assembly.Load("WebHost")
IndexCreation.CreateIndexes(assem, !store)
Now that we’ve tackled configuring both PicoMvc and RavenDB, we’re ready to attack implementing the service itself.
The JSON Service
To create the autocomplete drop-down we need to query RavenDB and then send the results to the user's webpage as a JSON document. Implementing the JSON service is pretty straightforward:
type AutoCompleteResult =
{ id: string;
label: string;
value: string }
[<Controller>]
module Commune =
let get (term: string) (store: IDocumentStore) =
use session = store.OpenSession()
let postcodeRegex = new Regex(@"^\d+$")
let comQuery = session.Advanced.LuceneQuery<Commune>("Communes/Search")
let comQuery =
if postcodeRegex.IsMatch term then
comQuery.WhereStartsWith("Postcode", term)
else
comQuery.WhereStartsWith("Name", term)
let query = comQuery.Take(20)
let res = query |> Seq.map (fun x -> { id = x.Id; label = sprintf "%s (%s)" x.Name x.Postcode; value = sprintf "%s (%s)" x.Name x.Postcode})
Result res
First we define a type, AutoCompleteResult, to hold the results we want to send back to the client. This will be directly translated into JSON.
Next we define a PicoMvc controller. This is just an F# module marked with the [<Controller>] attribute. Because the module's name is Commune, it will be exposed at the URL ~/commune.xxx, where xxx is used to determine which view will be used to render the result (how we choose a view to handle results is discussed later). In this case, our URL will be ~/commune.json and the view will render the result as JSON.
Our controller defines functions that handle the different HTTP verbs it might receive. In this case, we only want to handle GET verb requests, so we define a get function. The function’s parameter term will be populated by the item term from the query string, and store will be populated with a reference to the RavenDB document store.
Once we have the term parameters and the store parameter to give us a reference to our RavenDB store, implementing the service is simple. We use the advanced Lucene query to query the Communes/Search index. Then we test if our input term is a postcode or a commune. In France, postcodes are completely numeric so we can perform this test using a simple regex. Once we know whether the term is a post code or town name, we can use the Lucene query's WhereStartsWith method to query against the Name or Postcode fields. We then limit our query to 20 results and transform it into the format the client is expecting.
Creating a UI for this is easy enough. I based my UI on the remote.html example formerly available in the jQuery developer bundle (the example is included in the downloadable code samples for this book). It’s just a matter of changing the URL and a few of the labels to get it working.
There are a couple of improvements that could be made:
- A large number of communes start with the word “Saint.” A user might reasonably expect the abbreviation "St." to map to "Saint."
- Words in the commune names are separated with dashes. It may be a good idea to allow users to use spaces instead.
- I’m not sure how well RavenDB handles accents. It would be nice to map "e" to both "é" and "è". It is fairly easy to code this functionality yourself if RavenDB supports it; you simply need to store an accent-free version of the names and search based on that.
Summary
That’s it. It took a bit of explaining, but we learned plenty about PicoMvc along the way, and the final solution wasn’t very much code at all. In fact, the entire solution came to about 150 lines of F# and C#. You can see the final solution in the examples directory of PicoMvc on github at https://github.com/robertpi/PicoMvc/tree/master/examples/AutoComplete.
- 1800+ high-performance UI components.
- Includes popular controls such as Grid, Chart, Scheduler, and more.
- 24x5 unlimited support by developers.