
Force.com Succinctly®

CHAPTER 1
Force.com Overview
Introduction
Nowadays we hear the term Platform-as-a-Service (PaaS) being used more frequently by businesses, IT specialists, and developers. Furthermore, we also hear a lot about Software-as-a-Service (SaaS) and Infrastructure-as-a-Service (IaaS).
But what does this all really mean? Basically, all this fits into cloud computing, which has to do with renting compute resources on demand in a very elastic and scalable way. Although these three terms seem very alike, let’s try to differentiate one from the other.
Consider IaaS as the place to run software, SaaS as a way to use software, and PaaS as a place to write software. By establishing these definitions, we can quickly see the differences between each and what binds them together: software—running in the cloud.
By using PaaS platforms, we are able to build and publish applications to a fabric, whether it is .NET, Java, or Force.com—the bottom line is that we know this fabric will run the software we are writing under a controlled and typically multitenant environment in which multiple users share resources together.
In PaaS platforms, scalability and maintainability are already built-in and provided out-of-the-box, which means that there’s no exposure to the underlying infrastructure. Some offer additional services like data, caching, messaging, and one or more APIs, which encourages developers to write integrations and also enables automation.
Having said this, the Salesforce Sales Cloud and CRM are ready-to-use sales automation and customer service products, whereas Force.com is the underlying platform that can be used to build a variety of data-driven business applications—hosted on the main Salesforce.com infrastructure.
In this chapter, we’ll explore the key concepts behind Force.com as a platform, how it compares to other PaaS offerings, and check its primary services. Following that, we’ll start by creating an account and lay the foundation for the app that we will build throughout this book.
Sounds exciting, right? Let’s not delay this any further!
Key concepts
First, we’ll explore some key concepts that will help us to get started. One fundamental concept to understand is that Force.com does not expose the underlying infrastructure.
On other cloud platforms, you might have a sense of what the infrastructure is and know how many instances your app is running on, but that doesn’t happen with Force.com—there’s no machine provisioning or awareness of how an application is hosted, provisioned, or distributed.
Another key concept is that Force.com was designed for point-and-click application design, even though coding is supported. It is possible to create objects, fields, and their respective validations and layouts without writing a single line of code.
Force.com is multitenant all the way, which means that it is the same software instance and the same database for all users, running on the same application servers. This all scales out seamlessly, with built-in protection preventing users from taking each other down or hitting collisions on resource usage—because a multitenant architecture doesn’t do this automatically.
This is all possible because Force.com is built on top of a relational database, which is the core foundation of this flexible and elastic fabric. There are no indexes to manage or table partitions to optimize—all of this is taken care of automatically.
Furthermore, Force.com uses multifaceted permissions policies, which means that there are different layers of security built in into the platform—basically, application and database-level security regarding who may access certain records and who may not.
Primary services
These are the services that you get out-of-the-box, which you don’t have to write yourself. That might not sound like a big deal, but it’s a huge factor in getting something out the door as fast as possible. So, let’s quickly explore them:
Database: The first and possibly most important service is the database—this is the heart and soul of a Force.com application. This is where all the metadata is stored, all the objects, all your records.
In essence, everything that makes up your application is stored in the database. Objects can be built using relationships, constraints, validations, and auditing—which is all taken care of behind the scenes, and this database can be queried using a very familiar SQL-like syntax.
UI: The second service is the User Interface, which allows a drag-and-drop experience or the possibility to create custom pages using Visualforce or Lightning.
Reporting: This is an out-of-the-box flexible reporting service that allows you to build standard and custom reports very easily.
Application Logic: This service relies on configuration for validation rules and code for more advanced custom logic.
Workflow: This service allows you to model out business process sequences, such as an approval or a collection process, without having to write code, and in an asynchronous way.
Security: This service allows you to enable application-level security and use features like Single Sign-On (SSO).
Integration: This service provides a set of APIs, both SOAP- and REST-based, that allows you to integrate with any of the Force.com services from other applications or external service providers.
All of these primary services give us a good starting point and various options to start working with Force.com. Applications like the Salesforce Sales Cloud or CRM are built on top of these services, which are available to everyone with Force.com—pretty cool!
Force.com and other PaaS offerings
Force.com is probably the most abstracted of all the PaaS offerings that exist nowadays. This is because Salesforce did a very good job of abstracting much of the underlying complexity in order to allow developers and users to focus mostly on the business logic behind their applications.
Force.com is quite similar to Dynamics 365, which is a configurable platform, mostly related to CRM and financial solutions, that leverages .NET.
AWS Elastic Beanstalk is a service from Amazon Web Services that allows you to upload your code and automatically handles deployment, capacity provisioning, load balancing, auto-scaling, and application health monitoring.
Other PaaS services include the Google Cloud Platform, Cloud Foundry, Heroku (owned by Salesforce), and Microsoft Azure.
The main difference between Force.com and these services is that Force.com provides more out-of-the-box primary services that allow business applications to be written using core objects that are part of its underlying relational database, but without necessarily having to write code—at least for the object creation and validation part.
I’m not implying that Force.com is better than any of the other platforms previously mentioned—in several of my other books, I have used services from Azure and the Google Cloud Platform, which have provided a rock-solid foundation for the apps that were developed as examples for those books. Those platforms are amazing.
What I’m trying to convey is that Force.com was developed with the intention that users would be able to get business applications off the ground very quickly without having to worry about database and framework integrations—this is clearly marketed on their main website.
When should you choose Force.com?
I think this is a great question, and ultimately what should drive your decision to use this platform or not.
If you want to build an application that:
- Is data-driven and needs relational data
- Involves a migration of spreadsheet data or a legacy Access- or FileMaker-based application
- Requires a user interface that is data-entry oriented and fits perfectly fine with forms, grids, and wizards styles for reviewing data
- Can benefit from user collaboration
- Includes team-based activities
- Is task based
- Requires fine-grained security accesses and controls
- Requires reports on transactional data
- Requires manually entered data, which is frequently used
- Does not require bulk loads of data, which are CPU intensive
- Does not require high performance computing, such as running Hadoop jobs for big data analysis
If you want to build an application with any of these requirements, Force.com is a great platform for you, as it is focused on applications that use relational data and require collaborative team inputs and tasks.
So now that we’ve talked about how Force.com stacks up against other PaaS services and when it should be used, let’s get started by creating an account.
Creating an account
In order to create an application on Force.com, we must create an account. Let’s navigate to the Force.com for Developers main page and click on Sign Up at the top.
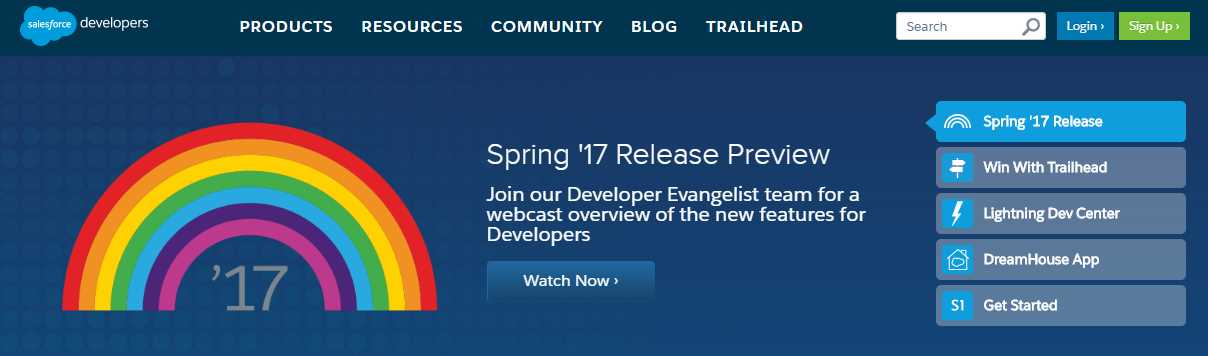
Figure 1-a: The Force.com for Developers Main Page
Keep in mind that Salesforce is a very marketing-oriented company, and, therefore, they are constantly developing their sites, so it’s possible that the Force.com for Developers main page might change or look different by the time you read this.
Nevertheless, rest assured that they’ll make sure it’s easy to navigate, so you’ll be able to find your way around.
Once you have clicked on Sign Up, you will be redirected to the sign-up page, where you will be asked to enter and submit your personal details.
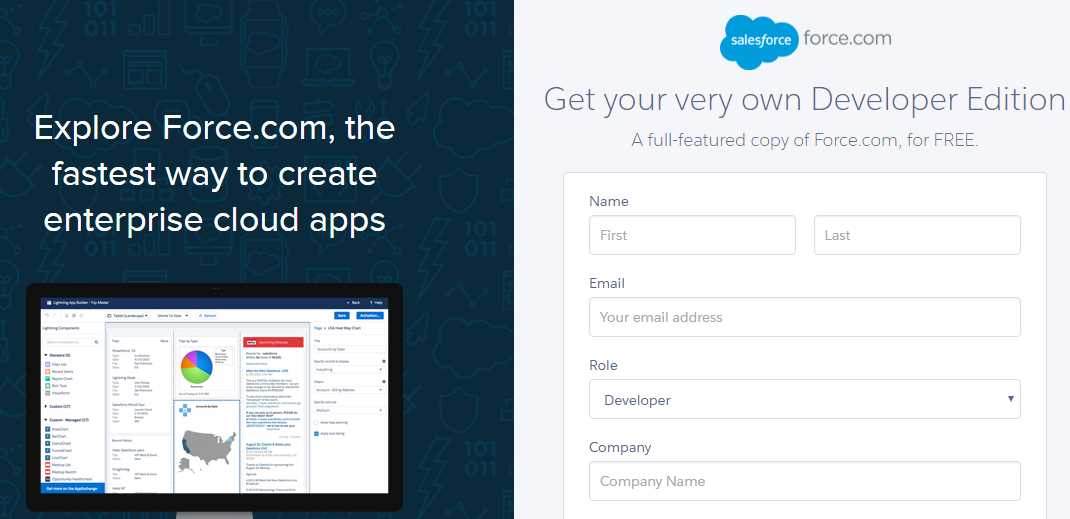
Figure 1-b: The Force.com Sign-up Page
There are two very important fields that should have different values. One is your actual email (your real email address), and the other is your Username, which you will later use to log in to your Force.com organization.
You’ll have to provide your real email address, as this is where you’ll receive an email to confirm your account. However, the Username field (which needs to be specified in the form of an email address) can be a dummy email address or a secondary email address from your organization. So, the Email and the Username fields should be different—please keep this in mind.
Once you have entered the values of these required fields, accept the Master Subscription agreement, then click Sign me up.
Notice that when you sign up for Force.com, you are getting what is known as a Force.com org (a Developer account), which gives you the full functionalities of the Salesforce.com platform, including many pre-built apps such as Sales, Services, Marketing, Community, Content, and Chatter.
In most cases, you will be automatically redirected to your new development org—which loads with the Lightning user interface—and you’ll be able to start working. However, in some occasions, that might not be the case. If you are not automatically redirected to your new org, there are two other possibilities.
One is that you receive an email from Salesforce in which you are requested to verify your account. If that is the case, then please follow the steps described in that email to get your account verified.
The other possibility is that you will be logged in but remain on the main Force.com for Developers page, and you will no longer see the Login or Sign Up buttons at the top of the page, but instead a button with your name on it that gives you the ability to go into your account settings and to navigate to your developer org.
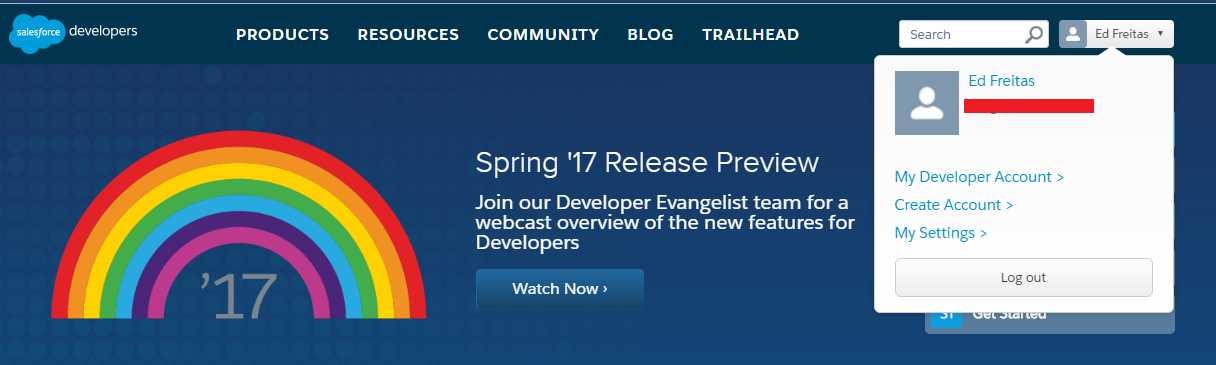
Figure 1-c: Logged in to the Force.com Developers Page
If this is the case, you can reach your developer org by clicking on the My Developer Account link from the dropdown menu, under the button with your name on the main page.
Once you click on the My Developer Account link, you might be requested to enter your Force.com username and your password, which you should have either received or created through the sign up or verification process. The login screen looks like this:
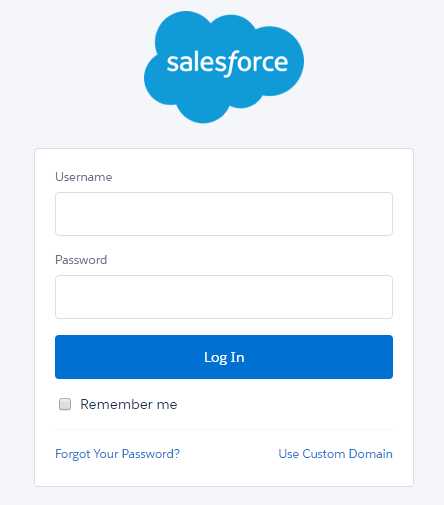
Figure 1-d: Force.com Org Login Page
Enter your details and click Log In, and this will take you to your developer org, which should look similar to the following screen.
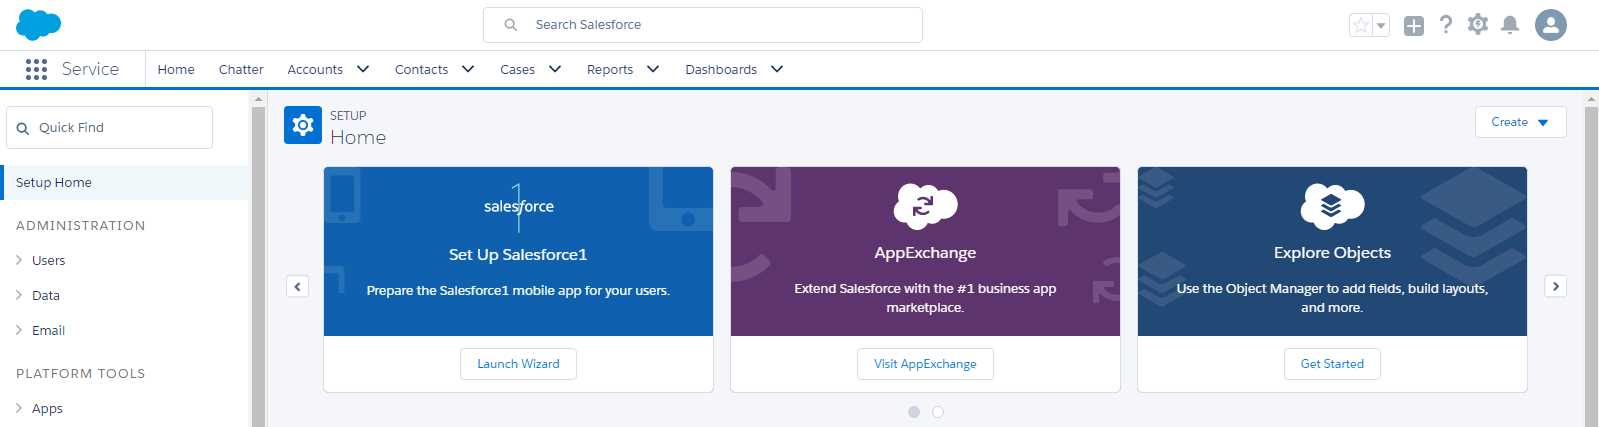
Figure 1-e: The Force.com Development Org (Lightning Experience)
I want to highlight that Salesforce is constantly improving their sites and adding extra security verification steps to their login mechanism, so the steps explained might slightly differ by the time you read this. However, you should still find it intuitive enough to set up an account, log in, and start working for the first time on your Force.com org.
Awesome! With this in place, we are ready to start creating our Force.com app.
Creating our app
One of the really cool things I love about Force.com is that immediately after creating an account, we can go ahead and create an application. There’s really nothing stopping us from doing that, so that’s exactly what we are going to do now.
The app we’ll create is a basic Customer Success application that will track software maintenance renewals.
In order to customize the app, we’ll also need to create some custom objects—we will do this in Chapter 2. We’ll create Client and Renewals custom objects.
This app will also require standard Force.com objects that are used within the support ticketing application that comes out-of-the-box with Salesforce, such as Cases and Accounts.
Although the Account object contains lots of useful fields for managing a customer account, we need extra fields that will be specific for managing clients with software renewals, which we should keep separate from other applications that use the Account object, such as the CRM and Sales apps. This is why we’ll create a separate Client object for our Customer Success app that will be linked to the Account object but will still be independent.
In order to get started, on the left side of your developer org, click PLATFORM TOOLS > Apps > App Manager. Once there, click New Lightning App.

Figure 1-f: Lightning Experience App Manager
Notice that the steps described are specific to Lightning Apps and not the Classic user interface for Force.com apps—however, the process is more or less the same, although the screens, user interface, and layouts are different.
Going forward, Lightning is the newest Force.com user interface experience, and is being actively promoted by Salesforce.
Once we’ve done that, an app creation wizard will guide us through each of the stages. This will allow us to enter the app details, select which default objects we want to use, and assign any user profiles.
Let’s start by entering the APP DETAILS & BRANDING panel.
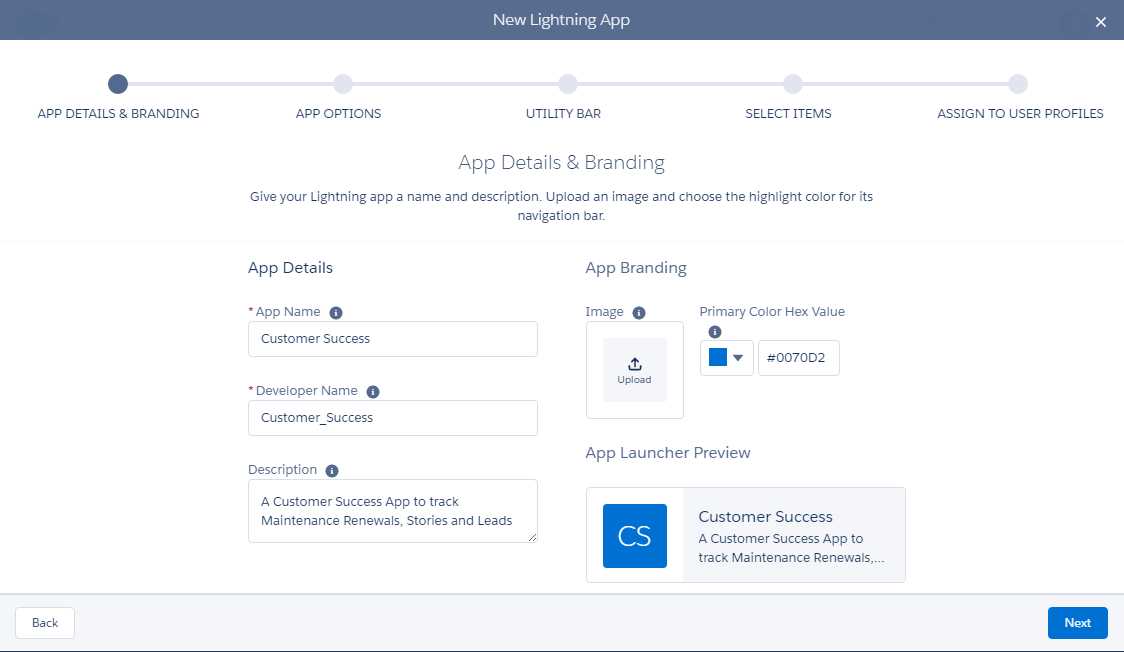
Figure 1-g: Lightning Experience App Wizard (APP DETAILS & BRANDING)
Give your app a name—I’ve called mine Customer Success. You’ll notice that Force.com automatically creates the Developer Name, which is usually the same name you’ve chosen with an underscore between words.
Don’t forget to enter a meaningful description. Once you have done that, click Next in the lower-right corner. In the next screen, the wizard will ask which type of navigation you would like for your app—choose the standard one, and then click Next.
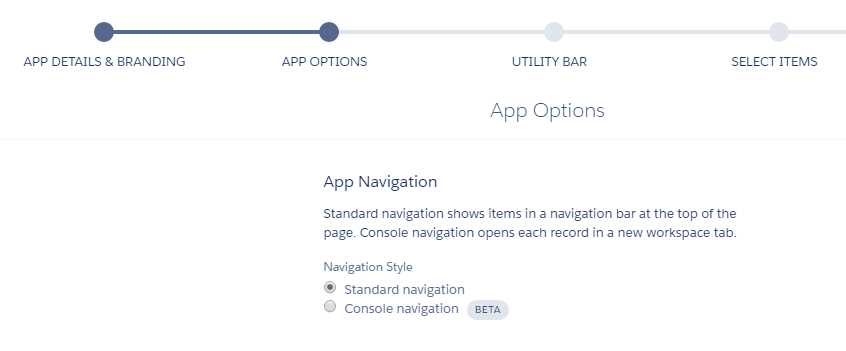
Figure 1-h: Lightning Experience App Wizard (APP OPTIONS)
The next screen is quite interesting because it allows us to add Utility Bar items to our app. The utility bar is a fixed footer that opens components in docked panels. Let’s have a look.
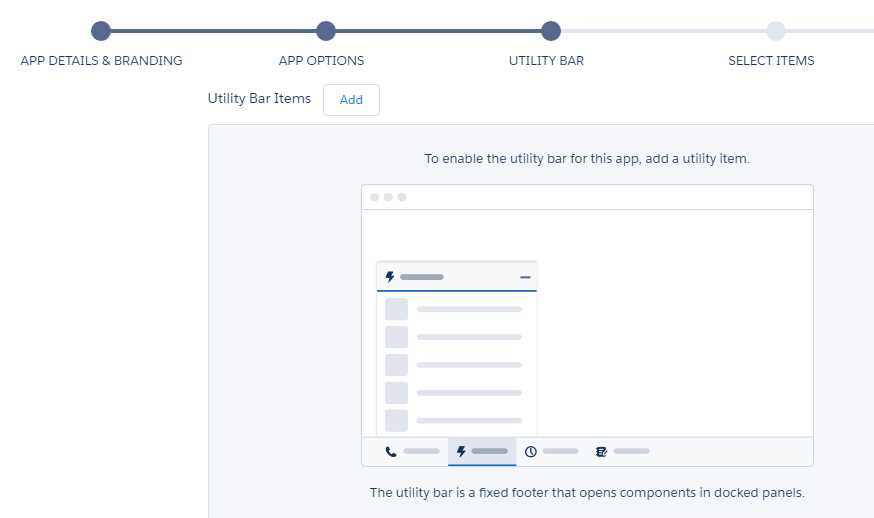
Figure 1-i: Lightning Experience App Wizard (UTILITY BAR)
Personally, I like to have access to recent items that I added or modified when working with a Force.com application, so I’ll add a Recent Items component to my app’s Utility Bar by clicking Add.

Figure 1-j: Adding a Utility Item (Force.com Component)
From the list, select Recent Items. You may add another if you wish. I’ll add only this one for my app, by clicking on the Recent Items option. Once you have done that, you’ll see the following information.
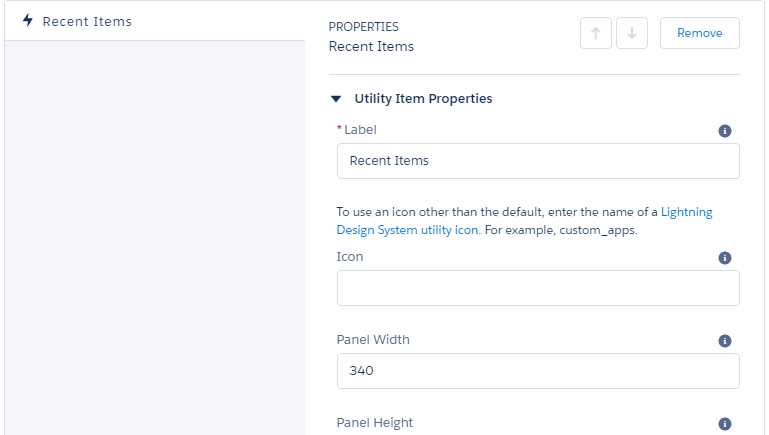
Figure 1-k: Utility Item Properties (Recent Items Component)
These are the properties of the Recent Items component. Most of the values you can leave as is; however, there are a couple that I would recommend you customize, which I will do for my app.
In order to do that, scroll down a bit and notice the Objects property and the Number of Records to Display value.
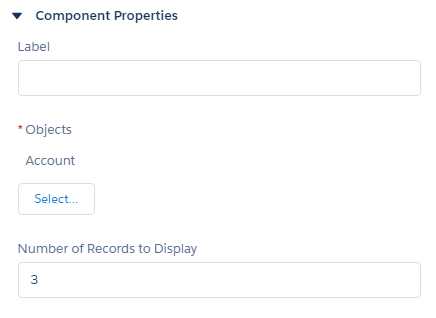
Figure 1-l: Components Properties (Recent Items Component)
Click Select. Once you’ve done that, a popup window will appear that you can use to select which standard Force.com objects will be displayed on the Recent Items list. By default, the Account object is selected, and I’ve also added the Case and Contact objects.
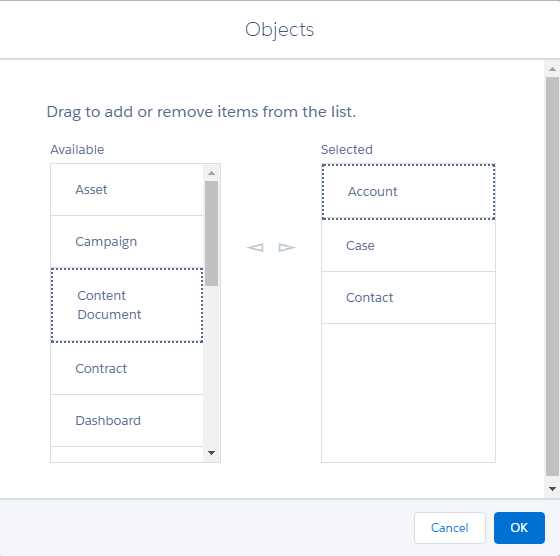
Figure 1-m: Selecting Objects for the Recent Items List
Once you have selected the components, click OK. Personally, I like to see at least the 10 most recent items I’ve worked with, so I’ll modify the Number of Records to Display value of 10.

Figure 1-n: Recent Items Components Properties Set
Once this has been done, in order to continue the wizard process, click Next. At this point, we’ve moved past ADD OPTIONS stage, and we are now on the SELECT ITEMS stage of the wizard.
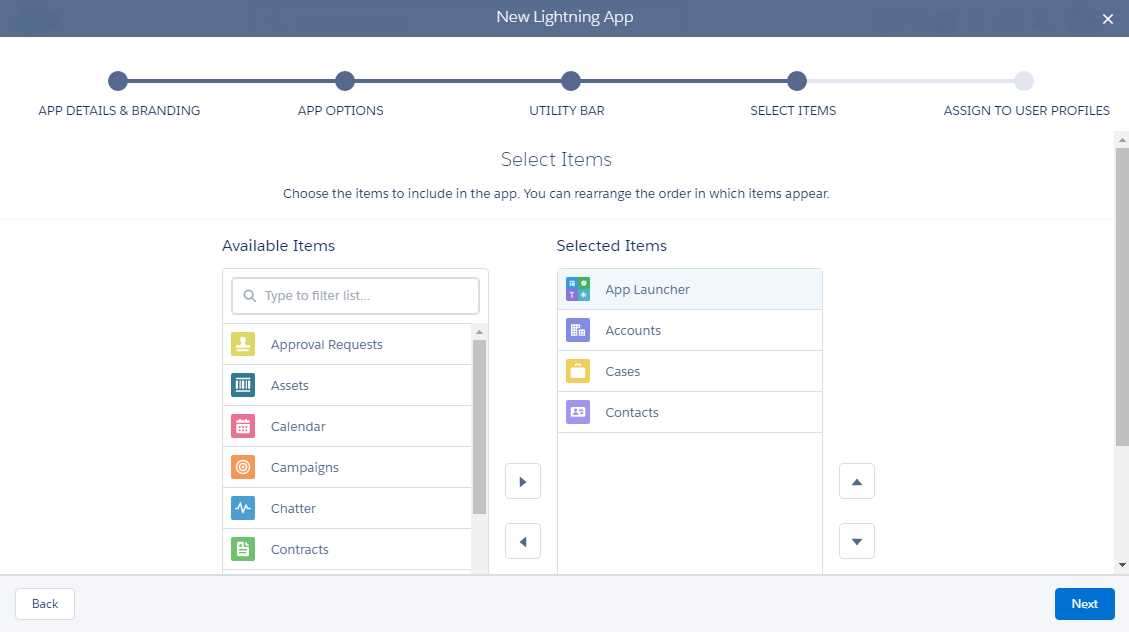
Figure 1-o: The Select Items Stage
In this stage, you can choose which objects you would like to see (include) when your Customer Success app loads.
These will correspond to tabs that will allow you to access the data associated with each of those objects. Think of objects as database tables. In my case, I’m interested in having data from Accounts, Cases, and Contacts, which are all related to a Customer Success application—so I have selected them. In order to continue, click Next.
We are almost done with the app creation wizard, but there’s one last step, which is to assign user profiles to our app. This step is important, as it will determine which Salesforce user groups will have access to see our Customer Success app when they log in.
Keep in mind that we are Force.com developers, and we are creating a Customer Success application that will be used by regular Salesforce users within our organization, so this is why assigning user profiles is a required step in the app creation process.
For now, let’s select all available user profiles and assign them to our app—we can always later modify this in the app’s setup. Scroll all the way down to the bottom, and while holding the Shift key, select them all, and add them to the Selected Profiles list.

Figure 1-p: The Assign to User Profiles Stage
Finally, click Save & Finish in order to finalize the wizard and create our app. We have now created our Customer Success app template!
We can see it on the Lightning Experience App Manager list as follows.

Figure 1-q: The Customer Success App Shown in the Lightning Experience App Manager
The fun is just about to start. The wizard has given us a starting point, and it’s created a basic app with out-of-the-box and ready-to-use Force.com objects we can already interact with, such as Accounts, Cases, and Contacts, which we added to our app in the SELECT ITEMS stage.
However, in order to make our Customer Success app really useful, we’ll need to create custom objects with specific custom fields and all the applicable validation logic—this is what we’ll do in the next chapter.
Summary
In this chapter, we’ve quickly explored what Force.com is, what primary services and capabilities it includes out-of-the-box, and how it compares to other PaaS offerings that exist in the market.
We also got started by signing up for a Developer account and then created the foundation of the Customer Success application we’ll be writing throughout this book.
The really cool thing (in my opinion) is that we’ve already had a sense of how intuitive the platform is—it provides quite a lot of functionality. Furthermore, the new Lightning Experience gives the user interface a modern and responsive look and feel, which is appealing to work with.
In the next chapter, we’ll dig deeper into the app by adding custom objects and fields, and we’ll create relationships and custom validations, which will be the building blocks of our Customer Success application.
Let’s explore what exciting things might lie ahead.
- 1800+ high-performance UI components.
- Includes popular controls such as Grid, Chart, Scheduler, and more.
- 24x5 unlimited support by developers.