
Force.com Succinctly®

CHAPTER 6
Diving Deeper into Lightning
Introduction
In the previous two chapters, we’ve laid the groundwork for understanding how UI works in Force.com, specifically with the Lightning Experience.
In this chapter, we’ll build upon that previous foundation and start to really explore all the facets of JavaScript development within Force.com by building a Lightning app that we can use with one of the custom objects we have created in previous chapters.
The full source code of the project can be downloaded here. So, let’s step right in and start exploring.
A developer’s perspective
Lightning in the Force.com world can mean many different things to different people. For users, it means a totally new user interface and working experience, but for a developer, it might mean something totally different. So, what is Lightning, really?
There are Lightning Apps, Lightning Data Services, Lightning Processes, Lightning Sync, Lightning Actions, Lightning Experiences, Lightning Connect, Lightning Components, and possibly even more services.
Everything in Force.com nowadays revolves around the “Lightning” buzzword, even if the technologies might not be exactly related, and despite confusion that could result. In any case, this buzzword is quite catchy and seems to be selling like hotcakes.
With that said, for developers and advanced business users, it is important to be able to separate what is a marketing term and what is an actual technology.
The parts that we are concerned with are actual Lightning Components, which are based on the Aura UI framework. These are the fundamental building blocks of Lightning Apps and constitute the overall Lightning look and feel—The Experience.
In essence, Lightning is a modern and responsive Singe Page Application (SPA) framework centered around Aura that runs in the multi-tenant environment of Force.com.
For a full understanding of what Lightning components are, I highly encourage you to follow the Lightning Components Basics Trailhead course, which can be found here.
Figure 6-a: The Lightning Components Basics Trailhead Course
Lightning bundle
We are going to create a Lightning App manually with the Developer Console that we are going to call QuickRenewals.
This app will make use of the Renewal custom object that we previously created, but we’ll create the UI from scratch, adding styles and JavaScript controllers, and we’ll also use an Apex language server-side controller. This is what is known as a bundle.
The Lightning Inspector
The Lightning Inspector is a Chrome extension that is helpful when we are debugging. Go to the Chrome App Store and search for Salesforce Lightning Extension and install it by clicking ADD TO CHROME. It’s not a must, but a nice-to-have.
When prompted, click Add extension. This will install the extension, which might come in handy later.
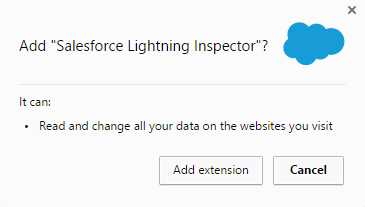
Figure 6-b: Adding the Salesforce Lightning Inspector
QuickRenewals overview
We are now going to use Lightning Components in order to build a small app called QuickRenewals, which is going to be based on the Renewal custom object we previously created.
The overall goal of the application is to provide quick access to Renewal records, and it will use two Lightning Components that will communicate through events. These components will be: Search and RenewalsList.
Throughout the creation of this app, you will learn how to:
- Create an Apex Controller that exposes data to a Lightning app
- Create a Lighting app, which we briefly looked at in the previous chapter
- Create Lightning components
- Create and work with Lightning events
- Use some static resources within a Lightning app
- Exchange info between Lightning components using events
Sounds awesome, right? Let’s start building this right away.
Static resources
I think most people would agree that anyone creating an app nowadays wants the app to look good. Not only does an app need to be able to do its job properly and be functional, but it also needs to be appealing to the eye, and this is why using static resources comes in handy.
One the most widely known and used front-end frameworks for building awesome-looking and responsive web apps is Bootstrap.
However, we’ll need to use a version of Bootstrap that is customized to match the Lightning Design System guidelines. This customized version of Bootstrap can be found here.
Download and unzip this customized version of Bootstrap to a local folder on your machine. On your Force.com org, go to Setup, then on the Quick Find search box, type in the word Static.
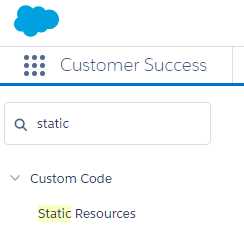
Figure 6-c: The Static Resources Option
Next, click on the Static Resources option. You’ll then see the following screen.
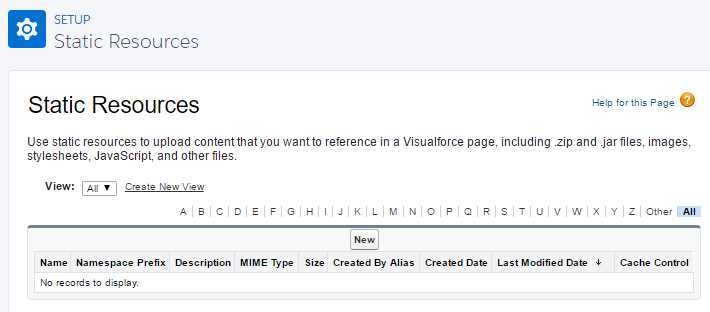
Figure 6-d: The Static Resources Main Setup Page
Click New. You’ll then see the following details screen.
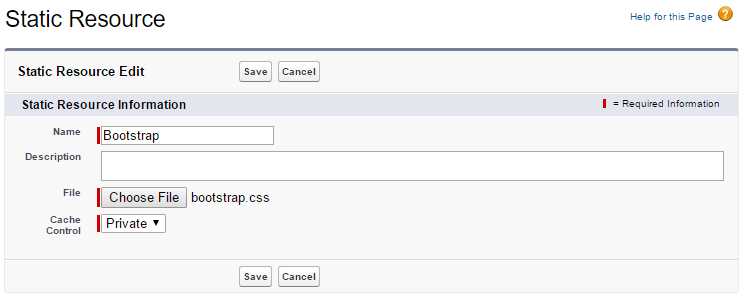
Figure 6-e: The Static Resources Detail Page
Specify Bootstrap as the name of the Static Resource and click Choose File—select the bootstrap.css file found under the folder dist/css of the unzipped folder. Finally, click Save.
We can now use the customized Bootstrap framework in our Lightning app. The next thing we need to do is create our Apex controller.
The Renewals controller
One of the things I love most about Force.com is how easy it is to work with data. They have done a great job in making it extremely easy and convenient to access data contained within objects.
We are now going to create an Apex Controller that will allow us to fetch Renewal records and search them by using the Renewal Name field. An Apex controller is basically an Apex class.
In order to create this class, from the Gear option at the top of your Lightning Experience screen, open the Developer Console in a new browser tab, so it is easier to work with.
Within the Developer Console, click on File > New > Apex Class. Name it RenewalsController when prompted and click OK. By default, you will see what is shown in Figure 6-f.
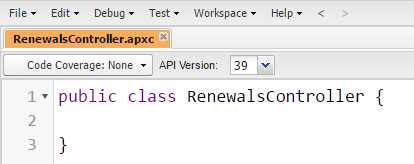
Figure 6-f: The Default Class Code
Let’s make some changes to this code in order to make it Lightning compatible.
Code Listing 6-a: The Modified Class Code
public with sharing class RenewalsController { @AuraEnabled public static List<Renewal__c> FindAll() { return [SELECT Name, Client__c, Amount__c, Currency__c, Expired__c, LastModifiedById from Renewal__c LIMIT 50]; } } |
First, notice that the RenewalsController class has now been set as public with sharing, and we’ve also added a static method called FindAll that will return all Renewal records.
Querying the database (object records) with Apex is very simple, and Salesforce Object Query Language (SOQL) statements can be embedded into the Apex code seamlessly. As you can see, if you are familiar with SQL, you’ll feel right at home with SOQL. Notice how the Renewal object and its fields are accessed, using the __c suffix.
In the .NET world, it is not possible to embed directly fully functional SQL statements in C# code as native language instructions—it is necessary to use ADO.NET, LINQ, Entity Framework, or other libraries in order to interact with relational databases.
With Force.com, SOQL is executed directly within the Apex language context itself—which is very convenient, expressive, and powerful.
Another interesting thing to notice is that the FindAll method is marked with the @AuraEnabled annotation, which indicates that it can be used within a Lightning app. This code should seem very straightforward for any developer with a C# or Java background.
Now, let’s add another method to this class in order to find a Renewal record by its name. The class would now look like this:
Code Listing 6-b: The Expanded Class Code
public with sharing class RenewalsController { @AuraEnabled public static List<Renewal__c> FindAll() { return [SELECT Name, Client__c, Amount__c, Currency__c, Expired__c, LastModifiedById from Renewal__c LIMIT 50]; }
@AuraEnabled public static List<Renewal__c> FindByName(String sKey) { String n = '%' + sKey + '%'; return [SELECT Name, Client__c, Amount__c, Currency__c, Expired__c, LastModifiedById FROM Renewal__c WHERE Name LIKE :n LIMIT 50]; } } |
Notice that we’ve added a new static method, called FindByName, that filters out records based on the field Name that represents the Renewal Name. Notice the unusual : syntax in order reference the n variable inside the SOQL statement.
Also notice how both queries have been limited to return only the first 50 records, as this improves performance. Don’t forget to click on the File > Save option in order to save these code changes.
Creating the Lightning app & main layout
Now that we have created the Apex controller that will be responsible for returning the data using SOQL, we now need to actually create the Lightning app and define the basic layout using Bootstrap.
From the Developer Console, click File > New > Lightning Application. Use QuickRenewals as the bundle name. Let’s now implement the following markup code.
Code Listing 6-c: The Layout Markup Code
<aura:application > <link href='/resource/Bootstrap/' rel="stylesheet"/> <div class="navbar navbar-default navbar-static-top" role="navigation"> <div class="container"> <div class="navbar-header"> <a href="#" class="navbar-brand">Quick Renewals</a> </div> </div> </div> <div class="container"> <div class="row"> <div class="col-sm-12"> Renewals List Goes Here </div> </div> </div> </aura:application> |
Let’s have a quick look at what we’ve just done here. The link tag references the Bootstrap style sheet we previously uploaded as a Static Resource.
Lightning App can include Lightning components and regular HTML markup. The code above contains regular HTML markup that refer to Bootstrap classes, contained within the Aura application tags.
In order to preview what we have accomplished, click on the Preview (or Update Preview) option on the right side of the Developer Console.
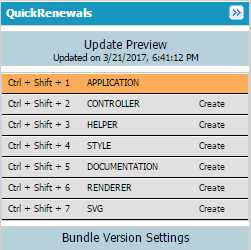
Figure 6-g: QuickRenewals Options
When you have clicked on that, you’ll see the following in a new browser tab (see Figure 6-h). Notice that the URL ends with the .app extension.
The URL’s domain is the same one we defined in the previous chapter when we created the Hello World example.
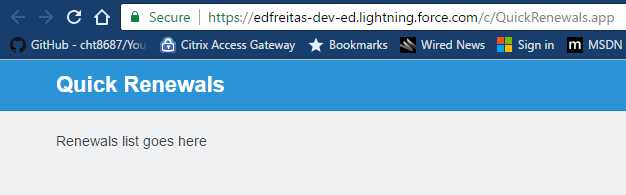
Figure 6-h: QuickRenewals Preview
It seems like we are making progress and our app is taking shape. Let’s carry on.
Creating the RenewalsList component
With the main layout created, let’s now move our attention to creating a Lightning component that will be responsible for the list of Renewals that we will then add to our QuickRenewals app.
We’ll do this by using the Developer Console, and we’ll explore how to use component attributes and event handlers in order to add this component to our application. So, let’s go ahead and create our component.
Click on File > New > Lightning Component and specify RenewalsList as the component name. Implement the code as follows. Leave the optional configuration checkboxes as unchecked.
Code Listing 6-d: The RenewalsList Markup Code
<aura:component controller="edfreitas.RenewalsController"> <aura:attribute name="renewals" type="Renewal__c[]"/> <aura:handler name="init" value="{!this}" action="{!c.doInit}" /> <ul class="list-group"> <aura:iteration items="{!v.renewals}" var="renewal"> <li class="list-group-item"> <a href="{! '#renewal/' + renewal.Name }"> <p>{!renewal.Name }</p> </a> </li> </aura:iteration> </ul> </aura:component> |
For now, let’s pay attention to the first line, specifically the controller attribute of the aura:component tag. RenewalsController must belong to a namespace, which in my case is: edfreitas.
A namespace in Force.com is a globally unique identifier across all Salesforce organizations. Namespaces are case insensitive and have a maximum length of 15 alphanumeric characters.
We’ll need to create a namespace for our app—let’s do that right away, and then come back to our component.
Creating a namespace
Leave your Developer Console browser tab open so we can come back to our component shortly.
If your Lightning Experience main screen is not opened on one of your other browser tabs, open it up. Then click on the Gear option, then on Setup.
On the Quick Find search box, type in the word Package. From the results, click on Package Manager. This will show you the following screen.
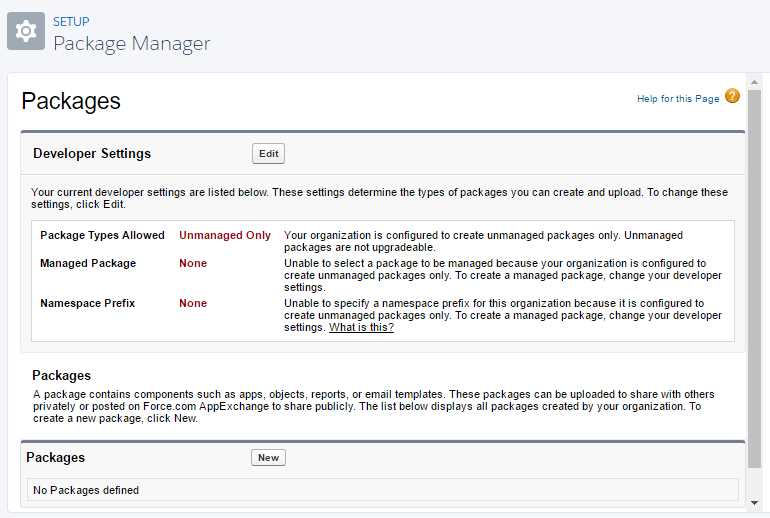
Figure 6-i: The Package Manager
Click Edit. You’ll then be presented with the following information.
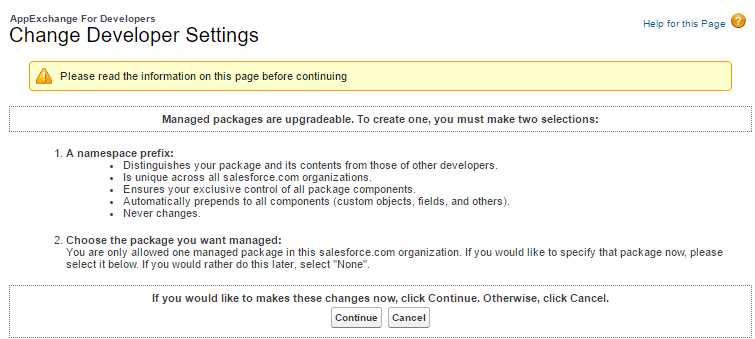
Figure 6-j: Change Developer Settings
Click Continue. Once you’ve done that, you’ll be asked to enter a Namespace Prefix, and check whether it is available, by clicking on the Check Availability button.
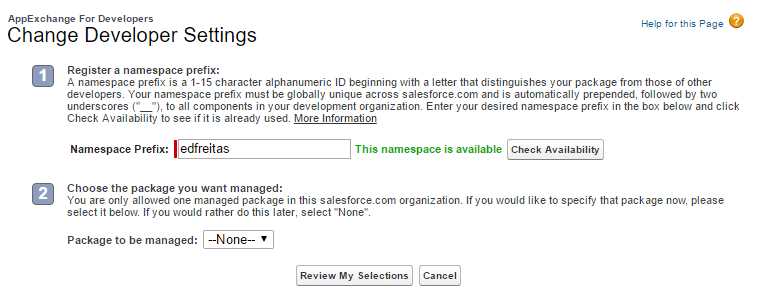
Figure 6-k: Change Developer Settings (Namespace Prefix)
When the namespace is available, simply click Review My Selections. Finally, you’ll be presented with the following screen.
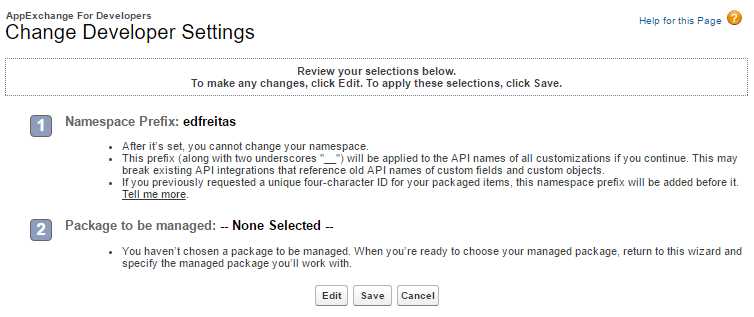
Figure 6-l: Change Developer Settings (Review Selections)
Click Save button in order to finalize the namespace creation. The Package Manager will now look like Figure 6-m.
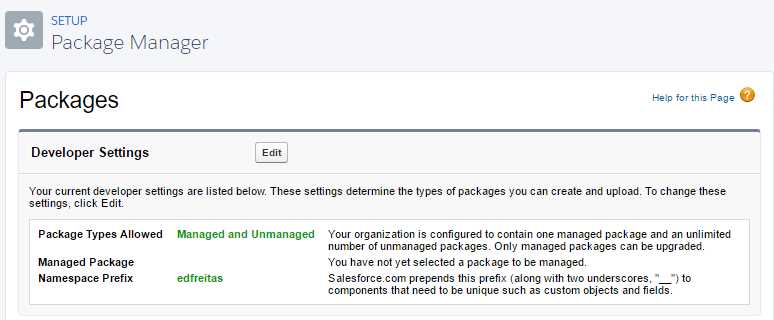
Figure 6-m: Updated Package Manager Settings
Notice that when you add a namespace, now all custom objects and fields will have the have the namespace name prepended to their actual names. In my case, mine will have the word edfreitas as a prefix.
For example, this is how the Renewal object will now be internally called: edfreitas__Renewal__c.
The Amount__c custom field will now be edfreitas__Amount__c. This is only applicable to custom objects and fields.
Nevertheless, we can continue to use the initial names in our Apex code—without the need to use the namespace name when invoking the objects or fields.
Enabling Lightning components for Debug mode
On the Lightning Experience screen, on the Quick Find search box, type in the words Lightning Components and click on the resulting option. This will bring you to the following screen.
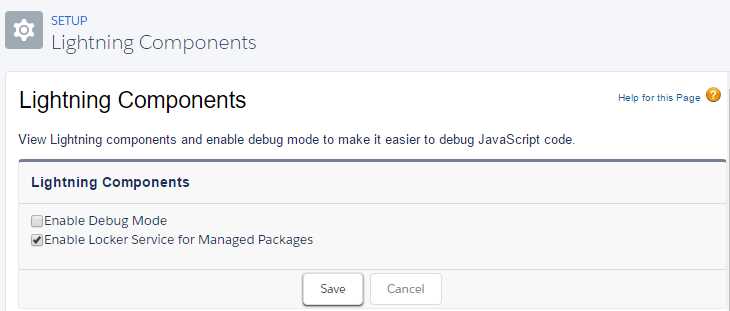
Figure 6-n: Lightning Components Setup Options
Select the Enable Debug Mode checkbox and then click Save. This option could come in handy when debugging JavaScript code on the Developer Console.
Continuing with the RenewalsList component
Now that we’ve created the namespace and have selected the Enable Debug Mode option, we can now carry on with the development of the RenewalsList component.
But before we add any extra functionality, let’s examine the code from Code Listing 6-d by breaking it into small chunks and understanding each part.
Code Listing 6-e: The RenewalsList Markup Code (Part 1)
<aura:component controller="edfreitas.RenewalsController"> |
The controller assigned to the component refers to the server-side Apex controller we previously wrote. Here we must specify the namespace.
Code Listing 6-f: The RenewalsList Markup Code (Part 2)
<aura:attribute name="renewals" type="Renewal__c[]"/> |
The renewals attribute is defined to hold a list of renewal objects (Renewal__c) returned from the server.
Code Listing 6-g: The RenewalsList Markup Code (Part 3)
<aura:handler name="init" value="{!this}" action="{!c.doInit}" /> |
The init handler is defined to execute some code when the component is initialized. That code (doInit) is defined in the component's client-side controller, which you'll implement in the next step.
Code Listing 6-h: The RenewalsList Markup Code (Part 4)
<aura:iteration items="{!v.renewals}" var="renewal"> |
The aura:iteration tag is used to iterate through the list of renewal objects returned from the server and create a <li> for each renewal record. Notice the <aura:iteration> and </aura:iteration> tags.
Code Listing 6-i: The RenewalsList Markup Code (Part 5)
<a href="{! '#renewal/' + renewal.Name }"> |
The <a href="{! '#renewal/' + renewal.Name }"> anchor tag around the renewal data is defined to set the page hashtag to #renewal/ followed by the name of the renewal record.
Later, you may want to create a RenewalDetails component that will use that hashtag to display detailed information about that particular renewal record.
We won’t create this RenewalDetails component, but that might be something fun for you do to later on.
Just in case you haven’t saved the code yet, click on File > Save in order to save your latest changes.
The client-side controller
The next thing we need to do is to implement the client-side controller. On the right side of the Developer Console, click on the CONTROLLER option.
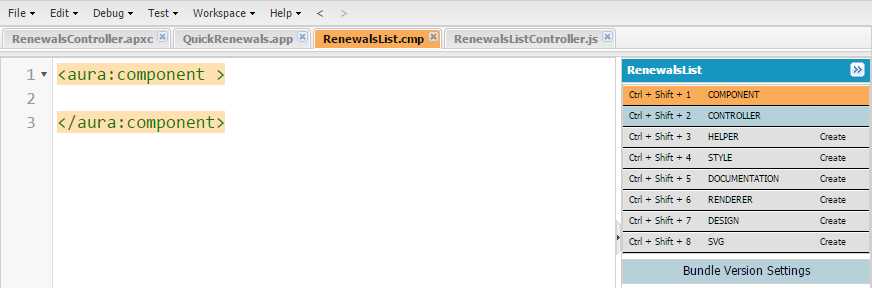
Figure 6-o: The RenewalsList Component Bundle Options
When you do that, the RenewalsListController.js file will be automatically created with the following default code.
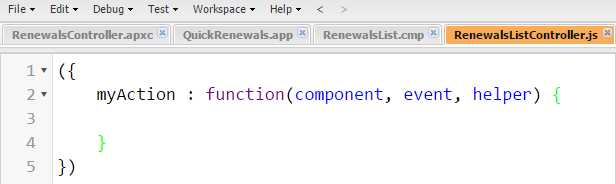
Figure 6-p: The RenewalsListController.js File
Let’s implement our client-side controller code as follows.
Code Listing 6-j: The RenewalsList Markup Code (Part 5)
({ doInit : function(component, event) { var action = component.get("c.FindAll");
action.setCallback(this, function(a) { component.set("v.renewals", a.getReturnValue()); }); $A.enqueueAction(action); } }) |
This controller has a single function called doInit. This is the function the component calls when it is initialized.
The first thing the code does is to get a reference to the FindAll method in the component’s server-side controller (Apex code we previously wrote) and store this in the action variable.
Because the call to the server’s FindAll method is asynchronous, we then register a callback function that is executed when the call returns. In the callback function, we simply assign the list of renewal records to the component’s renewals attribute.
The $A.enqueueAction(action) sends the request to the server. More precisely, it adds the call to the queue of asynchronous server calls. This is an optimization feature of Lightning.
Don’t forget to click on File > Save in order to save any code changes.
Adding RenewalsList to the application
In the Developer Console, let’s go back to the QuickRenewals application.
If the tab is not visible any more in the Developer Console, go to File > Open Lightning Resources, and then select QuickRenewals > APPLICATION. Finally, click Open Selected.
Now that the QuickRenewals.app file is opened, let’s modify the container div and replace the old code with the following one. Notice how now we have to reference the namespace in order to call the RenewalsList component.
Code Listing 6-k: The Container Div Markup Code
<div class="container"> <div class="row"> <div class="col-sm-12"> <edfreitas:RenewalsList /> </div> </div> </div> |
Now, click on Preview or Update Preview (visible on the right side of the screen). If you have added a least one Renewal record previously, you should see something like this.
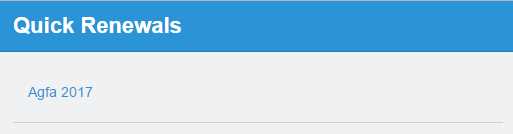
Figure 6-q: Preview of the QuickRenewals App
You might be asking yourself if we really do need the namespace when calling our RenewalsList component—the answer is yes. If the tag was <RenewalsList />, we would get the following error when previewing.

Figure 6-r: Field Integrity Exception
So yes, we do need to use the namespace. Now that we’ve added the RenewalsList component to our QuickRenewals app, let’s create the Search component.
The search component
It’s time to give our app some basic search capabilities. Let’s now create a component that can allow us to search renewals by their name.
We might have added the component to the RenewalsList component, but that would have limited the reusability of the component—so it’s best to have them as individual components, as it makes the code more modular and manageable.
So, if both components are going to be independent, how can we make sure they communicate with each other? Good question—this can be achieved by using events.
The Key Change event
Lightning events enable communication between components. We’ll need to implement an event that will be responsible for raising notifications when the search key changes. So, let’s go ahead and do that.
In the Developer Console, click File > New > Lightning Event and type in KeyChange as the bundle name. Let’s implement the code as follows.
Code Listing 6-l: The KeyChange Event
<aura:event type="APPLICATION"> <aura:attribute name="sKey" type="String"/> </aura:event> |
The event has one argument, called sKey. Don’t forget to click File > Save in order to save any changes.
Creating the Search component
In the Developer Console, click File > New > Lightning Component and indicate Search as the bundle name. Let’s implement the component code as follows.
Code Listing 6-m: The Search Component
<aura:component> <input type="text" class="form-control" onkeyup="{!c.KeyChange}" placeholder="Search"/> </aura:component> |
This is a component with a single input field. When the user types in a character, the onkeyup event triggers the KeyChange function, which is executed in the component’s client-side controller.
Doing it this way, the search is refined every time the user types in a character. Click File > Save in order to save any changes.
Implementing the Search controller
On the right side of the screen, click on CONTROLLER and implement the search controller code as follows. Click File > Save in order to save any changes.
Code Listing 6-n: The Controller Client-Side Code
({ KeyChange: function(component, event, helper) { var evt = $A.get("e.edfreitas:KeyChange"); evt.setParams({"sKey": event.target.value}); evt.fire(); } }) |
Listening for the KeyChange event
Now let’s go back to the RenewalsList component and add an event handler for the KeyChange event. This goes right after the init handler.
Code Listing 6-o: The Event Handler for the KeyChange Event
<aura:handler event="edfreitas:KeyChange" action="{!c.KeyChange}"/> |
The RenewalsList component code should now look like this.
Code Listing 6-p: The Updated RenewalsList Component Code
<aura:component controller="edfreitas.RenewalsController"> <aura:attribute name="renewals" type="Renewal__c[]"/> <aura:handler name="init" value="{!this}" action="{!c.doInit}" /> <aura:handler event="edfreitas:KeyChange" action="{!c.KeyChange}"/> <ul class="list-group"> <aura:iteration items="{!v.renewals}" var="renewal"> <li class="list-group-item"> <a href="{! '#renewal/' + renewal.Name }"> <p>{!renewal.Name }</p> </a> </li> </aura:iteration> </ul> </aura:component> |
Now click on CONTROLLER on the right side of the screen in order to add the following code to the RenewalsListController.js file.
Code Listing 6-q: KeyChange Function—RenewalsListController.js File
KeyChange : function(component, event) { var sKey = event.getParam("sKey"); var action = component.get("c.FindByName");
action.setParams({ "sKey": sKey }); action.setCallback(this, function(a) { component.set("v.renewals", a.getReturnValue()); });
$A.enqueueAction(action); } |
Code Listing 6-r shows how the updated RenewalsListController.js file should look.
Code Listing 6-r: The Updated RenewalsListController.js File
({ doInit : function(component, event) { var action = component.get("c.FindAll");
action.setCallback(this, function(a) { component.set("v.renewals", a.getReturnValue()); }); $A.enqueueAction(action); },
KeyChange : function(component, event) { var sKey = event.getParam("sKey"); var action = component.get("c.FindByName");
action.setParams({ "sKey": sKey }); action.setCallback(this, function(a) { component.set("v.renewals", a.getReturnValue()); });
$A.enqueueAction(action); } }) |
As always, don’t forget to click File > Save in order to save any changes. The final step is to add the Search component to the Lightning application.
Adding the Search component to our app
We’ve reached the last part of this exercise, and we are ready to tie the components together.
In the Developer Console, go back to the QuickRenewals application and modify the div container as described in the following code listing in order to add the Search component that we’ve just created.
Code Listing 6-s: The Updated QuickRenewals Container Markup Code
<div class="container"> <div class="row"> <div class="col-sm-12"> <edfreitas:Search/> <edfreitas:RenewalsList/> </div> </div> </div> |
The fully updated markup code looks Code Listing 6-t.
Code Listing 6-t: The Updated QuickRenewals Markup Code
<aura:application > <link href='/resource/Bootstrap/' rel="stylesheet"/> <div class="navbar navbar-default navbar-static-top" role="navigation"> <div class="container"> <div class="navbar-header"> <a href="#" class="navbar-brand">Quick Renewals</a> </div> </div> </div> <div class="container"> <div class="row"> <div class="col-sm-12"> <edfreitas:Search/> <edfreitas:RenewalsList /> </div> </div> </div> </aura:application> |
Once again, don’t forget to save all changes. On the left-hand side of the screen, click Preview or Update Preview to view the changes and see the app running.
The applications will look like Figure 6-s.

Figure 6-s: Preview of the QuickRenewals App
Cool! Now, let’s quickly test what we have just built to see if it actually works as we would expect.
If I type 2018, nothing is shown—as expected. So that worked.
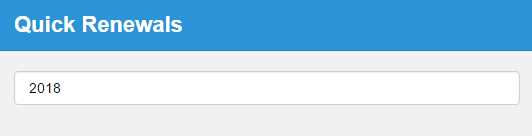
Figure 6-t: Testing the App (No Results Shown)
If I now type in the letter A, note that as expected—we get a result.
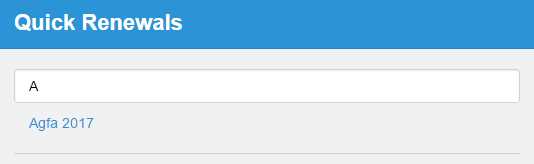
Figure 6-u: Testing the App (Results Shown)
So, our app is working!
Summary
Throughout this chapter, we’ve created a Lightning app step by step, and we explored how to write markup code, style the app, create components, use events, and create server-side code using Apex and Salesforce Object Query Language (SOQL) and client-side controllers in JavaScript.
It was a simple example, but we covered a lot of ground, and it was quite fun to do. We also looked at how namespaces in Force.com are the glue that tie all these app parts together.
Working with Force.com has allowed me to look at software development with a different mindset than what I am normally used to—especially having come into the Force.com world as a .NET developer.
However, this e-book has barely scratched the surface of what is still possible to do with this platform. There’s an incredibly broad range of subjects that we weren’t able to cover throughout this e-book, such as Apex Triggers, Visualforce, Workflow Automation, Schema Builder, and further exploring Lightning App development.
Force.com is an incredibly rich platform, and there are multiple learning tracks and certification paths available. There’s also an incredibly rich ecosystem of third-party libraries and frameworks that expand even further what is possible to accomplish—for example, JSForce, which is an open-source library that allows anyone to create Force.com apps with JavaScript outside of the Force.com ecosystem—the code is hosted somewhere else.
If you have found this e-book inspiring and would like to keep exploring Force.com and learn even more, I highly encourage you to sign up for the Salesforce Trailhead training modules, which contain a ton of useful and easy-to-follow resources.
Thanks for following along, and if you feel up for it, you are welcome to keep improving the examples and concepts that we’ve covered here—and if you do so, I’d love to hear from you. All the best.
- 1800+ high-performance UI components.
- Includes popular controls such as Grid, Chart, Scheduler, and more.
- 24x5 unlimited support by developers.