
External Collaboration with Azure AD B2B Succinctly®

CHAPTER 2
User Account Management
In the previous chapter, we covered Azure Active Directory business-to-business from a high level. In this and the upcoming chapters, we are going to cover some features in more depth. In this chapter we will fully focus on user account management. We will create a guest user in our Azure AD tenant, create a group, and assign a guest user to groups and applications.
How to create user accounts
As covered in the previous chapter, guest users can be added to Azure AD using their own credentials. In this demonstration, we are going to add a guest user by using a personal Microsoft account. The following steps explain the process:
- Navigate to the Azure portal by opening https://portal.azure.com/.
- In the top menu, type Azure Active Directory in the search box. Then select Azure Active Directory as shown:
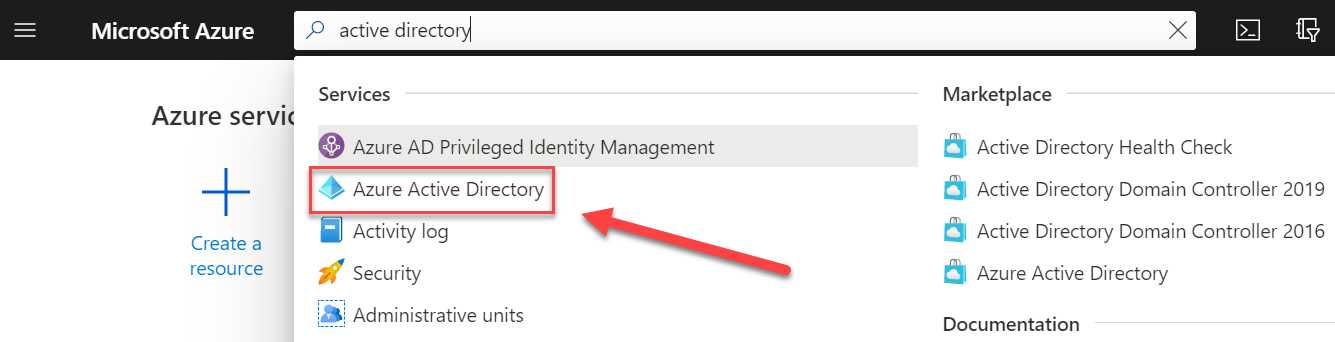
Figure 6: Open Azure AD in the Azure portal
- In the Overview blade of Azure AD, in the left menu, select Users > All users.
- Select + New guest user from the top menu as follows:
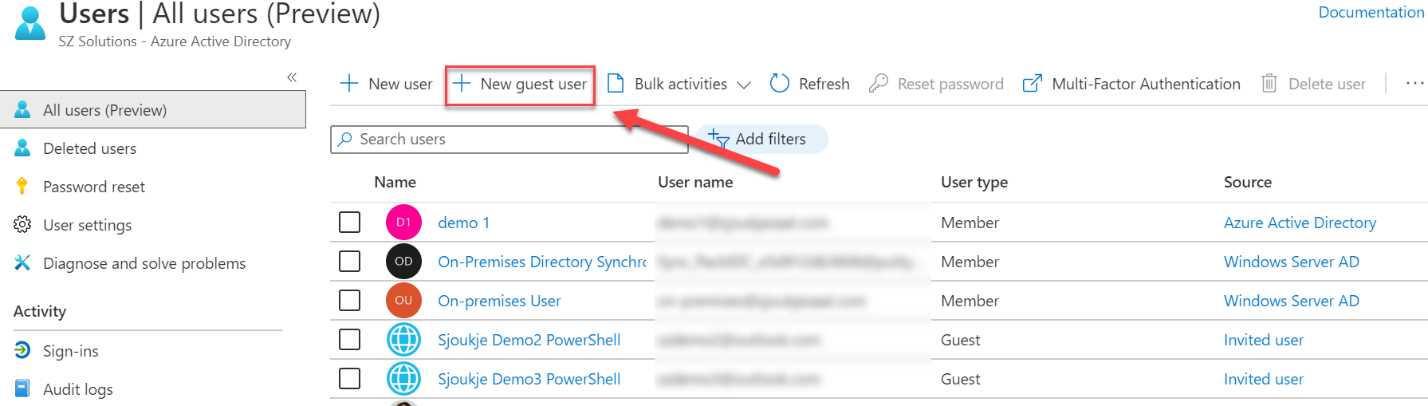
Figure 7: Add guest user
- Provide an email address and a personal message, which is sent to the user's inbox. This personal message includes a link to log in to your Azure AD tenant. You can also add the guest user to a group and a role-based access control (RBAC) role directly from here, although we are not going to do this in this step.
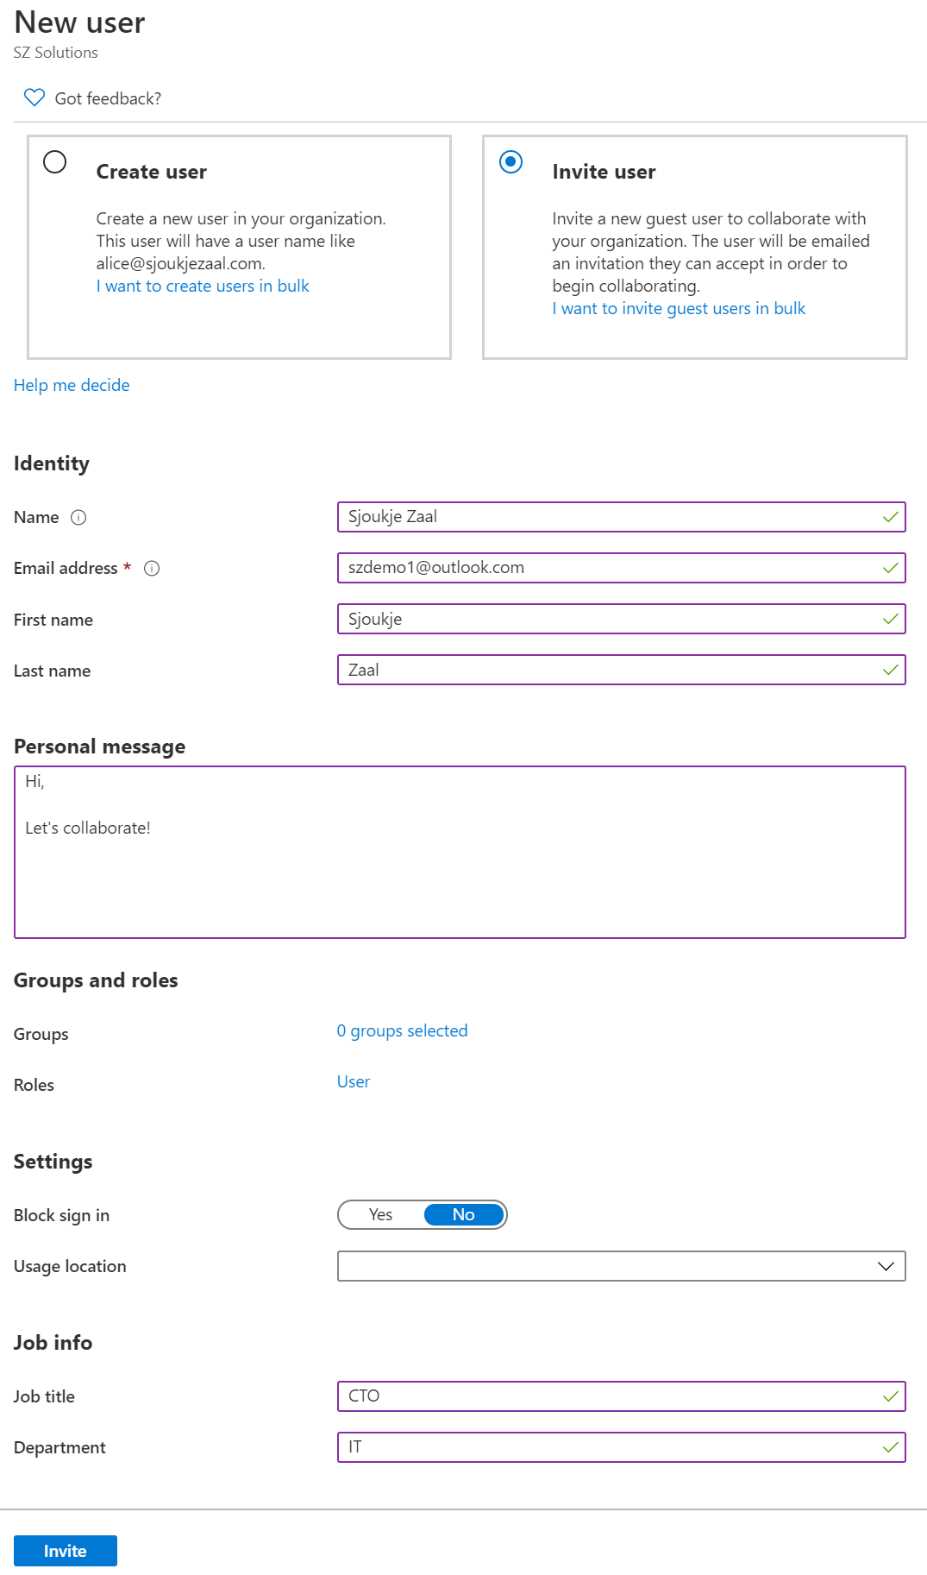
Figure 8: Add guest information
- Click Invite. This will create the user in the Azure AD tenant, and the invitation email will be sent to the email address you provided.
Now that we have created the user, we can add this user to a security group in Azure AD.
Groups and member types in Azure AD
There are several group types and member types in Azure AD. In the following section, we are going to describe the different types and why they are used. This can help you determine to which group your guest user can be added.
Group types
Azure AD offers the following two group types:
- Security: Security groups are used to manage user, device, and application access to shared resources in Azure for a group of users. You can create a user group for a specific user policy, for instance, or create a security group for specific types of applications. Using a security group, you can set permissions to a group of members at once, instead of adding these permissions to separate users. This makes management much easier and clearer. A security group can contain users, devices, groups, and service principals.
- Office 365: Office 365 groups can give access to a shared mailbox, SharePoint sites, Teams channels, calendars, files, and more. An Office 365 group can only have users; devices and groups are not supported. Both users and service principals can be owners of the group.
Group members
Azure AD has the following member types:
- Assigned: Specific users can be added as members of this group and they have unique permissions.
- Dynamic user: Dynamic users can have dynamic membership rules to automatically add and remove users. When an attribute of the member changes, the dynamic rules will be evaluated to see if the member meets the rule requirements. The user will then be added to the group. If the user doesn’t meet the requirement and is already part of the group, they will be removed.
- Dynamic device: This member type lets you define rules for devices. Based on the attributes of the device, it is added to the group or removed from the group.
In the next demonstration, we are going to create a security group and add the user that we created in the previous step to it.
How to add the guest user to a security group
The next step is to add the user to a security group in Azure AD. First, we are going to create a security group, and then add the user to it.
- Navigate to Azure Active Directory again in the Azure portal.
- In the left menu, select Groups.
- Click + New group in the top menu:
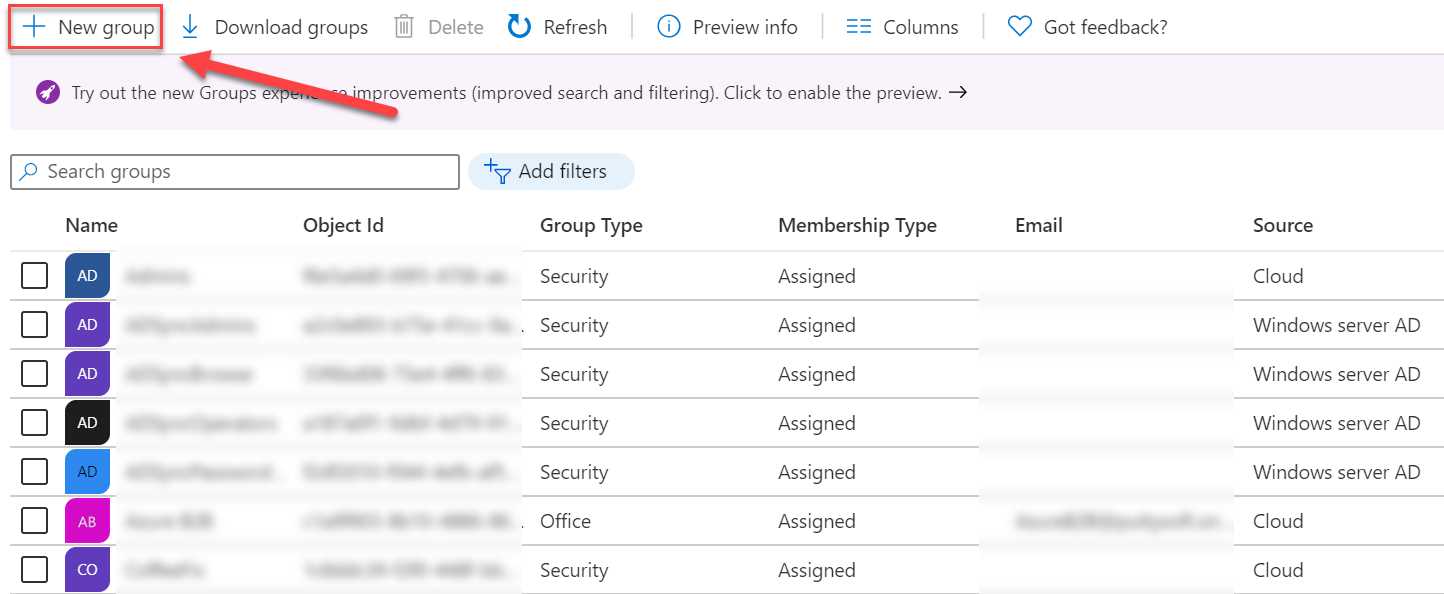
Figure 9: Add new group
- Make sure that the group type is set to Security. We are not creating an Office 365 group for this demo. Give the group a name and a description:
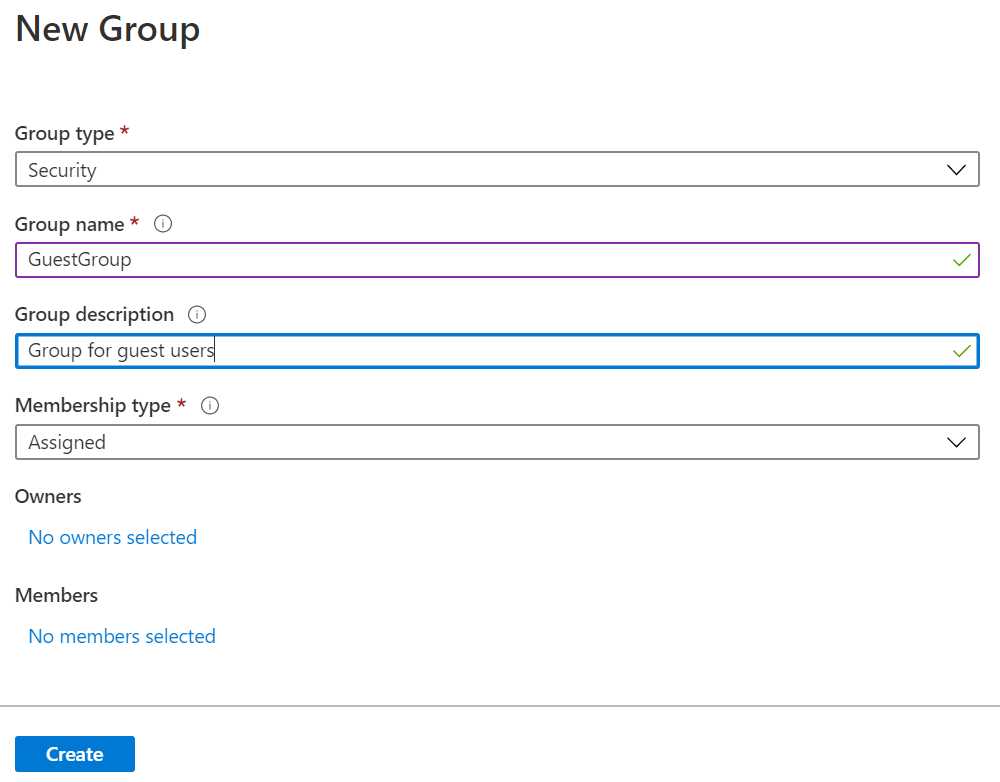
Figure 10: Specify values for the group
- Click Create.
- After creating the group, we can add the user to it. Click the created group in the list of groups to go to its settings:
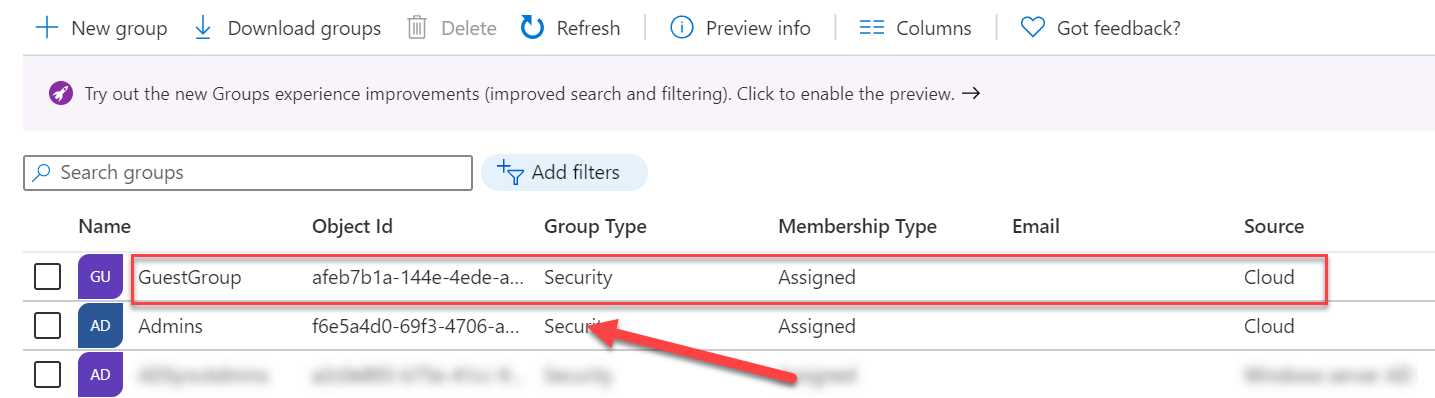
Figure 11: Select the group
- Select Members in the left menu, and Add members in the top menu:
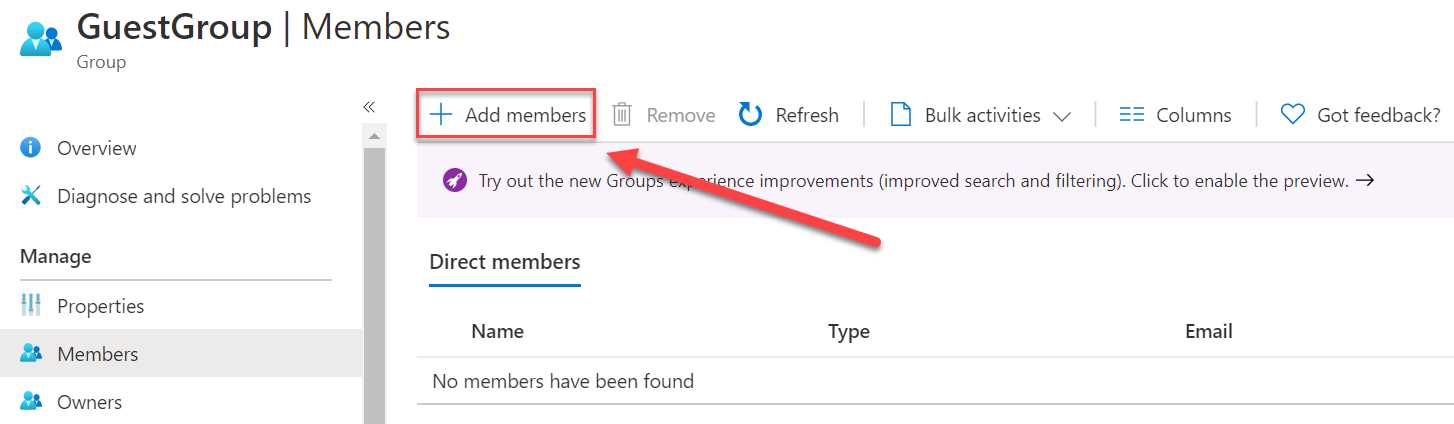
Figure 12: Add members to the group
- In the search field, type the user account name that we created in the previous demo, and select the account to add it:

Figure 13: Select the group
- Click Select.
The guest user is now added to the security group. In the next step, we are going to add the group to an application. This way, the guest user will have permissions to access the application when logging in to your Azure AD tenant.
How to assign accounts and groups to applications
The last step in this chapter is to add the security group that we created in the previous demo to an application. When the user accepts the invitation, they will automatically be redirected to the overview page of the applications they have access to.
Note: In the demonstration, an application is used that is already registered in Azure AD. If you want to add groups and members to applications, you first need to register them in Azure AD. For more information about this, you can refer to this site.
- Navigate to Azure Active Directory again in the Azure portal.
- In the left menu, select Enterprise applications.
- Select an application from the list:
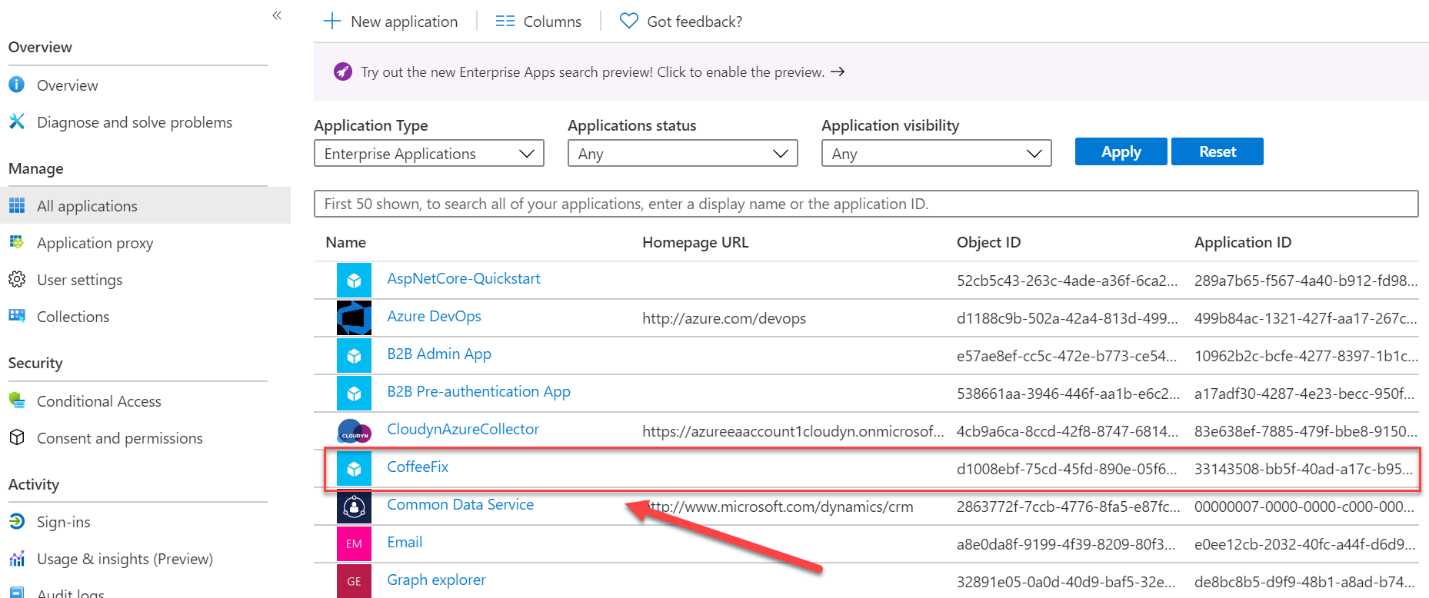
Figure 14: Select an application
- In the left menu of the application overview page, select Users and groups. Then in the top menu, select + Add user (you also add groups here):

Figure 15: Add a group
- In the Add Assignment blade that opens, click User and groups. In the search box, type the name of the group that we created, which is GuestGroup. Select the group and click Select.
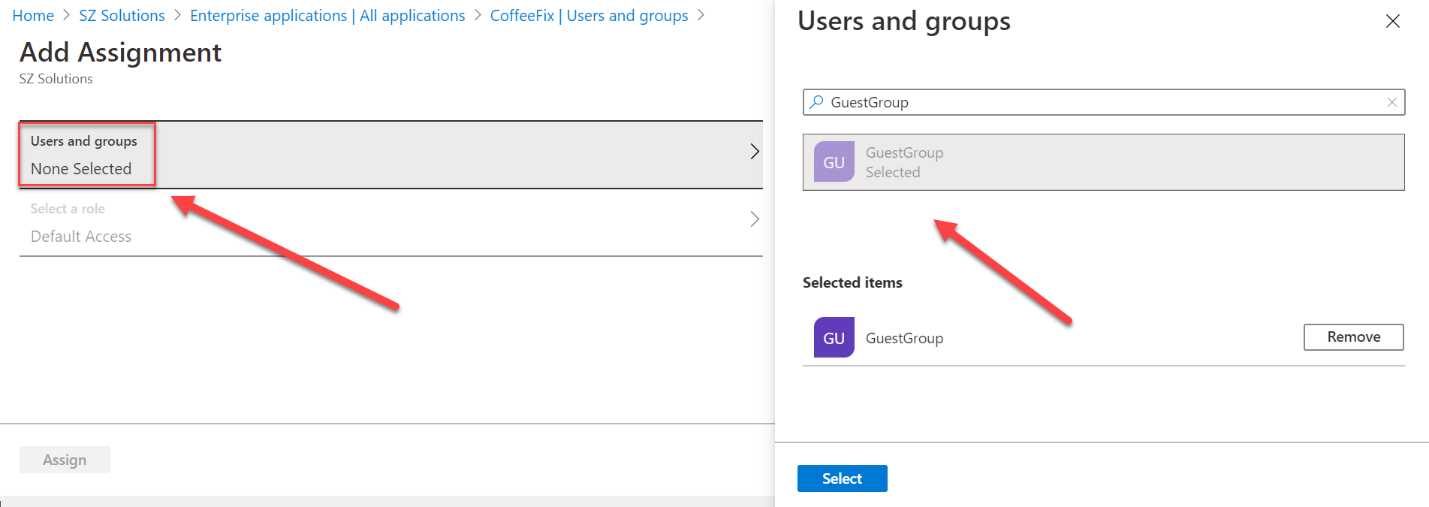
Figure 16: Add the group
- After the group is selected, click Assign.
The group and the users that are added to the group now have access to this application.
In this chapter, we have covered user account management in Azure AD and Azure AD B2B. We have added a guest user, created a security group, and added the group to an application. In the next chapter, we are going to cover the invitation redemption process for the guest user.
- 1800+ high-performance UI components.
- Includes popular controls such as Grid, Chart, Scheduler, and more.
- 24x5 unlimited support by developers.