
Electron Succinctly®

CHAPTER 3
Basic Building Blocks
Quick intro
In this chapter, we’ll focus on how to build the foundation of the desktop application we’ll be writing throughout this book.
We’ll look at the basics of Electron, the benefits of using plain JavaScript for creating the logic of our desktop app, and describe the problem we’ll be solving.
Why plain JavaScript?
As you probably know, one of the biggest challenges that developers face today is how to choose the right JavaScript framework. There are many amazing JavaScript frameworks out there, but the learning curve can be steep, depending on which one you choose.
The fundamental idea behind Electron is that cross-platform desktop applications should be written using web development techniques and languages—which in today’s world, usually means working with a JavaScript framework, although Electron does not enforce the usage of any framework in particular.
JavaScript frameworks are great and provide a lot of amazing features, such as dependency injection, two-way data binding, reusable components, routing, and more. However, this also adds an extra layer of complexity, which might not be needed for creating a basic Electron app and understanding fundamental concepts.
For instance, routing in a desktop app might not be needed, as desktop apps could have multiple windows. It might be easier, and more logical, for users accustomed to working with desktop applications, to use windows and menu navigation rather than routing, like with web apps—even though the underlying language used for both is JavaScript.
So, writing Electron apps in plain JavaScript offers advantages, such as being able to use familiar windows and menu navigation, which is common in desktop applications. This also provides a much easier way to understand how Electron works—without getting too preoccupied with how to integrate a JavaScript framework into an Electron app.
The problem
Important documents can be lifesavers. Suppose your work suddenly requires you to travel abroad, and you realize that your passport has expired. So, one of your colleagues is sent off to do the job and your passport expiration issue doesn’t go down very well with your manager.
Alternatively, suppose you have your passport in order, but your company’s credit card has expired. Since you don’t notice it until you’re asked for the credit card when checking out, you’re left paying the bill that you thought you were going to pay with the company’s card.
These are simple examples of why it’s good to know in advance when an important document is going to expire—this way, you can plan when to renew it with sufficient time.
Throughout this book, we’ll build an Electron app using plain JavaScript that will help keep track of documents that have an expiration date.
We’ll focus on the Electron aspects of the application, so you can understand how Electron works. This will allow us to build the standard desktop application functionality.
Later, if you wish, you can expand the application by adding any other features you consider necessary—such as saving the data on a database. The application will not save any data; it will only display it on the screen.
Creating the project
For the deployment of our application, we’ll use called Electron Packager, which will allow us to package and deploy the application to Windows, Mac, and Linux. However, the deployment doesn’t come until we’ve finalized our application, so first we need to create our project.
You can open Visual Studio Code and the command line—in my case, I’ll use this command line tool I love, but feel free to use one of your choice.
Using the command line, go into the project folder and execute the following command.
Listing 2-a: The “npm init” Command
npm init |
This command is used to create the main project file (package.json), which we will use to include Electron and other dependencies we might need for creating the app.
Follow the steps and answer the questions—in my case, it looks like this:

Figure 2-a: Creating the package.json File
As you might have noticed, under the dependencies section, Electron has been automatically added to our project’s package.json file, because we had already installed Electron under the project’s folder using another npm command.
If for some reason you missed installing Electron previously, then simply run the following command to install it now.
Listing 2-b: The “npm install --save” Command
npm install --save electron |
This command will add the Electron dependency to the package.json file.
Then using Visual Studio Code, open the package.json file. We’ll need to modify the scripts section by removing the test subsection and replacing it with a start subsection, which will allow us to start Electron, using the start command.

Figure 2-b: The “start” Script
This is all we need to do with the package.json file—now, we’re ready to start coding.
Our app’s entry point: main.js
You might have noticed that when the npm init command was executed, we were asked to give the name of the app’s main entry point. I decided to call it main.js; however, we could have given it any other name.
I chose this name simply to make it easier for desktop developers coming from a C# or C++ background, to easily correlate this entry point concept with the name of the main method, which is used to start programs written in these languages.
With Visual Studio Code opened, go ahead and create the main.js file under your project folder. This is where we will place the main code for our application.
So, the first thing we need to do within our main.js file is to bring in the Electron module and a couple of Node.js modules, which are complementary to working with Electron—these are the url and path modules.
Listing 2-c: The Main Required Modules (main.js)
const electron = require('electron'); const url = require('url'); const path = require('path'); |
Let’s define the app, BrowserWindow, and menu constants that our application will use.
Listing 2-d: The app, BrowserWindow and menu Constants (main.js)
const {app, BrowserWindow, Menu} = electron; |
Next, let’s define the variable that we will use for our application’s main window.
Listing 2-e: The Main Window Variable (main.js)
let main; |
These three simple steps are all we need to start developing the skeleton of our application.
So, let’s work on the main window logic—to do that, we first need to subscribe to the ready event using the on function with lambda syntax, which indicates that the application is ready. We can do this as follows.
Listing 2-f: The Application Ready Event (main.js)
app.on('ready', () => { }); |
As you can see, we pass an arrow function to the ready event, which will execute the code necessary for creating the browser window.
Next, inside the ready event, let’s create the main window object and pass it the name of the HTML file that will contain its user interface. We can do this as follows.
Listing 2-g: The Complete Application Ready Event (main.js)
app.on('ready', () => { // Create the new window main = new BrowserWindow({}); // Load the html into the window main.loadURL(url.format({ pathname: path.join(__dirname, 'main.html'), protocol: 'file', slashes: true })); }); |
Let’s quickly review what we’ve done. First, we create the browser window instance that will be responsible for executing and rendering the main user interface of our application—represented by main.html—which we will create shortly.
Second, we pass to the browser window object the location of the main.html file—this is what the loadURL method does.
Although the code for the loadURL method looks very complex, all it is essentially doing is passing the file path of main HTML file that will be loaded.
Listing 2-h: Example of a File Path
// Example of the file path that will be loaded in main.js // file://dirname/main.html |
We now have the basic skeleton for our application. But, before we can try it out and see how it looks, let’s quickly create the main.html file and add the following boilerplate code.
Listing 2-i: Basic main.html Code
<!DOCTYPE html> <html lang="en"> <head> <meta charset="UTF-8"> <meta name="viewport" content="width=device-width, initial-scale=1.0"> <meta http-equiv="X-UA-Compatible" content="ie=edge"> <title>DocExpire</title> </head> <body> <h1>DocExpire</h1> </body> </html> |
Save the changes, and on the command line, type npm start and press Enter. Now you should be able to see the application running.
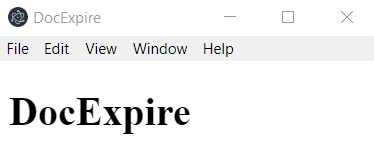
Figure 2-c: The Application Running
Awesome—we’ve now executed our first “Hello World” Electron app.
Notice though, that because we haven’t created our own menu items, it’s using the default menu items that are provided out of the box, including the Chrome Developer Tools, accessible through the View menu.
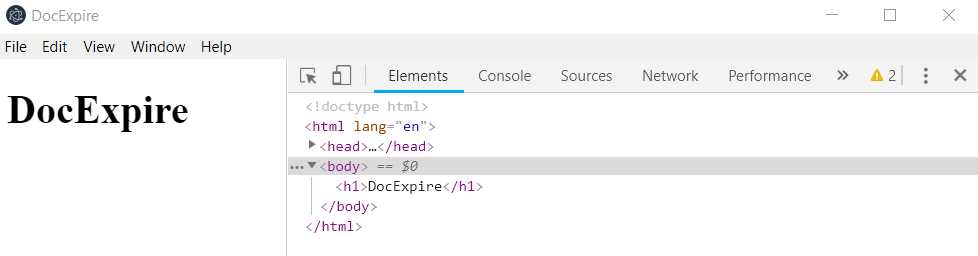
Figure 2-d: The Application Running with Chrome Developer Tools Opened
The next thing we’ll do is to replace the default menu with our own.
Replacing the default menu
We can replace the default menu by creating a menu template, which in Electron is an array of objects. We can do this as follows in main.js, just before the ready event.
Listing 2-j: Our Menu Template (main.js)
const menuTemplate = [ { label: 'File' } ]; |
For now, we are simply creating a File menu to quickly test it out. This defines the menu template, but we still need to add it to our application; we can do this as follows inside the ready event.
Listing 2-k: Building and Adding the Menu (main.js)
app.on('ready', () => { // … Previous code goes here …
// Build the menu from the template const menu = Menu.buildFromTemplate(mainMenu); // Insert the menu into the application Menu.setApplicationMenu(menu); }); |
As you can see, the menu is built by invoking the buildFromTemplate method, and then it’s added to the application with the setApplicationMenu method.
Let’s run npm start from the command line to see if our menu replaces the default menu options.
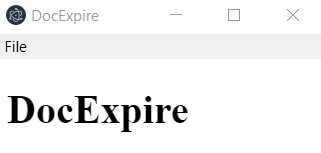
Figure 2-f: The Application using the Menu Template
If you are using a Mac, you might have noticed that the File menu is not called File, but instead is called, Electron.
This is because menus are rendered differently on a Mac than on other platforms. So if you are using a Mac and see Electron instead of File, don’t worry—we’ll later explore how to address this.
Awesome—that’s how easy it is to replace the default menu and add our own.
Adding submenus
We’ve just added a very basic menu template; however, that’s not enough for our application’s functionality.
So how can we add a submenu to our existing menu? If all we had to do to add a menu was to define an array of objects, then adding a submenu is no different—a submenu is just an array of objects inside a menu option.
With this said, let’s define some submenu options for the File menu that we will use in our application. We can do this as follows.
Listing 2-l: Adding Submenus (main.js)
const mainMenu = [ { label: 'File', submenu:[ { label: 'Add Document' }, { label: 'Clear Documents' }, { // For cloud syncing – for the future label: 'User Details' }, { label: 'Exit App' } ] } ]; |
For now, we’ve just added the label for the menu and submenus—later, we’ll finish off the menu template, but for now, this is enough.
Notice how we have added four submenus—the first option is to add a new document, the second option is to clear all the documents, the third is to add user details, and the last option is to exit the application.
By “document,” I’m referring to a document that has an expiration date—remember, we are building an application that is going to keep track of the expiration date of important documents.
The option to add user details could be used in the future, so that a list of documents is associated with an email address, which means that we could use the same application for different users. Each user could have its own list of documents, and this list could be synced between machines running the application, with something like Cloud Firebase.
Invoking a new window
There’s no reason why we couldn’t include all our application’s logic within the scope of one window. However, most desktop applications (regardless of the platform) rely on more than one main window. Therefore, a key element of developing Electron applications is being able to use multiple windows and benefitting from intra-window messaging.
Let’s define a click event for the Add Document menu option, which will allow us to open a new window, which we can use to add the details of a new document.
Listing 2-m: The Add Document Click Event (main.js)
const mainMenu = [ { label: 'File', submenu:[ { label: 'Add Document', click() { addDocumentWindow(); } }, // … Existing code … ] } ]; |
On the click event, we are invoking the addDocumentWindow function, which we have not defined.
Let’s go ahead and define this function—just before the ready event, and after the mainMenu template—within main.js.
Listing 2-n: The addDocumentWindow Function (main.js)
function addDocumentWindow() { // the addDocumentWindow functionality } |
Here comes the interesting bit: what do you think will go inside this function? If we are going to create a new window, then it’s pretty much going to be the same logic we originally had inside the ready event, before we replaced the default menu.
In other words, we already know how to do this—we can add this logic just before the ready event.
Listing 2-o: The addDocumentWindow Function (main.js)
let addDocWin; // Create Add Document window function addDocumentWindow() { // Create the new window addDocWin = new BrowserWindow({}); // Load the html into the window addDocWin.loadURL(url.format({ pathname: path.join(__dirname, 'doc.html'), protocol: 'file', slashes: true })); } |
This would create a new window. Notice that we are repeating the same code we wrote for most of the ready event. We can refactor this code as follows.
Listing 2-p: The Code Refactored (main.js)
function addWindow(name) { // Create the new window let win = new BrowserWindow({}); // Load the html into the window win.loadURL(url.format({ pathname: path.join(__dirname, name + '.html'), protocol: 'file', slashes: true })); return win; } |
By refactoring the code this way, we can reuse this function to create the Main window and the window to add a new document, by passing the name of the HTML file that the window will display and returning the handler to the window—win.
Now, let’s rewrite the addDocumentWindow, so we can create the Add Document window like we originally intended to.
Listing 2-q: The New AddDocumentWindow Function (main.js)
function addDocumentWindow() { addDocWin = addWindow('doc'); } |
Basically, this function just calls addWindow and passes the name of the HTML file for which the window will be created.
To make our code even cleaner, we can move the declaration of the addDocWin variable to the same line where we have the main variable declared.
Listing 2-r: The main and addDocWin Variables (main.js)
let main, addDocWin; |
With all this refactoring done, the ready event code now looks as follows.
Listing 2-s: The Refactored ready Event (main.js)
app.on('ready', () => { // Create the new window main = addWindow('main'); // Build the menu from the template const menu = Menu.buildFromTemplate(mainMenu); // Insert the menu into the application Menu.setApplicationMenu(menu); }); |
We can now run npm start and test the application. Click the Add Document menu option and check if the new window opens.
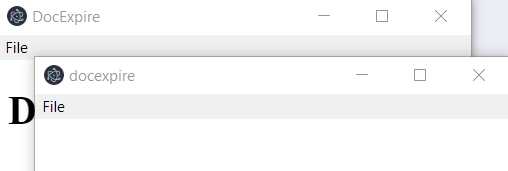
Figure 2-g: The Application Running (Two Windows Opened)
Notice that when you click the Add Document option, an almost identical second window opens. This second window has the same width, height, and menu as the main window—however, notice that the title on the second window is in lowercase, and that there is no content within the second window—this is because we have not yet created the doc.html file.
Let’s add some parameters when we open the second window—this way, we can customize the width, the height, and the title bar text.
We can do this by adjusting the addWindow function as follows.
Listing 2-t: The Adjusted addWindow Function (main.js)
function addWindow(name, params) { // Create the new window let win = new BrowserWindow(params); // Load the html into the window win.loadURL(url.format({ pathname: path.join(__dirname, name + '.html'), protocol: 'file', slashes: true })); return win; } |
As you can see, we’ve added a params parameter. So, how can we adjust the width, height, and title using params? We can do that by using params as an object rather than an individual property.
Let’s modify the addDocumentWindow function and the ready event, as follows.
Listing 2-u: The Adjusted addDocumentWindow Function and ready Event (main.js)
function addDocumentWindow() { addDocWin = addWindow('doc', {width: 200, height: 300, title: 'Add Document'}); } app.on('ready', () => { // Create the new window main = addWindow('main', {}); // Build the menu from the template const menu = Menu.buildFromTemplate(mainMenu); // Insert the menu into the application Menu.setApplicationMenu(menu); }); |
Now, run npm start to test the application. Click the Add Document menu option to see how the application looks now.
Figure 2-h: The Second Window Opened
Notice how the second window opened with the defined width, height, and title bar, and appeared centered to the main window.
The title is barely visible; it can be better seen by adjusting the width and height.
Recap: main.js
With some code and explanations behind, let’s recap all the code we’ve written so far in main.js.
Listing 2-v: main.js
const electron = require('electron'); const url = require('url'); const path = require('path'); const {app, BrowserWindow, Menu} = electron; let main, addDocWin; // Menu template const mainMenu = [ { label: 'File', submenu:[ { label: 'Add Document', click() { addDocumentWindow(); } }, { label: 'Clear Documents' }, { // For cloud syncing – for the future label: 'User Details' }, { label: 'Exit App' } ] } ]; // Create a new window function addWindow(name, params) { // Create the new window let win = new BrowserWindow(params); // Load the html into the window win.loadURL(url.format({ pathname: path.join(__dirname, name + '.html'), protocol: 'file', slashes: true })); return win; } function addDocumentWindow() { addDocWin = addWindow('doc', {width: 200, height: 300, title: 'Add Document'}); } // Application ready event app.on('ready', () => { // Create the new window main = addWindow('main', {}); // Build the menu from the template const menu = Menu.buildFromTemplate(mainMenu); // Insert the menu into the application Menu.setApplicationMenu(menu); }); |
Creating: doc.html
Now that we know how to create the Add Document window, we need to be able to add some HTML markup to it—this way we can start to give our app its character and “look and feel.”
As our application is all about keeping track of documents and their expiration dates, I’m going to leave it up to you, to use a datetime picker component—I won’t use this myself, but I thought I would mention it.
If you would like to get this component installed and later experiment with it, just run the following command from the application project folder.
Listing 2-w: Installing a Datetime Picker Component
npm i flatpickr –save |
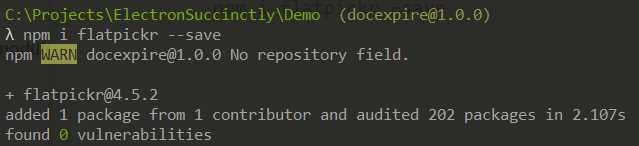
Figure 2-i: The Datetime Picker Component Installed
Let’s define the basic HTML markup for our doc.html file. If you haven’t yet created the doc.html file, go ahead and create it in Visual Studio Code or the editor you are using.
Then, paste the following markup and save the doc.html file.
Listing 2-x: Basic doc.html Markup
<!DOCTYPE html> <html lang="en"> <head> <meta charset="UTF-8"> <meta name="viewport" content="width=device-width, initial-scale=1.0"> <meta http-equiv="X-UA-Compatible" content="ie=edge"> <title>Document</title> </head> <body> <form> <div> <label>Document name:</label> <input type="text" id="name" autofocus> <label>Expiration date:</label> <input type="text" id="date"> </div> <button type="submit">Save</button> </form> </body> </html> |
If you now run the npm start command to test the application, and then click the Add Document menu option, you should see the following.
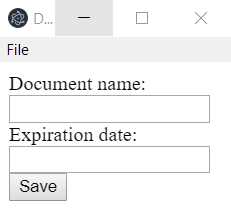
Figure 2-j: Executing doc.html
Notice that we haven’t added any styling or functionality to this form yet, so it’s just markup. We’ll later add Google’s Material Design to make our markup look more appealing.
Although we have slightly deviated from the main.js logic that we’ve been working on since the beginning of this chapter, I wanted to highlight how we can easily create a secondary window—which we’ll then link back to the logic within main.js—using an ipcRenderer object.
Exiting the application
With the File submenu options defined, let’s quickly see how we can add the logic required to exit the application.
Listing 2-y: Exiting the Application (main.js)
const mainMenu = [ { label: 'File', submenu:[ // … Existing code … { label: 'Exit App', click() { app.quit(); } } ] } ]; |
As you can see, exiting the application is as simple as adding a click event and invoking the app.quit method.
Now, save the changes to main.js, and then run npm start to give it a shot.
With the application opened, go to File > Exit App, and the application should properly close.
Closing secondary windows
When developing Electron applications, keep in mind that secondary windows that are opened will not be closed when the main window is closed.
Say your application is running, and both the main window and the Add Document window are opened, but you close the main window. What will happen is that the secondary window will remain opened.
The ideal behavior for any desktop application—what users normally expect—is that once the main window is closed, any secondary windows should also be closed, and the application terminated.
To achieve this, we need to add a bit of extra code to the ready event, as follows.
Listing 2-z: Terminating the Application (main.js)
app.on('ready', () => { // … Existing code … // Terminating the application main.on('closed', () => { app.quit(); }); }); |
As you can see, all we are doing is to listen for the closed event from the main window to get triggered—when that happens, an arrow function is executed, with the instruction to finalize the application.
If you now run npm start, and then click on the Add Document menu option and try to close the main window, the secondary window should also be closed, and the application terminated.
Secondary window garbage collection
It’s great that we can now successfully close all windows and terminate the app when closing the main window.
However, any variable that holds a reference to a secondary window will keep holding that memory space—therefore, it’s good to do some garbage collection for secondary windows.
We can do this by adding the following code to the addDocumentWindow function.
Listing 2-aa: Secondary Windows Garbage Collection (main.js)
function addDocumentWindow() { // … Existing code … // Garbage collection addDocWin.on('close', () => { addDocWin = null; }); } |
As you can see, we set the secondary window variable to null when the window’s close event is triggered—this will release the memory space allocated for this window.
Although this isn’t required, it’s a recommended practice that optimizes how our Electron application runs.
Adding a shortcut key
Besides being able to close the application through the menu option, I’d also like to be able to close it using a shortcut key (for example, Ctrl+E). What we can do is to add an accelerator.
Adding an accelerator is quite easy, but we need to make sure that we remain operating-system agnostic—which is the whole purpose of writing an Electron app in the first place. Therefore, on a Mac, instead of Ctrl+E, we’ll have to use Command+E.
To achieve this, we’ll have to ask Electron to check on which operating system it is running. We can achieve this by invoking the process.platform property from the Node.js API.
Remember that Electron internally uses Node.js, so we can invoke Node.js properties and methods within our Electron app.
If we are on a Mac, we can use the Command+E shortcut key to close the app, and on any other platform—including Windows—we can use Ctrl+E.
We can evaluate if we are on a Mac or another platform by using a ternary operator and checking if the value of process.platform is equal to darwin.
Listing 2-ab: The Exit App Accelerator inside mainMenu (main.js)
const mainMenu = [ { label: 'File', submenu:[ // … Existing code … { label: 'Exit App', accelerator: process.platform == 'darwin' ? 'Command+E' : 'Ctrl+E', click() { app.quit(); } } ] } ]; |
If you save the changes to main.js and run npm start, you should be able to exit the application using the shortcut key defined.
Optimizing the menu
I’m running Windows, but if you are following on a Mac, when the application has been running, you’ve probably noticed that the File menu is called Electron instead. As I explained previously, this is because menus are rendered differently on a Mac than they are on other platforms.
This can be easily solved by adding an “almost empty” object to the beginning of the mainMenu array. We can do this as follows.
Listing 2-ac: The Menu Template for a Mac (main.js)
const mainMenu = [ // Adding this empty object solves the File menu issue on a Mac { label: '' }, { label: 'File', submenu:[ // … Existing code … ] } ]; |
Notice that all we have done is to add { label: '' } before defining the File menu option.
If you are testing this application on a Mac, you’ll be happy; however, if you are using Windows or another platform and execute the npm start command, you’ll notice that an empty option has been added to the menu bar.
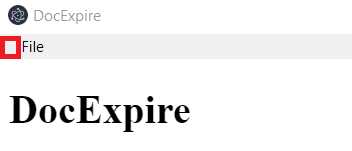
Figure 2-k: Empty Menu Option on Windows
So, we’ve managed to address the issue on a Mac, but created a problem on other platforms. Also, this solution of adding an empty element to the menu template array is not very elegant.
The way to address this, is to check the value of the process.platform property from the Node.js API, and only then, add the empty object when we are on a Mac. We can do this as follows.
Listing 2-ad: The menuMac Function (main.js)
function menuMac() { if (process.platform == 'darwin') { mainMenu.unshift({ label: '' }); } } |
I’ve created a new function called menuMac, which can be placed on main.js after the mainMenu template declaration.
Basically, the unshift array method adds an element to the beginning of the array—in this case, we are adding the object { label: '' } to mainMenu when the system detects that we are on a Mac, instead of hardcoding it within the array itself.
Don’t forget to remove { label: '' } from the from mainMenu. The menu template should now look as follows.
Listing 2-ae: The Menu Template (main.js)
const mainMenu = [ { label: 'File', submenu:[ // … Existing code … ] } ]; |
For this to work, we’ll need to invoke the menuMac function from the ready event. Our updated ready event should look as follows.
Listing 2-af: The Updated ready Event (main.js)
app.on('ready', () => { // … Existing code … menuMac(); // Build the menu from the template const menu = Menu.buildFromTemplate(mainMenu); // Insert the menu into the application Menu.setApplicationMenu(menu); // … Existing code … }); |
I’m quite happy with this code, but whenever I’m writing code, I like to keep things as clean as possible—which means that if there’s anything that can be optimized, I’ll do it.
In this case, there are three lines of code within the ready event that are related to displaying the menu. It’s a good idea to refactor those three lines into a separate function—let’s do that.
Listing 2-ag: The displayMenu Function (main.js)
function displayMenu() { menuMac();
// Build the menu from the template const menu = Menu.buildFromTemplate(mainMenu); // Insert the menu into the application Menu.setApplicationMenu(menu); } |
I’ve refactored the menu-related code into a new function called displayMenu, which we can now invoke from the ready event. Let’s adjust the ready event accordingly.
Listing 2-ah: The Updated ready Event (main.js)
app.on('ready', () => { // … Existing code … displayMenu(); // … Existing code … }); |
If you run the application, you’ll see that visually, nothing has changed.
Enabling Developer Tools
By adding our own menu template, we’ve lost access to the Chrome Developer Tools menu option—which can still be handy to have around during development, but not in production.
So, let’s create a function that can allow us to enable the Chrome Developer Tools when we are not running our application in a production environment. Let’s add this new function just before displayMenu.
Listing 2-ai: Function to Enable the Chrome Developer Tools (main.js)
function enableDevTools() { if (process.env.NODE_ENV === undefined || process.env.NODE_ENV !== 'production') { mainMenu.push({ label: 'DevTools', submenu: [ { label: 'Toggle DevTools', accelerator: process.platform == 'darwin' ? 'Command+T' : 'Ctrl+T', click(i, fw) { fw.toggleDevTools(); } } ] }); } } |
We’ve inserted an element—only when we our application is not in production—that inserts the DevTools menu option into the mainMenu array by using the JavaScript push method.
Notice how we’ve also added a keyboard accelerator, with the option to toggle (hide/show) the DevTools menu option, using the toggleDevTools method.
Now, we need to invoke the enableDevTools function from displayMenu—we can do this as follows.
Listing 2-aj: The Updated display (main.js)
function displayMenu() { menuMac(); enableDevTools(); // … Existing code … } |
If you now run the application with npm start, you should see the DevTools option on the menu bar.

Figure 2-l: The Application with the DevTools Menu Option
The code so far—main.js
We’ve covered a lot of ground to get the basic structure of our Electron application off the ground. Let’s have a quick look at how our main.js file looks now.
Listing 2-ak: The Code So Far (main.js)
const electron = require('electron'); const url = require('url'); const path = require('path'); const {app, BrowserWindow, Menu} = electron; let main, addDocWin; // Menu template const mainMenu = [ { label: 'File', submenu:[ { label: 'Add Document', click() { addDocumentWindow(); } }, { label: 'Clear Documents' }, { // For cloud syncing – for the future label: 'User Details' }, { label: 'Exit App', accelerator: process.platform == 'darwin' ? 'Command+E' : 'Ctrl+E', click() { app.quit(); } } ] } ]; function menuMac() { if (process.platform == 'darwin') { mainMenu.unshift({ label: '' }); } } function enableDevTools() { if (process.env.NODE_ENV === undefined || process.env.NODE_ENV !== 'production') { mainMenu.push({ label: 'DevTools', submenu: [ { label: 'Toggle DevTools', accelerator: process.platform == 'darwin' ? 'Command+T' : 'Ctrl+T', click(i, fw) { fw.toggleDevTools(); } } ] }); } } function displayMenu() { menuMac(); enableDevTools(); // Build the menu from the template const menu = Menu.buildFromTemplate(mainMenu); // Insert the menu into the application Menu.setApplicationMenu(menu); } // Create a new window function addWindow(name, params) { // Create the new window let win = new BrowserWindow(params); // Load the html into the window win.loadURL(url.format({ pathname: path.join(__dirname, name + '.html'), protocol: 'file', slashes: true })); return win; } function addDocumentWindow() { addDocWin = addWindow('doc', {width: 200, height: 300, title: 'Add Document'}); // Garbage collection addDocWin.on('close', () => { addDocWin = null; }); } // Application ready event app.on('ready', () => { // Create the new window main = addWindow('main', {}); displayMenu(); // Terminating the application main.on('closed', () => { app.quit(); }); }); |
Summary
Throughout this chapter, we’ve explored how to create the basic structure that our Electron application requires. We are now ready to start with the actual functionality of the application. We have everything we need from a functional point of view, so we can focus exclusively on our application’s logic—this is what we’ll do in the next chapter.
- Shared infrastructure for efficient resource management
- Self-service analytics for easy data exploration
- Enhanced security with row-level security and SSO
- Customizable dashboards to meet your specific needs