
Docker Succinctly®

CHAPTER 6
Clustering Hosts with Docker Swarm
Clustering with Docker swarm mode
You start to see the real power of Docker when your application is packaged and you’re ready to deploy to production. In most cases, you’ll want redundancy for your app so that if the server hosting it goes down, another server can take over; and you’ll want the ability to scale so that multiple servers can all run the app and share the workload between them. Docker has native support for that with Docker swarm mode, which lets you join multiple machines running Docker into a cluster that provides scale and redundancy.
Swarm mode is an optional feature in Docker. You can run Docker as a standalone host, as we’ve done so far, or you can join that same host to a swarm with a single command. When you have multiple machines running in a swarm, you start containers in a similar way, but you can specify how many instances of the container you want to run. You make a request to the swarm, and, based on the resources available, Docker decides which hosts will actually run the containers.
It’s incredibly easy to set up a Docker Swarm, and you can add and remove nodes while the swarm is running in order to manage your overall capacity. The swarm supports Docker networking, which means your containers can all communicate, and it monitors instances the entire time. If a host goes down and the number of containers running your app falls below what you requested, Docker will start new instances on other hosts in order to ensure the service level is correct. In this chapter, we’ll see how swarm mode works and how to run containers on a swarm.
Creating a Docker swarm
Docker swarm follows a manager-worker architecture in which the manager schedules work on the workers. In a swarm, the type of work is always the same—running containers—and Docker is slightly unusual in that containers can run on the manager nodes, too. A manager node must be running for the swarm to operate correctly. You can have multiple nodes designated as managers in order to provide high availability, but only one is active—the leader.
Tip: Docker swarm mode uses the Raft Consensus Algorithm for electing a new leader manager node if the current one is lost. Like similar algorithms, Raft relies on a majority election, which means you should have an odd number of manager nodes in order to avoid tied elections—three or five is common. Because Docker swarm managers can run containers, too, your secondary managers can work and you won't have wasted compute in your swarm.
Creating a swarm is easy. You’ll need a number of machines (or VMs) set up, and the only prerequisites for the machines are:
- Docker installed, version 1.12 or higher
- Ports 2377, 7946, and 4789 open so the machines can communicate
When you create your swarm, Docker will provision certificates and ensure that communication between all the nodes is encrypted. The specified ports need to be open between the nodes, but they don’t need to be public, and you can restrict access at the infrastructure layer. For instance, in Microsoft Azure you would create all your VMs in a virtual network and only open the ports to other machines from the virtual network, which means access from the public Internet would be blocked.
Note: Docker 1.12 introduced swarm mode, which means that is the minimum version you can use. Prior to 1.12, Docker Swarm was a separate product. You can still use the old Docker Swarm to cluster multiple Docker hosts, but it is far more complicated to set up, and there are no advantages to using it over the newer swarm mode.
With the machines ready to go, choose one to be the master, note its IP address, and create a swarm using the swarm init command. I have three VMs in Azure running Ubuntu, which have Docker installed, and I'm going to make them into a swarm. In Code Listing 62, I create the swarm from the machine with the internal IP address 10.0.0.4, which switches this Docker host into swarm mode and sets it as the manager for the swarm.
Code Listing 62: Creating a Docker Swarm
$ docker swarm init --advertise-addr 10.0.0.4 Swarm initialized: current node (am2avhyv52mr05yernr2t9ug8) is now a manager. To add a worker to this swarm, run the following command: docker swarm join \ --token SWMTKN-1-637apaa2992zallyfvw6iudobr6vai830h65tkk16mee8nw2u0-15ofjpt6mt4r1yy1jgg9buyb6 \ 10.0.0.4:2377 |
In the init command, you need only to specify the IP address from which the master will listen for nodes if the manager has multiple IP addresses, but specifying the address is useful as a matter of course so that you’ll know exactly where the manager is advertising for new joiners. That command is all you need. This is a functional swarm now, albeit with a single node, and now you can add the rest of your worker nodes.
The output from swarm init gives you a token that you use to join more nodes to the swarm. The token is a security measure that prevents any nodes joining the swarm unless you share the token with them—you should treat it carefully, like any other security secret. In Code Listing 63, I join another Azure VM to the swarm.
Code Listing 63: Joining the Swarm
$ docker swarm join \ > --token SWMTKN-1-637apaa2992zallyfvw6iudobr6vai830h65tkk16mee8nw2u0-15ofjpt6mt4r1yy1jgg9buyb6 \ > 10.0.0.4:2377 This node joined a swarm as a worker. |
The swarm join command specifies the secret token and the advertised address of the master, and the output shows the nodes have been accepted as workers, so now I have a multinode swarm. Now that we’re in swarm mode, managing nodes and containers is a little different, and certain commands work only on the manager. Because that is true, and also because worker nodes can come and go, it’s best to work with Docker on the manager.
Working with Docker swarm
Using Docker in swarm mode brings us two new concepts. First, all the machines in the swarm are called nodes, and you manage them with a set of node commands. Second, you don’t run containers on the swarm, you work at a higher level with services. Running a service is like running a container—it gets created from a Docker image in the same way—but a service can run as multiple instances of a container.
From the swarm manager, you can see all the nodes in the swarm and the current status with the node ls command, as in Code Listing 64 (in which I’ve added a third node to the swarm).
Code Listing 64: Listing Nodes in a Swarm
$ docker node ls ID HOSTNAME STATUS AVAILABILITY MANAGER STATUS 8smbcf360or1257jt5d3fj32i swarm-02 Ready Active aedcdczhcppw7qva7fdtvxmmj swarm-01 Ready Active am2avhyv52mr05yernr2t9ug8 * swarm-00 Ready Active Leader |
The output here tells us that machine swarm-00 is the leader manager node and that swarm-01 and swarm-02 are functioning worker nodes—with Active availability and Ready status. We’ll see what happens when a node goes offline later in this chapter.
To start a service on the swarm, use the service create command. Code Listing 65 shows the usual Nginx web application being started as a service.
Code Listing 65: Running a Service on the Swarm
$ docker service create --name website --publish 80:80 nginx:alpine cixz0vah486d81zo1ecw5fe2p |
Creating a service is a lot like running a container. You specify the image and any options for the engine—for example, the service name and port publishing in this example. Nginx exposes port 80, and my Azure VMs are configured to allow port 80 requests from the Internet, which means I should be able to browse my website from any computer so long as I know the address of the node running the container.
The service ls command tells me which services are running, service ps tells me which hosts are running which containers, and Code Listing 66 shows me which VM I need to hit in order to access the website.
Code Listing 66: Listing Services and Containers
$ docker service ls ID NAME REPLICAS IMAGE COMMAND cixz0vah486d website 1/1 nginx:alpine $ docker service ps website ID NAME IMAGE NODE DESIRED STATE CURRENT STATE ERROR 1w5lqx0lp4pnftqzl04m0kqiq website.1 nginx:alpine swarm-00 Running 2 minutes ago |
The one container running on swarm-00 happens to be the manager. Now, if I browse to the manager’s domain address, the port 80 request will be forwarded to the container running on the node and I can see the website. Figure 10 shows the result. As we should expect, notice that the hostname swarm-00 of the machine serving the response is the same as the VM to which I sent the request.
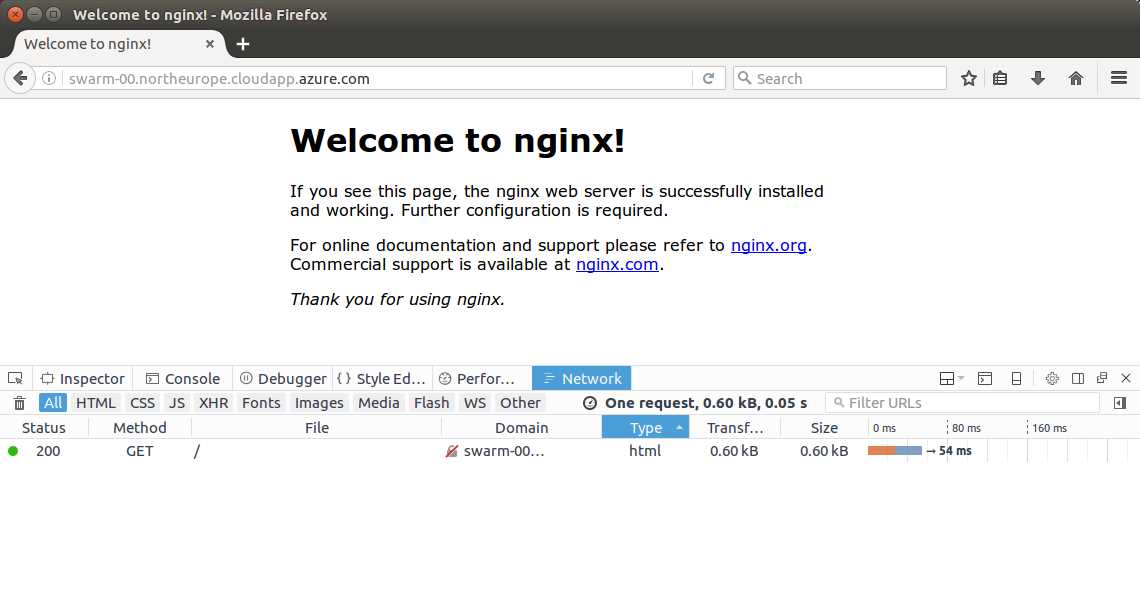
Figure 10: Browsing the Website on the Swarm Container
We can map our public web address to a specific host with a CNAME DNS entry, but we don’t want to do that. If that host goes down, the swarm will recreate the container on another host, and we’d need to change the CNAME, which isn’t very flexible or scalable. However, one of the great things about Docker swarm mode is its built-in request routing, which lets you send a request to any node in the swarm, and if that node isn’t running a container that can service the request, it will transparently route the request to another node where the container is running.
In Code Listing 67, I’m making a web request with cURL to node swarm-01 that doesn’t have the web container running. I still get the correct response, though—node swarm-01 has routed the request to node swarm-00, where the web container is running, and it has relayed the response.
Code Listing 67: Querying Another Swarm Node
$ curl http://swarm-01.northeurope.cloudapp.azure.com/ <!DOCTYPE html> <html> <head> <title>Welcome to nginx!</title> |
This feature is called the routing mesh, and it enables load balancing and failover. You can put a load balancer in front of your swarm so that requests can be forwarded to any node, and if a node gets a request it can’t handle, it will intelligently reroute the request to a node that can. Similarly, if a node fails, its containers will be started on other nodes, and the services will still be reachable through the routing mesh.
Scaling services
The services we’ve created so far have run with a single container instance on the swarm—that’s the default setting for a new service. We can run multiple instances of a container using the replicas option. Replica is the swarm terminology for an instance of a container, and as the name suggests, these are replicas running from the same image with the same setup. The services should be stateless so that requests can be handled by any container with the same results.
Running multiple replicas with a load balancer means you can scale up your service by running it on more nodes. The replica level can be specified when services are created, and it can be changed when services are running. The service scale command in Code Listing 68 adds another four instances of my website container to the Swarm.
Code Listing 68: Scaling a Swarm Service
$ docker service scale website=5 website scaled to 5 |
Now, when I check the service with the service ps command, as in Code Listing 69, I can see where the instances are running. In this case, I have more replicas than there are nodes in the swarm, which means nodes swarm-00 and swarm-02 have two replicas running and the node swarm-01 just has one.
Code Listing 69: Listing Service Replicas
$ docker service ps website ID NAME IMAGE NODE DESIRED STATE CURRENT STATE ERROR 1w5lqx0lp4pnftqzl04m0kqiq website.1 nginx:alpine swarm-00 Running Running 13 minutes ago 80qaxmk6fi836qyxc9n4i3o2n website.2 nginx:alpine swarm-01 Running Preparing 12 seconds ago eqvkkgax24vxpo6hq1wt17199 website.3 nginx:alpine swarm-02 Running Running 4 seconds ago 28z50bvlx7kakk403qib86dl4 website.4 nginx:alpine swarm-02 Running Running 4 seconds ago 4fp3992k7iq72nn0fobkdzwhs website.5 nginx:alpine swarm-00 Running Running 9 seconds ago |
If I now make a request to a specific node, I’ll get a response from that node—all nodes have an instance of the container running, which means they won’t need to reroute requests internally. I have a load balancer set up in Azure that shares requests among all the VMs, which is outside of Docker at the infrastructure level. Using Apache Bench to test performance, with five replicas running across three nodes, I get served more than 180 requests per second, as Code Listing 70 shows.
Code Listing 70: Benchmarking the Swarm Service
$ ab -n 3000 -c 150 http://docker-succinctly.northeurope.cloudapp.azure.com/ ... Benchmarking docker-succinctly.northeurope.cloudapp.azure.com (be patient) Completed 300 requests Completed 600 requests ... Concurrency Level: 150 Time taken for tests: 16.442 seconds Complete requests: 3000 Failed requests: 0 Total transferred: 2535000 bytes HTML transferred: 1836000 bytes Requests per second: 182.46 [#/sec] (mean) Time per request: 822.088 [ms] (mean) Time per request: 5.481 [ms] (mean, across all concurrent requests) |
If the service scale is reduced to a single replica, performance drops to fewer than 120 requests per second, as Code Listing 71 shows.
Code Listing 71: Benchmarking a Single Replica
$ ab -n 3000 -c 150 http://docker-succinctly.northeurope.cloudapp.azure.com/ ... Benchmarking docker-succinctly.northeurope.cloudapp.azure.com (be patient) Completed 300 requests Completed 600 requests ... Concurrency Level: 150 Time taken for tests: 25.840 seconds Complete requests: 3000 Failed requests: 0 Total transferred: 2535000 bytes HTML transferred: 1836000 bytes Requests per second: 116.10 [#/sec] (mean) Time per request: 1292.008 [ms] (mean) Time per request: 8.613 [ms] (mean, across all concurrent requests) |
Nginx is a highly performant web server in any circumstance, but running it as a service on a Docker swarm allows you to scale up in seconds with a single command and thereby drastically improve performance. For more complex systems that perform more compute-to-serve requests, the benefits from scaling up are even greater.
Tip: The routing mesh works at port level—if a node gets a request on a port from which there’s no container listening, it will forward the request on to another host that does have a container listening on that port. If you run only one service per port on your swarm, you don’t need a proxy—your load balancer and the swarm can handle it. If you’re running multiple services with the same port, such as several websites all running on port 80, you’ll need a proxy, like Nginx, running in the swarm. The proxy listens on port 80 while all your other services listen on custom ports, and Nginx routes traffic to different ports based on the incoming HTTP request.
The manager node in the swarm constantly checks in with nodes and verifies that all services have the correct replica level. When a node goes down, the swarm will create more containers on other nodes in order to ensure the services run as requested. In Code Listing 72, I shut down node swarm-02 in the swarm, which is currently running two of the Nginx containers.
Code Listing 72: Shutting Down a Worker Node
elton@swarm-02:~$ sudo shutdown 0 |
When the node shuts down, the heartbeats to the manager stop and the manager quickly sees that the node is unavailable. With that node down, my website service falls below the required replica level, which means the manager will schedule new containers on the remaining nodes. Code Listing 73 shows the node ls command that tells me node swarm-02 is down, but the service details show that there are still five containers running.
Code Listing 73: Listing Nodes and Running Replicas
$ docker node ls ID HOSTNAME STATUS AVAILABILITY MANAGER STATUS 8smbcf360or1257jt5d3fj32i swarm-02 Down Active aedcdczhcppw7qva7fdtvxmmj swarm-01 Ready Active am2avhyv52mr05yernr2t9ug8 * swarm-00 Ready Active Leader $ docker service ps -f "desired-state=running" website ID NAME IMAGE NODE DESIRED STATE CURRENT STATE ERROR 1w5lqx0lp4pnftqzl04m0kqiq website.1 nginx:alpine swarm-00 Running Running 36 minutes ago bpeyfjd5hll29rdiborxryj1t website.2 nginx:alpine swarm-01 Running Running 12 minutes ago 5c2q4odd5vw62eyb6g4clrrz1 website.3 nginx:alpine swarm-00 Running Running 13 seconds ago ehlxvdq66adtjd9p53zs9i7y5 website.4 nginx:alpine swarm-00 Running Running 13 seconds ago 7pok5wg9ntfo4iy1zq9a983n6 website.5 nginx:alpine swarm-01 Running Running 12 minutes ago |
The containers that had been on node swarm-02 have been rescheduled on the other nodes so that node swarm-00 now has three containers and node swarm-01 has two.
The swarm takes care of routing traffic to nodes and repairing services when nodes are unavailable, which means much of the hard work of managing distributed systems has been dealt with.
Summary
Docker swarm mode is a clustering technology built into the Docker platform. You can create a swarm from multiple Docker hosts in minutes and have a cluster that can intelligently route traffic between nodes and run scalable services as multiple instances of containers.
Communication between nodes is all encrypted, and nodes don’t have to be on the same operating system or even the same platform, which means you can build hybrid swarms with Linux and Windows Server hosts.
Running a hybrid swarm with Windows and Linux nodes lets you migrate multiple existing workloads into a single swarm, containerizing apps to use different base images—such as Windows Server Core for .NET Framework apps and Ubuntu Server for Linux apps. Your applications are all Docker images, and you can manage them in the same way, but at runtime you can only run Windows-based containers on Windows hosts and Linux-based containers on Linux hosts.
In the next chapter, we’ll see how containers actually work and what Docker looks like on different host platforms.
- 1800+ high-performance UI components.
- Includes popular controls such as Grid, Chart, Scheduler, and more.
- 24x5 unlimited support by developers.