
Custom Blazor Oqtane Modules Succinctly®

CHAPTER 3
The Help Desk Module
To demonstrate the features of Blazor and Oqtane, and how controls such as the suite available from Syncfusion can make development faster and easier, we will create a Oqtane Help Desk custom module.
Help Desk users
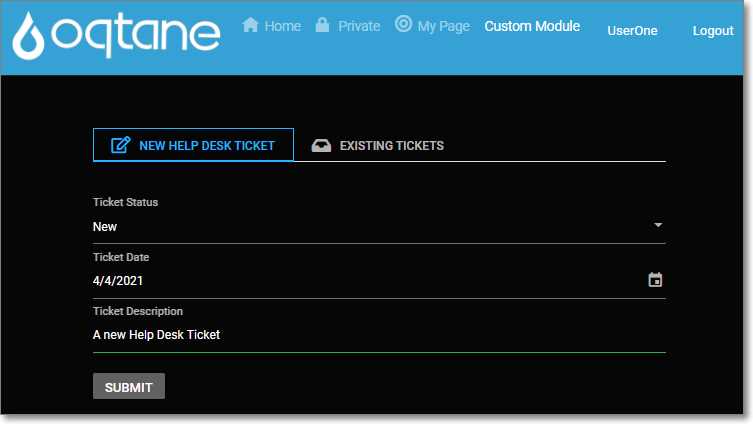
Figure 4: New Help Desk Ticket
Logged-in users who only have view permission of the Oqtane module instance will see a form that allows them to create a new help desk ticket by entering the help desk ticket details and clicking the Submit button.
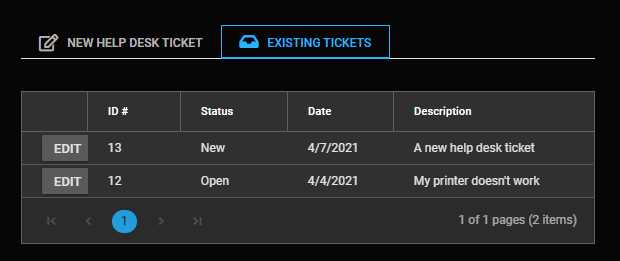
Figure 5: Existing Tickets
By clicking the Existing Tickets tab, users can view and edit their tickets.
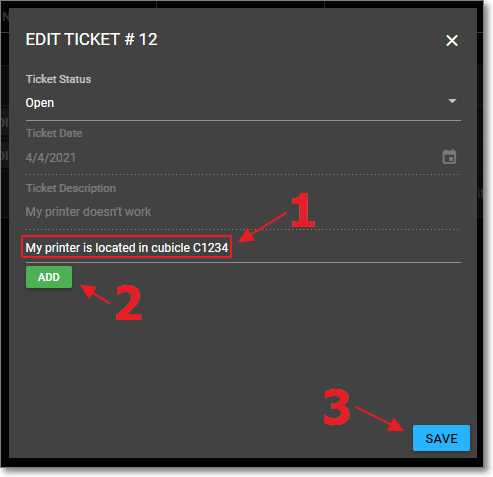
Figure 6: User Adding Details
When the user clicks the Edit button, the ticket is opened in the Edit Ticket form. However, some of the fields of the help desk ticket are grayed-out and disabled. The user can only change the ticket status and add new details.
Help Desk administrators
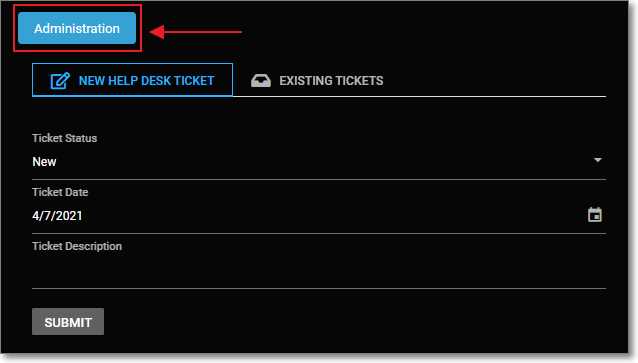
Figure 7: Administration Button
When a user who has edit permission to the Oqtane module instance views the module, they will see an Administration button. The button will take them to the section of the application that will allow them to administer all help desk tickets.
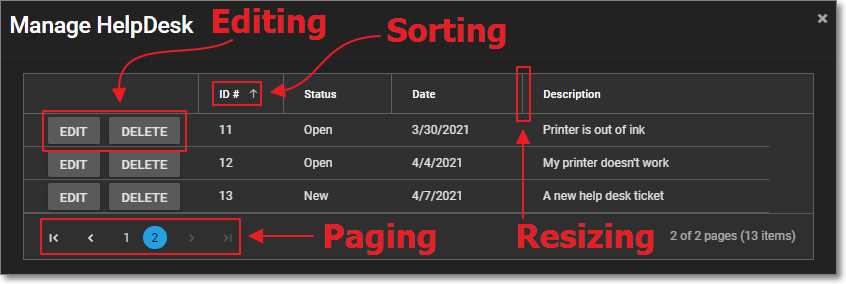
Figure 8: Syncfusion DataGrid
This will display the Syncfusion DataGrid, which will allow the administrator to edit and delete records, as well as sort, page, and resize the data grid.
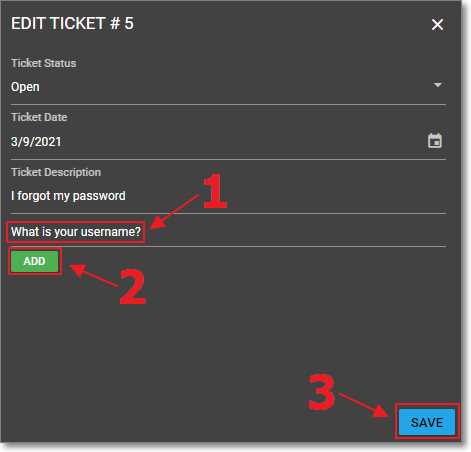
Figure 9: Syncfusion Dialog
If a user clicks the Edit button next to a record in the DataGrid, it will open in the Syncfusion Dialog control. This dialog will allow the administrator to edit all fields of the help desk ticket, as well as add help desk ticket detail records at the bottom of the form.
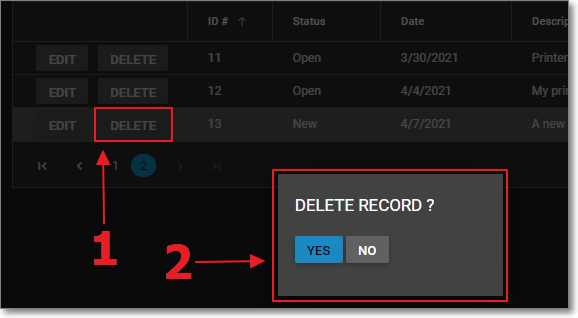
Figure 10: Delete Confirmation
If the user clicks the Delete button next to a record in the data grid, the delete confirmation pop-up window will open in the Syncfusion Dialog.
The user can click Yes to delete the record or No to cancel the action.
- 80+ high performance Blazor components.
- Lightweight and user friendly.
- Stunning Built-in themes with customization.