
Custom Blazor Oqtane Modules Succinctly®

CHAPTER 4
Create the Help Desk Module
In this chapter, we will cover the steps to create the Help Desk module.
Note: The source code for the completed application is available on GitHub here.
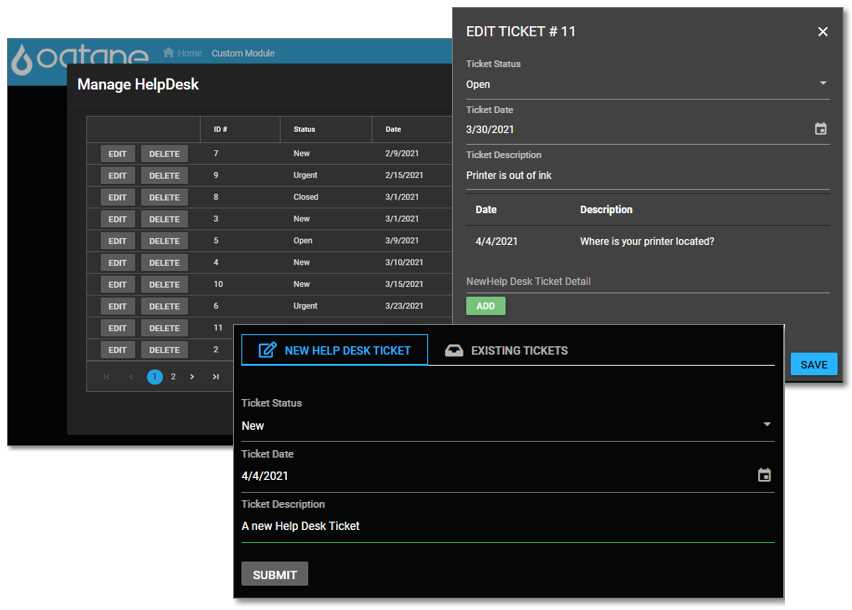
Figure 11: The Help Desk Application in Action
Install .NET Core (aka .NET 5) and Visual Studio
If you don’t already have the following software installed, these steps are required:
- Install the .NET 5 SDK from here.
- Install Visual Studio 2019 version 16.8 (or later), with the ASP.NET, web development, and .NET Core workload here.
Note: The requirements to create applications using Blazor are constantly evolving. For the latest requirements, see this page.
Note: When you install Visual Studio 2019 and select the .NET Core workload during installation, the .NET Core SDK and runtime, and SQL Server Express 2016 LocalDB will be installed for you. Learn more here.
Install Oqtane
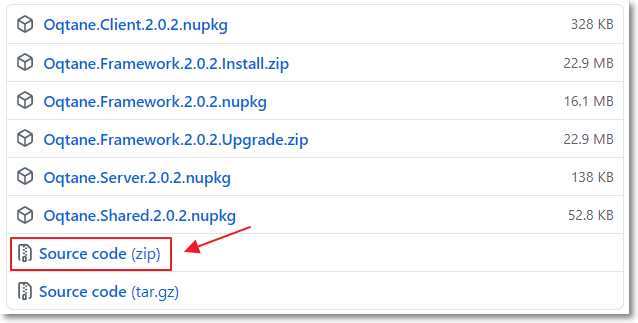
Figure 12: Download Oqtane
Go to this webpage to download and unzip the latest release version of the Oqtane source code to your local system.
Note: This book uses Oqtane version 2.0.2.
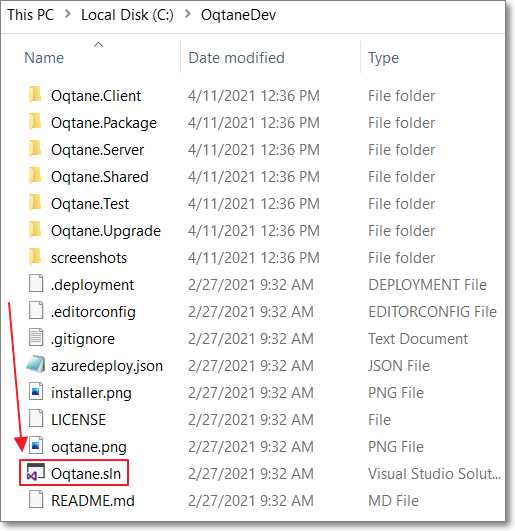
Figure 13: Open Oqtane.sln
Open the Oqtane.sln solution file in Visual Studio and select Build > Build Solution.
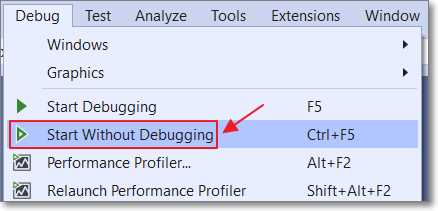
Figure 14: Start Without Debugging
Make sure you specify Oqtane.Server as the Startup Project, and then select Debug > Start Without Debugging to run the application.
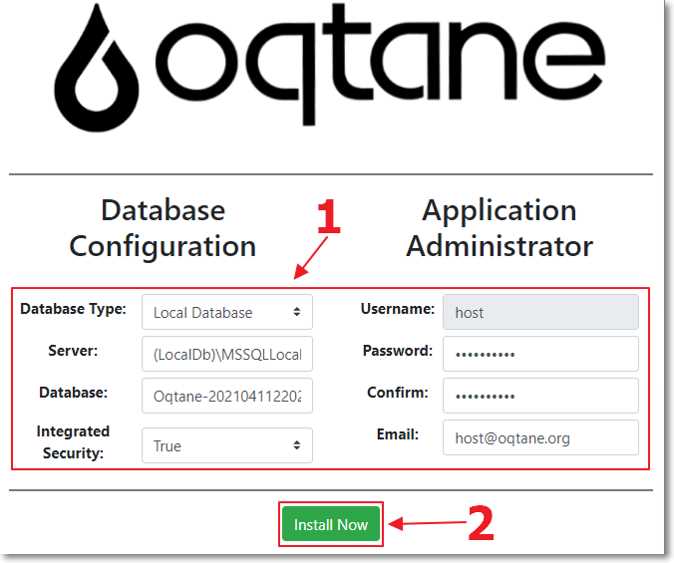
Figure 15: Oqtane Install Wizard
The Oqtane application will open in your web browser. Fill in the details required by the installation wizard and click Install Now.
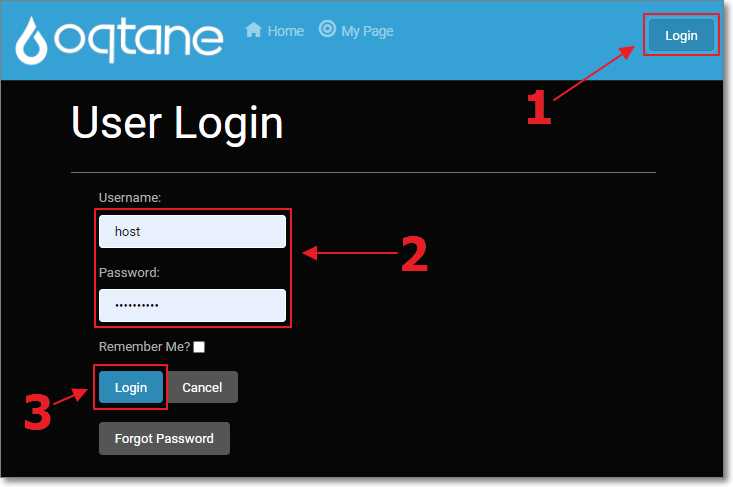
Figure 16: Log into Oqtane
When the installation is complete, click Login. Enter the username and password you created earlier and click Login.
Oqtane is now fully installed.
Oqtane module creator
There are two methods to create custom modules in Oqtane: inline and external.
Creating an external Oqtane module allows us to create a module that is more easily packaged to be distributed to other Oqtane instances. This is the method we will use.
An external Oqtane module is created outside of the Oqtane solution, as a separate Visual Studio project, in a folder at the same level as the Oqtane solution. It contains all the project and solution files already configured so that it can build and deploy the artifacts to the Oqtane instance. It can also package a module into a NuGet package.
For assistance in creating the custom module, we will use the built-in Oqtane module creator.
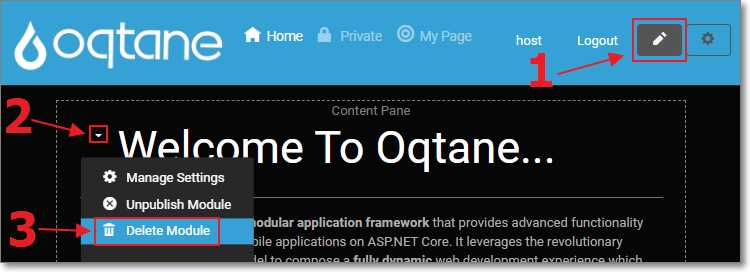
Figure 17: Delete Welcome Message Module
While logged in as the host account, click the pencil icon to open the Edit menu. Next, select the context menu for the HTML module on the page and click Delete Module to delete that module instance.
Repeat the process to remove the remaining HTML modules on the page.
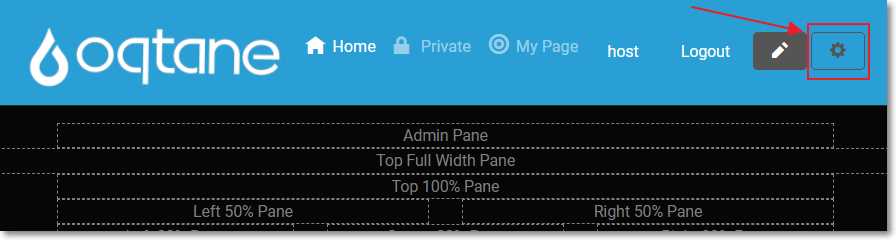
Figure 18: Open Control Panel
Click the gear icon to open the Control Panel.
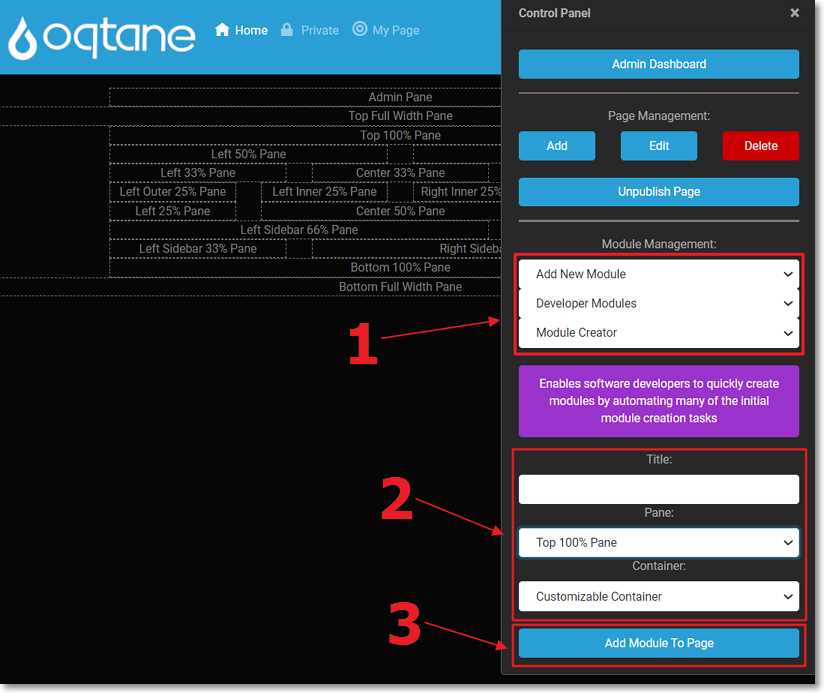
Figure 19: Add Module Creator
In the Module Management section, select Add New Module > Developer Modules > Module Creator. Select the Top 100% Pane and click the Add Module To Page button.
The module creator will be added to the page. Click the X in the upper-right corner of the Control Panel to close it.
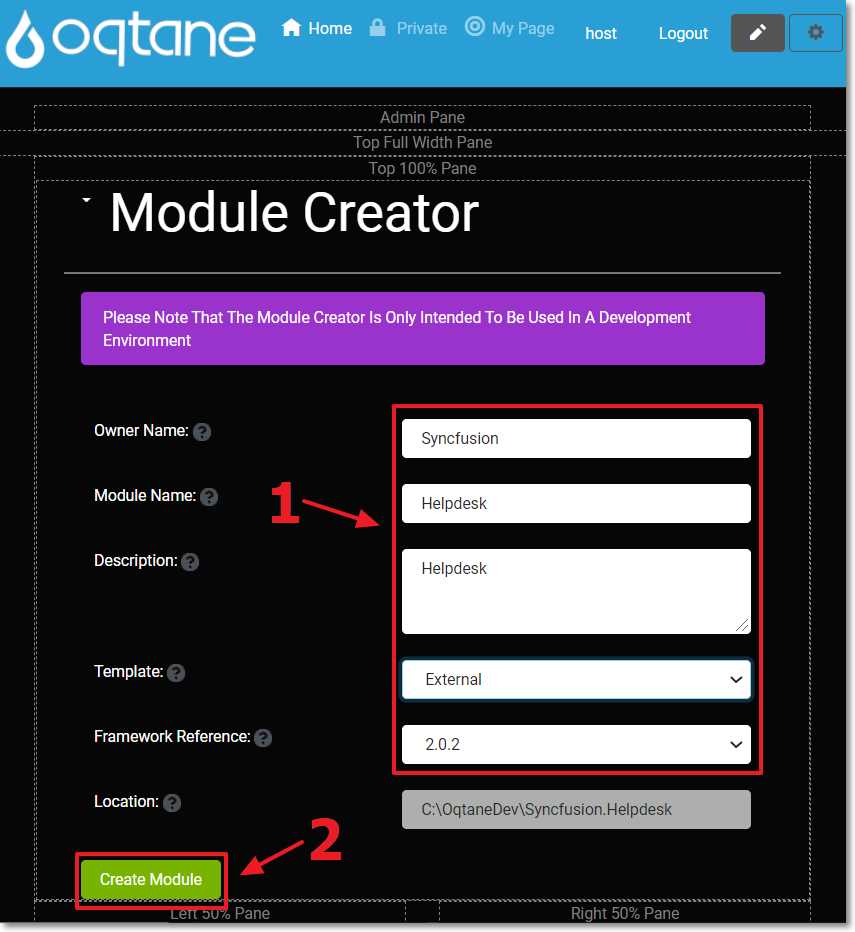
Figure 20: Create Module
Fill in the details for the module according to the preceding image and click Create Module.

Figure 21: Restart Needed
Oqtane will need to restart to create the module.
Click the Restart link in the message that displays. Next, click the red Restart Application button. Finally, click the red Restart Application button.
Close your web browser (but leave Visual Studio open).
Build the project
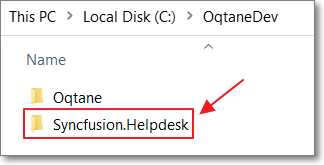
Figure 22: Module Folder Created
If we look at the file system at this point, we see that a new folder was created.

Figure 23: Help Desk Solution
This folder contains all the code created by the wizard. We can see that the wizard created a lot of code that gives us a good starting point for our custom module, including a Visual Studio solution file.
Open the Visual Studio solution file in another instance of Visual Studio.
We now want to build the project, create the NuGet package for the module, and put that NuGet package in the Module folder of the Oqtane solution.
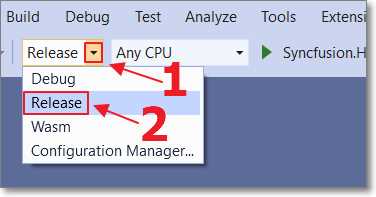
Figure 24: Switch to Release Mode
Switch to Release mode (by default, the NuGet package is only set to be created when building in Release mode).
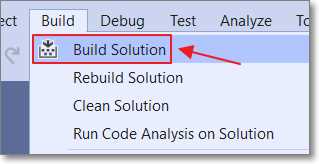
Figure 25: Build Help Desk Solution
Choose Build Solution. It should build without errors.
Switch the build mode back to Debug.
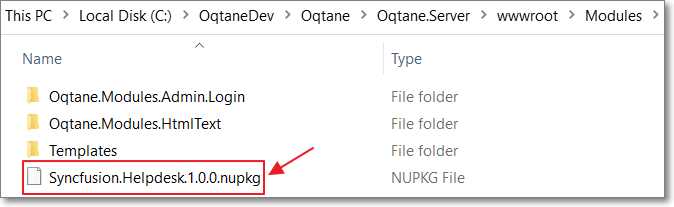
Figure 26: Syncfusion.Helpdesk.1.0.0.nupkg
When we view the Oqtane.Server/wwwroot/Modules directory of the Oqtane solution, we see the NuGet package for the module has been copied to that location. When we run the Oqtane application, it will scan this directory and see that the module is to be installed or upgraded.
Note: You can install the .nupkg module in other Oqtane installations using Module Management (in Administration), either by uploading it or downloading it from NuGet in the Available Modules section. The Available Modules section in Oqtane scans nuget.org for NuGet packages that have the Oqtane tag. The module creator creates a *.nuspec for your module, which contains the required NuGet tags automatically.
Complete the module installation
Return to the Visual Studio instance that contains the Oqtane solution and select Start Without Debugging to restart.
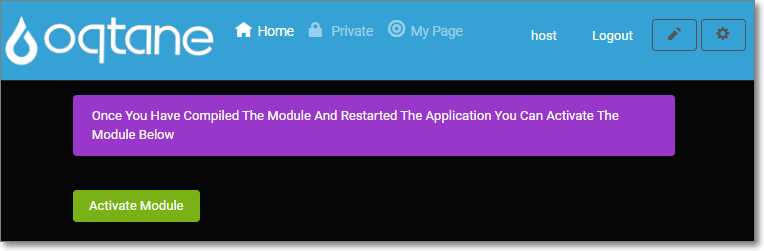
Figure 27: Activate Module Screen
Oqtane will detect that a new module has been added.
Log in as the host account and click Activate Module to complete the installation. Another Activate Module button will appear. Click it.
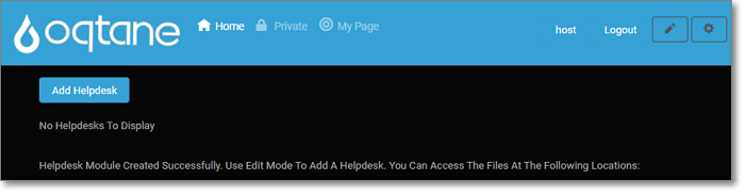
Figure 28: Module Installed
The module will appear.
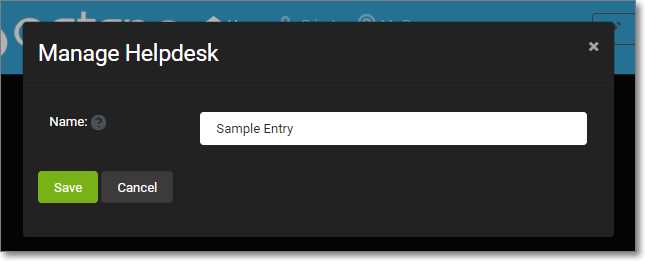
Figure 29: Insert a Record
Click the Add Helpdesk button to bring up the form that allows you to insert a sample entry. Enter a value such as Sample Entry in the Name field and click Save.
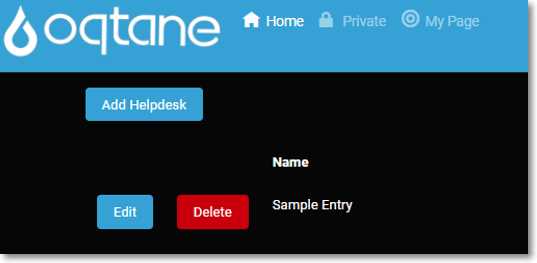
Figure 30: View Sample Entry
We see the record has been added, and we have the option to edit it or delete it.
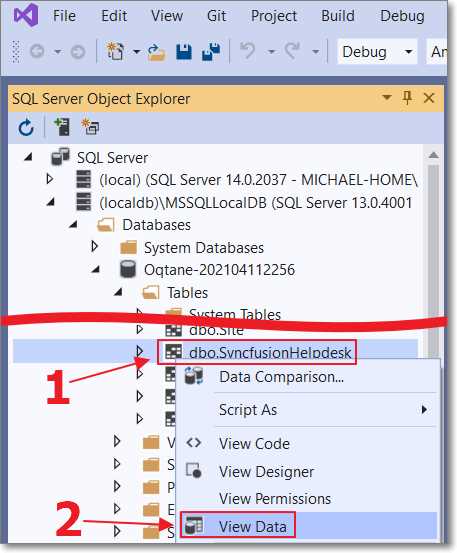
Figure 31: Select View Data
We can return to Visual Studio and select View > SQL Server Object Explorer.
We can locate the Oqtane database in the MSSQLLocalDB node. After expanding it, we see that a SyncfusionHelpDesk table has been created.
Right-click this table and select View Data to see the data.

Figure 32: View Data
Note that the data records the ModuleId. This allows the data to be segmented by module instance.
Explore the module
When we return to the Visual Studio instance that contains the Syncfusion.Helpdesk module, we can examine the Visual Studio solution that has been created, which provides a useful starting point for creating our module.
The description of the files, created by the Oqtane module creator, are as follows.
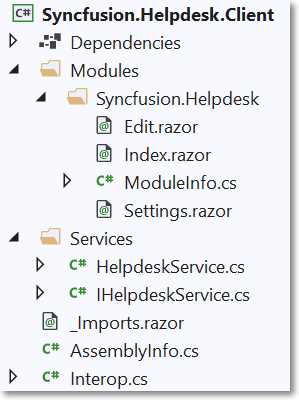
Figure 33: Syncfusion.Helpdesk.Client
Syncfusion.Helpdesk\Client\
- Modules\Edit.razor: Component for adding or editing content.
- Modules\Index.razor: Main component for your module.
- ModuleInfo.cs: Implements the IModule interface to provide configuration settings for your module.
- Modules\Settings.razor: Component for managing module settings.
- Services\IHelpdeskService.cs: Interface for defining service API methods.
- Services\HelpdeskService.cs: Implements service API interface methods.
- _Imports.razor: Global imports for module components.
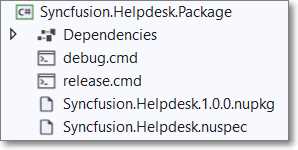
Figure 34: Syncfusion.Helpdesk.Package
Syncfusion.Helpdesk\Package\
- debug.cmd: Copies assemblies to Oqtane bin folder when in debug mode.
- release.cmd: Creates NuGet package and deploys to Oqtane wwwroot/modules folder when in release mode.
- Syncfusion.Helpdesk.1.0.0.nupkg: NuGet package that can be deployed to an Oqtane instance.
- Syncfusion.Helpdesk.nuspec: NuGet manifest for packaging module.
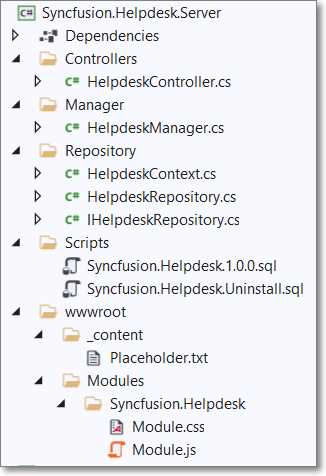
Figure 35: Syncfusion.Helpdesk.Server
Syncfusion.Helpdesk\Server\
- Controllers\HelpdeskController.cs: API methods implemented using a REST pattern.
- Manager\HelpdeskManager.cs: Implements optional module interfaces for features such as the import or export of content.
- Repository\HelpdeskContext.cs: Provides a DbContext for data access.
- Repository\HelpdeskRespository.cs: Implements repository interface methods for data access using EF Core.
- Repository\IHelpdeskRepository.cs: Interface for defining repository methods.
- Scripts\Syncfusion.Helpdesk.1.0.0.sql: Database schema definition script.
- Scripts\Syncfusion.Helpdesk.Uninstall.sql: Database uninstall script.
- wwwroot\Module.css: Module style sheet.
- wwwroot\Module.js: Module JavaScript.
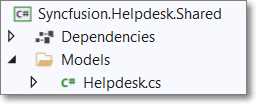
Figure 36: Syncfusion.Helpdesk.Shared
Syncfusion.Helpdesk\Shared\
- Syncfusion.Helpdesk.csproj: Shared project
- Models\Helpdesk.cs: Shared module class
Dynamic routing
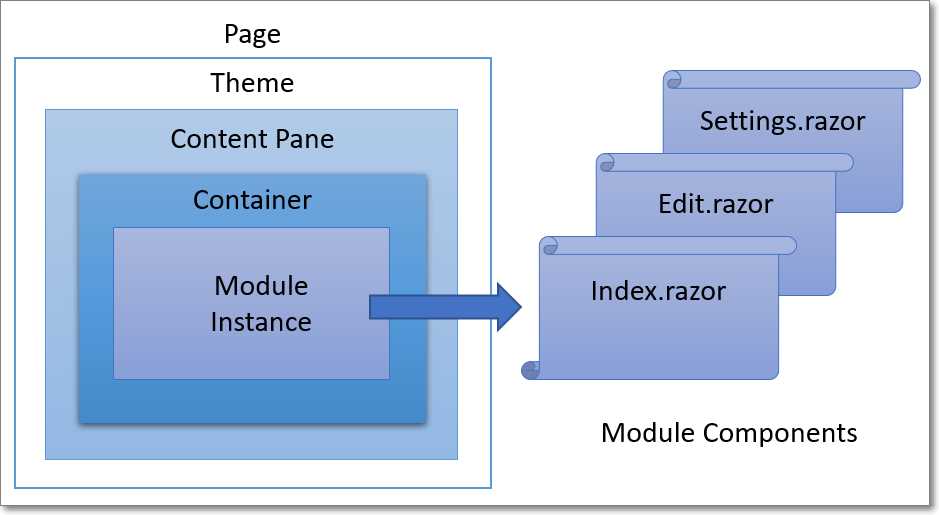
Figure 37: Dynamic Routing and Loading
Oqtane uses dynamic routing to load the Oqtane page and any modules on the page.
. 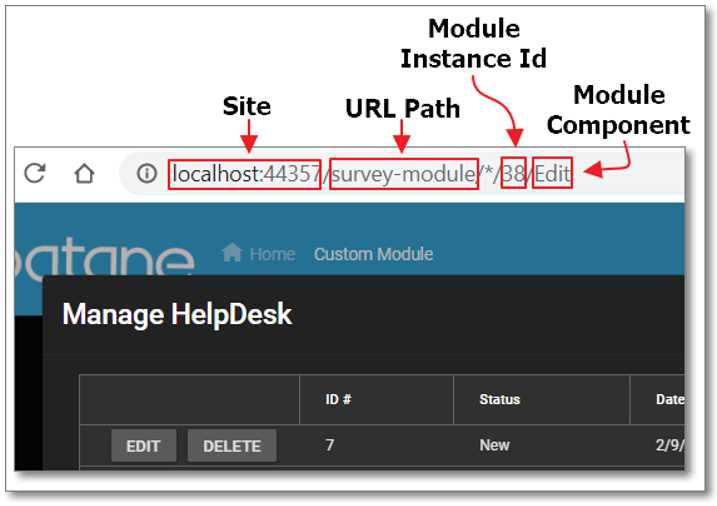
Figure 38: Oqtane URL
When looking at the routing for loading the the Edit module, in the completed module code, we see the the Oqtane URL in the web browser is composed of the following parts:
- Site: An Oqtane site can have several tenants, each with its own site URL.
- URL Path: An Oqtane page can have a custom name for the URL path to load the page; otherwise, the page name is used for the URL path.
- Module Instance ID: An Oqtane module can have multiple instances, each with a unique module ID, on a page and throughout the site.
- Module Component: The Index control is the default. Other typical controls are Edit and Settings. Additional controls can be created and loaded.
- 80+ high performance Blazor components.
- Lightweight and user friendly.
- Stunning Built-in themes with customization.