
Custom Blazor Oqtane Modules Succinctly®

CHAPTER 5
Add Syncfusion
The Syncfusion controls allow us to easily implement advanced functionality with a minimum amount of code. The Syncfusion controls are contained in a NuGet package.
In this chapter, we will cover the steps to obtain that package and configure it for our Oqtane custom module.
Note: See the latest requirements to use Syncfusion here.
Install NuGet packages
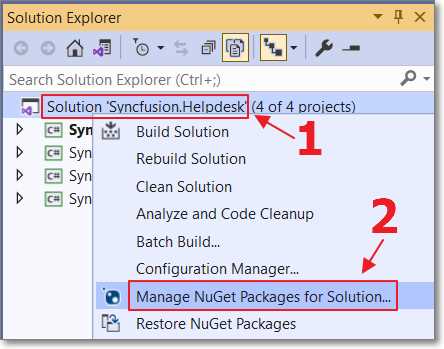
Figure 39: NuGet Packages
Right-click the Solution node and select Manage NuGet Packages for Solution.
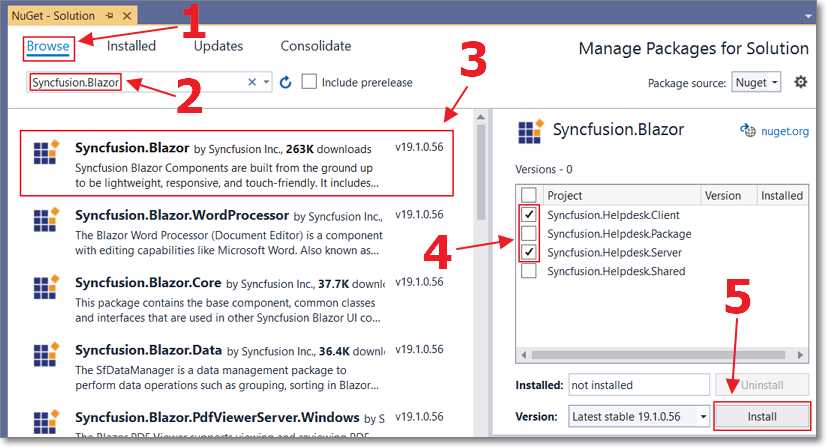
Figure 40: Install NuGet Packages
Go to the Browse tab and install the following NuGet packages:
- Syncfusion.Blazor (in the Client and Server project)
- Microsoft.AspNetCore.Mvc.NewtonsoftJson (in the Client project)
Additional configuration
The Syncfusion.Helpdesk module will build into the Oqtane framework (in the other Visual Studio instance).
We need to instruct the Syncfusion.Helpdesk module to include the Syncfusion assemblies. To do that, open the debug.cmd file in the Syncfusion.Helpdesk.Package Dependencies entry and remove the Oqtane.Server\wwwroot line.
Code Listing 1: debug.cmd
XCOPY "..\Server\wwwroot\*" "..\..\Oqtane\Oqtane.Server\wwwroot\" /Y /S /I |
Replace it with lines like the following (adjusting to match your directory structure).
Code Listing 2: Server Project Startup.cs Using Statement
XCOPY "..\Server\wwwroot\*" "..\..\Oqtane\Oqtane.Server\wwwroot\" /Y /S /I XCOPY "..\Server\bin\Debug\net5.0\Syncfusion.Blazor.dll" "..\..\Oqtane\Oqtane.Server\bin\Debug\net5.0\" /Y XCOPY "..\Server\bin\Debug\net5.0\Syncfusion.ExcelExport.Net.dll" "..\..\Oqtane\Oqtane.Server\bin\Debug\net5.0\" /Y XCOPY "..\Server\bin\Debug\net5.0\Syncfusion.Licensing.dll" "..\..\Oqtane\Oqtane.Server\bin\Debug\net5.0\" /Y XCOPY "..\Server\bin\Debug\net5.0\Syncfusion.PdfExport.Net.dll" "..\..\Oqtane\Oqtane.Server\bin\Debug\net5.0\" /Y XCOPY "..\Server\bin\Debug\net5.0\Newtonsoft.Json.dll" "..\..\Oqtane\Oqtane.Server\bin\Debug\net5.0\" /Y |
Where this example has Oqtane, you will need to replace that with the name of the folder of your Oqtane installation. In this example, the Oqtane solution is installed at: C:\OqtaneDev\Oqtane.
Open the Syncfusion.Helpdesk.nuspec file in the Syncfusion.Helpdesk.Package project and add the following lines to the files section.
Code Listing 3: Syncfusion.Helpdesk.nuspec
<file src="..\Server\bin\Release\net5.0\Syncfusion.Blazor.dll" target="lib\net5.0" /> <file src="..\Server\bin\Release\net5.0\Syncfusion.ExcelExport.Net.dll" target="lib\net5.0" /> <file src="..\Server\bin\Release\net5.0\Syncfusion.Licensing.dll" target="lib\net5.0" /> <file src="..\Server\bin\Release\net5.0\Syncfusion.PdfExport.Net.dll" target="lib\net5.0" /> <file src="..\Server\bin\Release\net5.0\Newtonsoft.Json.dll" target="lib\net5.0" /> |
Add using statements to Imports.razor
![]()
Figure 41: _Imports.razor
To allow the use of the Syncfusion components without the need to include their using declaration on each component file, open the _Imports.razor file in the Client project, and add the following using statements.
Code Listing 4: _Imports.razor
@using Microsoft.AspNetCore.Components.Forms @using Syncfusion.Blazor @using Syncfusion.Blazor.Inputs @using Syncfusion.Blazor.Popups @using Syncfusion.Blazor.Data @using Syncfusion.Blazor.DropDowns @using Syncfusion.Blazor.Layouts @using Syncfusion.Blazor.Calendars @using Syncfusion.Blazor.Navigations @using Syncfusion.Blazor.Lists @using Syncfusion.Blazor.Grids @using Syncfusion.Blazor.Buttons @using Syncfusion.Blazor.Notifications |
Implement Syncfusion in IServerStartup
Syncfusion requires its service to be registered in the Startup class of the Oqtane framework application.
To do this, in the Syncfusion.Helpdesk.Server module project, we need to create a class that implements the Oqtane IServerStartup interface.
According to Shaun Walker (the creator of Oqtane):
“The IServerStartup interface matches the characteristics of the standard .NET Core Startup methods. You can create a class in your external module's Server project and add whatever service registration logic you would normally add in the Startup class. During startup, Oqtane will call the methods automatically.”
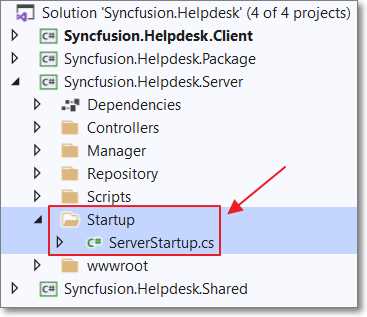
Figure 42: ServerStartup.cs
In the Server project, create a folder called Startup, and create a class file in it called ServerStartup.cs using the following code.
Code Listing 5: ServerStartup.cs
using Microsoft.AspNetCore.Builder; using Microsoft.AspNetCore.Hosting; using Microsoft.Extensions.DependencyInjection; using Oqtane.Infrastructure; using Syncfusion.Blazor; namespace Syncfusion.Helpdesk.Server.Startup { public class ServerStartup : IServerStartup { public void ConfigureServices(IServiceCollection services) { services.AddSyncfusionBlazor(); } public void Configure(IApplicationBuilder app, IWebHostEnvironment env) { //Register Syncfusion license. //Syncfusion.Licensing.SyncfusionLicenseProvider.RegisterLicense("YOUR LICENSE KEY"); } public void ConfigureMvc(IMvcBuilder mvcBuilder) { } } } |
Support Oqtane WebAssembly mode
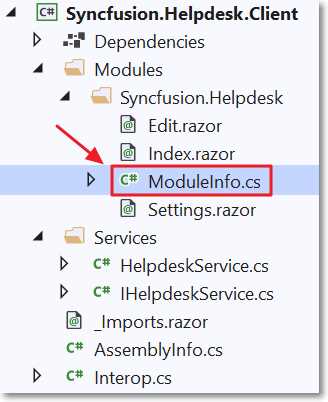
Figure 43: ModuleInfo.cs
Oqtane can run in two modes: Server and Client (WebAssembly).
Note: You can switch modes by updating the Runtime property to either Server or WebAssembly in the appsettings.json file in the Oqtane website.
“The ModuleInfo.cs file in the Client project contains the implementation for IModule, which contains a Dependencies property. This should contain a comma delimited list of all assemblies that need to be downloaded to the client when running on WebAssembly.”
Note: You can find more information on why this is needed at this link.
Open the ModuleInfo.cs file, add a comma, and add the Syncfusion assemblies to the Dependencies property, so that it reads like the following.
Code Listing 6: Dependencies
Dependencies = "Syncfusion.Helpdesk.Shared.Oqtane,Syncfusion.Blazor,Syncfusion.ExcelExport.Net,Syncfusion.Licensing,Syncfusion.PdfExport.Net,Newtonsoft.Json" |
Syncfusion is properly registered when running Server mode by creating a class that implements the IServerStartup interface. However, when Syncfusion is running in WebAssembly mode, it normally needs to be registered in the Program.cs file in the Blazor Client project.
To do this in Oqtane, in the Client project, create a folder named Startup, and in that folder, create a ClientStartup.cs file.
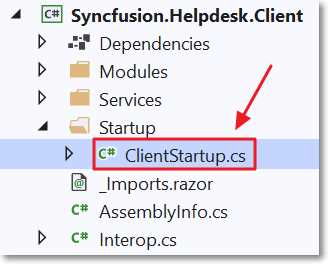
Figure 44: ClientStartup.cs
Complete this class to implement the IClientStartup interface by using the following code.
Code Listing 7: ClientStartup.cs
using Microsoft.Extensions.DependencyInjection; using Oqtane.Services; using Syncfusion.Blazor; namespace Syncfusion.Helpdesk.Client.Startup { public class ClientStartup : IClientStartup { public void ConfigureServices(IServiceCollection services) { services.AddSyncfusionBlazor(); //Syncfusion.Licensing.SyncfusionLicenseProvider //.RegisterLicense("Enter Your Syncfusion License Here"); } } } |
Including the JavaScript and .css files
Syncfusion components require JavaScript and .css files to be loaded using the Blazor _content feature. Normally, these elements would be automatically extracted from the Syncfusion NuGet package and deployed to the Blazor _content folder when the project is built in Visual Studio.
However, due to the unique method Oqtane uses to dynamically load custom modules, we have to use the following method of manually extracting the required resources from the Syncfusion NuGet package and placing them in a location where Oqtane and the Syncfusion controls can consume them.
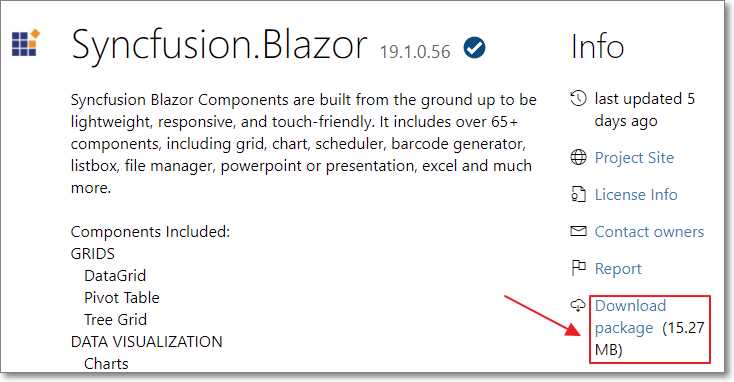
Figure 45: Download NuGet Package
First, we download the NuGet package here.

Figure 46: Extract Using 7-Zip
To unzip it, we use a tool such as 7-Zip, which you can download here.
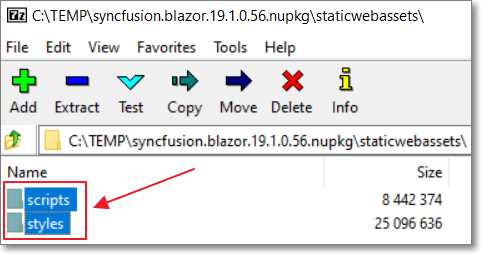
Figure 47: Extract Files
We then extract the required resources from the staticwebassets folder.

Figure 48: Create syncfusion.blazor
Next, we create the syncfusion.blazor directory under Server\wwwroot\_content.
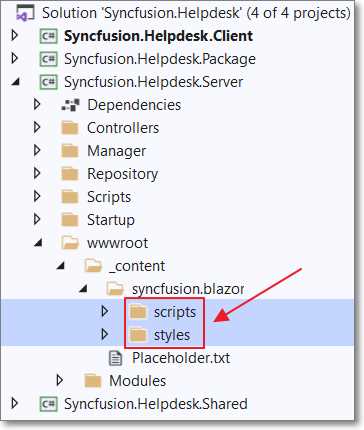
Figure 49: Copy and Paste Files
Finally, we copy and paste the files in the Server\wwwroot\_content\syncfusion.blazor directory.
Using IHostResources to include references in _Host.cshtml
UI component suites, such as Syncfusion’s, require .css, JavaScript, and fonts to be referenced in the _Hosts.cshtml file of the main Blazor application (in this case, the Oqtane framework).
To facilitate this, Oqtane requires your module to include a class that implements the IHostResources interface.
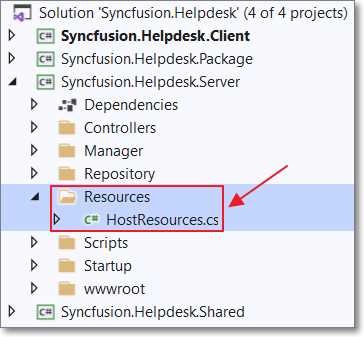
Figure 50: HostResources.cs
Create a Resources folder in the Server project and add a HostResources.cs file using the following code.
Code Listing 8: HostResources.cs
using System.Collections.Generic; using Oqtane.Infrastructure; using Oqtane.Models; using Oqtane.Shared; namespace Syncfusion.Helpdesk { public class HostResources : IHostResources { public List<Resource> Resources => new List<Resource>() { // Only register .css files. // The JavaScript files will automatically be pulled // from the _content/syncfusion.blazor directory // so they do not need to be registered here. new Resource { ResourceType = ResourceType.Stylesheet, Url = "_content/Syncfusion.Blazor/" + "styles/bootstrap4.css" }, new Resource { ResourceType = ResourceType.Stylesheet, Url = "_content/Syncfusion.Blazor/" + "styles/material-dark.css" }, new Resource { ResourceType = ResourceType.Script, Url = "https://kit.fontawesome.com/a076d05399.js" } }; } } |

Figure 51: JavaScript and CSS Deployed
If we now build the module in Visual Studio and look in the Oqtane /Oqtane.Server\wwwroot\_content\syncfusion.blazor directory, we see that the JavaScript and .css are properly deployed to the _content directory.
Note: If you get build errors, such as exited with code 4, close and reopen the instance of Visual Studio that contains the Oqtane solution. It can sometimes prevent the instance of Visual Studio that contains the custom module from building fully.
Consume the Syncfusion controls
We are now ready to consume the Syncfusion UI controls in our Oqtane module.
Open the Index.razor file in the Client project and replace the HTML markup with the following code (keep the C# code as is in the @code section).
Code Listing 9: Consume Syncfusion
@using Syncfusion.Helpdesk.Services @using Syncfusion.Helpdesk.Models @namespace Syncfusion.Helpdesk @inherits ModuleBase @inject IHelpdeskService HelpdeskService @inject NavigationManager NavigationManager @using Syncfusion.Blazor.Grids @if (_Helpdesks == null) { <p><em>Loading...</em></p> } else { <br /> <ActionLink Action="Add" Security="SecurityAccessLevel.Edit" Text="Add" /> <br /> <br /> @if (_Helpdesks.Count != 0) { <SfGrid DataSource="@_Helpdesks" AllowPaging="true"> <GridPageSettings PageSize="5"></GridPageSettings> </SfGrid> } } |
Rebuild the module in Visual Studio (ensure you are in debug mode in Visual Studio and not release mode). Run the application in the instance of Visual Studio that contains the Oqtane solution.
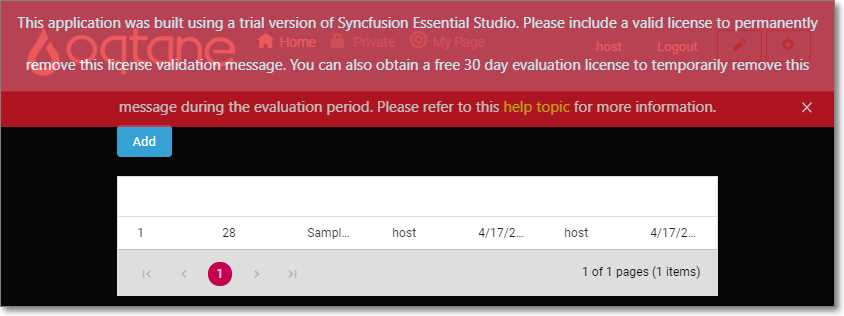
Figure 52: Consume Syncfusion Controls
The module will be displayed. You can add records using the Add button, and they will be displayed in the Syncfusion grid control.
You will see a Syncfusion license notice; to remove it, you will need to obtain a license. You can obtain a free one here.
Note: The following only applies to Oqtane running in Server mode. If running in WebAssembly mode, you will have to hard-code the Syncfusion license in the ClientStartup.cs file.

Figure 53: Open appsettings.json
In the Oqtane project, open the appsettings.json file.
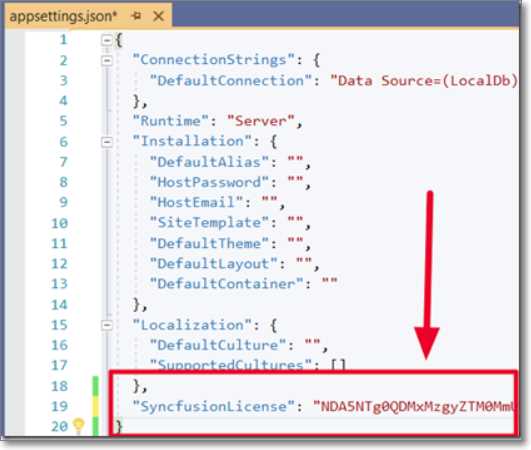
Figure 54: Insert Syncfusion License
Add a SyncfusionLicense node and the Syncfusion license as its value.

Figure 55: Add License Code
In the Syncfusion.Helpdesk solution in Visual Studio, open the ServerStartup.cs file.
Add the following using statement.
Code Listing 10: Add Microsoft.Extensions.Configuration
using Microsoft.Extensions.Configuration; |
Change the Configure method to the following.
Code Listing 11: Configure Method
public void Configure(IApplicationBuilder app, IWebHostEnvironment env) { // Register Syncfusion license. // Get a free license here: // https://www.syncfusion.com/products/communitylicense var builder = new ConfigurationBuilder() .SetBasePath(env.ContentRootPath) .AddJsonFile("appsettings.json", optional: false, reloadOnChange: true); var Configuration = builder.Build(); var SyncfusionLicense = Configuration.GetSection("SyncfusionLicense"); if (SyncfusionLicense != null) { Syncfusion.Licensing.SyncfusionLicenseProvider .RegisterLicense(SyncfusionLicense.Value); } } |
Rebuild the Syncfusion.Helpdesk solution and restart the Oqtane site.

Figure 56: Oqtane Site with No License Warning
Now when you run the application, the warning no longer appears.
- 80+ high performance Blazor components.
- Lightweight and user friendly.
- Stunning Built-in themes with customization.