
Cassandra Succinctly®

CHAPTER 4
Using Cassandra with Applications
Up until now, we have been concentrating mostly on Cassandra and CQL. Understanding how Cassandra works and knowing CQL is essential to be able to use Cassandra with applications. Cassandra has drivers for most of the popular languages available today.
- Cassandra Drivers
Language | Driver |
Java | |
C# | |
Python | |
Clojure | |
Erlang | |
Go | |
Haskell | |
Node.js | |
Perl | |
PHP | |
Ruby | |
Scala |
In this chapter, we will show how to use Cassandra from Node.js, C#, and Java. Most of this chapter will be oriented toward the Node.js application.
Cassandra with Node.js
Node.js is a very popular technology today and is currently used by companies such as Microsoft, VMWare, eBay, Yahoo, and many others. Node.js became popular partly because most web developers didn’t have to learn a new language in order to start using it. Some people describe Node.js as server-side JavaScript. JavaScript has a very interesting event model and is a good fit for asynchronous programming. There are a lot of other factors that contribute to the increasing popularity of Node.js.
Some important Node.js features include:
- Configuration is done with JSON.
- Code can be reused on the client and server-side.
- Vibrant community and very easy package sharing.
- Simple and dependable package manager.
- Minimalistic and lightweight environment; users include only what they want to use.
- Several tools to support production usage of the technology.
To follow along in this section, you will need to install Node.js. Installing Node.js is a straightforward and well-documented process; all of the information can be found at nodejs.org. In this section, we will build an app based on our used car market example. The provided example will not be 100 percent production-ready; it is more oriented toward showing how to interact with Cassandra from Node.js applications. Most of the time, we will ignore security best practices and user input validation, but we will use the most common and popular Node.js libraries to build our example.
Initial Setup
Before doing any work, we have to determine the directory where we will hold the sources. Choose any folder you like but always avoid using spaces when naming folders and choosing locations as it might lead to undesired behavior across various platforms. To start everything up, we need to create an empty folder called “cass_node_used_cars” and then position ourselves in this folder. The first command we will run will be npm init; this command creates the package.json file. This file contains all the metadata for the project. To create it, simply issue the following command and answer the questions the command will ask you.
# npm init |
Code Listing 103
The generated package.json file should look something like the following.
{ |
Code Listing 104
Besides the package.json file generated with the help of the npm init command, we need to create additional files.
. ├── cassandra.js ├── config.js ├── index.js ├── node_modules ├── package.json ├── public ├── routes.js └── views ├── add_offer.html ├── add_user.html ├── home.html ├── search.html └── layouts └── main.html |
Code Listing 105
The node_modules directory will be created automatically in the later steps so you don’t have to create it right away. The next step is to install the libraries. To interact with Cassandra, we are going to use a library called node-cassandra-cql. By default, the Node.js CQL library is installed to be compatible with previous versions of Cassandra.
In our demonstration app, we are going to show how to use lightweight transactions and batch statements. To use these Cassandra capabilities, we have to use the v2 protocol which is not used by default. To install it, we will simply command npm to install the protocol12 version of the module. To use a specific package, we have to specify its name after an @ symbol when installing the module. We will install the modules and use the save option so that npm updates the package.json file. The public folder contains publically available assets such as images, and JavaScript and CSS files.
Remember that this folder is visible to everybody. The views folder contains the template files for the application. The files with a .js extension contain the logic of the application. Later, we will use the index.js file to start the application. At the moment, it would be best if we installed the required modules by issuing the following commands.
# npm install node-cassandra-cql@protocol2 -save |
Code Listing 106
We are going to build a minimal web interface for our application. The most popular web application framework for Node.js is Express, so we are going to use it. For writing the template logic, we are going to use Handlebars. To work with dates, we will use the Moment library. Our application will process HTTP POST requests. In earlier versions, Express handled such requests out of the box, but now we have to use a middleware component called body-parser.
We are also going to demonstrate a searching technique used in Cassandra that doesn’t require defining Cassandra indexes on tables or using some kind of search technology on top of Cassandra. This technique will use the Promise library. After running the previous install commands, the package.json file should have a dependencies section.
"dependencies": { |
Code Listing 107
The tables from the previous chapters are not 100 percent tailored to the example application, and we used them to show various techniques, so we need to create two more tables.
CREATE TABLE car_offers ( country text, date timeuuid, username text, brand text, color text, equipment map<text, text>, mileage int, model text, price float, year int, PRIMARY KEY (country, date) ) WITH CLUSTERING ORDER BY (date DESC); CREATE TABLE car_offers_search_index ( brand text, color text, price_range text, creation_time timeuuid, date timeuuid, country text, PRIMARY KEY ((brand, color, price_range), creation_time) ); |
Code Listing 108
In the example, we are going to partition the data by the country from which the offer is made. The app will have the country fixed to USA. It only adds complexity if we add more countries and doesn’t make explaining easier. Besides the new offers table, we will create an index for searching the offers. Building a more complex searching index would also require a lot of time and provide very little additional insight into using Cassandra in an application. In the following sections, we will look closely at example files in our application.
index.js
var express = require('express'); var app = express(); require('./config')(app); require('./routes')(app); app.listen(8080); console.log('Application is running on port 8080'); |
Code Listing 109
This module initializes the Express framework. After express has been initialized, we initialize the config.js and routes.js modules. The web application is running on port 8080. If everything works fine, you should see the message from console.log. If you plan to follow along with building this example, it would be best if we didn’t have to restart the Node application just to see if some change has taken effect. The best practice is to install the nodemon tool and then run the example with it as shown in the following code.
# npm install -g nodemon # nodemon index.js |
Code Listing 110
After starting the application with nodemon, it will track changes and automatically reload the application when something changes. The example we are building is not fully functional yet. Don’t be surprised if you receive error messages after trying to run the index.js file as shown in previous listing. Just continue editing the files.
config.js
This file contains the entire configuration for Express and the other frameworks we are using. We also have to load the Express module so that we can define the static directory. The Handlebars module has a bit more configuration that we need to do. The Handlebars framework doesn’t come with out-of-the-box support for formatting dates and comparing strings, so we need to define formatDate and if_eq helpers. For date formatting, we will use Moment.js. The Express framework externalized support for parsing post requests, so we have to use the body-parser module. We also have to define the layouts directory and configure the view engine. All of these changes are shown in the following code listing.
var express = require('express'), bodyParser = require('body-parser'), handlebars = require('express3-handlebars'), moment = require('moment'); module.exports = function(app){ app.engine('html', handlebars({ defaultLayout: 'main', extname: ".html", layoutsDir: __dirname + '/views/layouts', helpers: { formatDate: function(value) { return moment(value).format('YYYY-MM-DD HH:mm:ss'); }, if_eq : function(a, b, opts) { if(a == b) { return opts.fn(this); } else { return opts.inverse(this); } } } })); app.use(bodyParser.urlencoded({extended: false})); app.set('view engine', 'html'); app.set('views', __dirname + '/views'); app.use(express.static(__dirname + '/public')); }; |
Code Listing 111
Express supports more than 20 other view technologies, with the most popular being Jade, Haml, and Underscore. In our example, we will stick to plain old HTML.
cassandra.js
var cql = require('node-cassandra-cql'); var client = new cql.Client({ hosts: ['127.0.0.1:9042'], keyspace: 'used_cars' }); module.exports = { client: client, cql: cql }; |
Code Listing 112
This file initializes the Cassandra driver. The hosts value and keyspace parameter would normally be loaded from a configuration file, but in this example application, it’s sufficient to do it directly in the file. This module exports the client to enable other modules to query Cassandra and cql to make type handling in later examples easier.
routes.js
This is the most complex file, so we are going to review each function separately. Normally the logic would be split into multiple modules, but in this example application the logic is simply put in the routes file. You can jump to view sources and add them to the example as you define the route logic.
var cassandra = require('./cassandra'), client = cassandra.client, cql = cassandra.cql, Promise = require('promise'); module.exports = function (app) { // all of the following methods go here }; |
Code Listing 113
Now we’ll start with adding the routes and defining the logic for them. Let’s define the logic for the home page. The home page should display all of the car offers right away. The request will be in the get form, and there will be no specified URL or page in the parameter. We do this by simply defining an app.get with the route and a callback for the request processing.
app.get('/', function (req, res) { client.execute('SELECT dateOf(date) as date, username,\ brand, color, mileage, model, price, year \ FROM car_offers', [], function(err, result) { if (err) { res.render('500'); } else { res.render('home', {rows: result.rows}); } }); }); |
Code Listing 114
To display the home page, we simply select all of the offers from Cassandra. To use the execute method from the Cassandra client, we have to provide the following parameters:
- Query string
- Parameters
- Callback function
The SELECT query we used returns a timeuuid type for the date. To make handling the data easier, we converted the timeuuid to date directly in the query. If the Cassandra query doesn’t throw any errors, we will redirect the client to the home view. On the home view, the application user will have buttons to create user profiles in the application. The button for creating the user profile will lead to the first route in the following code listing.
app.get('/show/adduser', function (req, res) { res.render('add_user', {}); }); app.post('/adduser', function (req, res) { client.execute('INSERT INTO users (\ username, emails, first_name, last_name,\ password, state)\ VALUES (?, null, ?, ?, null, null) IF NOT EXISTS', [req.param('username'), req.param('first_name'), req.param('last_name')], function(err) { if (err) { res.render('add_user', { username: req.param('username'), first_name: req.param('first_name'), last_name: req.param('last_name'), errorOccured: true }); } else { res.redirect('/'); } }); }); |
Code Listing 115
Showing the add_user view is relatively simple; we just need to show the view and don’t have to prepare any data for it. When the form from the view sends a post request to the adduser route, we extract the parameters from the post and fill in the parameters for inserting into the users table. We won’t use all of the fields in our example, so we simply set them to null in the query. We also use a lightweight transaction with the IF NOT EXISTS so no two users with the same username will ever be created.
This is a neat Cassandra feature, but to use it, we had to install the protocol12 version of the driver. If an error occurs, we display the add_user page again, but this time we pass in the parameters so that the user doesn’t lose values in the form, and we also provide the view with the error flag so that the error message is displayed to the user. If there were no errors on INSERT, we simply redirect the user back to the home page.
Now that we have our users added to the application, we want to create offers for them. The offers form will display the users list in a selection box, so before displaying the add_offer page, we need to fetch the users from Cassandra. The SELECT statement is pretty simple; we just list the columns that we need. Note that we only use the username and the first and last name. If we are unable to fetch the users from Cassandra, we will simply render an internal error page. If we get the users, we will render the add_offer page.
app.get('/show/addoffer', function (req, res) { client.execute('SELECT username, first_name, last_name \ FROM users', [], function(err, users) { if (err) { res.render('500'); } else { res.render('add_offer', {users: users.rows}); } }); }); |
Code Listing 116
After the user is finished providing details in the add_offer view, the form will be posted to the addoffer route.
app.post('/addoffer', function (req, res) { var offer_timeuuid = cql.types.timeuuid(); client.execute('INSERT INTO car_offers (\ country, date, brand, color, equipment,\ mileage, model, price, username, year)\ VALUES (?, ?, ?, ?, null, ?, ?, ?, ?, ?)', [req.param('country'), offer_timeuuid, req.param('brand'), req.param('color'), parseInt(req.param('mileage'), 10), req.param('model'), { value: parseFloat(req.param('price')), hint: cql.types.dataTypes.float }, req.param('username'), parseInt(req.param('year'), 10)], function(err) { if (err) { res.render('add_offer', { brand: req.param('brand'), color: req.param('color'), mileage: req.param('mileage'), model: req.param('model'), price: req.param('price'), username: req.param('username'), year: req.param('year'), errorOccured: true }); } else { makeSearchIndexEntries( req.param('brand'), req.param('color'), parseFloat(req.param('price')), offer_timeuuid, req.param('country')); res.redirect('/'); } }); }); |
Code Listing 117
We didn’t let Cassandra generate the timeuuid date field automatically with the help of the now function because we need this value to create search index entries. Instead, we generated one on the application side with the timeuuid() function. The parameters are sent to the server as strings. Most of the time this is fine, but some parameters have to be converted to other types. We used the parseInt and parseFloat JavaScript functions to do that. If we simply passed the parsed float to the parameters, the driver would insert some very strange values with large negative exponents instead. So we inserted the price as an object with two fields. The first one is the value, and the second is the hint in which we say to the driver that this is a float value. The driver then behaves fine and inserts the floats normally.
If the INSERT statement throws an error, we return to the add_offer page and propagate the posted data so that the user doesn’t lose the entered values. In cases where everything works as expected, we make index search entries and return to the home page. We built the search index for the field’s brand, color, and price range. The search index we are going to build doesn’t require any modifications to Cassandra’s installation, and the good side is that we can back it up and it will be distributed among the nodes in the cluster. The downside of this search index is that it generates a lot of writes to Cassandra, but that’s just fine because in Cassandra philosophy, the disk is cheap and the writes are fast.
function makeSearchIndexEntries(brand, color, price, date, country) { var insertQuery = 'INSERT INTO car_offers_search_index\ (brand, color, price_range, creation_time, date, country)\ VALUES (?, ?, ?, now(), ?, ?)'; brand = brand.toLowerCase(); color = color.toLowerCase(); var price_range = convertPriceToRange(price); var queries = [ {query: insertQuery, params: ['', '', '', date, country]}, {query: insertQuery, params: ['', '', price_range, date, country]}, {query: insertQuery, params: ['', color, '', date, country]}, {query: insertQuery, params: ['', color, price_range, date, country]}, {query: insertQuery, params: [brand, '', '', date, country]}, {query: insertQuery, params: [brand, '', price_range, date, country]}, {query: insertQuery, params: [brand, color, '', date, country]}, {query: insertQuery, params: [brand, color, price_range, date, country]} ]; var consistency = cql.types.consistencies.one; client.executeBatch(queries, consistency, function(err) { if (err) { console.log('error inserting '); } }); } function convertPriceToRange(price) { if (price > 0) { if (price < 1000) { return '1'; } if (price < 3000) { return '2'; } if (price < 5000) { return '3'; } if (price < 10000) { return '4'; } return '5'; } return '0'; } |
Code Listing 118
To make the index building as fast as possible, we are going to use a batch statement. executeBatch is available in version12 of the driver. The batch statement is also going to make inserting the values a bit easier because we need to insert all of the combinations that are possible for an offer. Also, the brand and the color values are always saved and queried in lowercase so that we don’t have to worry about results not showing up in a search because of incorrect casing.
In every statement, the date and country parameters are always inserted. The brand, color, and price_range are combined in every possible manner. For simplicity, we used three variables resulting in eight INSERT statements, which is enough for demonstration purposes. Setting the quorum level to one also speeds things up because it requires an acknowledgement from just one node to continue. The price is not stored directly in the index. Instead, we use a price range. Building the price ranges is done with the convertPriceToRange function which maps the price to a simple string.
Now, we will move to the search form. First, we need to display the search form to the user.
app.get('/show/search', function (req, res) { res.render('search', {}); }); |
Code Listing 119
The search form will then post the search parameters to the search route. The search route will process the parameters and then make a SELECT to the index table.
app.post('/search', function (req, res) { var accumulator = []; var brand = req.param('brand').toLowerCase(); var color = req.param('color').toLowerCase(); var price_range = req.param('price_range');
client.execute('SELECT country, date \ FROM car_offers_search_index \ WHERE brand=? AND color=? AND price_range = ?', [brand, color, price_range], function(err, result) { if (!err) { var prevPromise = Promise.resolve(); result.rows.forEach(function (row) { prevPromise = prevPromise.then(function () { return new Promise(function (resolve, reject) { client.execute( 'SELECT dateOf(date) as date, username,\ brand, color, mileage, model, price, year \ FROM car_offers \ WHERE country = ? AND date = ?', [row.get('country'), row.get('date')], function(err, result) { resolve(result.rows[0]); }); }); }).then(function (value) { accumulator.push(value); }); }); prevPromise.then(function () { res.render('search', { brand: req.param('brand'), color: req.param('color'), price_range: req.param('price_range'), results: accumulator }); }); } else { res.render('search', { brand: req.param('brand'), color: req.param('color'), price_range: req.param('price_range') }); } }); }); |
Code Listing 120
Querying the search index will return a list of country fields and timeuuid fields named date. With the combination of the two, we can uniquely identify all the data stored in the offers table. Node.js is by its nature a very asynchronous environment, but sometimes we want things to happen in order or just wait for something to finish before continuing other tasks. Our problem in the previous module is loading the data for every search result from the offers table. This is relatively hard to do with Node.js itself, so we use the Promise library to do that. For every row in the results, we will create a new promise. The promises are then chained by the prevPromise variable. Every promise will query the offers table and fetch the result. When the promise is done fetching the result, it pushes the result to the accumulator array. The last promise then renders the view with the loaded search results. Every rendering of the search form passes in the posted values so that the user doesn’t lose the values after submitting the form. With that, we have finished the logic behind the example. Now we will move to the presentation part.
main.html
This file serves as a container for generating all of the other views. It’s the best place to include all of the header, footer, and navigation scripts. To make our example a bit more eye-catching, we are going to use Twitter Bootstrap. It is simple to include and relatively easy to use but makes the examples look much better:
<!DOCTYPE html> <html lang="en"> <head> <meta charset="utf-8"> <meta http-equiv="X-UA-Compatible" content="IE=edge"> <meta name="viewport" content="width=device-width, initial-scale=1"> <title>Used Cars</title> <link rel="stylesheet" href="//maxcdn.bootstrapcdn.com/bootstrap/3.2.0/css/bootstrap.min.css"> <link rel="stylesheet" href="//maxcdn.bootstrapcdn.com/bootstrap/3.2.0/css/bootstrap-theme.min.css"> </head> <body> <div class="container"> <h1>Used Cars</h1> {{{body}}} </div> <script src="https://ajax.googleapis.com/ajax/libs/jquery/1.11.1/jquery.min.js"> <script src="//maxcdn.bootstrapcdn.com/bootstrap/3.2.0/js/bootstrap.min.js"></script> </body> </html> |
Code Listing 121
All of the other views are going to be rendered inside the {{{body}}} tag in the previous code listing. Most of the time, the scripts are the longest to load so it’s best practice to put the scripts before the closing body tag. We’ll continue with other views.
home.html
The home screen will show all of the available offers. If there are no offers, a warning message will be shown. From the home screen, users can add an offer, add a user, or start searching.
{{#if rows}} <table class="table table-striped"> <thead> <tr> <td>date</td> <td>username</td> <td>brand</td> <td>color</td> <td>mileage</td> <td>model</td> <td>price</td> <td>year</td> </tr> </thead> <tbody> {{#each rows}} <tr> <td>{{formatDate date}}</td> <td>{{username}}</td> <td>{{brand}}</td> <td>{{color}}</td> <td>{{mileage}}</td> <td>{{model}}</td> <td>{{price}}</td> <td>{{year}}</td> </tr> {{/each}} </tbody> </table> {{else}} <div class="alert alert-warning" role="alert"> <strong>Warning!</strong> There are no car offers at the moment </div> {{/if}} <p> <a href="./show/addoffer" class="btn btn-primary">Add Offer</a> <a href="./show/adduser" class="btn btn-info">Add User</a> <a href="./show/search" class="btn btn-success">Search</a> </p> |
Code Listing 122
add_user.html
The following template is for adding users.
<p class="text-center bg-info">Add User</p> {{#if errorOccured}} <div class="alert alert-danger" role="alert"> <strong>Warning!</strong> An error occured. </div> {{/if}} <form class="form-horizontal" role="form" action="/adduser" method="post"> <div class="form-group"> <label class="col-sm-2 control-label">username</label> <div class="col-sm-10"> <input type="text" class="form-control" name="username" value="{{username}}"> </div> </div> <div class="form-group"> <label class="col-sm-2 control-label">first_name</label> <div class="col-sm-10"> <input type="text" class="form-control" name="first_name" value="{{first_name}}"> </div> </div> <div class="form-group"> <label class="col-sm-2 control-label">last_name</label> <div class="col-sm-10"> <input type="text" class="form-control" name="last_name" value="{{last_name}}"> </div> </div> <div class="form-group"> <div class="col-sm-offset-2 col-sm-10"> <button type="submit" class="btn btn-info">Add</button> <a href="/" class="btn btn-default">Cancel</a> </div> </div> </form> |
Code Listing 123
add_offer.html
The following template is for adding offers. This form has the most input fields in our example application.
<p class="text-center bg-primary">Add Offer</p> {{#if errorOccured}} <div class="alert alert-danger" role="alert"> <strong>Warning!</strong> An error occured. </div> {{/if}} <form class="form-horizontal" role="form" action="/addoffer" method="post"> <input type="hidden" name="country" value="USA"> {{#if username}} <input type="hidden" name="username" value="{{username}}"> {{else}} <div class="form-group"> <label class="col-sm-2 control-label">username</label> <div class="col-sm-10"> <select name="username" class="form-control"> {{#each users}} <option value="{{username}}"> {{first_name}} {{last_name}} </option> {{/each}} </select> </div> </div> {{/if}} <div class="form-group"> <label class="col-sm-2 control-label">brand</label> <div class="col-sm-10"> <input type="text" class="form-control" name="brand" value="{{brand}}"> </div> </div> <div class="form-group"> <label class="col-sm-2 control-label">color</label> <div class="col-sm-10"> <input type="text" class="form-control" name="color" value="{{color}}"> </div> </div> <div class="form-group"> <label class="col-sm-2 control-label">mileage</label> <div class="col-sm-10"> <input type="text" class="form-control" name="mileage" value="{{mileage}}"> </div> </div> <div class="form-group"> <label class="col-sm-2 control-label">model</label> <div class="col-sm-10"> <input type="text" class="form-control" name="model" value="{{model}}"> </div> </div> <div class="form-group"> <label class="col-sm-2 control-label">price</label> <div class="col-sm-10"> <input type="text" class="form-control" name="price" value="{{price}}"> </div> </div> <div class="form-group"> <label class="col-sm-2 control-label">year</label> <div class="col-sm-10"> <input type="text" class="form-control" name="year" value="{{year}}"> </div> </div> <div class="form-group"> <div class="col-sm-offset-2 col-sm-10"> <button type="submit" class="btn btn-primary">Add</button> <a href="/" class="btn btn-default">Cancel</a> </div> </div> </form> |
Code Listing 124
search.html
This is the last template in our example. It uses custom directive for string comparison and the view logic for displaying the search results.
<p class="text-center bg-success">Search Cars</p> <form class="form-horizontal" role="form" action="/search" method="post"> <div class="form-group"> <label class="col-sm-2 control-label">brand</label> <div class="col-sm-10"> <input type="text" class="form-control" name="brand" value="{{brand}}"> </div> </div> <div class="form-group"> <label class="col-sm-2 control-label">color</label> <div class="col-sm-10"> <input type="text" class="form-control" name="color" value="{{color}}"> </div> </div> <div class="form-group"> <label class="col-sm-2 control-label">price_range</label> <div class="col-sm-10"> <select name="price_range" class="form-control"> <option value=""></option> <option value="1" {{#if_eq price_range "1"}}selected{{/if_eq}}> < 1000</option> <option value="2" {{#if_eq price_range "2"}}selected{{/if_eq}}> >= 1000 < 3000</option> <option value="3" {{#if_eq price_range "3"}}selected{{/if_eq}}> >= 3000 < 5000</option> <option value="4" {{#if_eq price_range "4"}}selected{{/if_eq}}> <= 5000 < 10000</option> <option value="5" {{#if_eq price_range "5"}}selected{{/if_eq}}> > 10000</option> </select> </div> </div> <div class="form-group"> <div class="col-sm-offset-2 col-sm-10"> <button type="submit" class="btn btn-success">Search</button> <a href="/" class="btn btn-default">Back</a> </div> </div> </form> {{#if results}} <table class="table table-striped"> <thead> <tr> <td>date</td> <td>username</td> <td>brand</td> <td>color</td> <td>mileage</td> <td>model</td> <td>price</td> <td>year</td> </tr> </thead> <tbody> {{#each results}} <tr> <td>{{formatDate date}}</td> <td>{{username}}</td> <td>{{brand}}</td> <td>{{color}}</td> <td>{{mileage}}</td> <td>{{model}}</td> <td>{{price}}</td> <td>{{year}}</td> </tr> {{/each}} </tbody> </table> {{else}} <div class="alert alert-success" role="success"> There are no search results </div> {{/if}} |
Code Listing 125
Used Car Market in Action
The following screenshots will give you an idea what the application should look like in the end.
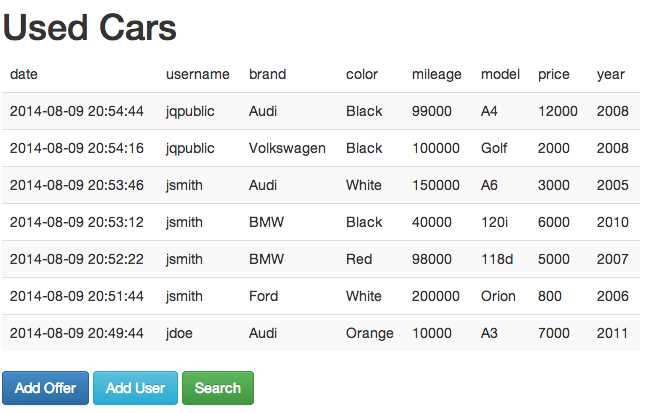
- Demo application home screen

- Demo application search screen

- Demo application Add User form
Cassandra with Java
Java is a very mature, stable, and battle-tested technology. In fact, Cassandra was written in Java. In the beginning, most developers using Cassandra used Java on a daily basis. The situation has changed a lot from the early days, but still, Java remains a very important language when it comes to Cassandra’s platform.
The techniques that we covered in the Node.js section apply to Java, too. Java has its own set of frameworks; some of them are similar to Express, but we won’t go into them. To use Cassandra from Java, use your preferred IDE and make sure that you add the com.datastax.driver as a dependency to the project. In this section, we will build a Java client that lists all of the offers from the previously used used_cars keyspace.
package com.cassandra.example; import java.text.SimpleDateFormat; import java.util.Date; import java.util.UUID; import com.datastax.driver.core.BoundStatement; import com.datastax.driver.core.Cluster; import com.datastax.driver.core.PreparedStatement; import com.datastax.driver.core.ResultSet; import com.datastax.driver.core.Row; import com.datastax.driver.core.Session; public class CassandraExample { public static void main(String[] args) { String host = "127.0.0.1"; Cluster cluster = Cluster.builder().addContactPoint(host).build(); Session session = cluster.connect("used_cars"); PreparedStatement statement = session .prepare("SELECT * FROM car_offers WHERE country = ?"); BoundStatement boundStatement = statement.bind("USA"); ResultSet results = session.execute(boundStatement); System.out.println(String.format( "%-23s\t%-15s\t%-7s\t%-7s\t%-7s\t%-7s\t%-10s\t%-7s", "date", "brand", "color", "mileage", "model", "price", "username", "year")); SimpleDateFormat sdf = new SimpleDateFormat("yyyy-MM-dd HH:mm:ss.S"); for (Row row : results.all()) { UUID dateUUID = row.getUUID("date"); Date date = new Date(getTimeFromUUID(dateUUID)); String brand = row.getString("brand"); String color = row.getString("color"); Integer mileage = row.getInt("mileage"); String model = row.getString("model"); Float price = row.getFloat("price"); String username = row.getString("username"); Integer year = row.getInt("year"); System.out.println(String.format( "%-23s\t%-15s\t%-7s\t%-7s\t%-7s\t%-7s\t%-10s\t%-7s", sdf.format(date), brand, color, mileage, model, price, username, year)); } session.close(); cluster.close(); } static final long INTERVALS_SINCE_UUID_EPOCH_100NS = 0x01b21dd213814000L; public static long getTimeFromUUID(UUID uuid) { return (uuid.timestamp() - INTERVALS_SINCE_UUID_EPOCH_100NS) / 10000; } } |
Code Listing 126
The previously listed module has a dependency on the DataStax Cassandra driver. If you are going to try the example without any dependency management system, be aware that the driver needs the sl4j-api, sl4j-simple, com.google.gson, guava, jboss netty, and metrics modules to run.
The example is relatively easy to follow. The only tricky part is to extract the time stamp from the timeUUID column. The most common mistake is taking the timestamp and pasting it to a Date constructor. Before taking the time stamp, we need to adjust it to match to the commonly used milliseconds since midnight of January 1st 1970. UUIDs are measured from midnight October 15th 1582 in 100-nanosecond intervals. Conversion between the two epochs is done in the previously listed getTimeFromUUID function.
Cassandra with C#
C# is also an extremely popular technology. Before doing any work with the driver, we need to import it with the package manager into our project. It’s sufficient to type Install-Package CassandraCSharpDriver in the standard Package Manager Console window. If you are running .NET on platforms other than Windows, add a package to the project by searching for “DataStax C# Driver for Apache Cassandra”. The following example for C# is going to be identical to the Java example and it will display the output in the console. As with the Java example, the most complex part of the code is extracting the time stamp from the GUID type. The rest is pretty similar in any of the previous languages and is more Cassandra-specific than application or computer language-specific. The C# example is shown in the following listing.
Code Listing 127
Summary
In this chapter, we have shown how to use Cassandra with today’s most popular development environments. Most of the chapter was dedicated to Node.js, where we saw how to build a complete web application that relies on Cassandra underneath. The completed application focuses on Cassandra as an underlying data platform and not so much on the application using it. Repeating the same application for Java and C# wouldn’t provide additional insight to Cassandra, so in these final two sections we have looked only at how to connect to a cluster, retrieve the offers, and print them to the console.
- 1800+ high-performance UI components.
- Includes popular controls such as Grid, Chart, Scheduler, and more.
- 24x5 unlimited support by developers.