
Cassandra Succinctly®

CHAPTER 2
Getting Started with Cassandra
Cassandra is open-source software. Getting started with Cassandra is completely free. The most basic version sufficient for getting into Cassandra is the DataStax Community Edition. The download link changes from time to time, but at the time of writing it is currently available here.
The DataStax Community Edition of Cassandra supports the following systems:
- CentOS 5.X and 6.X
- Red Hat Enterprise Linux 5.X, 6.X
- Debian 6.X
- Ubuntu 10.X, 11.X, 12.X
- Mac OSX 10.X
- Windows OS family
The range of systems able to install Cassandra is pretty wide and covers all of the most popular operating systems out there today. To get started, it’s even possible to just download the DataStax Sandbox virtual machine containing all of the necessary software to try Cassandra out preinstalled. However, registration is required and there are licensing terms users must accept. Enterprise-grade distributions are also available but they will not be covered here. Most of the download links for DataStax Community Edition have a tarball download option. In the next section, we’ll cover how to install Cassandra on CentOS 6.X. The other systems are pretty similar. The Windows platform has its own installer and we’ll describe it, too.
Installing Cassandra on Linux with a Tarball
This section will show you how to install Cassandra on CentOS 6.X from scratch. Cassandra actually runs on top of Java, so we will first have to install Java. Most Linux distributions actually come with a preinstalled Java, but we will cover installing Java just in case.
Installing Java
Skip this step if the system has the appropriate version of Java installed. The easiest way to check this is with the java –version command. The latest version of Oracle Java 7 should be installed. To download Java, the wget command is used. If the wget command is not available on the system, install it. For CentOS, it’s as simple as yum install wget. If the following wget command fails for any reason, download the archive manually and continue from there.
# cd /opt/ # tar xzf jdk-7u60-linux-i586.tar.gz # cd /opt/jdk1.7.0_60/ # alternatives --install /usr/bin/java java /opt/jdk1.7.0_60/jre/bin/java 2 # alternatives --install /usr/bin/javaws javaws /opt/jdk1.7.0_60/jre/bin/javaws 2 # alternatives --install /usr/bin/javac javac /opt/jdk1.7.0_60/bin/javac 2 # alternatives --config java # java –version # export JAVA_HOME=/opt/jdk1.7.0_60 |
Code Listing 1
Installing DataStax Community Edition of Cassandra
Once Oracle Java 7 is installed, we need to download Cassandra. After downloading Cassandra, there are couple of things that we need to check, including the location of directories where Cassandra stores data.
# cd /opt/ # wget http://downloads.datastax.com/community/dsc.tar.gz # tar xzf dsc.tar.gz # sudo mkdir /var/lib/cassandra # cd /opt/dsc-cassandra-2.0.9/bin [Or start Cassandra in daemon mode. Log will jump out, but pressing Ctrl + C gets out of it and Cassandra will continue to work] [To shut down daemon Cassandra use] |
Code Listing 2
As you can see from the previous code example, starting Cassandra usually takes just a couple of minutes and nothing more. Take into account that this is a more complicated version of installing Cassandra and that there are easier solutions that include system package managers. The installation from a tarball was shown here because it will work on most of the available Linux environments out there today.
Installing Cassandra on Windows
The most popular version of Microsoft Windows at the time of writing is Windows 7. The rest of the Windows systems are either not officially supported or have a much smaller market share than Windows 7.
The installation procedures will be explained for Windows 7. If you’re installing Cassandra on a 32-bit system, download and install Microsoft Visual C++ 2008 Redistributable Package (x86) from Microsoft’s website. The web utilities that accompany Cassandra do not support Internet Explorer; install Chrome or Firefox if you want to use these tools. You will not need these tools to follow along with this book, however.
There are also some hardware prerequisites. DataStax Community Edition of Cassandra for Windows is preconfigured to use 1 GB of RAM. An operating system such as Windows 7 usually takes at least 1 GB to run smoothly, so it’s recommended to have an environment with at least 2 GB of RAM available. Be very careful not to allocate too little memory to the system because the installation might complete without warning you about the RAM requirement, and Cassandra will simply not start when you try to run it.
Tip: DataStax Community Edition of Cassandra for Windows requires 1 GB of RAM or more.
Installing Java
Java for Windows is available here. Agree to the terms and conditions on that page to download the Java installer, and then run the downloaded software.

- Initial screen of Java installer for Windows
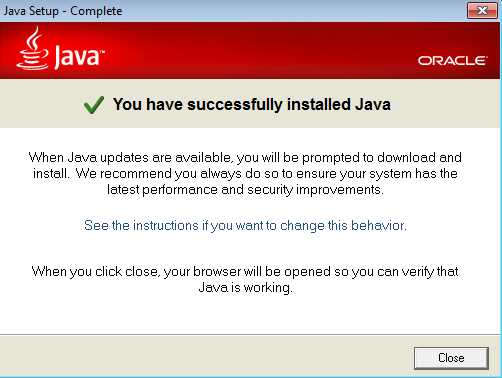
- Successful Java install on Windows
The previous figures are fairly standard screens when installing something on Windows. Note that during the installation, a security message may be displayed to notify you that you are about to make changes to the system. To install Java successfully, allow the application to make changes to the system.
After installing Java, it’s important to set the JAVA_HOME environment variable. The Cassandra installation will run without giving any warning about the missing environment variable, but Cassandra will not actually start if this variable is not set. To check or set the JAVA_HOME variable:
- Right-click My Computer.
- Select Properties from the context menu.
- Open Advanced System Settings.
- In the System Properties window, click the Advanced tab.
- Click Environment Variables.
- Add or update the JAVA_HOME variable as shown in the following figure.

- Adding Java environment variable
The value for the JAVA_HOME variable might be different from system to system because the system disk might have different name than “C:”, or you may have selected a different destination when running the Java installer. Make sure the path value in the variable matches the path where Java was installed. Cassandra will not start if this variable is not set properly.
Installing DataStax Community Edition of Cassandra
DataStax Community Edition is available here. Download the version for your machine depending on whether you’re running 32-bit or 64-bit Windows. The only other option is MSI Installer 2.x. After downloading the file, run the installation as an administrator. The following figures show the steps of the installer on the Windows 7 operating system.
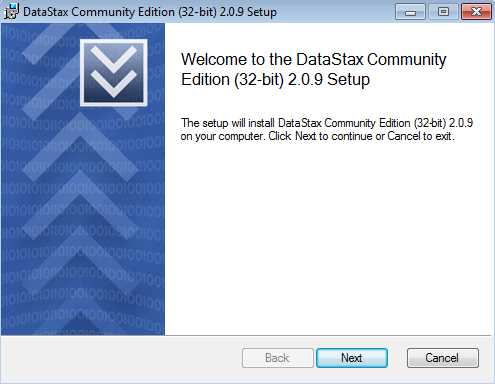
- Initial screen of the DataStax Community Edition installer
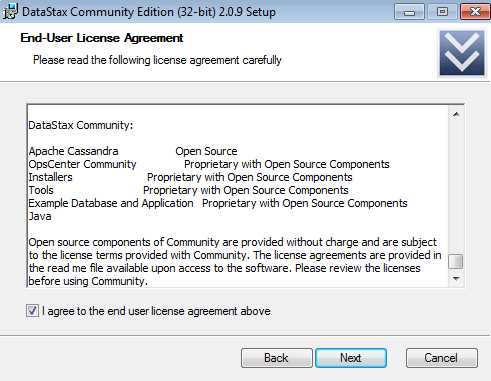
- License agreement for the DataStax Community Edition installer

- Destination folder selection

- Setting Cassandra to start automatically

- Authorizing changes to the system

- Final screen of the DataStax Community Edition installer
The installation process is similar to any Windows application installation. The installation itself shouldn’t take more than a couple of minutes. If all of the installation steps were successful, your system should now run Apache Cassandra. Also, some new items should appear in the Start menu as shown in the following figure.

- New Start menu items for DataStax Community Edition on Windows
The final check to ensure Cassandra installed would be to click Cassandra CQL Shell inside the DataStax Community Edition folder in the Start menu. If something like the following figure appears on the screen, then you are ready to work with Cassandra on Windows.
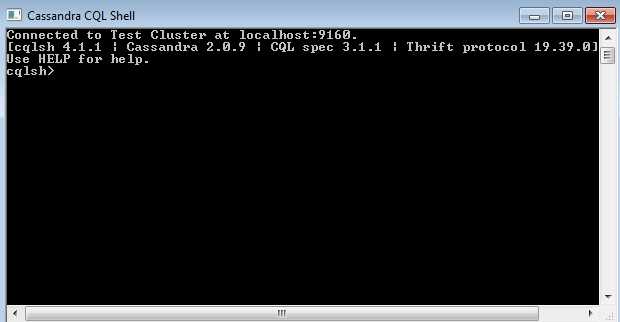
- Cassandra CQL Shell on Windows
The CQL shell is a command-line utility for interacting with the Cassandra database. The instructions for the database to run are given in a language called CQL, which stands for Cassandra Query Language. Using CQL will be covered in a later chapter. For now, we won’t cover how to use CQL when interacting with the CQL shell. The CQL shell is just fine for most tasks. A more graphical tool for developing with CQL is the DataStax DevCenter.
Installing and Using DataStax DevCenter
The basic tooling shipped with Cassandra has a sufficient set of features for most daily operations that administrators and developers will need to perform. A free visual tool with more advanced features and a friendlier user interface for creating CQL statements is a stand-alone app called DataStax DevCenter.
To install DataStax DevCenter:
- Go to the download section of the DataStax website at http://www.datastax.com/download.
- Click the DataStax DevCenter link.
- Select the operating system you are using and be careful to choose the correct 32-bit or 64-bit option. The download will start automatically.
- The downloaded application is compressed. Extract it to the desired location.
- Go to the extracted location and run the DevCenter.exe executable.

- DataStax DevCenter
DataStax DevCenter is based on the Eclipse Rich Client Platform. The tool has several panes whose organization can be customized by the user. The layout shown in Figure 25 is the default one. Initially, the interface will not show much information.
To connect to a Cassandra instance or a cluster, we need to add a new connection by clicking the New Connection button in the Connections pane, known as the Connection Manager.

- Adding a local connection
The initial port parameters loaded in the new connection window will be just fine for a standard Cassandra installation. To make sure the connection parameters are valid, click the Test button. If the connection is successful, a confirmation dialog will be displayed.

- Successful Cassandra Connection Test
After adding the connection in DevCenter, not much will happen. In order to connect to Cassandra, we have to use the Connection Manager, which is used to create, edit, delete, open, and close cluster connections.
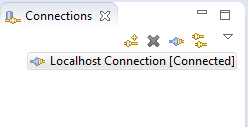
- DevCenter Connections Manager
After clicking the Open Connection icon, DevCenter connects to the selected Cassandra cluster. Earlier we mentioned keyspaces, the top-level containers for data in Cassandra where replication is defined. DevCenter provides a nice overview of the keyspaces available to the user in the Schema Navigator, located in the top right corner.

- DevCenter Schema Navigator
The Schema Navigator can be used to browse Cassandra’s objects structure down to the column level. It is useful for checking what a column is called or what the data type of a certain column is.
With time, users will accumulate a number of scripts to perform various operations on the Cassandra database. DevCenter also has a pane for managing CQL scripts.

- DevCenter CQL Scripts
The pane you will probably spend the most time in is the Query Editor, the upper middle pane in DevCenter. It has features such as syntax highlighting and autocomplete, which is invoked by pressing Ctrl+Spacebar. If multiple connections are open at the same time, you can select which connection to run the commands on in the Run using connection drop-down at the top of the Query Editor pane. No connection is selected by default, so you’ll have to select a connection before running queries. After selecting a connection, you can also select the keyspace in which the commands will be executed from the In keyspace drop-down.
I have mentioned previously that Cassandra usually deals with a large amount of data. To prevent users from trying to fetch too much data from the system and possibly causing performance issues in the cluster, the Query Editor runs all read statements with a limit. The initial limit is set to 300. The final limit adjustment is left up to the user.
Running queries is done by selecting a script and then clicking the Execute CQL Script button to the right of the With limit text box, or pressing Alt+F11. Multiple open scripts will be shown as tabs in the editor, as shown in the following figure.

- DevCenter Query Editor with multiple scripts
The Query Editor will also detect errors as you type and suggest possible solutions.

- DevCenter Query Editor error detection and correction
Some commands will produce results in a tabular form. These results are displayed in the Results pane, where you see the results from the latest query. The Results pane is pretty simple; it shows the selected columns and their values. The binary values will be displayed with a mark, and going into single bytes is not yet possible with the DevCenter Query Editor.
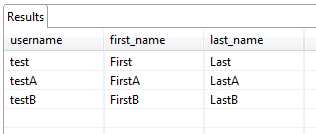
- DevCenter Results Pane
When navigating large scripts, one can very easily lose the overview of the whole script. In the bottom right corner of DevCenter, the Outline pane is available to remedy such situations. Double-clicking a statement in it takes the user to the corresponding statements in the currently open script.
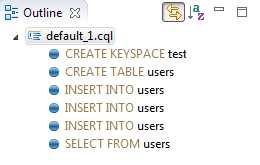
- DevCenter Outline Pane
Summary
In this chapter, we discussed how to install Cassandra on two of the most popular operating systems today: Linux and Microsoft Windows. We saw that the basic installation of Cassandra is simple and usually takes only a couple of minutes to set everything up.
Cassandra is, at its core, a Java application, so we covered how to set up the basic Java environment required for Cassandra to run. The installation of Java needs a bit of tweaking, especially on the Windows platform, but all in all Java is a pretty stable, scalable, and battle-tested platform used in countless production systems by many companies.
Cassandra includes a couple of useful and powerful tools such as cqlsh and nodetool. We didn’t cover these in this chapter because to use them, it is not necessary to set up the same environment we need to start interacting with Cassandra.
Also in this chapter we covered how to install and use a tool called DataStax DevCenter. DevCenter is suitable for users with no command line experience, and it has many ergonomic features for newcomers to Cassandra. It enables users to make changes to queries much easier, and it has decent context-aware autocomplete abilities, such as quick fixes for most common mistakes when using CQL.
- 1800+ high-performance UI components.
- Includes popular controls such as Grid, Chart, Scheduler, and more.
- 24x5 unlimited support by developers.