
Camtasia Succinctly®

CHAPTER 4
Recording the Computer Screen
The exercise explained in this book corresponds to a computer’s screen recording. This chapter covers the basics about this subject. At the end, a small video tutorial on how to use the Alarms & Clock application will be created.
Creating the script for video recording planning
As suggested in Chapter 3, a script document should be created in order to make a plan for video recording. The following table displays the script for the Alarms & Clock application tutorial.
Table 3: Alarms & Clock tutorial script
Alarms & Clock Windows application video tutorial Please read through the entire script to familiarize yourself with the actions you’ll be completing during this activity. Also, before you begin recording, open the Alarms & Clock Windows application and resize and reposition it at the center of your screen.
|
The script displayed in the previous table should be saved in its own file, as part of the recording assets. Of course, this file will be outside Camtasia and won’t be displayed as a part of the media assets libraries.
Preparing recording scenario
Before screen recording, the Alarms & Clock application should be placed at the center of the screen, according to the script displayed in the previous section of this chapter. So the screen should look like the following figure.
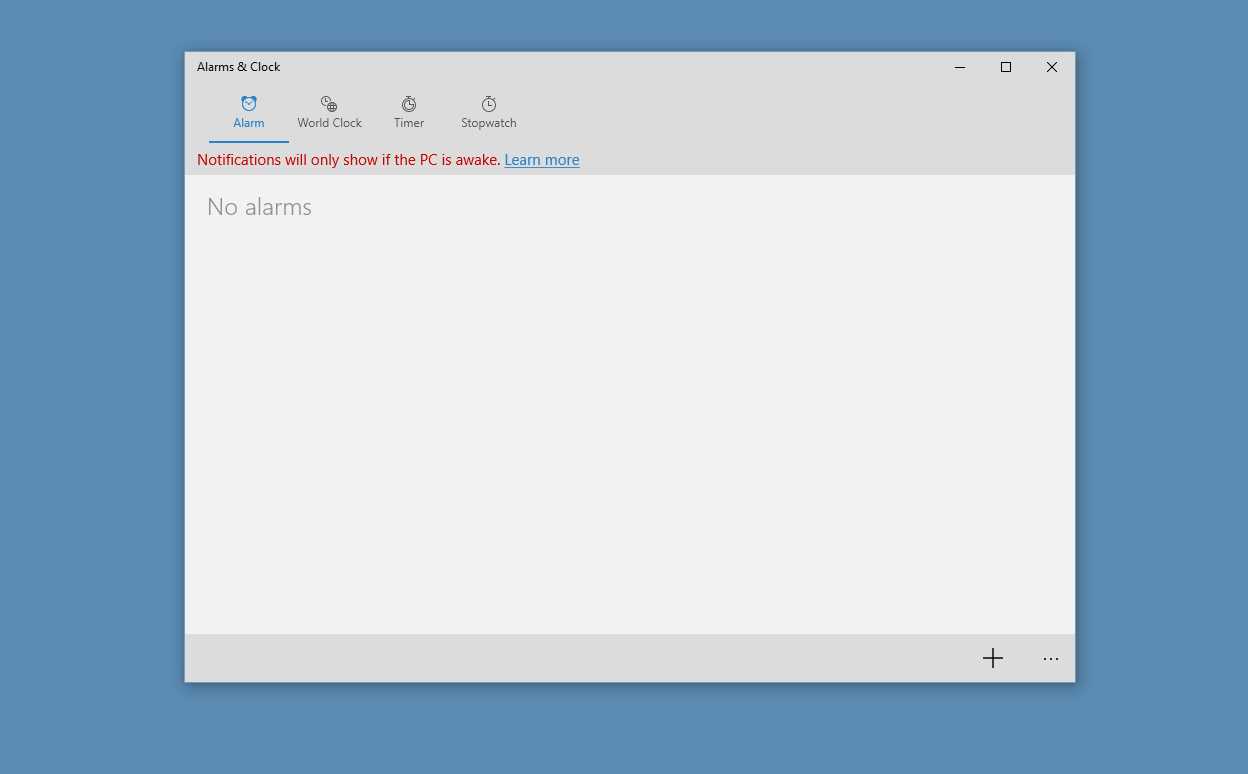
- The Alarms & Clock application at the center of the screen
As you can see in the previous figure, there are no icons on the computer’s desktop. This avoids distractions for both the video maker and the future viewers.
Recording the screen
Running the Screen Recorder
To start screen recording, the first step is bringing up the Camtasia Screen Recorder program. This can be accomplished by clicking Record the screen located at the top left-hand side of Camtasia’s main window.
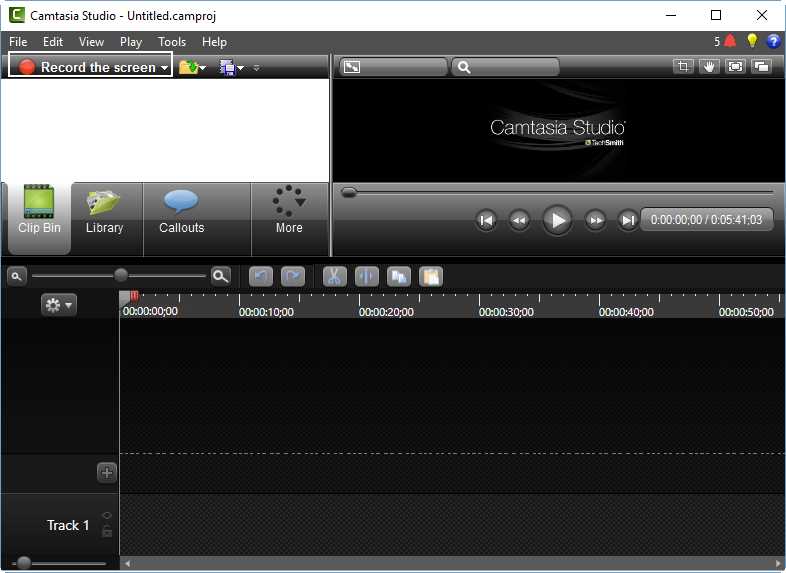
- “Record the screen” button in Camtasia’s main window
After that button is clicked, Camtasia’s main window will be minimized and the Camtasia Screen Recorder will be displayed on the bottom right-hand side of the screen. Also, a green, dashed rectangle will be drawn around the entire screen, indicating the area that will be recorded by the program.
Note: Bringing up the Camtasia Screen Recorder doesn’t start any actual recording. Click the Record button (or the F9 hot key) in order to begin.
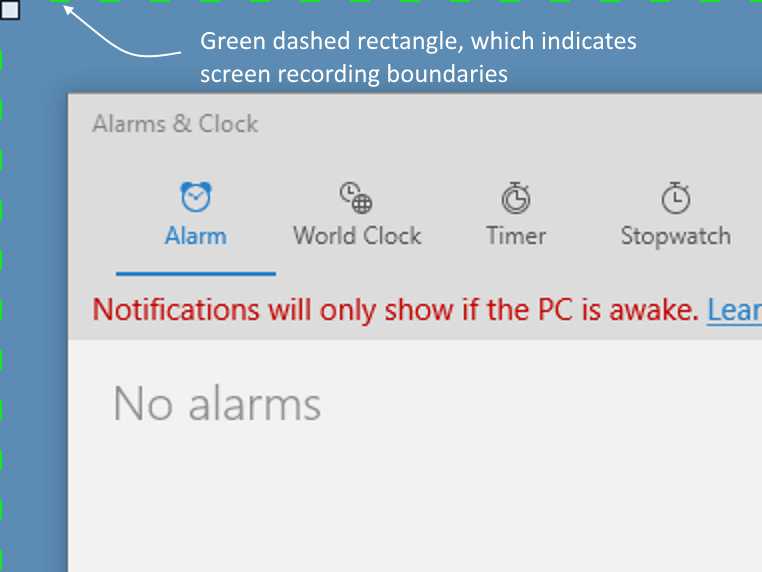
- The screen recording boundaries rectangle
By default, Camtasia Screen Recorder sets the recording boundaries to the entire screen. This can be customized using the “Select area” options available in the recorder.
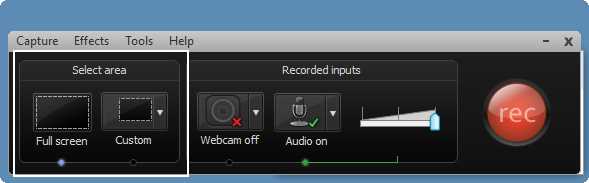
- Camtasia Screen Recorder and the “Select area” options panel
The previous figure displays the “Select area” panel highlighted. This is the place where the screen recording boundaries can be set up. The blue dot located at the bottom of the “Full screen” option indicates that the entire screen will be recorded.
Setting up recording boundaries
In order to specify a recording area other than the entire screen, click the Custom button of the recorder program. This action will bring up a context menu with all custom options available.
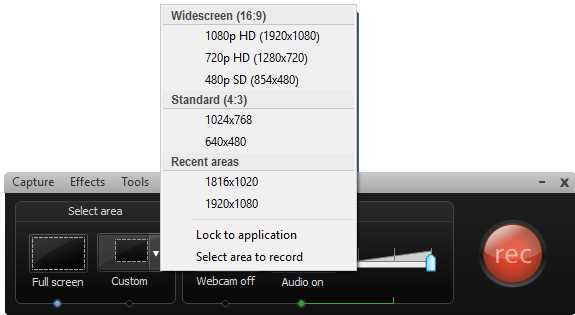
- Custom area options context menu
As noted in the previous figure, the Custom context menu offers three option groups and two separated options at the end. The custom option groups are:
- Widescreen (16:9): Contains all screen areas (in terms of pixel resolution) available for creating a 16:9 video.
- Standard (4:3): Contains all screen areas (in terms of pixel resolution) available for creating a 4:3 standard video.
- Recent areas: Contains all the areas recently used for video recording.
Note: Video quality and screen areas depend on the graphics adapter in your machine.
Besides the option groups displayed in the context menu, there are two other independent options available:
- Lock to the application: Tells the screen recorder that recording boundaries will be the same as the boundaries of the currently active application (the screen recorder is not considered an active application).
- Select area to record: Allows the user to select the portion of the screen to be recorded.
For the purposes of this exercise, click Select area to record. After that, the mouse pointer should be placed over the upper-left corner of the Alarms & Clock application. Once this is done, the screen will look like the following figure.
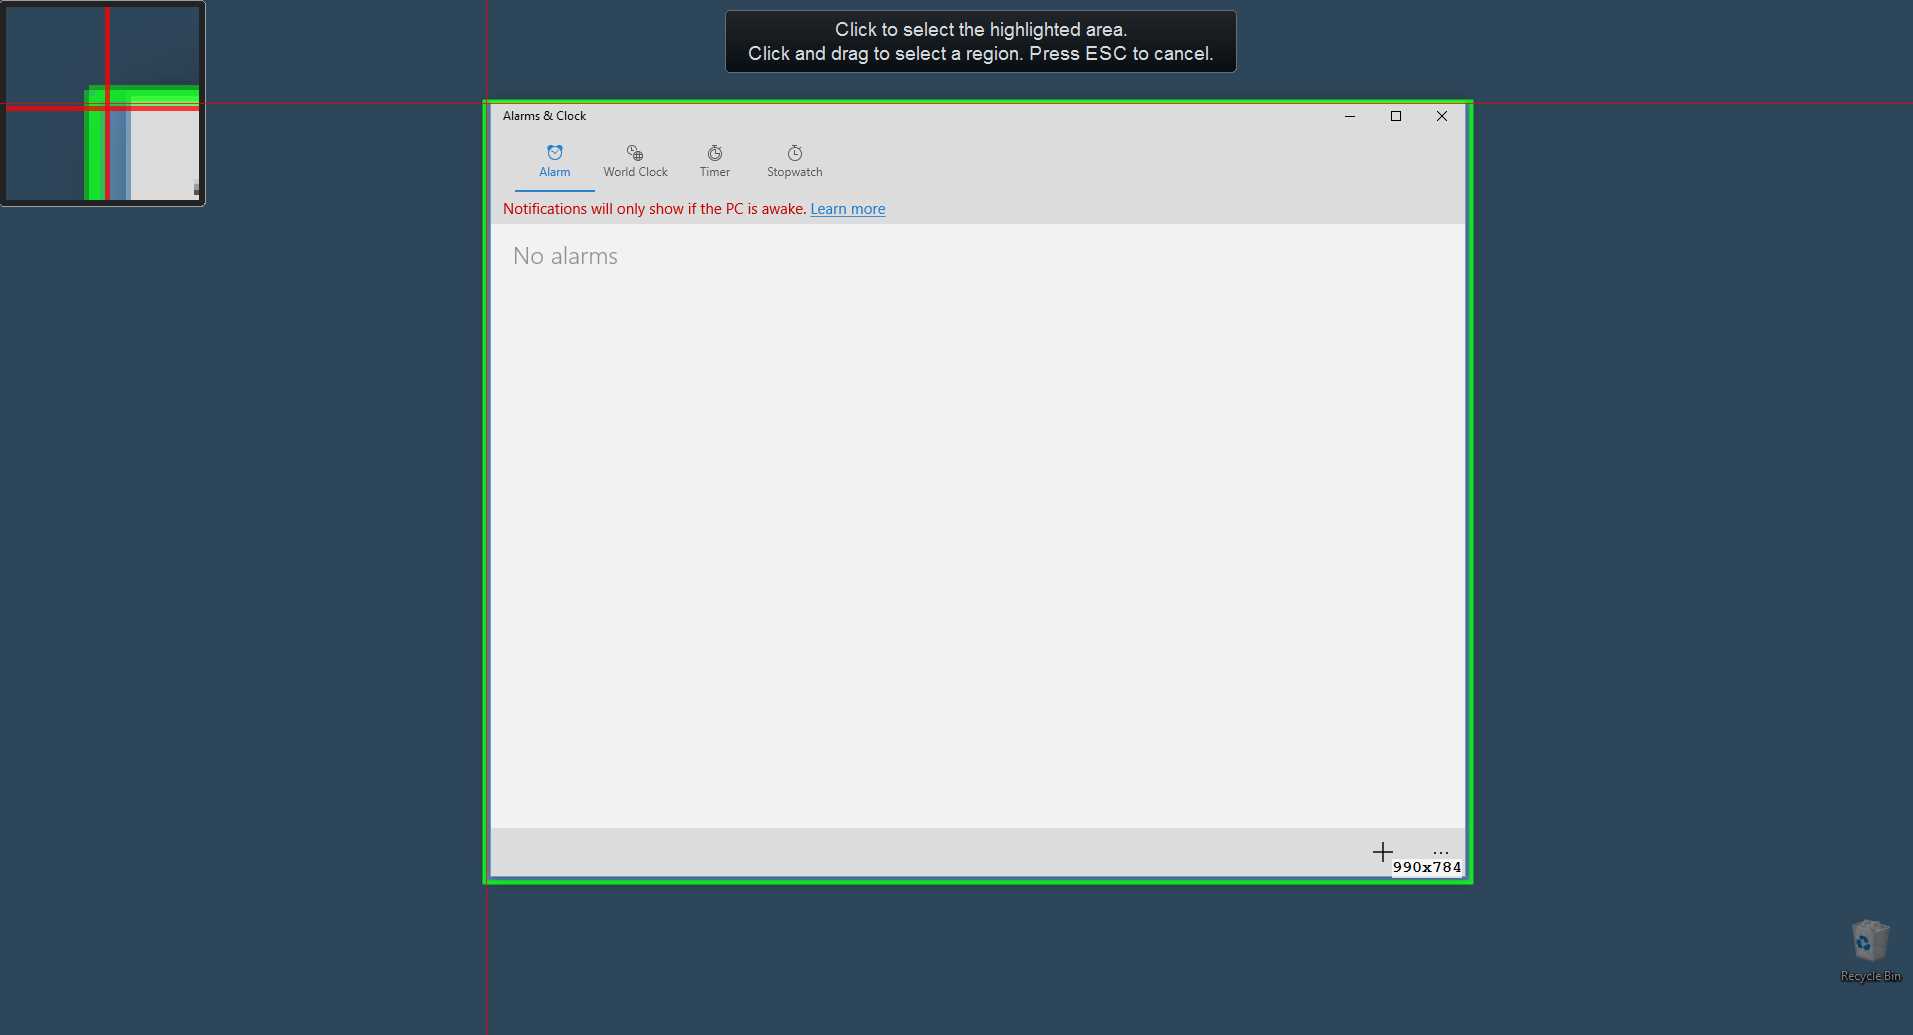
- A general view of the screen, after choosing “Select area to record” option
When the mouse pointer is placed over an application, the screen recorder selects its window boundaries automatically and places a green rectangle around them, suggesting these boundaries as the recording area. Also, a magnifier is displayed in the screen’s upper-left corner. This magnifier will help you see exactly where the mouse pointer is located at a pixel level as we move the pointer around the screen. Finally, a white-on-black sticker is displayed at the top of the screen. This sticker displays a series of directions that should be followed to accomplish the “Select area to record” task.
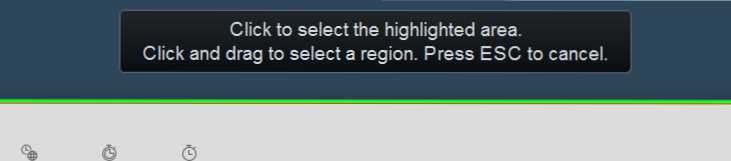
- The directions sticker at the top of the screen
The previous figure displays the directions placed at the top of the screen. The following options are available for selecting the area to record:
- Click to select the highlighted area: Selects the highlighted area as the area to record, when the user clicks on its boundaries.
- Click and drag to select a region: To select a different area than suggested, the user should click outside of these boundaries and drag the mouse pointer until the desired region is selected, and then release the mouse button.
- Press Esc: Cancels the “Selecting the area to record” task.
For this exercise, click on the highlighted area to set the Alarms & Clock application as the recording area.
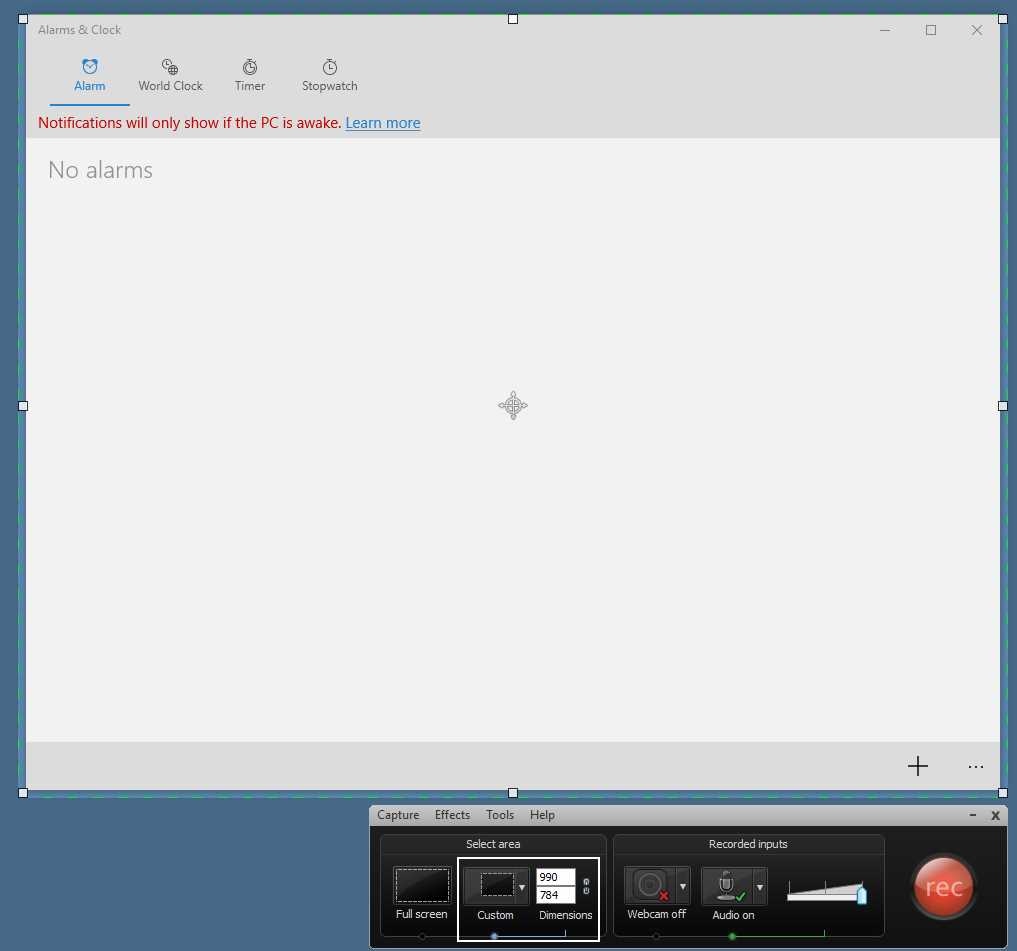
- The Alarms & Clock application selected as the recording area
As displayed in Figure 22, after the area to record is selected, a green, dashed rectangle is drawn around the Alarms & Clock application window’s boundaries. Also, a pointer is placed on the selected area, indicating the center of this one. Now, the “Select area” panel of the screen recorder displays the blue dot under the Custom button, and the Dimensions entries beside the Custom button display the width and height of the area.
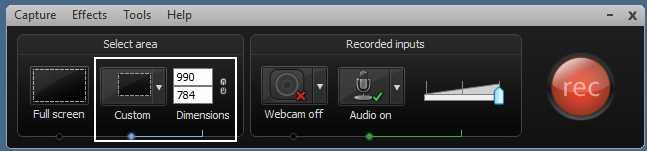
- The Screen Recorder showing the selected recording area’s dimensions
Setting up audio options
The next step prior to recording is to set up the audio options that will be available for doing the job. This can be accomplished by using the Audio button located in the Recorded Inputs options panel. The Screen Recorder turns on the audio recording by default, using the Window’s default recording device. So, assuming the default recording device is the microphone that will be used for recording, at this point it seems there’s nothing more to do except adjust the microphone’s volume using the slider located to the right of the Audio button. But there’s something else to take into account: an audio option called “Record system audio” is also turned on by the Screen Recorder. This option allows all sounds played by the computer to be recorded along with the microphone’s input. In some cases, there’s no problem if we leave this option turned on, but sometimes it is desirable to suppress all sounds played by the system except for the microphone’s input.
For the purposes of this exercise, we’re going to turn off system audio recording. To do so, click on Audio, and a context menu will appear.
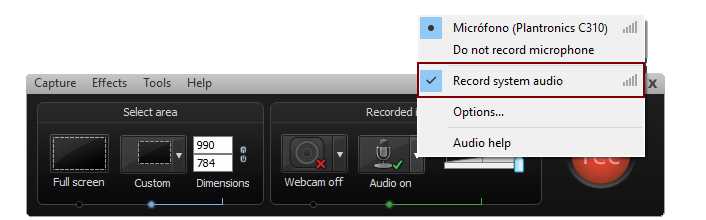
- The Audio options context menu
As noted in Figure 24, the “Record system audio” option is checked, indicating that the option is turned on. We should click on the menu option to turn it off. After that, the context menu will disappear.
Start video recording
To start video recording, click rec, located on the right side of the Screen Recorder window, or press the F9 hot key. Either way, the screen will look like the following figure.
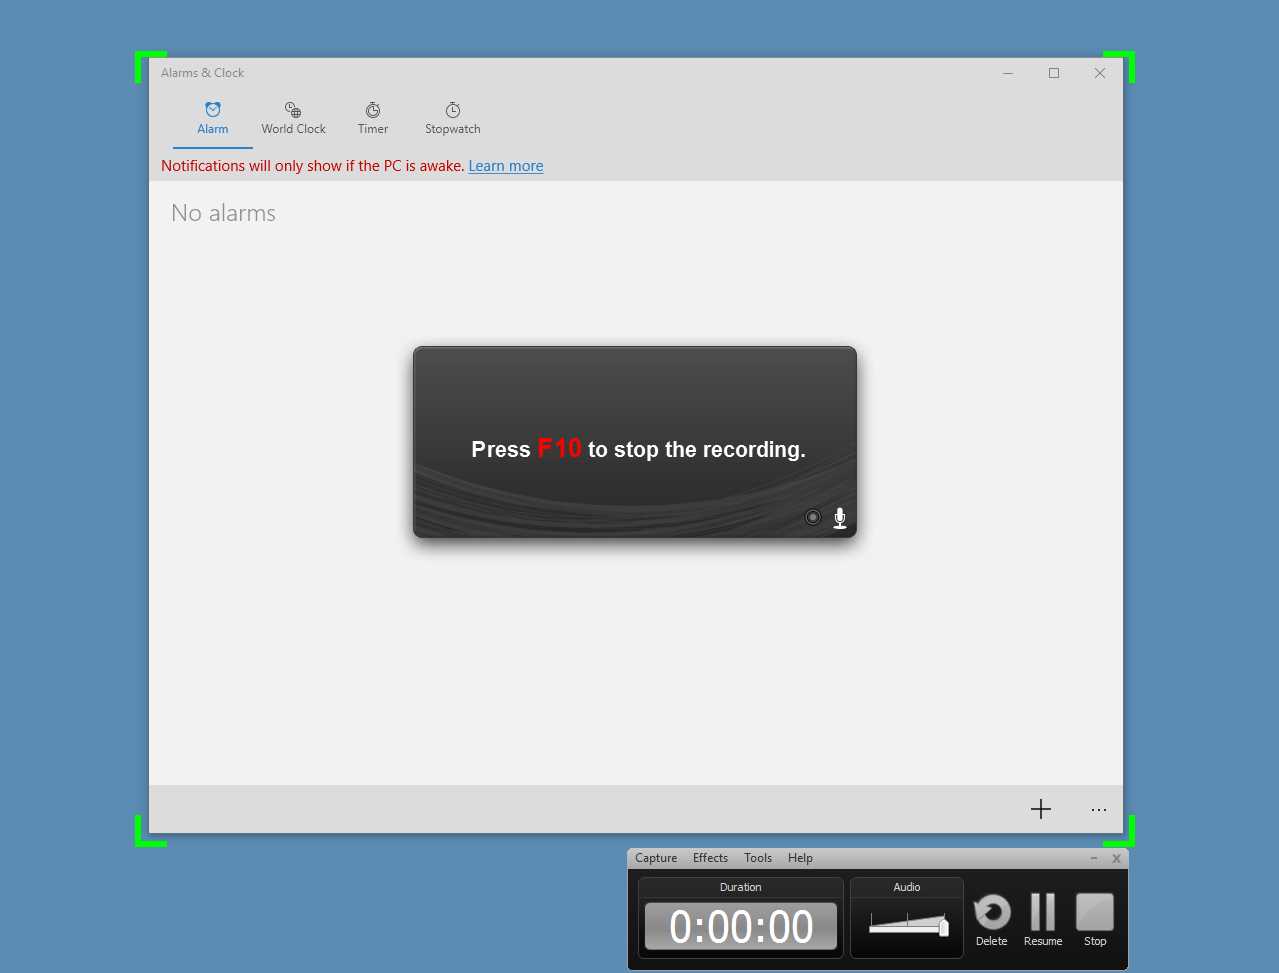
- Starting screen recording after clicking rec or pressing F9 hot key.
Figure 25 shows how the Camtasia Screen Recorder starts the job. First, we can see that a set of four green corners are placed in the limits of the recording area. These corners act as a guide, telling the user that only those actions performed within these boundaries will be recorded. That includes the mouse pointer movement, of course. Also, a banner window with the legend “Press F10 to stop the recording” is displayed at the center of the recording area. This window has two purposes: first, it instructs the user on how the recording job can be stopped (in this case, by pressing the F10 hot key), and second, it will display a countdown to the moment that the screen recording starts.
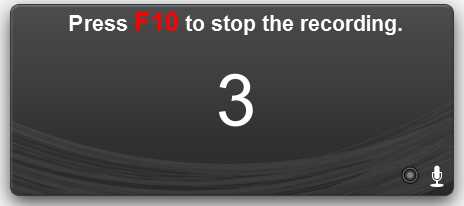
- The countdown prior to screen recording
As shown in Figure 26, a three-second countdown is displayed before the recording job starts. After that, the banner will disappear and recording will start.
Tip: The use of two monitors plugged into the computer is suggested, in order to display the recording script on the second monitor while the actual recording is being done on the main monitor.
Finishing recording
To stop video recording, we’re going to press the F10 hot key. After that, a preview window is shown and our recording material is played automatically. This window has a series of controls that allow us to manipulate the result of the recording. We can play the entire recording, skip to the beginning or the end, or choose what to do with the recording output.
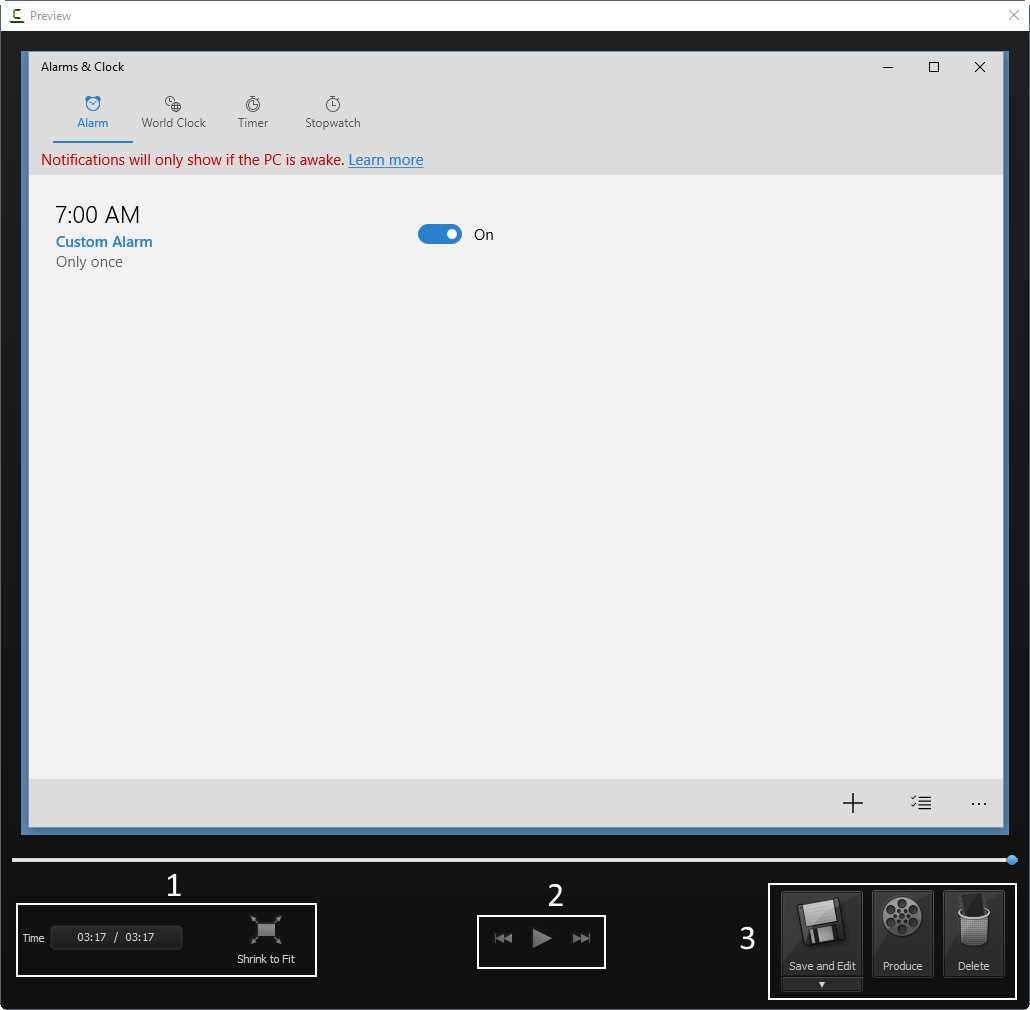
- The Preview window
Figure 27 displays the Preview window. There are three highlighted areas that point to a specific set of controls into the window:
- Recording time and Shrink to Fit button: Displays the total time for the recording and allows you to size the video to fit the entire window.
- Recording navigation controls: Allow you to play the recording entirely, skip to the beginning, or skip to end of the recording.
- Recording output actions: Allow you to choose what to do with the recording output. We can save the recording and editing in the Editor window, produce a video with a specific format directly, or delete the recorded material in order to perform a new job.
In this case, we will click Save and Edit to save the recording to the disk, and edit it in Camtasia Editor.
Saving the recording to disk
After you click Save and Edit, the Camtasia Recorder file-saving window will appear.
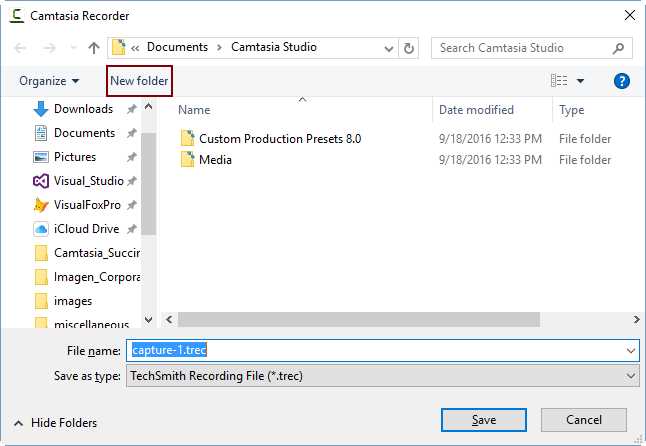
- Camtasia file-saving window
By default, Camtasia Screen Recorder uses the Documents\Camtasia Studio folder to save files. In order to keep files properly organized, we will create a separate folder for this exercise and call it Alarms_Tutorial. Then, we’re going to save the recorded material in a file named alarmstutorial.trec. Once this is done, the Screen Recorder will be closed and the recording file will be shown in the Camtasia Editor window.
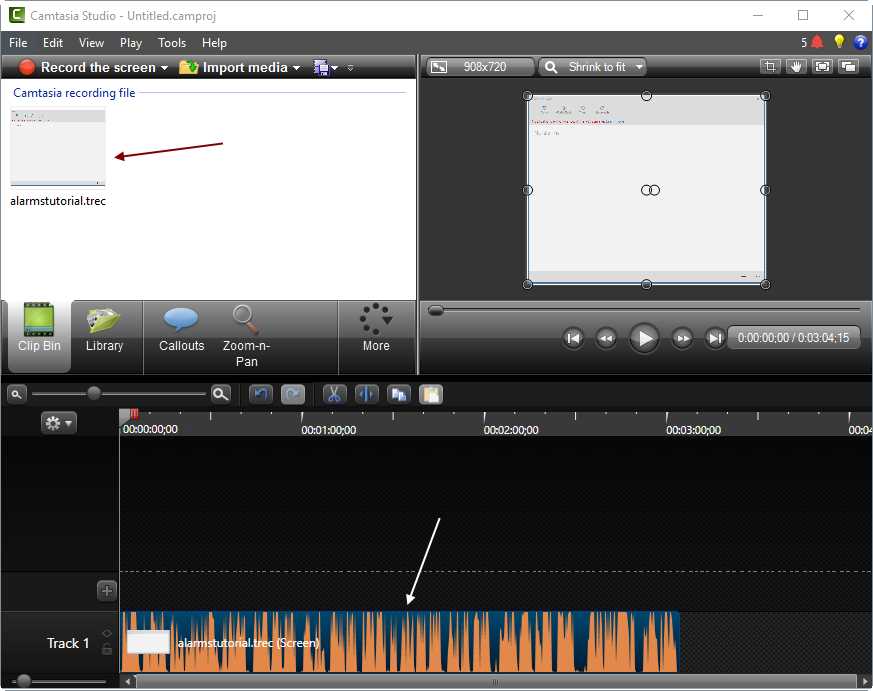
- Camtasia Editor window with the recording file in the Clip Bin and the Timeline
The previous figure displays the Camtasia Editor Window and the alarmstutorial.trec file in the Clip Bin and in the Timeline. Now, we’re ready to start working with Camtasia projects.
Chapter summary
This chapter covered the basics of screen recording. At the end, we created a small video tutorial on how to use the Alarms & Clock application. As recommended in Chapter 3, a script document was used as a plan for the video recording. We also placed the Alarms & Clock application at the center of the screen before recording. After that, we executed the Camtasia Screen Recorder by using the “Record the screen” button located in the program’s main window.
We set up the recording boundaries and audio options before starting the job, using the Select Area and Audio buttons of the Camtasia Screen Recorder. For this exercise, we used the Custom button of Select Area to indicate that the Alarms & Clock application’s window would be the recording boundaries to use. We also used the Audio button to suppress the recording of all sounds played by the system.
We used the F9 hot key to start screen recording. A banner window appeared after that, indicating that recording could be stopped by pressing the F10 hot key. This window also displayed a three-second countdown to indicate when the recording would begin.
Once the recording job was finished (by pressing the F10 hot key), a Preview window displayed the recording output. The recording job’s material was saved in a file named alarmstutorial.trec.
- 1800+ high-performance UI components.
- Includes popular controls such as Grid, Chart, Scheduler, and more.
- 24x5 unlimited support by developers.