
Camtasia Succinctly®

CHAPTER 9
Producing the Video
All the effort displayed in editing work would be useless without a final product: the video. Camtasia can produce a video in the MP4 format. It also allows us to share our video on YouTube, Vimeo, Google Drive, or TechSmith’s Screencast.com service.
Produce and share
To start video production, click Produce and share in the Clip Bin.
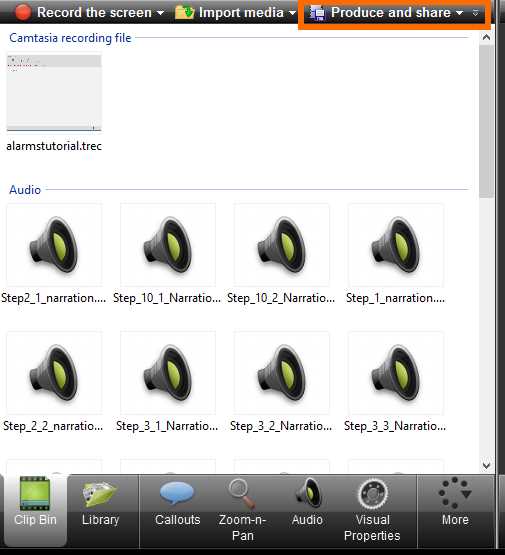
- The Produce and share button in the Clip Bin
The dialog box displayed in the following figure will appear.
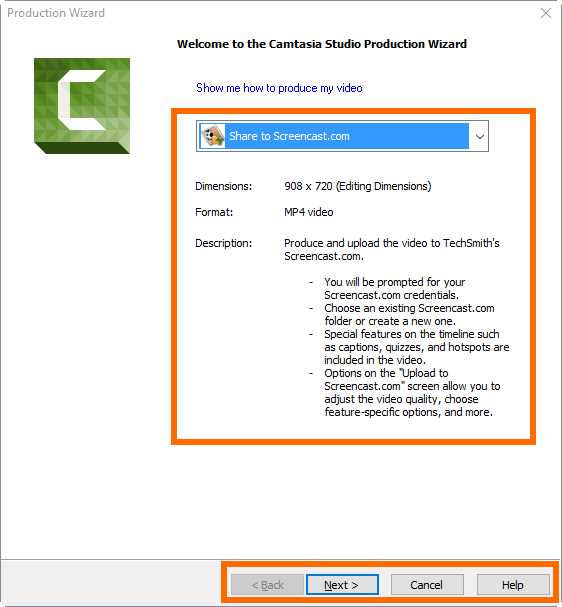
- Camtasia Studio Production Wizard
This is the Camtasia Studio Production Wizard, which will help us to create our video. As noticed in Figure 78, the combo box in the dialog allows us to select the type of video to be produced. Also, the video specifications for the option selected are displayed below the combo box.
If we wish to change the video type, we should click over the drop-down button of the combo box. A list of all the available options will be displayed.
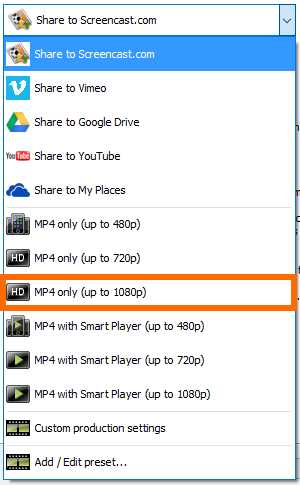
- Video format options
For the purposes of this exercise, we will select the HD MP4 only option. The Camtasia Studio Production Wizard looks like the following figure.
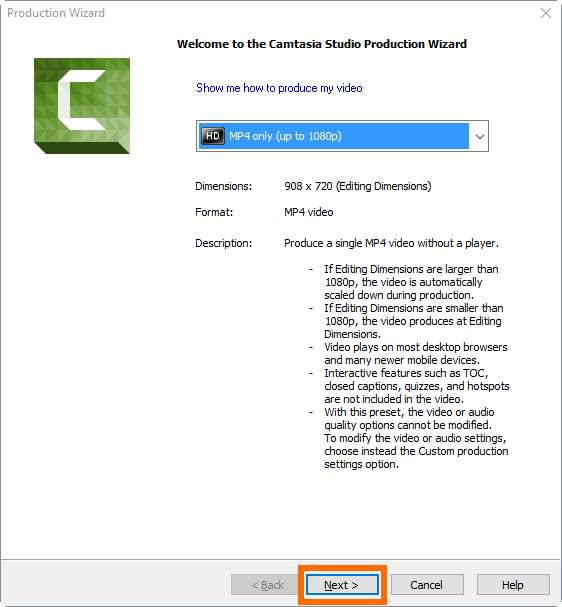
- “HD MP4 only” video format selected
Click Next to continue. Now, the following dialog box appears.
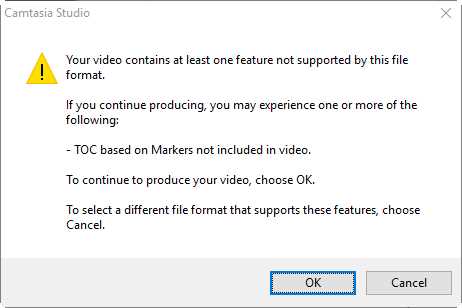
- Features compatibility warning dialog box
This is a features compatibility dialog box, which is displayed because we employed markers in order to add references for each step described in the video recording script. In this case, Camtasia tells us that those markers are not supported by the file format we’ve chosen. Since there’s no problem with this issue, we should click OK to continue.
Now, the Production Wizard will ask for the destination to save the video.
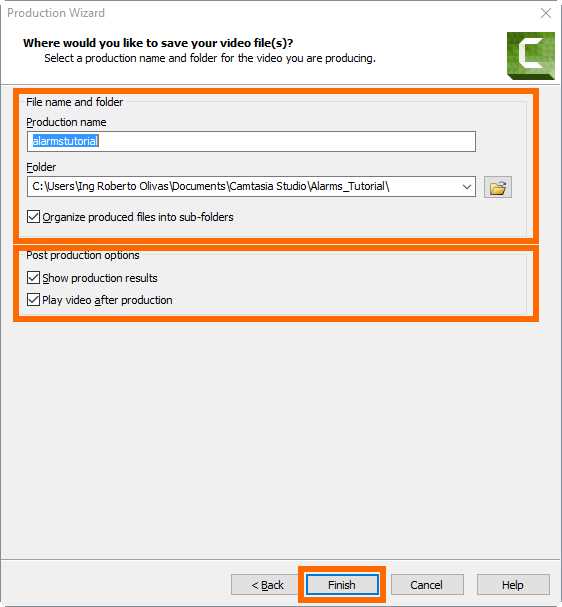
- Video destination dialog box
As you can see in Figure 82, the Production Wizard assigns the name of the project file to the video file. Also, it uses the project’s folder as the destination folder for the video. The Organize produced files into sub-folders option instructs the Production Wizard to create subfolders for the produced files. This is checked by default.
Finally, there are two postproduction options that are checked by default:
- Show production results: Tells the Production Wizard to show a dialog box with the results of the production process, after finishing video production.
- Play video after production: Tells the Production Wizard to launch the default video playing application, in order to play the produced video just after finishing video production.
Click Finish to start video production, and the following dialog box will appear.
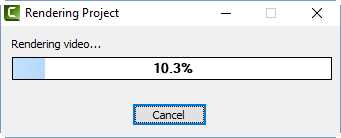
- Rendering Project dialog box
This dialog box will show the progress of the production process. When the process ends, the dialog box will be closed and the Production Results dialog box will be shown (if the “Show Production results” option was checked). Also, the video will be played using the default video player application (if the “Play video after production” option was checked).
If the Production Results dialog box is displayed, we should click Finish to close the dialog and finish the production process. The Production Results dialog box is shown in the following figure.
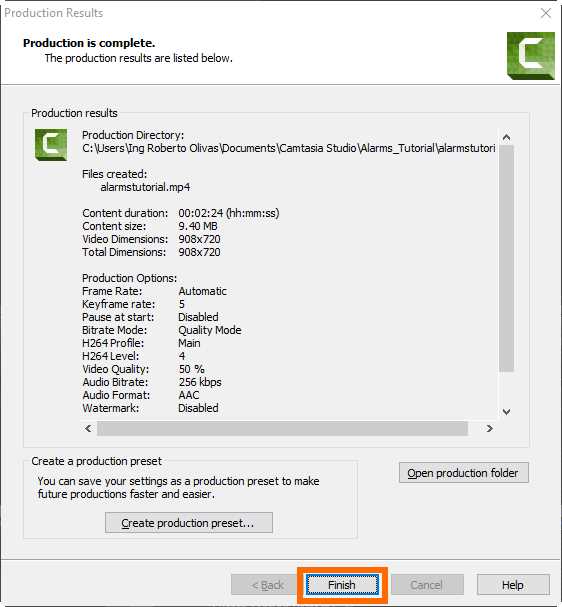
- The Production Results dialog box
Now we can go into the project’s folder in order to find the produced video. The video was saved in a subfolder named after the project file (without the .camproj extension).
Chapter summary
Camtasia can produce a video in the MP4 format, and allows us to share our video using YouTube, Vimeo, Google Drive, or TechSmith’s Screencast.com service. We should click on Produce and share in the Clip Bin in order to start video production. Then the Camtasia Studio Production Wizard is displayed to help us with video production. A combo box is displayed in order to select the type of video to be produced. For the purposes of this book, we selected the HD MP4 only video format.
A features compatibility dialog box was displayed because we employed markers in the project. These markers added references for each step described in the video recording script. In this case, Camtasia told us that those markers couldn’t be supported by the file format we chose. Since there was no problem with this issue, we clicked OK to continue the production process.
The Production Wizard assigned the name of the project file to the video file. Also, it used the project’s folder as the destination folder for the video. The check box option to Organize produced files into sub-folders instructed the Production Wizard to create subfolders for the produced files.
Finally, we kept the two postproduction options delivered by the Production Wizard: the Show production results option, in order to show a dialog box with the results of the process after finishing; and the Play video after production option, in order to play the produced video just after finishing production.
At the end, the produced video was saved in a subfolder named as the project file (without the .camproj extension).
- 1800+ high-performance UI components.
- Includes popular controls such as Grid, Chart, Scheduler, and more.
- 24x5 unlimited support by developers.