
Camtasia Succinctly®

CHAPTER 3
Beginning with Camtasia
Executing Camtasia
To start Camtasia, click the Camtasia icon on the computer’s desktop.
![]()
- Camtasia’s icon on computer desktop
If the trial version of Camtasia is installed, the following dialog box will appear.
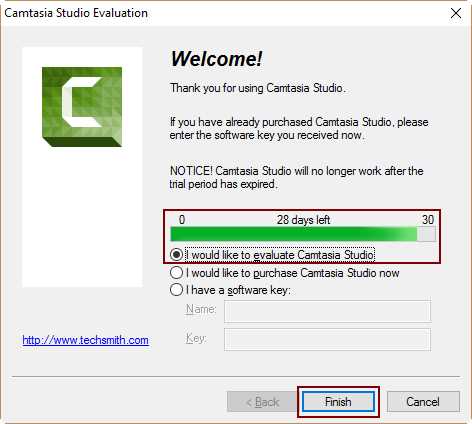
- Camtasia Evaluation dialog box
The dialog box shown in the Figure 10 tells the user that Camtasia is running in evaluation mode. In this case, the dialog box indicates that the program can be executed for 28 more days if the user doesn’t provide a valid license key.
To continue using the program, the user should buy the software and enter the proper license key by clicking on the I have a software key option, which is found in the dialog box. When the user does this, the text entries for Name and Key will be enabled to allow the proper data to be entered. Then, to activate the program, the user should click Finish at the bottom of the dialog box.
Note: There must be an Internet connection available in order to activate Camtasia after it’s purchased.
For the purposes of this book, the evaluation version of the program will be employed. So leave the I would like to evaluate Camtasia Studio option selected, and then click Finish to start working with Camtasia.
Now the program will show the following dialog box.
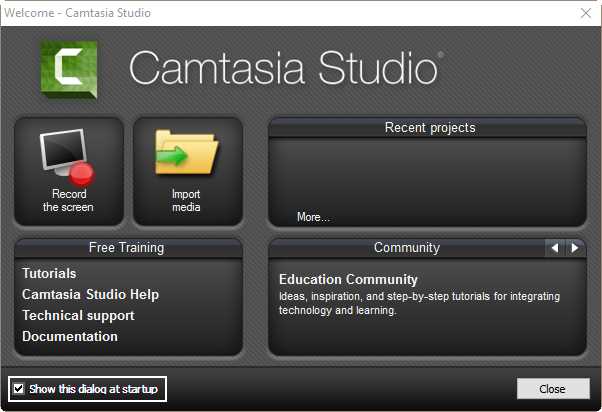
- Camtasia Welcome dialog box
The Camtasia Welcome dialog box (shown in Figure 11) provides the user with the tasks commonly performed in the program, a list of all recent projects created, and the most relevant sites from which to receive free training and ideas.
This dialog box can be a useful tool for the novice user, since it can start working with the software with a few clicks. Also, the user can access a lot of useful training content from one place.
If you don’t want to execute any task of the dialog box, click the Close button located at the bottom right, and the Camtasia user interface will be displayed.
To avoid the welcome dialog box being displayed every time Camtasia starts, you can uncheck the Show this dialog at startup check box located at the bottom left-hand side of the screen.
Camtasia user interface
Camtasia’s main window is the place where the user will do most of the work with the software, and this is displayed in the following figure.
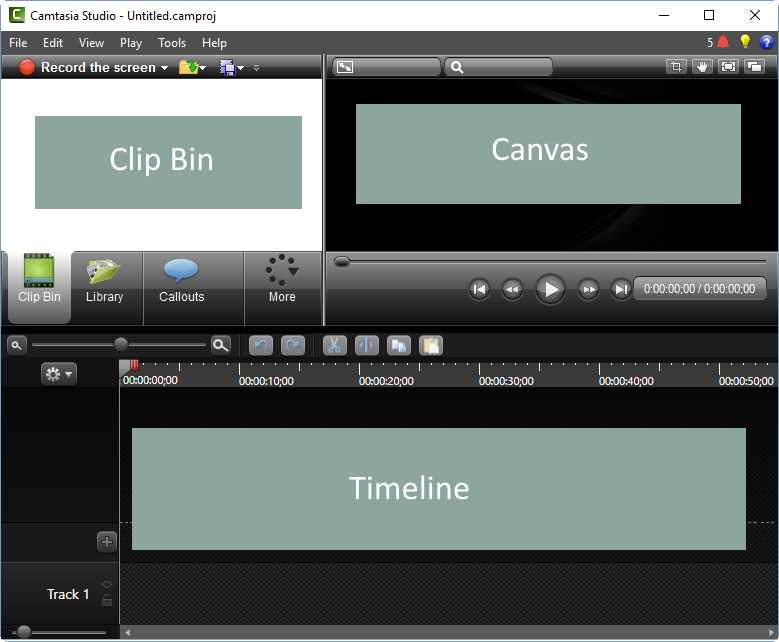
- Camtasia’s main window.
Camtasia’s main window is known as the Camtasia Editor interface. This interface has three main areas, as displayed in Figure 12:
- The Clip Bin: This is the place where the user will store all the material they plan to use in Camtasia projects. The Clip Bin has additional tabs, which give effects options to be added to videos.
- The Canvas: This is the visual preview for video editing. This is also the place where the user can interact with the additional effects and options provided by Camtasia, such as the Assets Library.
- The Timeline: This is the place where the sequence of all video clips, effects, and other media is arranged, in order to assemble and edit the video that will be produced. Each element in the timeline is found in an independent track, which can be edited separately.
Prerecording suggestions
Before starting with the first video recording, there are some recommendations that should be taken into account in order to create high-quality material that clearly communicates the topics discussed in it.
Clean up computer desktop
It is recommended that you entirely wipe out all the icons located on the desktop, in order to avoid distractions while making a recording. If the computer has two monitors, you can move all icons from the primary monitor to the secondary one. Another way to clean up the desktop is to select and drag all icons to the Recycle Bin. Then, when the recording is finished, you can restore them back to the desktop.
Change the desktop wallpaper
Another thing to be considered is the desktop wallpaper. A colorful wallpaper can distract you from focusing on your goals.

- A suggested desktop for video recording
Figure 13 shows the suggested desktop that should be on the monitor of a video-recording computer. As can be noted, there’s no colorful wallpaper and no icons at all.
Planning the video: write a script
An important issue to solve is planning the video recording. The best way to do this by is writing a script. A script can help the users to organize everything they want to include in the video, and makes sure that the language employed in narrations is exact and concise. The following table shows a suggested structure for a script document, made by the people of TechSmith.
Table 2: Video script suggested structure.
[Script title] [Brief description about the things you need to do in order to prepare recording scenario.]
|
As noted in the previous table, the script document should start with a title, which will define the reason why the video is going to be recorded. Then, there should be a paragraph describing the recording scenario and all the things that must be done to prepare it. Finally, it is suggested you create a table with all the steps to perform during video recording, numbered. The table should contain three columns:
- Steps: A sequential number starting with 1, which indicates the order of every action in the video.
- Action on Screen: A description of what should be happening on the screen when the video is viewed.
- Narration: A paragraph describing what the narrator should say, to be heard when the video is viewed.
It’s suggested you share the script with all members of the team in charge of video recording. A practice run-through video recording is also highly recommended.
Note: A complete script document will be discussed in the next chapter, which explains how to make a screen recording.
Look for a high quality audio
In order to get better-sounding audio, the use of a USB microphone is suggested. It could be a desktop or headset microphone, but USB is always the way to go.
Even though most USB microphones allow you to configure noise reduction, be aware of all surroundings. To obtain the best audio possible, stay clear of noisy heat fans, doors opening and closing, and another disturbing noises.
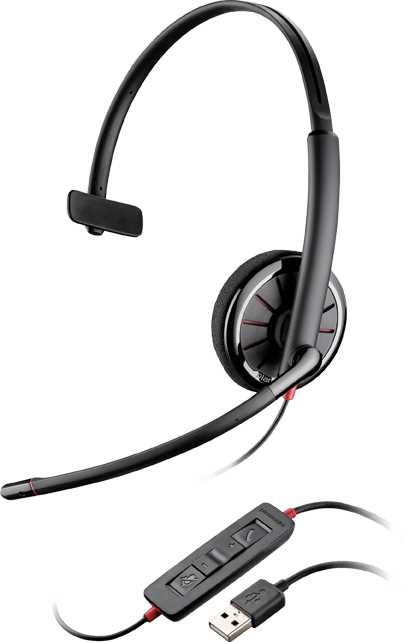
- A headset USB microphone
Chapter summary
This chapter discussed how to start working with Camtasia. The user should click the Camtasia icon on the computer’s desktop to run the software.
When the trial version of Camtasia is being used, a dialog is shown before the software starts. This dialog tells the user how many days are left before the program becomes inactive. The dialog box allows you to enter a valid license key in order to activate the software after it’s purchased.
Every time Camtasia starts, the Welcome dialog box is shown. This dialog box provides the user with the tasks commonly performed in the program, and can be useful for a novice user. To disable the Welcome dialog box, uncheck the Show this dialog at startup option.
Camtasia’s main window is where the user will work most with the software. This window contains three main areas: the Clip Bin, the Canvas, and the Timeline.
Before starting with the first video recording, there are four basic suggestions to follow in order to create a high-quality video. The first one is removing all the icons from the computer desktop. The second consists of placing a plain wallpaper on the desktop in order to avoid distractions. The third, and maybe the most important thing, is writing a recording plan as a script document. Finally, to get the best audio possible, employ a USB microphone and stay clear of noisy places.
- 1800+ high-performance UI components.
- Includes popular controls such as Grid, Chart, Scheduler, and more.
- 24x5 unlimited support by developers.