
C# Features Succinctly®

CHAPTER 5
.NET Productivity Features in Visual Studio
There are a variety of nice productivity features in Visual Studio that can enhance your workflow and make your day-to-day tasks easier. Currently, I am using Visual Studio 2019 version 16.7 preview 5.0, but some of these features are also available in the current release of Visual Studio 2019.
Developer PowerShell inside Visual Studio
Inside Visual Studio, if you press Ctrl+`, you will open the Visual Studio terminal.
Tip: The ` or backtick is located on the same key as ~ on the keyboard. It is also the same keystroke as used in Visual Studio Code. This makes Ctrl+` a very convenient, one-handed keystroke used to open the terminal inside Visual Studio.
Launching the terminal opens the integrated Developer PowerShell instance, as seen in Figure 12.
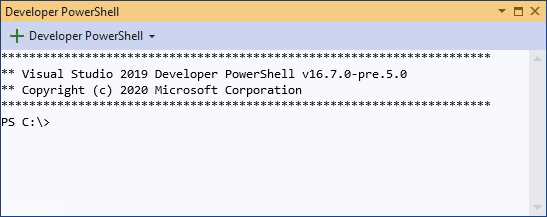
Figure 12: Developer PowerShell
If you are not comfortable using PowerShell, you can switch to using the Developer Command Prompt, as seen in Figure 13.
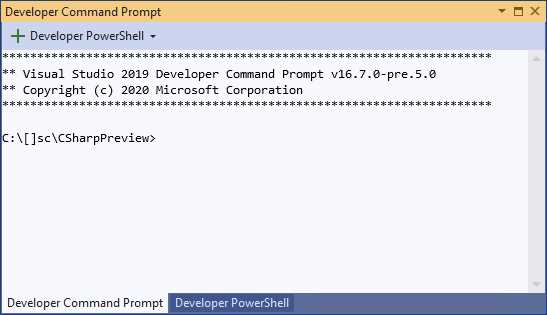
Figure 13: Developer Command Prompt
You can easily select whichever terminal you want from the drop-down, as seen in Figure 14.
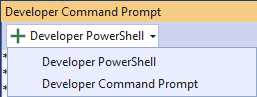
Figure 14: Selecting different terminals
You no longer need to leave Visual Studio to use the terminal window. This is definitely a time-saver.
The Visual Studio Git Window
Visual Studio will now include a new Git window. This is currently available in the Preview edition of Visual Studio 2019.
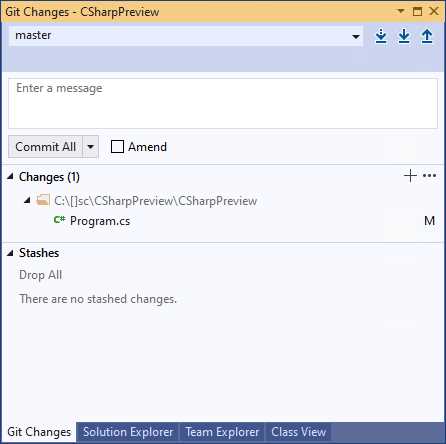
Figure 15: The new Git window
As seen in Figure 15, the new Git window is laid out rather nicely, and contains everything you would expect to see.
You can click the branch (currently set to master in Figure 16) and create a new branch.
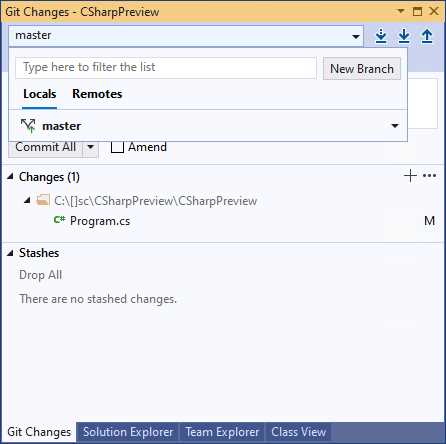
Figure 16: Managing branches
This will display the window in Figure 17. Here you can specify a branch name and select the branch you want to base your new branch on.
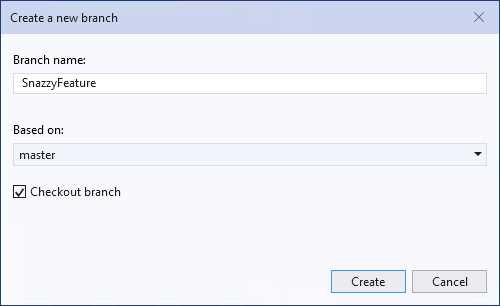
Figure 17: Creating a new branch
Once the new branch is created, it is available under the branches drop-down (Figure 18).
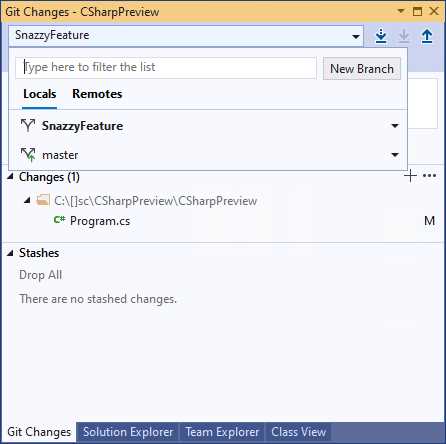
Figure 18: Branches in the Git window
Managing your branch is also easily done from the drop-down next to the branch name, as seen in Figure 19.
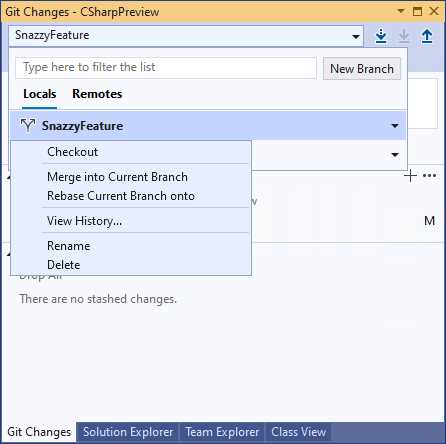
Figure 19: Managing your branch
It is here that you can checkout, merge, rebase, rename, delete, or view the branch history.
Double-clicking a file will show you the code changes in the diff view right inside your editor, as seen in Figure 20.
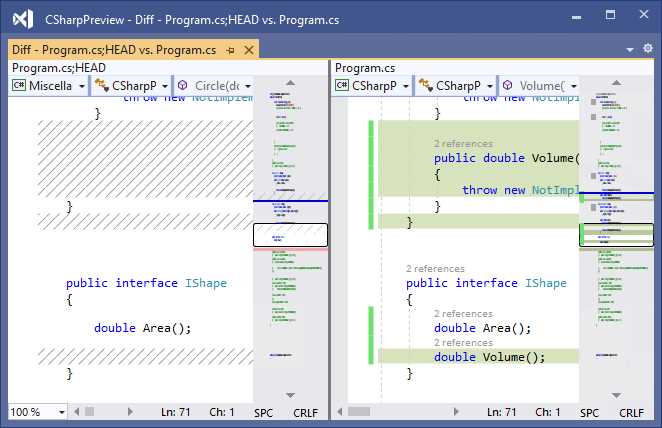
Figure 20: View code changes
The Git window also allows you to do the usual tasks such as stashing, staging, undoing changes, fetching, pulling, pushing, and syncing. According to Mika Dumont, a Program Manager on .NET and Visual Studio, the purpose of the Git window was to streamline the Git experience as the Team Explorer user interface was becoming somewhat busy.
Drag and drop projects to add a reference
In Figure 21, you will notice that I have two projects in the solution. These are:
- CSharpPreview
- CSharpPreview.Core
If I want to add a reference to CSharpPreview.Core from my CSharpPreview project, I can simply click and drag the CSharpPreview.Core project onto the CSharpPreview project.
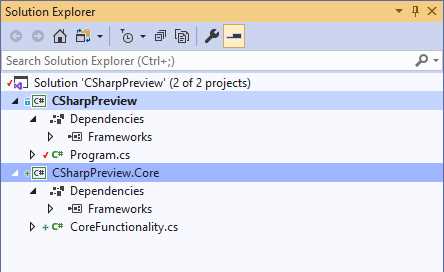
Figure 21: Adding a project reference
A reference to CSharpPreview.Core will be added, as seen in Figure 22.
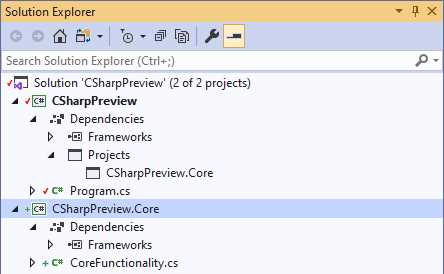
Figure 22: Project reference added
There’s no more right-clicking and adding a reference. You can also drag a file from File Explorer to the Solution Explorer and drop it inside a project. The file will then get copied to your source. Nice!
Searching Visual Studio
Another nice feature in Visual Studio is Ctrl+Q, a great keyboard shortcut that gives the Search text box in Visual Studio focus, allowing you to start typing immediately (Figure 23).
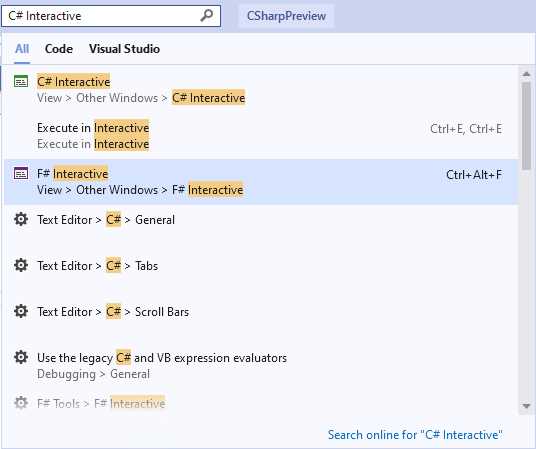
Figure 23: Search Visual Studio
You can further filter your search results by only viewing results in Visual Studio or results in your code (Figure 24).
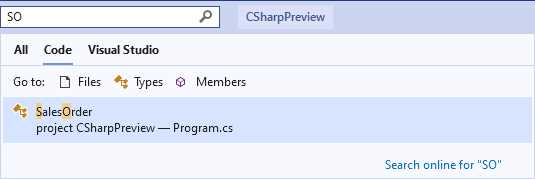
Figure 24: Searching code via camel case
Interestingly enough, you can search your code in Visual Studio by only typing in camel case, as seen in Figure 24. This is great, especially if someone in the team decided to create a SalesOrderFunctionalPreProcessor class.
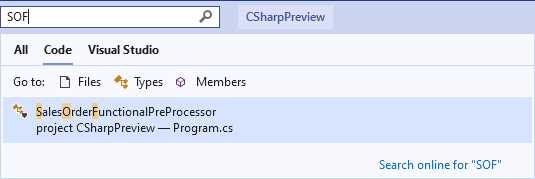
Figure 25: Partial camel case character search
Being able to type in SOF in this instance (Figure 25), makes searching code quick and easy.
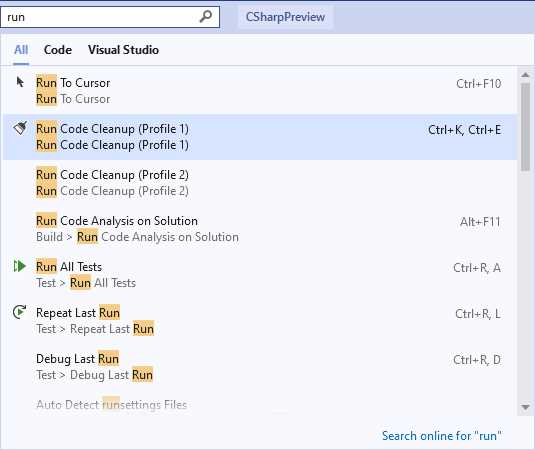
Figure 26: Search commands to run
The search also allows you to run commands (Figure 26). This enables you to run tests, for example, and includes the keyboard shortcut, which is super helpful.
Code analyzers
Code analyzers ensure that your code is more readable, and they will give you suggestions as you go along. Consider Figure 27.
Figure 27: Lightbulb code suggestion
The lightbulb will suggest improvements to your code as you write it. Some of these suggestions can, however, be easily missed. Consider Figure 28.

Figure 28: Code fix suggestion
If you look carefully at intFactors.Count – 1, you will notice the ellipsis (three dots) below the “in” portion of the variable intFactors.
If you click on the ellipsis, you will see the code fix suggestion (Figure 29). In this example, the suggestion is to use the index operator. Have a look at Code Listing 41 for more on the index operator.
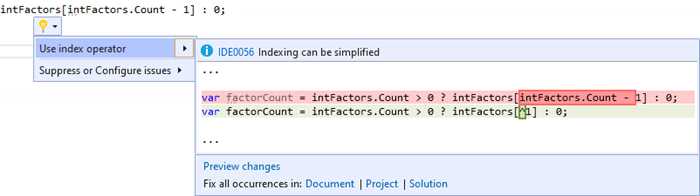
Figure 29: Use index operator suggestion
You can also change the severity of this code fix suggestion by changing the severity from the same place you applied the code fix (Figure 30).
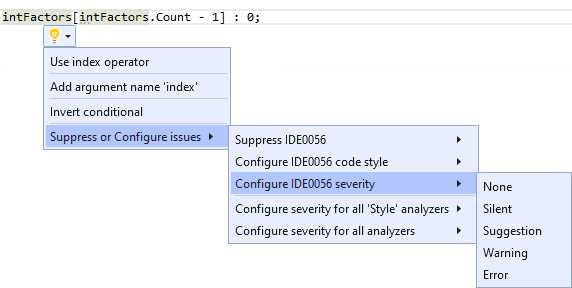
Figure 30: Configure severity
Changing this code fix to a warning will give you a squiggly line under the code being analyzed, as seen in Figure 31.
![]()
Figure 31: Severity promoted to warning
Code analyzers are a fantastic feature of Visual Studio, and they help developers and teams maintain good coding practices.
File header support in .editorconfig
The .editorconfig file is a universal way to enforce a specific code style or code quality options across your team (Figure 32).
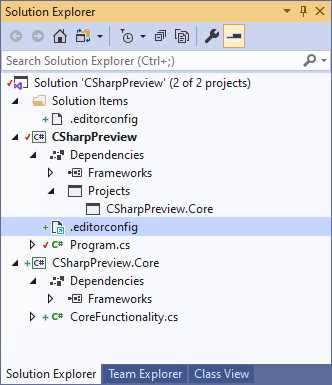
Figure 32: The .editorconfig file
This can be checked into source control and can travel with your solution to new team members.
If you open the .editorconfig file (Figure 33), you will notice the warning we added for the index operator in Figure 30. The .editorconfig now includes file header support. I can now add file headers to files in my solutions using my .editorconfig file. To do this, add the text you want to the file_header_template as seen in Figure 33, and save your .editorconfig.
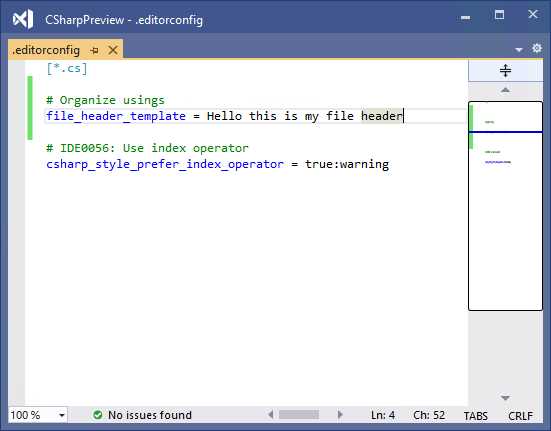
Figure 33: Modifying the .editorconfig file
In a code file, place your cursor at the very top before the first using statement, and click the lightbulb that is displayed (Figure 34).
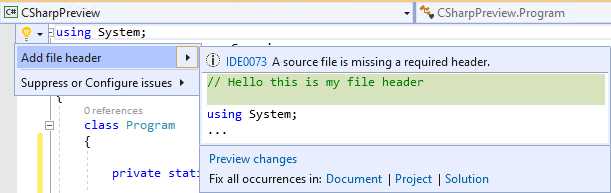
Figure 34: Add file header
You are now able to include this file header in your code file. You can also choose to add it to the document, project, or solution.
C# language resources
Microsoft has made many resources available to developers. There is a rich body of code online, as well as various communities that allow developers to find help if they need it. Here are a few resources you might find useful.
C# language reference
This Introduction document is probably the one you will be reading the most.
C# language proposals
Language proposals should be seen as living documents, and would be the place to go to see what the current thinking is surrounding a specific language feature.
C# language design meetings
The language design meetings (also known as LDM) is where the C# team investigates, designs, and decides on features being added to the C# language. You can read the meeting notes here.
C# language design
This is the official repo for the C# language.
- 1800+ high-performance UI components.
- Includes popular controls such as Grid, Chart, Scheduler, and more.
- 24x5 unlimited support by developers.