
Blazor WebAssembly Succinctly®

CHAPTER 7
Creating New Tickets
In this chapter, we will create a page that will contain a form to create new help desk tickets.
In the Pages folder of the Client project, open the index.razor page and add the following under the @page directive.
Code Listing 41: Using and Inject Code
@using Microsoft.AspNetCore.Components.Authorization; @using SyncfusionHelpDeskClient.Shared @inject HttpClient Http @inject IHttpClientFactory ClientFactory |
Blazor Toast component
We will use the Syncfusion Blazor Toast component to display a brief pop-up message when a help desk ticket is submitted.
Add the following code markup under the existing closing AuthorizeView tag.
Code Listing 42: Toast Control
<SfToast ID="toast_default" Height="50" @ref="ToastObj" Title="Help Desk Ticket" Content="@ToastContent"> <ToastPosition X="Right"></ToastPosition> </SfToast> |
Next, add the following to the @code section.
Code Listing 43: Toast Properties
SfToast? ToastObj; private string ToastContent { get; set; } = ""; |
The ToastObj will provide programmatic access to the control, for example, to open it and close it. The ToastContent property will allow us to set the text that is displayed in the control.
Forms and validation
Blazor provides a method for you to create forms with validation to collect data.
Forms
Blazor provides an EditForm control that allows us to validate a form using data annotations. These data annotations are defined in a class that is specified in the Model property of the EditForm control.
Validation
The EditForm control defines a method to handle OnValidSubmit. This method is triggered only when the data in the form satisfies all the validation rules defined by the data annotations.
Any validation errors are displayed using the DataAnnotationsValidator and/or the ValidationSummary control.
HelpDeskTicket Class
To support the forms and validation that we will implement, add a new class called HelpDeskTicket.cs in the Shared project.
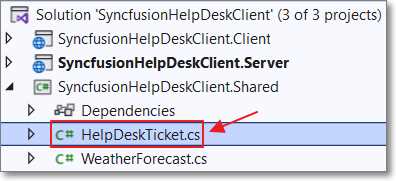
Figure 56: HelpDeskTicket.cs
Because this class is in the Shared project, it will be usable by both the Server and Client projects.
Use the following code for the class.
Code Listing 44: HelpDeskTicket.cs
#nullable disable using System; using System.Collections.Generic; using System.ComponentModel.DataAnnotations; namespace SyncfusionHelpDeskClient.Shared { public class HelpDeskTicket { public int Id { get; set; } [Required] public string TicketStatus { get; set; } [Required] public DateTime TicketDate { get; set; } [Required] [StringLength(50, MinimumLength = 2, ErrorMessage = "Description must be a minimum of 2 and maximum of 50 characters.")] public string TicketDescription { get; set; } [Required] [EmailAddress] public string TicketRequesterEmail { get; set; } public string TicketGuid { get; set; } public List<HelpDeskTicketDetail> HelpDeskTicketDetails { get; set; } } public class HelpDeskTicketDetail { public int Id { get; set; } public int HelpDeskTicketId { get; set; } public DateTime TicketDetailDate { get; set; } public string TicketDescription { get; set; } } } |
Syncfusion Blazor controls
We will also employ the following Syncfusion controls in our form:
- TextBox: Allows us to gather data from the user and later display existing data.
- DatePicker: Allows the user to enter a date value and later display an existing date value.
- DropDownList: Presents a list of predefined values (in our example, a list of ticket status values) that allows the user to choose a single value. Later we will use this control to also display an existing selected value.
The DropDownList control requires a data collection for the display options. To enable this, in the Shared project, add the following class.
Code Listing 45: HelpDeskStatus.cs
#nullable disable using System; using System.Collections.Generic; using System.Linq; using System.Threading.Tasks; namespace SyncfusionHelpDeskClient.Shared { public class HelpDeskStatus { public string ID { get; set; } public string Text { get; set; } public static List<HelpDeskStatus> Statuses = new List<HelpDeskStatus>() { new HelpDeskStatus(){ ID= "New", Text= "New" }, new HelpDeskStatus(){ ID= "Open", Text= "Open" }, new HelpDeskStatus(){ ID= "Urgent", Text= "Urgent" }, new HelpDeskStatus(){ ID= "Closed", Text= "Closed" }, }; } } |
Note: You can get more information on the Syncfusion Blazor controls on their website.
New ticket form
We will now add the code to display the form. In the Client project, add the following markup to the index.razor page.
Code Listing 46: Help Desk Form
<h3>New Help Desk Ticket</h3> <br /> <EditForm ID="new-ticket-form" Model="@objHelpDeskTicket" OnValidSubmit="@HandleValidSubmit"> <DataAnnotationsValidator></DataAnnotationsValidator> <div> <SfDropDownList TItem="HelpDeskStatus" TValue="string" PopupHeight="230px" Placeholder="Ticket Status" DataSource="@HelpDeskStatus.Statuses" FloatLabelType="@FloatLabelType.Always" @bind-Value="@objHelpDeskTicket.TicketStatus"> <DropDownListFieldSettings Text="Text" Value="ID"> </DropDownListFieldSettings> </SfDropDownList> </div> <div> <SfDatePicker ID="TicketDate" Placeholder="Ticket Date" FloatLabelType="@FloatLabelType.Always" @bind-Value="@objHelpDeskTicket.TicketDate" Max="DateTime.Now" ShowClearButton="false"></SfDatePicker> <ValidationMessage For="@(() => objHelpDeskTicket.TicketDate)" /> </div> <div> <SfTextBox Placeholder="Ticket Description" FloatLabelType="@FloatLabelType.Always" @bind-Value="@objHelpDeskTicket.TicketDescription"> </SfTextBox> <ValidationMessage For="@(() => objHelpDeskTicket.TicketDescription)" /> </div> <div> <SfTextBox Placeholder="Requester Email" FloatLabelType="@FloatLabelType.Always" @bind-Value="@objHelpDeskTicket.TicketRequesterEmail"> </SfTextBox> <ValidationMessage For="@(() => objHelpDeskTicket.TicketRequesterEmail)" /> </div> <br /><br /> <div class="e-footer-content"> <div class="button-container"> <button type="submit" class="e-btn e-normal e-primary">Save</button> </div> </div> </EditForm> |
Add the following to the @code section.
Code Listing 47: HelpDeskTicket Object
// HttpClient to allow anonymous http calls. HttpClient? NoAuthenticationClient; // Global property for the Help Desk Ticket. HelpDeskTicket objHelpDeskTicket = new HelpDeskTicket() { TicketStatus = "New", TicketDate = DateTime.Now }; |
Finally, add the following code to insert the data into the database. This will call the Post method (because it is using PostAsJsonAsync) in the SyncfusionHelpDeskController (in the Server project) when the form has successfully passed validation.
Code Listing 48: HandleValidSubmit
protected override void OnInitialized() { // Create an HttpClient to use for non-authenticated calls. NoAuthenticationClient = ClientFactory.CreateClient( "ServerAPI.NoAuthenticationClient"); } public async Task HandleValidSubmit(EditContext context) { try { // Save the new Help Desk Ticket. // Create a new GUID for this Help Desk Ticket. objHelpDeskTicket.TicketGuid = System.Guid.NewGuid().ToString(); if (NoAuthenticationClient != null) { await NoAuthenticationClient.PostAsJsonAsync( "SyncfusionHelpDesk", objHelpDeskTicket); } // Clear the form. objHelpDeskTicket = new HelpDeskTicket() { TicketStatus = "New", TicketDate = DateTime.Now }; // Show the Toast. ToastContent = "Saved!"; StateHasChanged(); if (ToastObj != null) { await this.ToastObj.ShowAsync(); } } catch (Exception ex) { ToastContent = ex.Message; StateHasChanged(); if (ToastObj != null) { await this.ToastObj.ShowAsync(); } } } |
Test the form
We can now run the project and enter new help desk tickets.
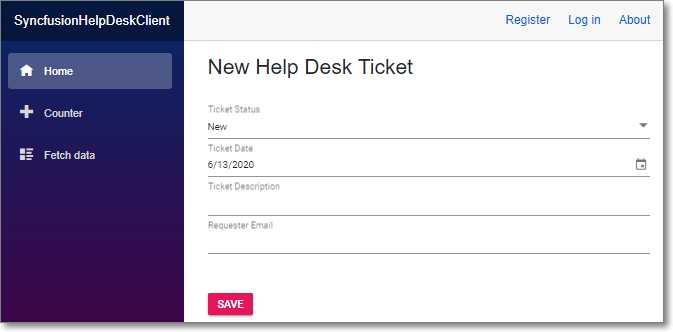
Figure 57: New Help Desk Ticket Form
The user is presented with a new help desk ticket form.
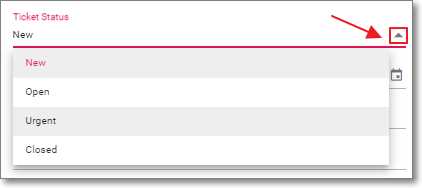
Figure 58: Select Ticket Status
The user can select a ticket status using the DropDownList control.
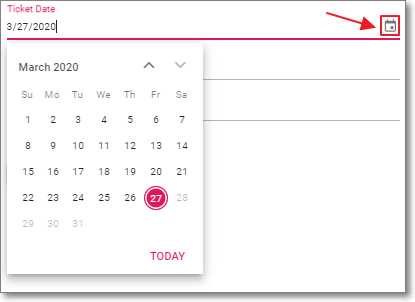
Figure 59: Select Ticket Date
The user can select a ticket date using the DatePicker control.
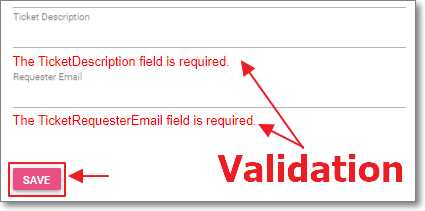
Figure 60: Validation Errors
If the user tries to save an incomplete record, they will see validation errors.
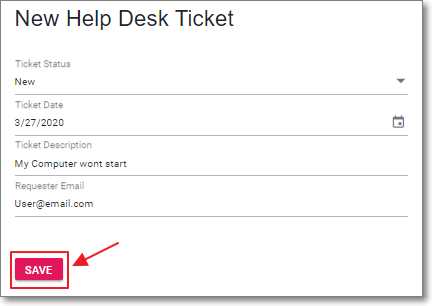
Figure 61: Save Ticket
With a properly completed form, the user can click Save to save the data.
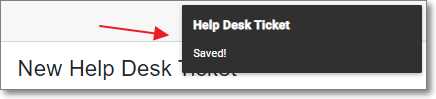
Figure 62: Toast Confirmation
The user will see a brief confirmation message by the Toast control.
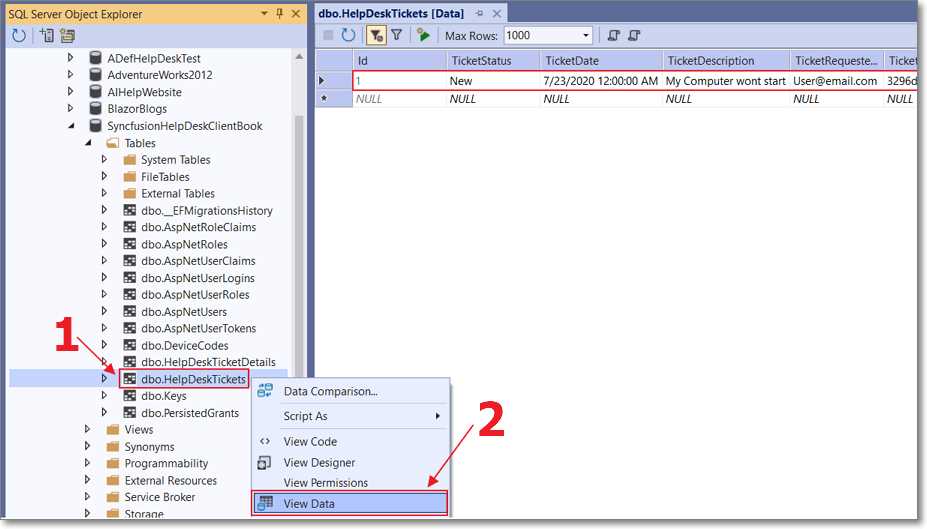
Figure 63: View Data in the Database
If we look in the database, we will see the data has been added.
Enter data for at least six help desk tickets so that you will have enough data to demonstrate paging in the Syncfusion DataGrid covered in the following chapter.
- 80+ high performance Blazor components.
- Lightweight and user friendly.
- Stunning Built-in themes with customization.