
Blazor WebAssembly Succinctly®

CHAPTER 3
Create the Help Desk Application
In this chapter, we will cover the steps to create the Help Desk application.

Figure 20: The Help Desk Application in Action
The source code for the completed application is available on GitHub.
Install SQL Server
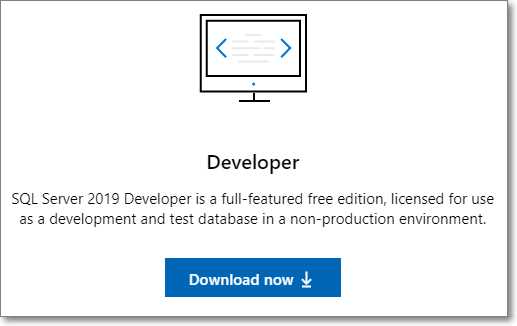
Figure 21: Installing SQL Server
The application requires a database to store the data. Download and install the free SQL Server 2019 Developer edition here, or use the full SQL Server, if you have access to it.
Install .NET Core and Visual Studio
To create the application, these steps are required (if you do not already have the following software installed):
- Install the .NET Core 6.0 SDK.
- Install Visual Studio 2022 version 17.2 (or later) with the ASP.NET and web development workload here.
Note: The requirements for creating applications using Blazor are constantly evolving. See the latest requirements.
Note: If you install Visual Studio 2022 and select the ASP.NET or .NET workload during installation, the .NET Core SDK and runtime will be installed for you. Learn more.
Create the project
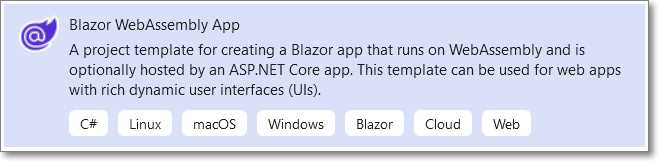
Figure 22: Blazor App
Open Visual Studio and select Create a New Project > Blazor WebAssembly App > Next.
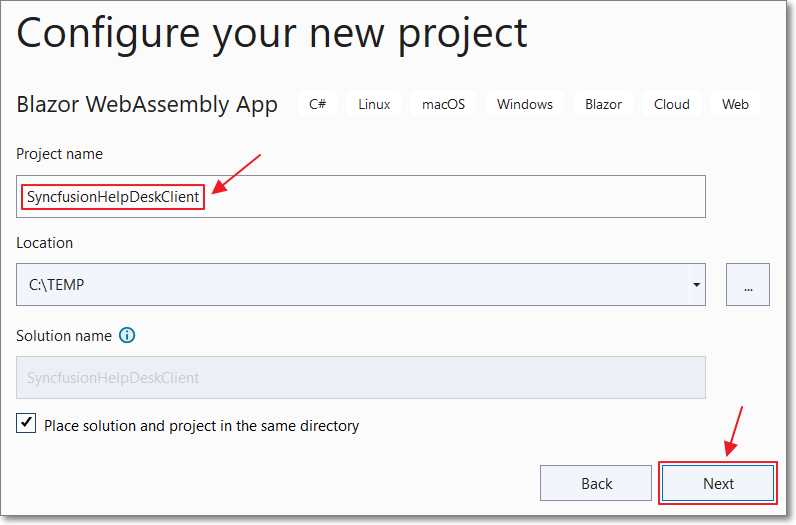
Figure 23: Create New Project
Enter SyncfusionHelpDeskClient for Project name and click Next.
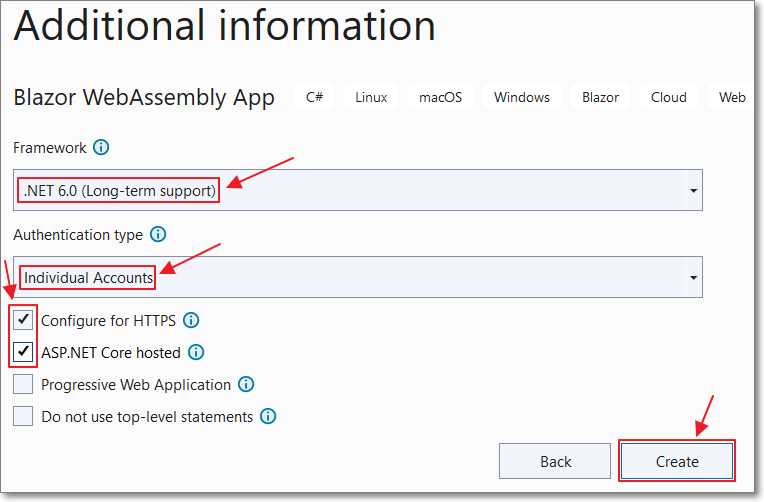
Figure 24: Additional Information
On the Additional information dialog, select .NET 6.0 (Long-term support) for Framework.
For the Authentication type, select Individual Accounts.
Select Configure for HTTPS and ASP.NET Core hosted.
Click Create.
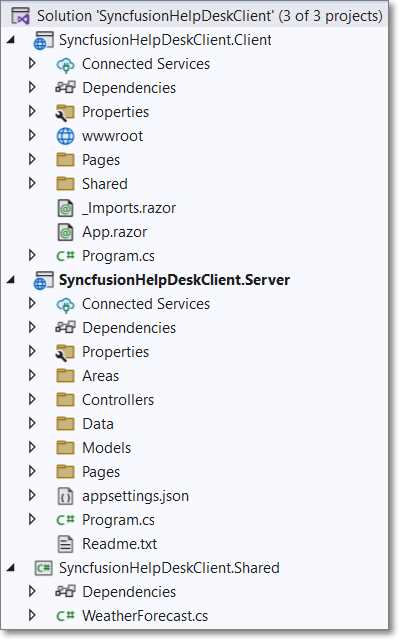
Figure 25: In Visual Studio
The new project will open in Visual Studio.
Create the database
From the toolbar, click View and select the SQL Server Object Explorer.
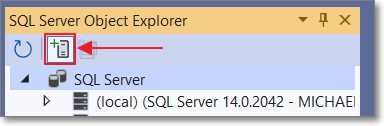
Figure 26: Add SQL Server
Click Add SQL Server to add a connection to your database server, if you don’t already have it in the SQL Server list.
Note: For this example, we do not want to use the localdb connection (for SQL Express) that you may see in the list.
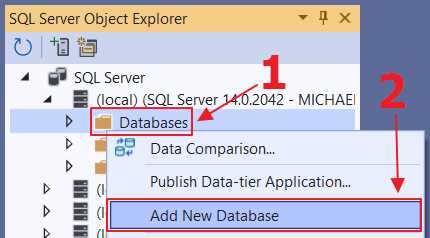
Figure 27: Add New Database
Expand the tree node for your SQL Server, then right-click Databases and select Add New Database. Name the database SyncfusionHelpDeskClientBook.
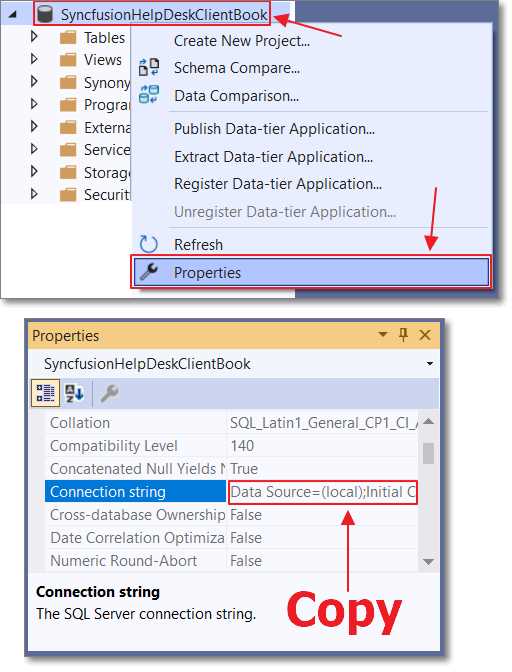
Figure 28: Copy Connection String
After the database has been created, right-click it and select Properties. In the Properties window, copy the connection string.
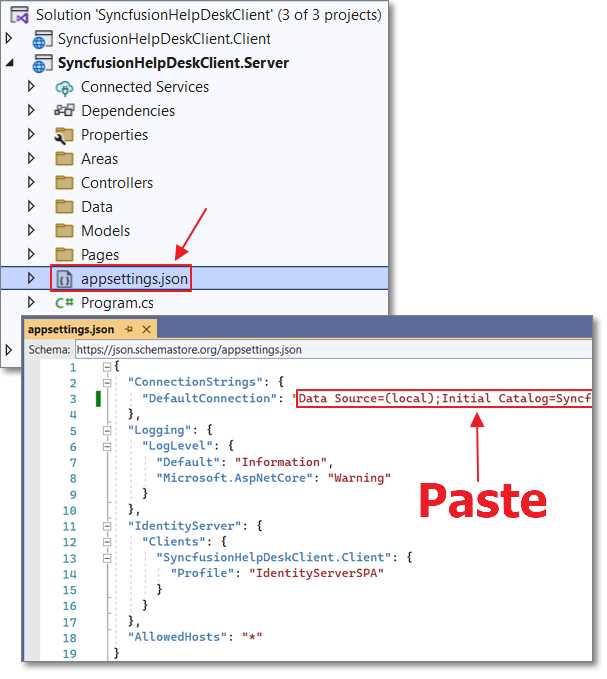
Figure 29: Paste Connection String
Open the appsettings.json file in the Server project and paste the connection string in the DefaultConnection property.
Save and close the file.
Blazor WebAssembly security
The default code the Visual Studio wizard creates will allow us to create new users. However, we want some users to be administrators. To do this, we must enable role management.
Open the Program.cs file in the Server project and remove the following code.
Code Listing 9: Original Identity Code
builder.Services.AddDefaultIdentity<ApplicationUser>( options => options.SignIn.RequireConfirmedAccount = true) .AddEntityFrameworkStores<ApplicationDbContext>(); builder.Services.AddIdentityServer() .AddApiAuthorization<ApplicationUser, ApplicationDbContext>(); |
Replace the code with the following code to remove the requirement to confirm new user accounts and to enable role management.
Code Listing 10: Updated Identity Code
builder.Services.AddDefaultIdentity<ApplicationUser>() .AddRoles<Microsoft.AspNetCore.Identity.IdentityRole>() // Add roles .AddEntityFrameworkStores<ApplicationDbContext>(); // From: https://github.com/dotnet/AspNetCore.Docs/issues/17649 // Configure identity server to put the role claim into the id token // and the access token and prevent the default mapping for roles // in the JwtSecurityTokenHandler. builder.Services.AddIdentityServer() .AddApiAuthorization<ApplicationUser, ApplicationDbContext>(options => { options.IdentityResources["openid"].UserClaims.Add("role"); options.ApiResources.Single().UserClaims.Add("role"); }); // Need to do this as it maps "role" to ClaimTypes.Role and causes issues. System.IdentityModel.Tokens.Jwt.JwtSecurityTokenHandler .DefaultInboundClaimTypeMap.Remove("role"); |
In Visual Studio, press F5 to run the application and open it in your web browser.
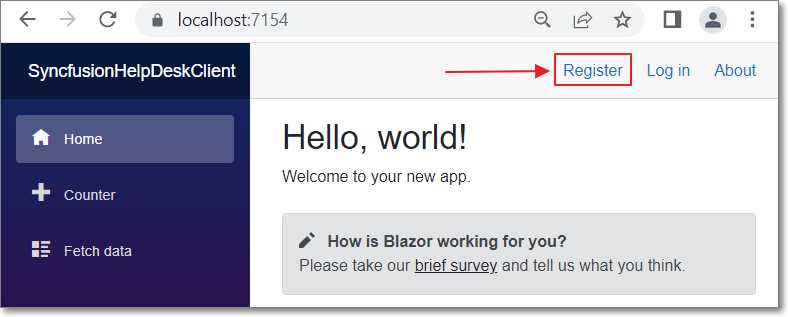
Figure 30: Register User
Click Register and create a user with the email address Test@Email.
You will then see the following page.
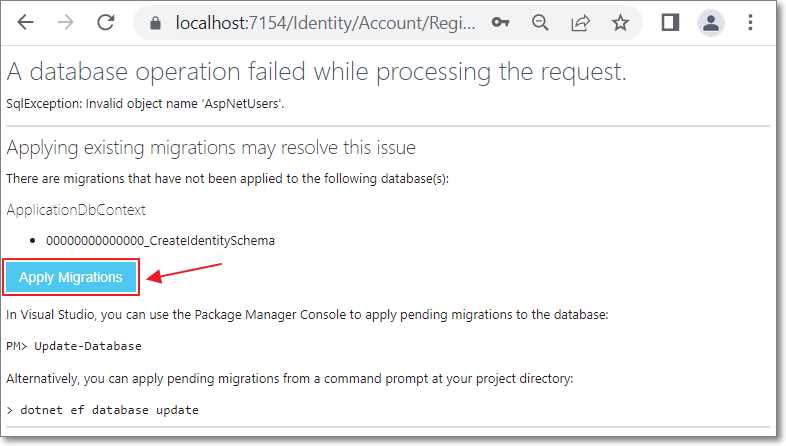
Figure 31: Apply Migrations
Click Apply Migrations. After a few moments, you will see a prompt to refresh the page. Refresh the page in your web browser.
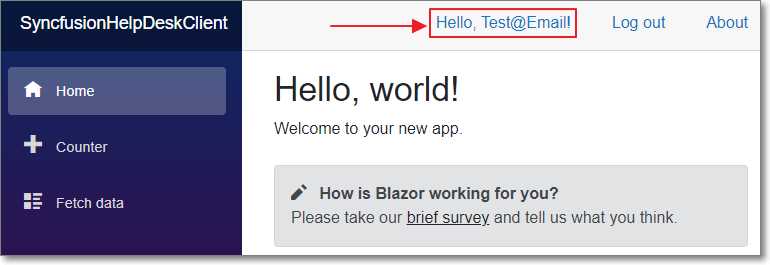
Figure 32: Logged In
The required tables will be created in the database, and the application will display the home page and indicate that the Test@Email account is logged in.
Close the web browser to stop the application and return to Visual Studio.
Create an administrator
We will now create code that will programmatically create an administrator role and add the Administrator@Email account to the administrator role.
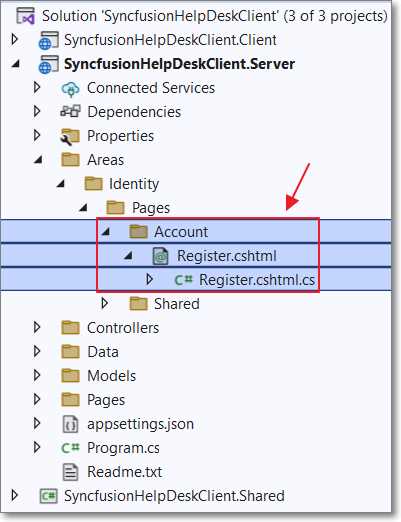
Figure 33: Add Custom Register Page
To do this, we need to override the registration page with a custom registration page.
In the Server project, create an Account folder in the Areas/Identity/Pages folder. Create a Register.cshtml page and a Register.cshtml.cs page using the following code.
Code Listing 11: Register.cshtml
@page @model SyncfusionHelpDeskClient.Server.Areas.Identity.Pages.RegisterModel @{ ViewData["Title"] = "Register"; } <h1>@ViewData["Title"]</h1> <div class="row"> <div class="col-md-4"> <form asp-route-returnUrl="@Model.ReturnUrl" method="post"> <h4>Create a new account.</h4> <hr /> <div asp-validation-summary="All" class="text-danger"></div> <div class="form-group"> <label asp-for="Input.Email"></label> <input asp-for="Input.Email" class="form-control" /> <span asp-validation-for="Input.Email" class="text-danger"></span> </div> <div class="form-group"> <label asp-for="Input.Password"></label> <input asp-for="Input.Password" class="form-control" /> <span asp-validation-for="Input.Password" class="text-danger"></span> </div> <div class="form-group"> <label asp-for="Input.ConfirmPassword"></label> <input asp-for="Input.ConfirmPassword" class="form-control" /> <span asp-validation-for="Input.ConfirmPassword" class="text-danger"></span> </div> <button type="submit" class="btn btn-primary">Register</button> </form> </div> <div class="col-md-6 col-md-offset-2">
</div> </div> @section Scripts { <partial name="_ValidationScriptsPartial" /> } |
Code Listing 12: Register.cshtml.cs
#nullable disable using System; using System.Collections.Generic; using System.ComponentModel.DataAnnotations; using System.Linq; using System.Text; using System.Text.Encodings.Web; using System.Threading.Tasks; using Microsoft.AspNetCore.Authentication; using Microsoft.AspNetCore.Authorization; using Microsoft.AspNetCore.Identity; using Microsoft.AspNetCore.Identity.UI.Services; using Microsoft.AspNetCore.Mvc; using Microsoft.AspNetCore.Mvc.RazorPages; using SyncfusionHelpDeskClient.Server.Models; namespace SyncfusionHelpDeskClient.Server.Areas.Identity.Pages { [AllowAnonymous] public class RegisterModel : PageModel { const string ADMINISTRATION_ROLE = "Administrators"; const string ADMINISTRATOR_USERNAME = "Admin@email"; private readonly SignInManager<ApplicationUser> _signInManager; private readonly UserManager<ApplicationUser> _userManager; private readonly RoleManager<IdentityRole> _roleManager; public RegisterModel( SignInManager<ApplicationUser> signInManager, UserManager<ApplicationUser> userManager, RoleManager<IdentityRole> roleManager) { _userManager = userManager; _signInManager = signInManager; _roleManager = roleManager; } [BindProperty] public InputModel Input { get; set; } public string ReturnUrl { get; set; } public IList<AuthenticationScheme> ExternalLogins { get; set; } public class InputModel { [Required] [EmailAddress] [Display(Name = "Email")] public string Email { get; set; } [Required] [StringLength(100, ErrorMessage = "The {0} must be at least {2} and " + "at max {1} characters long.", MinimumLength = 6)] [DataType(DataType.Password)] [Display(Name = "Password")] public string Password { get; set; } [DataType(DataType.Password)] [Display(Name = "Confirm password")] [Compare("Password", ErrorMessage = "The password and confirmation " + "password do not match.")] public string ConfirmPassword { get; set; } } public async Task OnGetAsync(string returnUrl = null) { ReturnUrl = returnUrl ?? ""; ExternalLogins = (await _signInManager .GetExternalAuthenticationSchemesAsync()) .ToList(); } public async Task<IActionResult> OnPostAsync( string returnUrl = null) { returnUrl = returnUrl ?? Url.Content("~/"); ExternalLogins = (await _signInManager .GetExternalAuthenticationSchemesAsync()) .ToList(); if (ModelState.IsValid) { var user = new ApplicationUser { UserName = Input?.Email, Email = Input?.Email }; var result = await _userManager.CreateAsync( user, Input?.Password); if (result.Succeeded) { // Set confirm Email for user. user.EmailConfirmed = true; await _userManager.UpdateAsync(user); // Ensure there is a ADMINISTRATION_ROLE var RoleResult = await _roleManager .FindByNameAsync(ADMINISTRATION_ROLE); if (RoleResult == null) { // Create ADMINISTRATION_ROLE role. await _roleManager .CreateAsync( new IdentityRole(ADMINISTRATION_ROLE)); } if (user.UserName?.ToLower() == ADMINISTRATOR_USERNAME.ToLower()) { // Put admin in Administrator role. await _userManager .AddToRoleAsync( user, ADMINISTRATION_ROLE); } // Log user in. await _signInManager.SignInAsync( user, isPersistent: false); return LocalRedirect(returnUrl); } foreach (var error in result.Errors) { ModelState.AddModelError( string.Empty, error.Description); } } // If we got this far, something failed, redisplay form. return Page(); } } } |
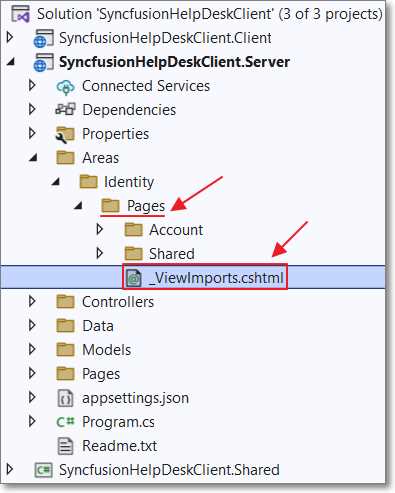
Figure 34: _ViewImports.cshtml
Next, add a _ViewImports.cshtml file in the Pages folder using the following code.
Code Listing 13: _ViewImports.cshtml
@using Microsoft.AspNetCore.Identity @using SyncfusionHelpDeskClient.Server.Areas.Identity @using SyncfusionHelpDeskClient.Server.Areas.Identity.Pages @addTagHelper *, Microsoft.AspNetCore.Mvc.TagHelpers |
Finally, to test that we can restrict access to a user in the Administrators role, in the Server project, remove the following code in the Controllers\WeatherForecastController.cs file.
Code Listing 14: Remove Authorize
[Authorize] |
Replace the code with the following.
Code Listing 15: Authorize Only Administrators
[Authorize(Roles = "Administrators")] // Only allow Administrators. |
Note: We must always enforce security in the server project because it is possible to bypass the client project and call code in the server project directly. Security in the client project (implemented later) is only for visual representation; it cannot enforce security.
Even though security cannot be enforced in the client project, it is still helpful to implement code that will display differently according to the roles of the current user.
We will also implement code in the client project that will indicate if the current user is in the administrator role.
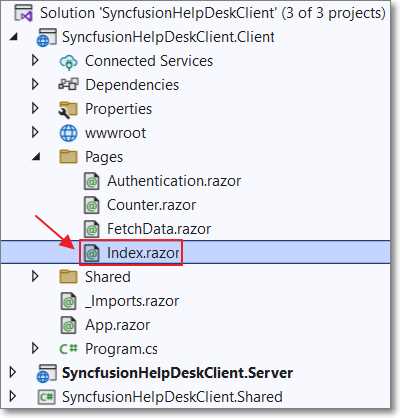
Figure 35: Update Index.razor
Open the Index.razor page in the Client project and replace all the code with the following code.
Code Listing 16: Detect an Administrator
@page "/" <AuthorizeView Roles="@ADMINISTRATION_ROLE"> <p>You are an Administrator</p> </AuthorizeView> @code { string ADMINISTRATION_ROLE = "Administrators"; } |

Figure 36: Register Administrator
Run the application and click Register.
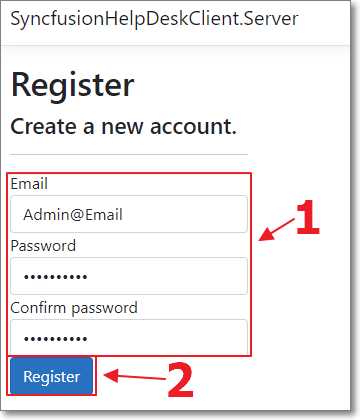
Figure 37: Create Admin@Email
Create a new user with the email address Admin@Email.
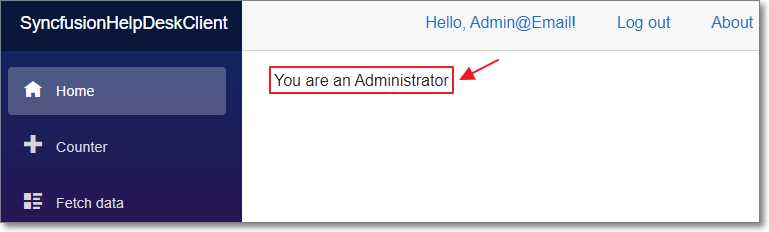
Figure 38: Administrator Display
The home page of the application will indicate that the user is an administrator.
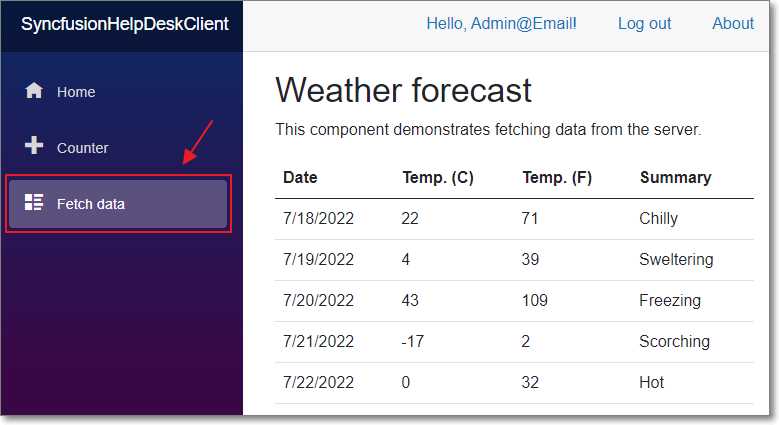
Figure 39: Fetch Data Page
The Fetch data page will also work.
When we log in, the code in the Index.razor page runs to create the administrator role and to add the Admin@Email account to that role.
Unauthenticated users
Sometimes we want to allow unauthenticated users to call server-side controllers.
To demonstrate this, in the Server project, remove the following code in the Controllers\WeatherForecastController.cs file.
Code Listing 17: Remove Administrators
[Authorize(Roles = "Administrators")] // Only allow Administrators. |
Replace the code with the following.
Code Listing 18: Allow All Users
[AllowAnonymous] // Allow everyone. |
However, when we run the application and log in as a user who is not an administrator (Test@Email), we will be directed to the login page.
This happens because the Fetch data page is marked as authorized, and the default HttpClient, which makes the calls to the server-side code, requires the user to be authenticated.
To rectify this, we will need to create a second HttpClient that does not require authentication.
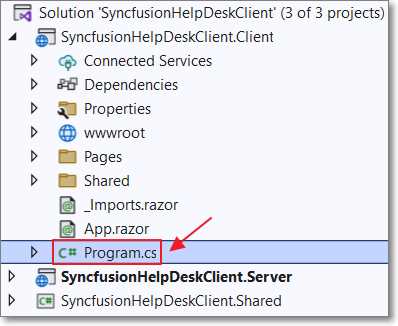
Figure 40: Update Program.cs
In the Client project, open the Program.cs file and insert the following code before builder.Services.AddApiAuthorization().
Code Listing 19: Create NoAuthenticationClient
// This allows anonymous requests. // See: https://bit.ly/2Y3ET3K builder.Services.AddHttpClient("ServerAPI.NoAuthenticationClient", client => client.BaseAddress = new Uri(builder.HostEnvironment.BaseAddress)); |
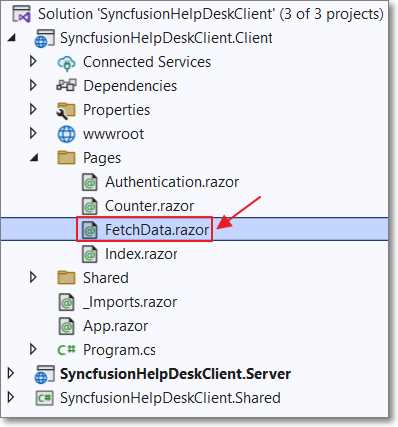
Figure 41: Update FetchData.razor
Next, open the FetchData.razor page and remove the following code, which requires users to be logged in to view the page.
Code Listing 20: Remove [Authorize]
@attribute [Authorize] |
Add the code with the following that allows a named HttpClient to be used.
Code Listing 21: Add ClientFactory
@inject IHttpClientFactory ClientFactory |
Finally, delete the following code.
Code Listing 22: Remove Default HttpClient
forecasts = await Http.GetFromJsonAsync<WeatherForecast[]>("WeatherForecast"); |
Replace it with the following code that uses the new named HttpClient.
Code Listing 23: Add NoAuthenticationClient
// Use the NoAuthenticationClient var client = ClientFactory.CreateClient("ServerAPI.NoAuthenticationClient"); forecasts = await client.GetFromJsonAsync<WeatherForecast[]> ("WeatherForecast"); |
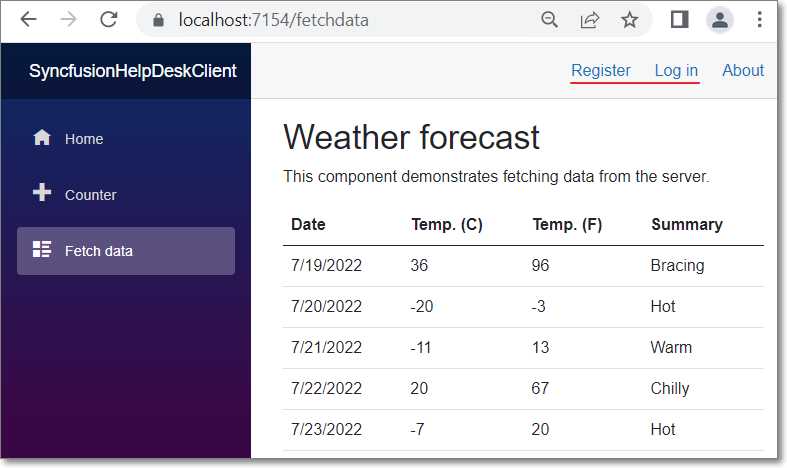
Figure 42: Page Works for Unauthenticated Users
When we run the application, the Fetch data page now works for unauthenticated users.
- 80+ high performance Blazor components.
- Lightweight and user friendly.
- Stunning Built-in themes with customization.