
Azure Pipelines Succinctly®

CHAPTER 1
What is Azure DevOps?
Azure DevOps, formerly known also as Visual Studio Team Services, is the name of a set of services that help manage the entire lifecycle of an application. The product is composed of five services: Azure Boards, Azure Repos, Azure Pipelines, Azure Artifacts, and Azure Test Plans. Azure DevOps is available both online and on-premises, and the latter is named Azure DevOps Server. In the following sections, you will first sign up for an account, and then receive an overview of each service (excluding Azure Pipelines, which is extensively discussed in this book).
Sign up for Azure DevOps
The first step is to sign up in the Azure DevOps portal using a Microsoft or GitHub account. Open the Azure DevOps start page and select Start free or Start free with GitHub (Figure 1.1).
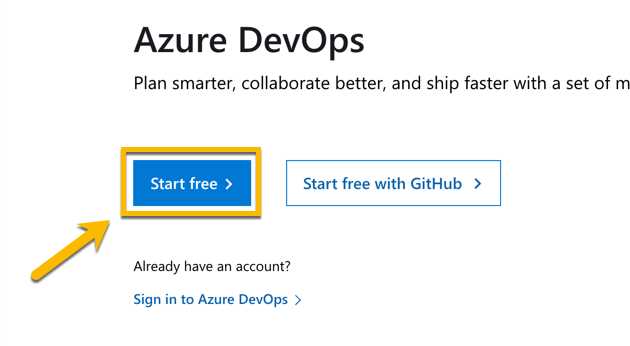
Figure 1.1: Azure DevOps start page
If needed, you can create a Microsoft account on this page for free (Figure 1.2).
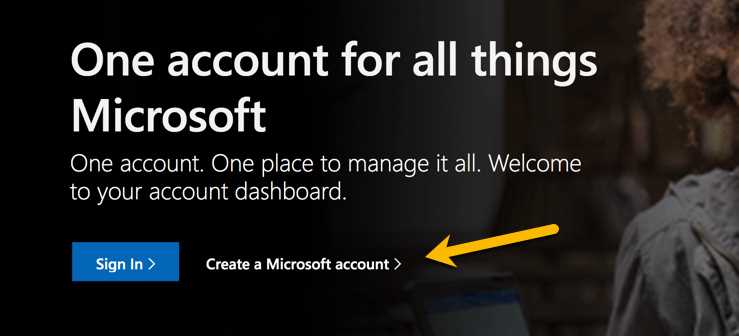
Figure 1.2: Create a new Microsoft account
After logging in, you will be asked to select a country (Figure 1.3) for the new organization using the account name. An organization is simply a container for our projects.
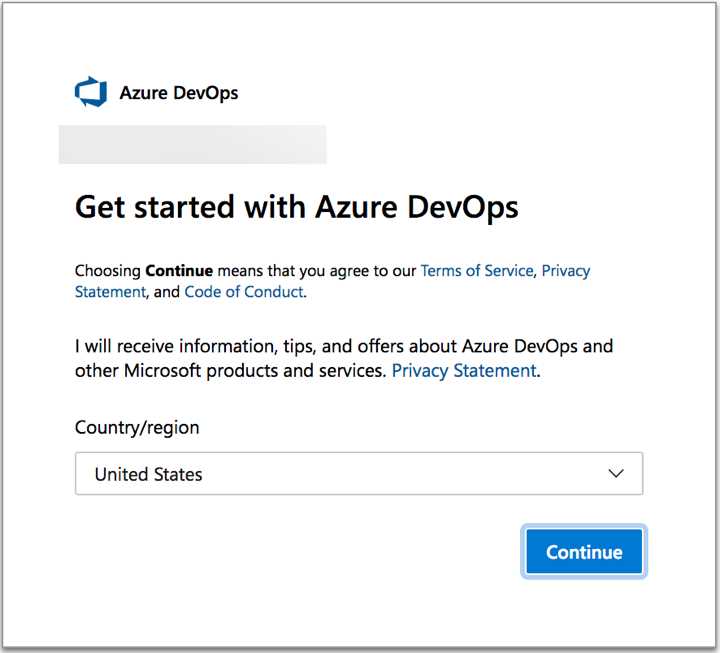
Figure 1.3: Country selection for an organization
When the organization is created, the page shown in Figure 1.4 appears. Here you can make the first project, give it a name, and choose whether it is public or private.
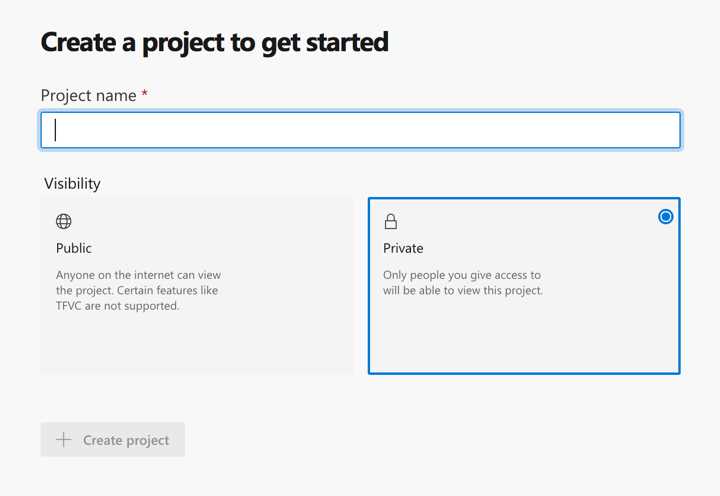
Figure 1.4: Create a new project
The project is located at https://dev.azure.com/{organization_name}/{project_name}, (Figure 1.5) and has Git as the version control system and Basic as the process template (discussed later).
Figure 1.5: Landing page of a new project
There are several different settings when creating a new project:
- Name: The name of the project.
- Description: A description of the project.
- Project Visibility: The visibility of the project; can be public or private.
- Process Template: Helps organize the work. There are four process templates available: Basic, Agile, Scrum, and Capability Maturity Model Integration (CMMI).
- Version Control System: Supports both Git (unlimited repositories per project) and Team Foundation Version System (one repository per project).
Note: The Basic process is the most straightforward process available in Azure DevOps. It is used to track Epics, Issues, and Tasks.
Azure DevOps services
Let's take a look at the Azure DevOps services.
Azure Boards
Azure Boards allow us to organize and track the work related to a software project. Its main component is the work item, which is just an object that collects all the information regarding a new feature or a requirement for an application. The Work Items view lists all the work items in the project (Figure 1.6).
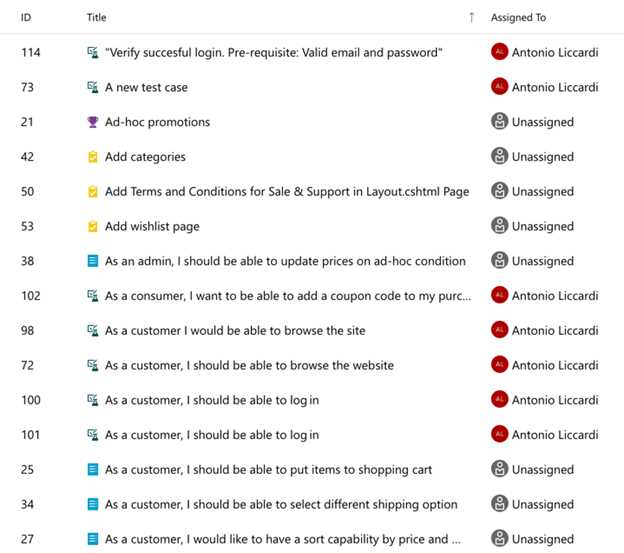
Figure 1.6: Work Items view
There are many types of work items, and they are related to the process selected in the project creation. What's interesting about work items is that they can track progress using a state model. In this way, each part of the team is updated about completed work or problems.
As seen in the previous section, there are four process templates in Azure Boards: Basic, Agile, Scrum, and CMMI. Figure 1.7 shows which types of work items are included with each process and their relationships.
Tip: You can find more information about process templates here.
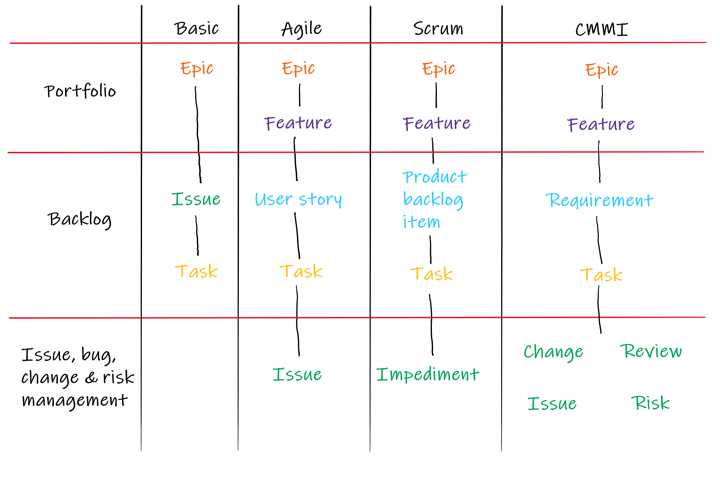
Figure 1.7: Types of work items
Note: In Agile, Scrum, and CMMI processes, it is possible to configure whether bugs are treated as a requirement or a task.
Work items in each process have their state workflow. When you double-click on a single work item, a window opens showing all the item’s details, such as description, assignee, area, iteration, effort, full history, and even deployment details. In Figure 1.8, the work item detail page is related to a user story from the Scrum process template.

Figure 1.8: Work item page
Each process template is highly customizable: once inherited, work items can be customized by adding new fields or changing the state model. Many extensions are also available from the Marketplace for stepping up the customization level (Figure 1.9).
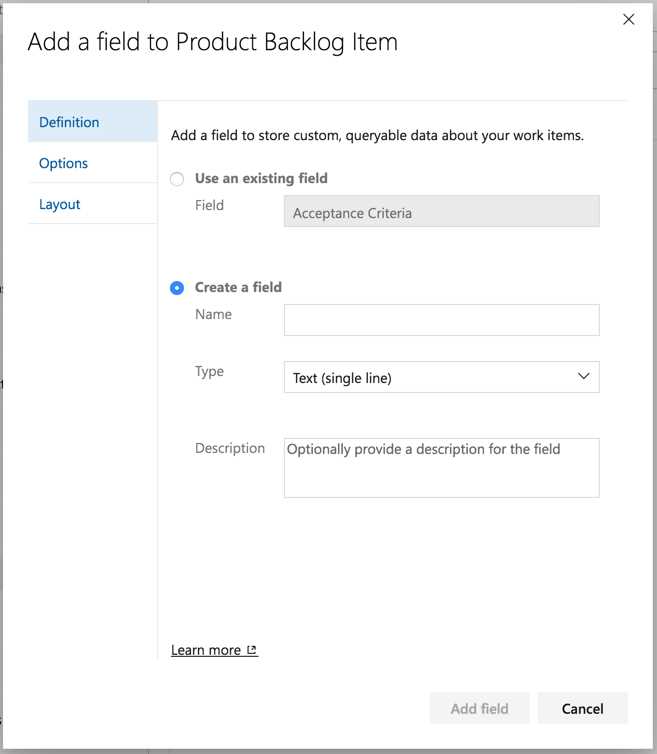
Figure 1.9: Process template customization
The first steps for organizing work are creating areas and iterations. Areas let us define area paths (including hierarchies) and assign teams involved during the development; iterations help to schedule work into time-framed containers (Figure 1.10). Once created, progress can be tracked using the Boards, Backlog, and Sprint sections.
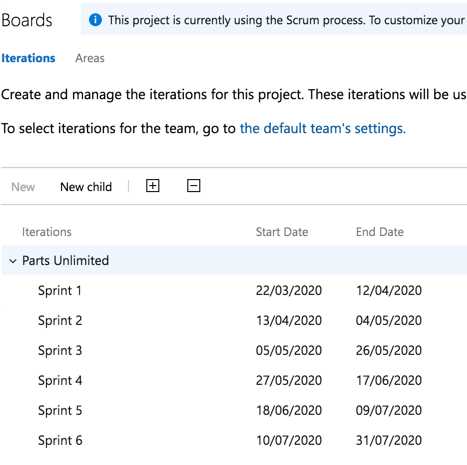
Figure 1.10: Areas and iterations
As the name implies, Azure Boards include a few types of boards. The main one is a kanban board (defined for each team), which makes it easy to get an overview of work in progress from different levels (portfolio management). Swimlanes are also available to help expedite work.
The customization level here is very high. It is possible to customize columns and cards, including fields and styles, and limit the work in progress (Figure 1.11).
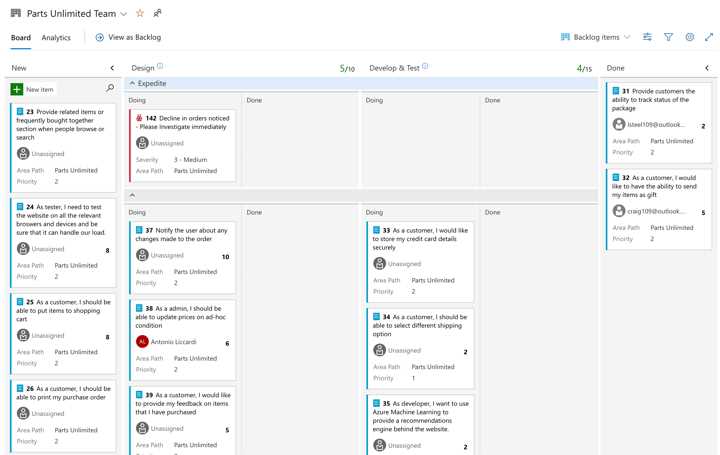
Figure 1.11: The kanban board
The Backlog section contains one or more backlogs, depending on how many teams are available. In a backlog, a user can manage relationships between work items, reorder them using drag and drop, or add them to a specific sprint (Figure 1.12).
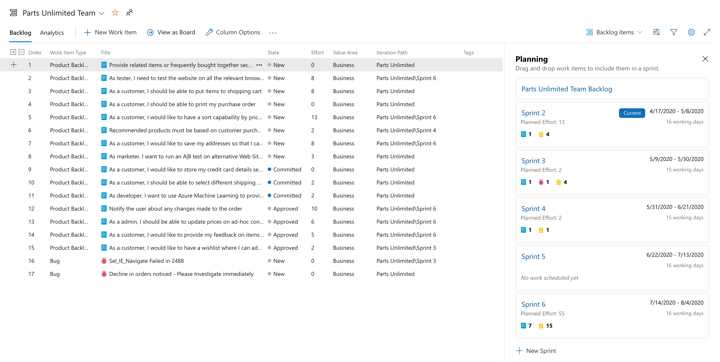
Figure 1.12: The Backlog section
The Sprint section gives us more detail about the work in progress in the current sprint, and has a Task board, a Burndown chart, an Analytics view, and a Capacity planning view. All the filters come in handy for adjusting what is shown (Figure 1.13).
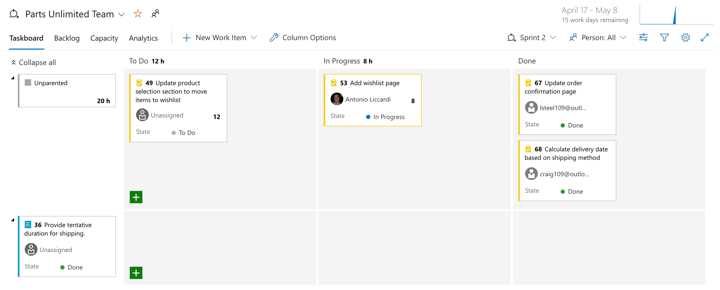
Figure 1.13: The Sprint section
Finally, Azure Boards has a powerful query engine that allows extracting data to track work and monitor KPIs (Figure 1.14). Results can be converted into graphs and pinned to dashboards in the Overview section (Figure 1.15).
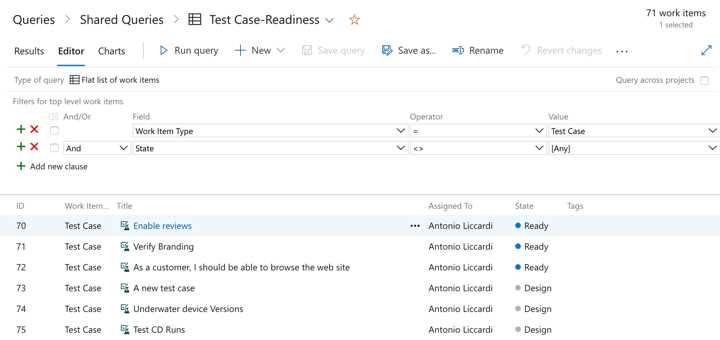
Figure 1.14: The query editor view
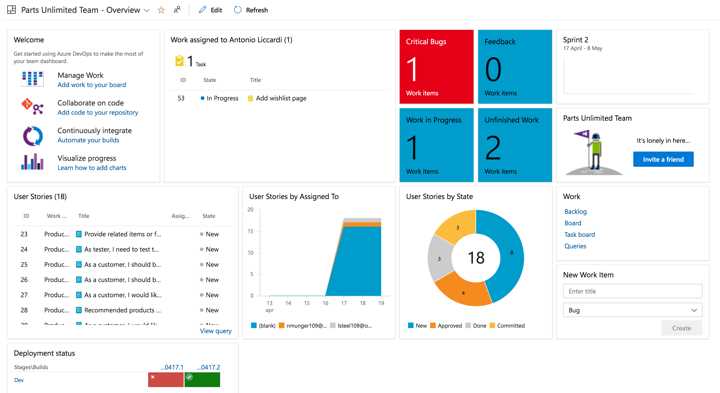
Figure 1.15: A dashboard example
Azure Repos
Azure Repos is another component of Azure DevOps. It makes version control systems such as Git (default) or Team Foundation Version Control (TFVC) available to track changes in your code.
Git is an open-source distributed version control system created by Linus Torvalds in 2005 to maintain changes to the Linux kernel, and its popularity and usage have increased over the past 10 years. Azure Repos provide unlimited Git repositories and implement a standard Git version. The user interface lets us fully manage the repository showing source code, full history, blame (annotation), and tags, and users can even create new files or folders. On the other hand, TFVC is a centralized version control system available in Azure DevOps from earlier versions, and Azure Repos allows one TFVC repository per project. Migration from TFVC to Git is also possible using the import feature from the user interface.
When using Git, Azure Repos provides a pull request (PR) mechanism to review code created by developers before the merge process (Figure 1.16). The user experience of the workflow is astonishing—reviewers can comment on code changes to give feedback to the developers, and can require mandatory work before the merge. Developers can respond to comments and mark the feedback as "resolved." Thanks to branch policies, a PR can trigger a build to compile and test the source code before the review, and in case of failure, a reviewer can reject it. Some actions can be automated (such as the autocomplete feature), and integrations with external services are available.
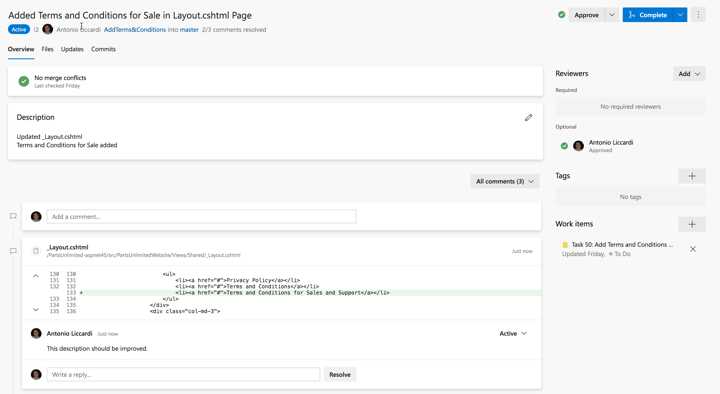
Figure 1.16: The pull request view
Azure Test Plans
In Azure Boards, test cases are a work item type that track testing done on software. They are created and managed on the board, and developers can specify precisely the steps and expected results that tests require (Figure 1.17).
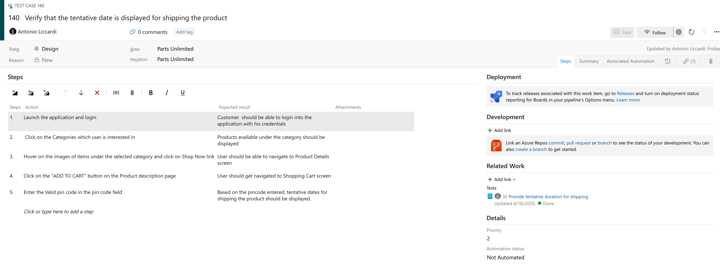
Figure 1.17: A test case
Sometimes, testing needs more insight into how developers should execute it, explaining dependencies, environments, and configuration. In this case, a service like Azure Test Plans is what you should use. Indeed, this component lets us plan and track different kinds of tests, such as manual or user acceptance. Also, thanks to the Test & Feedback extension, developers can practice exploratory testing, and stakeholders can share their feedback with us in a natural way (downloadable here).
Test plans are related to area paths and iterations, and they organize test suites using three different approaches (Figure 1.18):
- Static suite: Grouping test cases added manually.
- Requirement based suite: Grouping test cases related to work items such as Product Backlog items.
- Query-based: Grouping test cases starting from a search.
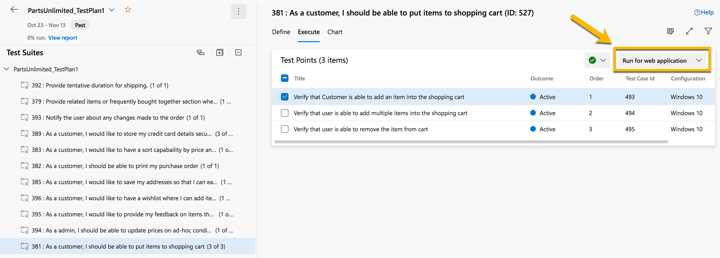
Figure 1.18: A test plan
A test case summarizes what to test. The test case window contains a section that lists all the mandatory steps to execute the test. Also, each test is related to a specific running configuration, which is customizable depending on parameters such as the system configuration (such as Windows 10 or Android devices).
You can run the test using the Run for web application button, which opens the Test Runner: this will recap all the steps to execute, and you can flag it as passed or failed. In case of failure, the runner lets us type comments, create a new bug (which includes information regarding the testing environment), take screenshots, or even take videos (Figure 1.19).
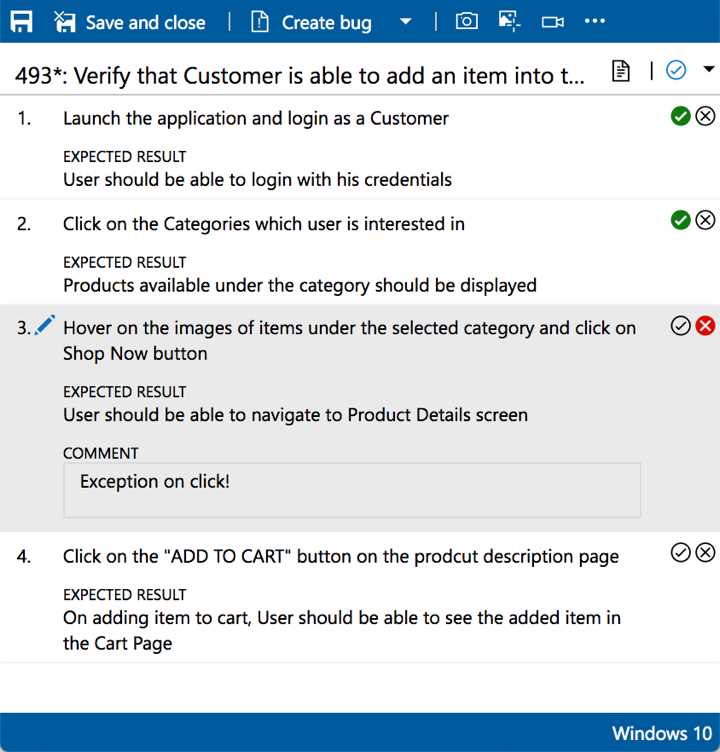
Figure 1.19: The test runner
The Runs section on the side menu recaps all the test sessions, and the Progress report section gives insights about runs (Figure 1.20). With such instrumentation, testing is an enjoyable experience!
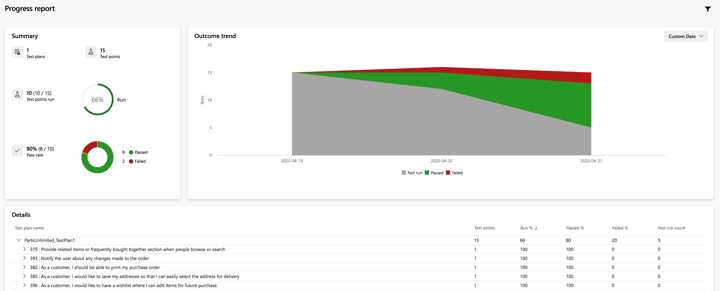
Figure 1.20: The progress report
Azure Artifacts
Azure Artifacts is a service that helps create and maintain NuGet, npm, Maven, Python, and universal packages.
You can start using Azure Artifacts by creating a new feed that is scoped for an organization or a project (Figure 1.21). Then you can upload a package directly from a CI/CD pipeline. Administrators can set policies about who can read or upload packages. After a package is uploaded, developers can download it directly into their preferred IDE, such as Visual Studio, or by using a command line (Figure 1.22).
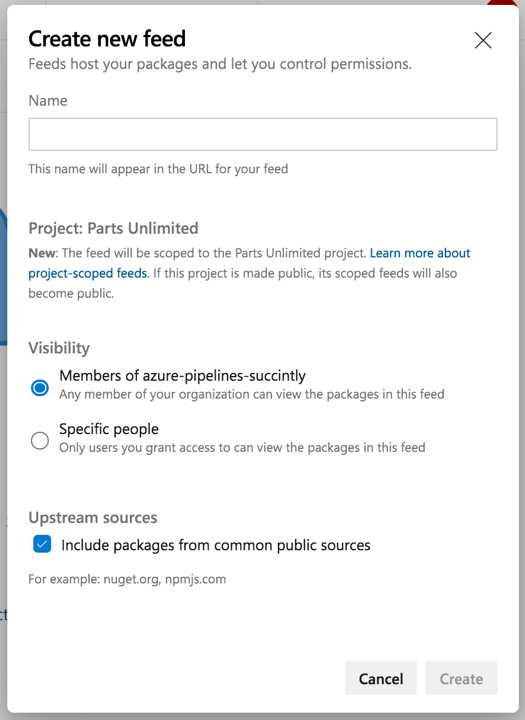
Figure 1.21: Create a new feed
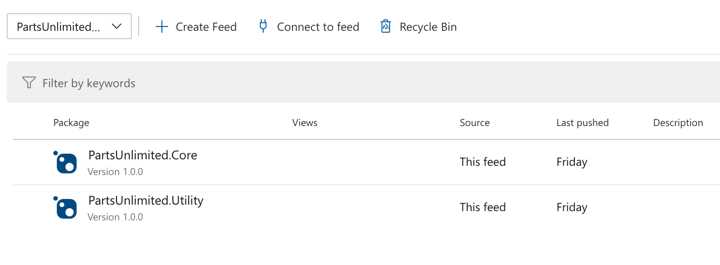
Figure 1.22: A NuGet feed with packages
Universal packages are a particular type of artifact that collects files into a single package that falls outside the scope of the other supported types.
Also, Azure Artifacts supports upstream sources, which combine our feeds with remote feeds such as nuget.org.
Azure DevOps Server
Azure DevOps Server, previously known as Team Foundation Server (TFS), is a platform that provides the same services as Azure DevOps Services, with some slight differences.
First, you have to set up an entire infrastructure to install the server, including a back end based on SQL Server. Scaling is different too: Azure DevOps Services uses organizations and projects to scale, rather than Azure DevOps Server, where scaling means adding more server instances (including their management). Other differences are related to user management and reporting.
The main reason that companies use an on-premises version is to keep their data in the same network as their infrastructure. A detailed list of all differences is available here.
Pricing
Azure DevOps uses a per-user pricing model, and it differs between the cloud and on-premises editions. It offers two plans: Basic and Basic + Test Plans, which differ for the integration with Azure Test Plans.
Both plans provide Azure Pipelines for free with the following limitations:
- One free Microsoft-hosted CI/CD (1,800 minutes free with one free parallel job).
- One free self-hosted CI/CD (one free parallel job with unlimited minutes).
You can purchase additional parallel jobs by paying a monthly fee, depending on how many parallel jobs you need. Regarding Azure DevOps Server, Microsoft provides a free version for individuals or small teams named Azure DevOps Server Express.
You can find additional information about Azure DevOps pricing here.
Preview features
Both Azure DevOps Services and Azure DevOps Server receive regular updates, even if the former receives them in advance of the latter because of its nature as a SaaS platform. Indeed, Microsoft usually updates the platform behind the scenes and gives us the ability to enable some preview features, supporting beta testing. Preview features can be enabled at the organization level or user level through the User Settings button close to the Account Manager button (Figure 1.23).
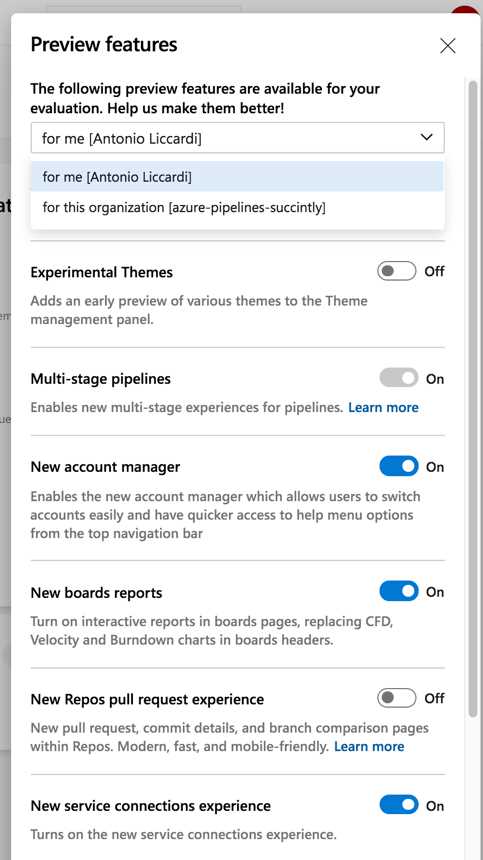
Figure 1.23: Enable preview features
Note: The preview features shown in this book could be released by the time of the publication.
Azure DevOps CLI
Like many tools or frameworks, Azure DevOps also has its own command-line interface (CLI), and it is based on the Azure CLI. With this tool, you can execute commands or tasks directly from a console window, in a quicker way compared to the user interface. A bonus is the automation of repetitive tasks. The installation instructions are available here, and they include links to the documentation and samples.
Azure DevOps documentation
Microsoft makes available excellent documentation for Azure DevOps, including:
- Full documentation.
- Learning path for certifications.
- Azure DevOps Labs, step-by-step tutorials on how to use features in Azure DevOps.
- 1800+ high-performance UI components.
- Includes popular controls such as Grid, Chart, Scheduler, and more.
- 24x5 unlimited support by developers.