
Azure Maps Using Blazor Succinctly®

CHAPTER 5
Creating Store Administration
In this chapter, we will construct an administration page that will allow store locations to be geocoded and added to the database.
Create the data layer
We will now create the data context code that will allow the data service, created in the following steps, to communicate with the database tables we just added.
A data context is a layer of code that sits between the database and the C# code that communicates with the database.
Install the following NuGet packages:
- Microsoft.EntityFrameworkCore
- Microsoft.EntityFrameworkCore.SqlServer.NetTopologySuite
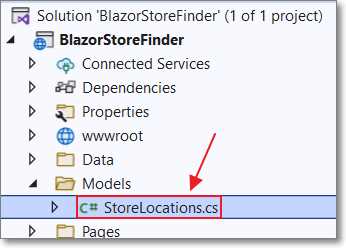
Figure 52: Add StoreLocations.cs
Create a Models folder and add a new class named StoreLocations.cs using the following code.
Code Listing 32
#nullable disable namespace BlazorStoreFinder { public partial class StoreLocations { public int Id { get; set; } public string LocationName { get; set; } public string LocationLatitude { get; set; } public string LocationLongitude { get; set; } public string LocationAddress { get; set; } public NetTopologySuite.Geometries.Point LocationData { get; set; } } } |

Figure 53: Create BlazorStoreFinderContext.cs
Add a BlazorStoreFinderContext.cs class in the Data folder using the following code.
Code Listing 33: BlazorStoreFinderContext.cs File
#nullable disable using System; using System.Collections.Generic; using Microsoft.EntityFrameworkCore; using Microsoft.EntityFrameworkCore.Metadata; namespace BlazorStoreFinder { public partial class BlazorStoreFinderContext : DbContext { public BlazorStoreFinderContext() { } public BlazorStoreFinderContext( DbContextOptions<BlazorStoreFinderContext> options) : base(options) { } public virtual DbSet<StoreLocations> StoreLocations { get; set; } protected override void OnModelCreating(ModelBuilder modelBuilder) { modelBuilder.Entity<StoreLocations>(entity => { entity.Property(e => e.LocationAddress) .IsRequired() .HasMaxLength(250); entity.Property(e => e.LocationLatitude) .IsRequired() .HasMaxLength(50); entity.Property(e => e.LocationLongitude) .IsRequired() .HasMaxLength(50); entity.Property(e => e.LocationName) .IsRequired() .HasMaxLength(50); entity.Property(e => e.LocationData) .IsRequired(); }); OnModelCreatingPartial(modelBuilder); } partial void OnModelCreatingPartial(ModelBuilder modelBuilder); } } |
The preceding data context class leverages Entity Framework Core to communicate with the database. The class contains two constructors. The second constructor allows a database connection string to be passed. We will do that in the Program.cs file.
Open the Program.cs file and add the following using statements.
Code Listing 34: Data Layer Using Statements
using BlazorStoreFinder; using Microsoft.EntityFrameworkCore; |
Next, add the following code (after the var builder = WebApplication.CreateBuilder(args) line).
Code Listing 35: Data Connection Configuration
builder.Services.AddDbContext<BlazorStoreFinderContext>(options => options.UseSqlServer( builder.Configuration.GetConnectionString("DefaultConnection"), x => x.UseNetTopologySuite())); |
This code retrieves the database connection string from the appsettings.json file and passes it to the BlazorStoreFinderContext data context class created earlier. It also configures the NetTopologySuite component that will allow access to spatial data types in the database.
Store location service
We will now create a StoreLocationService class that will use the data context to read and write to the database. We will create data access methods that will be called by Razor controls to be created later.

Figure 54: Create StoreLocationService.cs
Add a StoreLocationService.cs class in the Services folder using the following code.
Code Listing 36: StoreLocationService Class
#nullable disable using Microsoft.Data.SqlClient; using Microsoft.EntityFrameworkCore; using NetTopologySuite.Geometries; using Newtonsoft.Json; using System.Data; using System.Net.Http.Headers; using System.Text; namespace BlazorStoreFinder { public class StoreLocationService { private readonly BlazorStoreFinderContext _context; public StoreLocationService(BlazorStoreFinderContext context) { _context = context; } } } |
Next, add the following method to the class that will return a collection of all store locations in the database.
Code Listing 37: GetStoreLocations
public async Task<List<StoreLocations>> GetStoreLocations() { return await _context.StoreLocations.OrderBy(x => x.Id).ToListAsync(); } |
Add the following code that will return a single store location when passed the record ID.
Code Listing 38: GetStoreLocation
public async Task<StoreLocations> GetStoreLocation(int id) { return await _context.StoreLocations.FindAsync(id); } |
Add the following code to allow a store location to be inserted into the database.
Code Listing 39: AddStoreLocation
public async Task<StoreLocations> AddStoreLocation (StoreLocations storeLocation) { _context.StoreLocations.Add(storeLocation); await _context.SaveChangesAsync(); return storeLocation; } |
Also, add the following method that will delete a store location when passed the record ID.
Code Listing 40: DeleteStoreLocation
public async Task DeleteStoreLocation(int id) { var storeLocation = await _context.StoreLocations.FindAsync(id);
_context.StoreLocations.Remove(storeLocation); await _context.SaveChangesAsync(); } |
Finally, to register the store location service, add the following code to the Program.cs file before the var app = builder.Build() line.
Code Listing 41: Register StoreLocationService
// Register StoreLocationService builder.Services.AddScoped<StoreLocationService>(); |
Geocode store locations
We will now add a method to the store location service that will accept an address, geocode it, and return a coordinate containing the latitude and longitude. This will then be stored in the database using the AddStoreLocation method created earlier.
To geocode the address, we will call the Azure Maps API. This API method will return a SearchAddressResult object containing more than just the coordinates.
The first step is to create a class, matching the properties of the SearchAddressResult object, that will be used to deserialize the response from the Azure Maps API.

Figure 55: Create SearchAddressResult.cs
In the Models folder, add a SearchAddressResult.cs class using the following code.
Code Listing 42: SearchAddressResult.cs
#nullable disable namespace BlazorStoreFinder.Result {
} |
In your web browser, navigate to the following URL:
https://docs.microsoft.com/en-us/rest/api/maps/search/get-search-address

Figure 56: Copy SearchAddressResult
Scroll down to the Sample Response section and use the Copy button to copy it.
. 
Figure 57: Paste JSON As Classes
In Visual Studio, select Edit from the toolbar, then Paste Special > Paste JSON As Classes to paste the contents inside the namespace declaration.
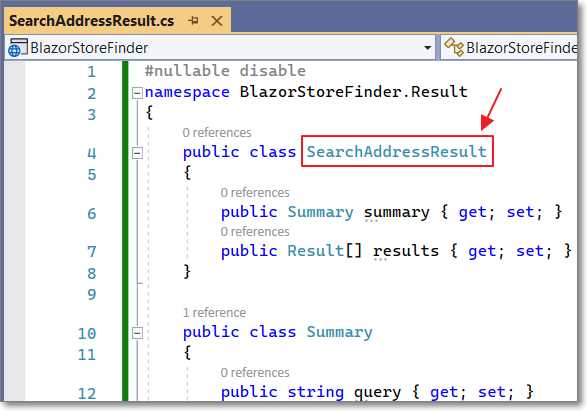
Figure 58: Change Rootobject to SearchAddressResult
The pasted code will set that root class name to Rootobject. Change Rootobject to SearchAddressResult.
Next, add the following using statement to the store location service class (StoreLocationService.cs).
Code Listing 43: BlazorStoreFinder.Result Using Statement
using BlazorStoreFinder.Result; |
Finally, add the following method to the class that will call the Azure Maps API and return a Coordinate object containing latitude and longitude when passed an address.
Code Listing 44: GeocodeAddress
public async Task<Coordinate> GeocodeAddress(string address) { Coordinate = new Coordinate(); // Create an HTTP client to make the REST call. // Search - Get search address // https://bit.ly/3JER1ii // Best practices for Azure Maps Search Service // https://bit.ly/3JFQkFt using (var client = new System.Net.Http.HttpClient()) { // Get an access token from AuthService. var AccessToken = await AuthService.GetAccessToken(); client.DefaultRequestHeaders.Accept.Clear(); client.DefaultRequestHeaders.Accept.Add( new MediaTypeWithQualityHeaderValue("application/json")); // Pass the Azure Maps client Id. client.DefaultRequestHeaders.Add("x-ms-client-id", AuthService.ClientId); // Pass the access token in the auth header. client.DefaultRequestHeaders.Authorization = new System.Net.Http.Headers.AuthenticationHeaderValue( "Bearer", AccessToken); // Build the URL. StringBuilder sb = new StringBuilder(); // Request an address search. sb.Append("https://atlas.microsoft.com/search/address/json?"); // Specify the API version and language. sb.Append("&api-version=1.0&language=en-US"); // Pass the address. sb.Append($"&query={address}"); // Set the URL. var url = new Uri(sb.ToString()); // Call Azure Maps and get the response. var Response = await client.GetAsync(url); // Read the response. var responseContent = await Response.Content.ReadAsStringAsync(); var AddressResult = JsonConvert.DeserializeObject<SearchAddressResult>( responseContent); // Create coordinate. coordinate = new Coordinate( Convert.ToDouble( AddressResult.results.FirstOrDefault()?.position.lon), Convert.ToDouble( AddressResult.results.FirstOrDefault()?.position.lat)); } return coordinate; } |
Add and edit store locations
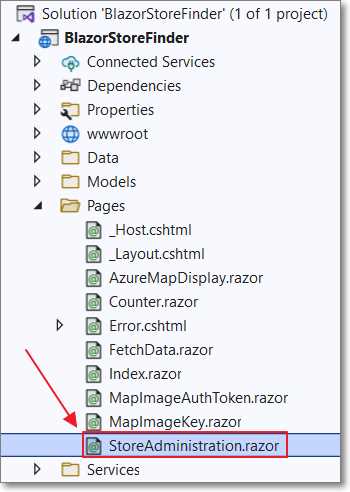
Figure 59: StoreAdministration.razor
In the Pages folder, create a new control named StoreAdministration.razor using the following code.
Code Listing 45: Administration Control
@page "/storeadmin" @using Syncfusion.Blazor.Grids @using Syncfusion.Blazor.Calendars @using Syncfusion.Blazor.DropDowns @using Syncfusion.Blazor.Inputs @using Syncfusion.Blazor.Popups @using System.Text; @using NetTopologySuite.Geometries @using Newtonsoft.Json @using System.Net.Http.Headers @inject StoreLocationService _StoreLocationService @inherits OwningComponentBase<StoreLocationService> <h3>Store Administration</h3> @code { List<StoreLocations> storelocations = new List<StoreLocations>();
private DialogSettings DialogParams = new DialogSettings { MinHeight = "250px", Width = "450px" }; } |
Add the following code to the UI section. This will create a Syncfusion DataGrid component that contains the store locations and allows you to add and delete them.
The data grid also allows editing entries using a pop-up.
Code Listing 46: Syncfusion DataGrid Component
<div class="col-lg-12 control-section"> <div class="content-wrapper"> <div class="row"> <SfGrid DataSource="@storelocations" Toolbar="@(new List<string>() { "Add", "Delete" })" AllowPaging="true"> <GridEvents OnActionBegin="ActionBeginHandler" TValue="StoreLocations"></GridEvents> <GridEditSettings AllowAdding="true" AllowDeleting="true" Mode="@EditMode.Dialog" Dialog="DialogParams"> <Template> @{ var Store = (context as StoreLocations) ?? new StoreLocations(); } <div> <div class="form-row"> <div class="form-group col-md-12"> <SfTextBox ID="Location Name" @bind-Value="@(Store.LocationName)" TValue="string" FloatLabelType="FloatLabelType.Always" Placeholder="Location Name"></SfTextBox> </div> </div> <div class="form-row"> <div class="form-group col-md-12"> <SfTextBox ID="Address" @bind-Value="@(Store.LocationAddress)" TValue="string" FloatLabelType="FloatLabelType.Always" Placeholder="Address"></SfTextBox> </div> </div> </div> </Template> </GridEditSettings> <GridColumns> <GridColumn Field=@nameof(StoreLocations.Id) HeaderText="Id" IsPrimaryKey="true" ValidationRules="@(new ValidationRules{ Number=true})" Width="50"> </GridColumn> <GridColumn Field=@nameof(StoreLocations.LocationName) HeaderText="Location Name" ValidationRules="@(new ValidationRules{ Required=true})" Width="150"> </GridColumn> <GridColumn Field=@nameof(StoreLocations.LocationAddress) HeaderText="Address" ValidationRules="@(new ValidationRules{ Required=true})"> </GridColumn> <GridColumn Field=@nameof(StoreLocations.LocationLatitude) HeaderText="Latitude" Width="150"> </GridColumn> <GridColumn Field=@nameof(StoreLocations.LocationLongitude) HeaderText="Longitude" Width="150"> </GridColumn> </GridColumns> </SfGrid> </div> </div> </div> |
Note: For more information on the Syncfusion DataGrid component, see this article.
Add the following method to the code section. This will call the GetStoreLocations() method, created earlier, to retrieve the store locations from the database and populate the data grid.
Code Listing 47: Calling Service.GetStoreLocations
protected override async Task OnInitializedAsync() { // We access StoreLocationService using @Service storelocations = await Service.GetStoreLocations(); } |
Add the ActionBeginHandler method that will respond to the Syncfusion DataGrid toolbar action event. Based on the option selected, it will call the Save or Delete method (to be created later).
Code Listing 48: Save and Delete Handler
public async Task ActionBeginHandler( ActionEventArgs<StoreLocations> args) { if (args.RequestType.ToString() == "Save") { await Save(args.Data); } if (args.RequestType.ToString() == "Delete") { await Delete(args.Data); } } |
The following method will delete a store location from the database.
Code Listing 49: Administration Delete Method
public async Task Delete(StoreLocations store) { await Service.DeleteStoreLocation(store.Id); storelocations = await Service.GetStoreLocations(); } |
The following Save method calls the GeocodeAddress method, created earlier, to geocode the address and save the result to the database.
Code Listing 50: Geocode and Save Location
public async Task Save(StoreLocations store) { // Geocode address. Coordinate = await Service.GeocodeAddress(store.LocationAddress); // Create a new store location. store.LocationLatitude = coordinate.Y.ToString(); store.LocationLongitude = coordinate.X.ToString(); // SRID 4326 (WGS 84) is the most standard // in cartography and GPS systems. store.LocationData = new Point(coordinate) { SRID = 4326 }; // Save a new store location. await Service.AddStoreLocation(store); } |
Finally, add the following code to NavMenu.razor to add a link to the control.
Code Listing 51: Administration Link
<div class="nav-item px-3"> <NavLink class="nav-link" href="storeadmin"> <span class="oi oi-cog" aria-hidden="true"></span> Administration </NavLink> </div> |
Run the application and navigate to the Administration page.

Figure 60: Administration Page—Add New Location
Click Add to add a new store location.

Figure 61: Add a Store Location
Enter a name and an address for the location and click Save.
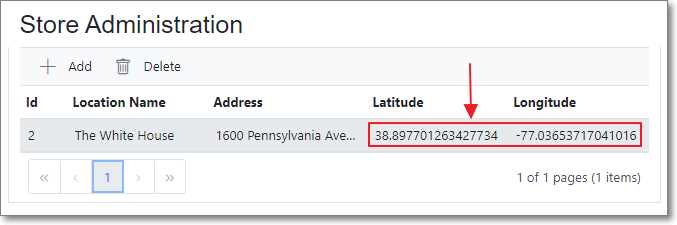
Figure 62: View Latitude and Longitude
The latitude and longitude for the address will appear in the DataGrid (and be saved to the database).
- 80+ high performance Blazor components.
- Lightweight and user friendly.
- Stunning Built-in themes with customization.