
Azure Maps Using Blazor Succinctly®

CHAPTER 4
Create the Application
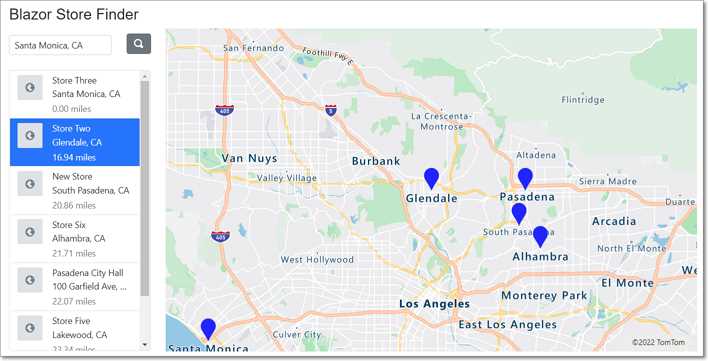
Figure 43: Store Finder Application
In this chapter, we will cover the steps to set up the development of the Blazor Store Finder application.
Note: The source code for the completed application is available on GitHub.
Install SQL Server
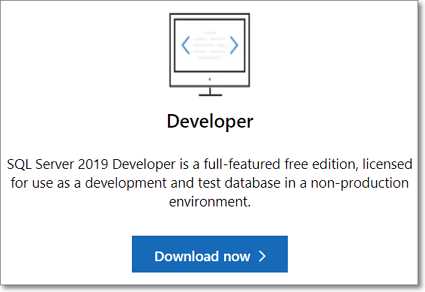
Figure 44: SQL Server
The application requires a database to store the data. Download and install the free SQL Server 2019 Developer Edition here. Or, if you have access to it, use the full SQL Server.
Add Syncfusion
The Syncfusion controls allow us to implement advanced functionality easily, with a minimum amount of code. The Syncfusion controls are contained in a NuGet package.
In this section, we will cover the steps to obtain that package and configure it for our application.
Note: You can find the latest requirements to use Syncfusion here.
Install and configure Syncfusion
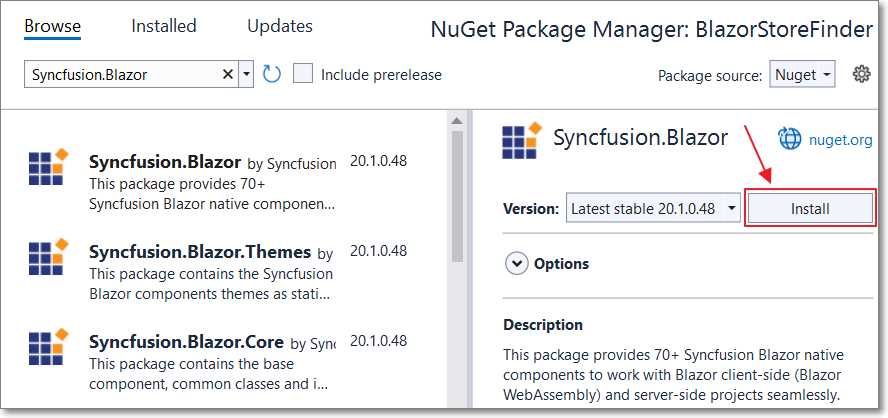
Figure 45: Install Syncfusion NuGet Package
Install the following NuGet packages:
- Syncfusion.Blazor
- Syncfusion.Blazor.Themes
Open the _Imports.razor file and add the following.
Code Listing 27: Syncfusion in _Imports.razor
@using Syncfusion.Blazor |
Open the Program.cs file and add the following using statement.
Code Listing 28: Syncfusion Program.cs Using Statement
using Syncfusion.Blazor; |
Next, add the following code (before the var app = builder.Build() line).
Code Listing 29: AddSyncfusionBlazor
// Add Syncfusion builder.Services.AddSyncfusionBlazor(); |
Add the following to the head element of the _Layout.cshtml page.
Code Listing 30: Syncfusion in _Layout.cshtml
<link href="_content/Syncfusion.Blazor.Themes/bootstrap5.css" rel="stylesheet" />
<script src="_content/Syncfusion.Blazor/scripts/syncfusion-blazor.min.js" type="text/javascript"></script> |
Note: When you run the application, you will see a message:
This application was built using a trial version of Syncfusion Essential Studio. Please include a valid license to permanently remove this license validation message. You can also obtain a free 30-day evaluation license to temporarily remove this message during the evaluation period. Please refer to this help topic for more information.
Click the link in the message for instructions on obtaining a key to make the message go away.
Create the database
From the toolbar, select View, and then choose SQL Server Object Explorer.
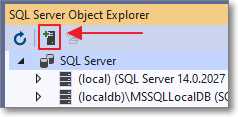
Figure 46: Add SQL Server
Click the Add SQL Server button to add a connection to your database server, if you don’t already have it in the SQL Server list.
Note: For this example, we do not want to use the (localdb) connection (for SQL Express) that you may see in the list.
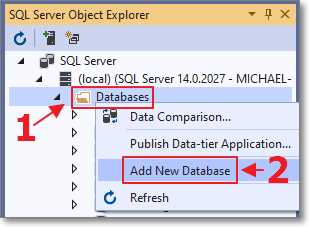
Figure 47: Add New Database
Expand the tree node for your SQL server, then right-click Databases and select Add New Database.
Name the database BlazorStoreFinder.
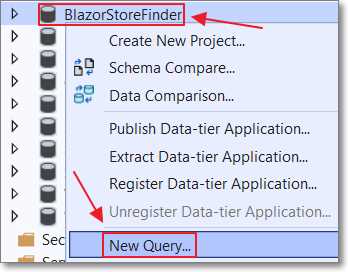
Figure 48: Create New Query
We will now create the StoreLocations table that will contain the stores. After the database has been created, right-click it and select New Query.
Paste in the following script.
Code Listing 31: StoreLocations Table SQL Script
SET ANSI_NULLS ON GO SET QUOTED_IDENTIFIER ON GO IF NOT EXISTS (SELECT * FROM sys.objects WHERE object_id = OBJECT_ID(N'[dbo].[StoreLocations]') AND type in (N'U')) BEGIN CREATE TABLE [dbo].[StoreLocations]( [Id] [int] IDENTITY(1,1) NOT NULL, [LocationName] [nvarchar](50) NOT NULL, [LocationLatitude] [nvarchar](50) NOT NULL, [LocationLongitude] [nvarchar](50) NOT NULL, [LocationAddress] [nvarchar](250) NOT NULL, [LocationData] [geography] NOT NULL, PRIMARY KEY CLUSTERED ( [Id] ASC )WITH (PAD_INDEX = OFF, STATISTICS_NORECOMPUTE = OFF, IGNORE_DUP_KEY = OFF, ALLOW_ROW_LOCKS = ON, ALLOW_PAGE_LOCKS = ON) ON [PRIMARY] ) ON [PRIMARY] TEXTIMAGE_ON [PRIMARY] END GO |
Click the Execute icon.

Figure 49: Execute SQL Script to Create StoreLocations Table
The StoreLocations table will be created.
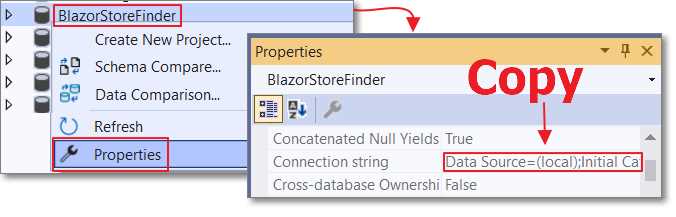
Figure 50: Copy Connection String
Right-click the database and select Properties. In the Properties window, copy the Connection string.

Figure 51:Paste Connection String
Open the appsettings.json file and paste the connection string in the DefaultConnection property.
Save and close the file.
- 80+ high performance Blazor components.
- Lightweight and user friendly.
- Stunning Built-in themes with customization.