
Azure Cosmos DB and DocumentDB Succinctly®

CHAPTER 2
First Steps with DocumentDB
Introduction
In the previous chapter, we had a bird’s-eye view of DocumentDB, its main features, and why it’s a great option when it comes to choosing a NoSQL database, given its capacity to massively, seamlessly scale.
In this chapter, we’ll explore how we can get DocumentDB set up and ready to use, specifically how to create the DocumentDB account, database, and then our first collection. After this initial setup, we’ll look at collections more in-depth and add documents to them.
In order to have data to later query and work with, we’ll also look at using the DocumentDB Data Migration Tool to import data from other sources into DocumentDB. This is a great way to see how data can transition away from more traditional sources to a NoSQL JSON document database.
Before getting started, it is important to note that you’ll need a Microsoft account (typically associated with a Hotmail or Live email account) and also an Azure subscription. Sounds exciting, so let’s not wait any longer to get started setting up DocumentDB.
DocumentDB setup
The first step to getting DocumentDB up and running is to create an instance on Azure. If you don’t have an Azure account, you’ll need to sign up for Azure with a Microsoft account. You can do that by visiting azure.microsoft.com and then clicking the PORTAL option at the top of the page.
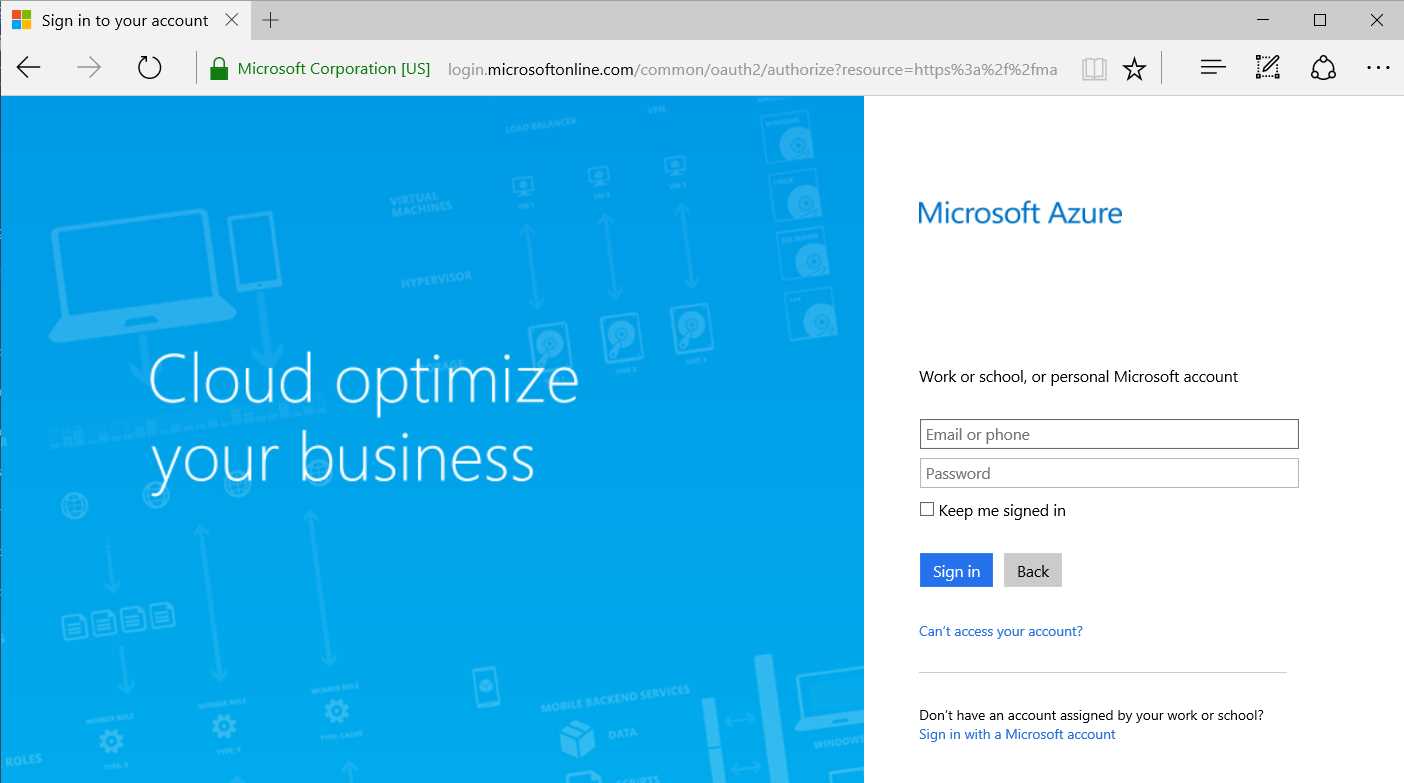
Figure 2-a: Microsoft Azure Sign-in Screen
Once you’ve signed up or signed in to the Azure Portal, you can browse through the list of Azure services and select the Azure Cosmos DB option.

Figure 2-b: Browsing for Cosmos DB within the List of Azure Services
After selecting the Azure Cosmos DB option, you have to create a new Cosmos DB account by clicking Add.

Figure 2-c: Screen to Add a Cosmos DB Account
This leads to a screen that allows you to enter the details of the Cosmos DB account: ID, API, Subscription, Resource Group, and Location. You can select which Azure region your account will be hosted on.
The ID is a unique global identifier within Microsoft Azure for the Cosmos DB account. Make sure to select SQL (DocumentDB) as the API. To finalize the creation of the account, click Create.
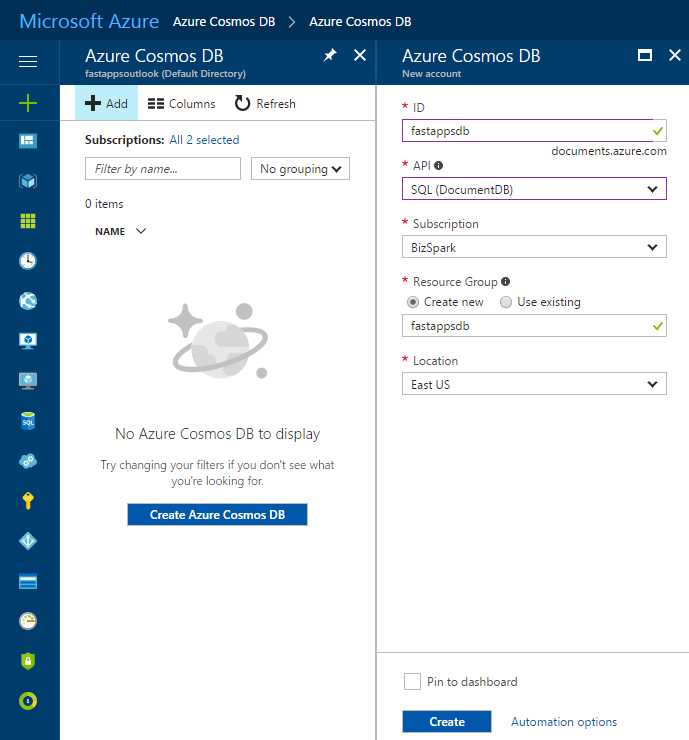
Figure 2-d: Final Cosmos DB Account Creation Screen
Once the Cosmos DB account has been created, it can be seen as follows.
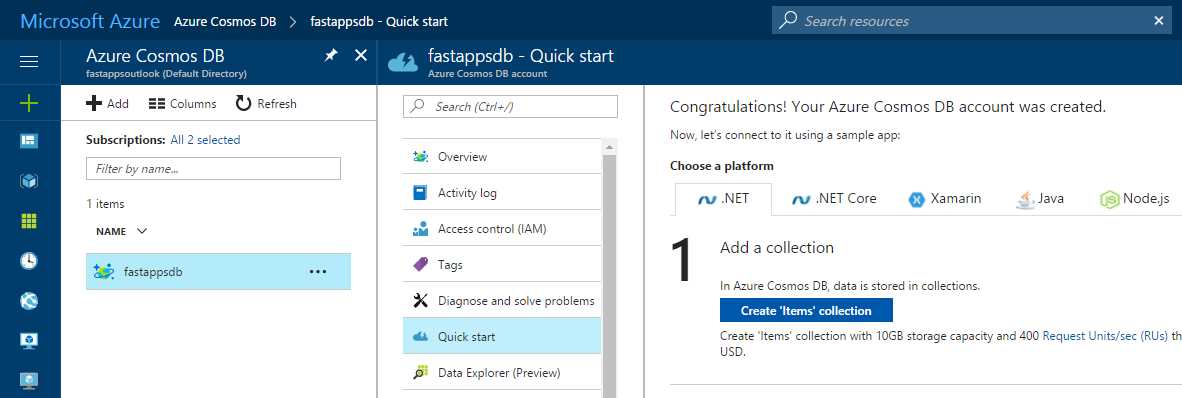
Figure 2-e: Cosmos DB Account Dashboard
In Cosmos DB, data is stored in collections. We can choose our platform and then click the Create ‘Items’ collection button to get started. In my case, I’ll be using .NET code later on so this is the platform I’ll choose.
Once the Items collection has been created, you’ll be presented with the following screen.
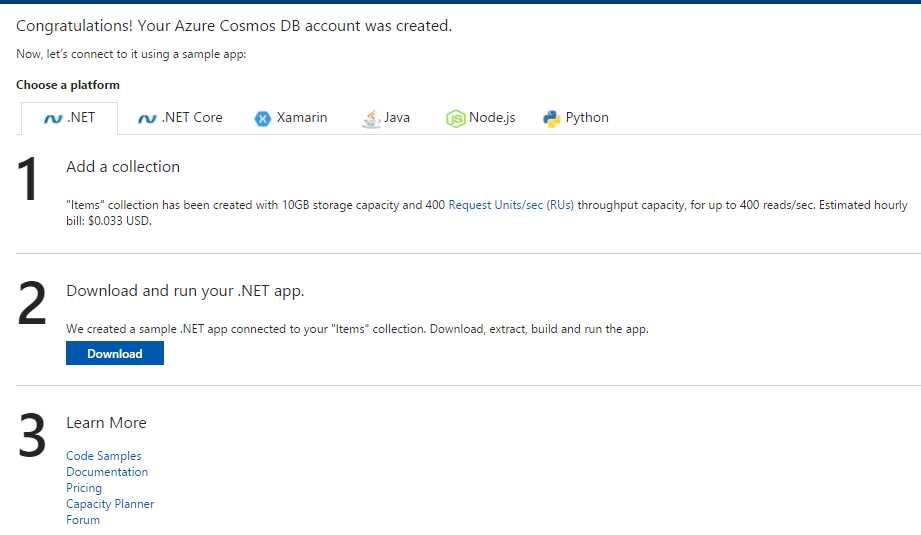
Figure 2-f: Items Collection Created Screen
You can choose to download the sample application provided, but I’ll skip this for now. Let’s instead click on the Data Explorer (Preview) option to view our Items collection.
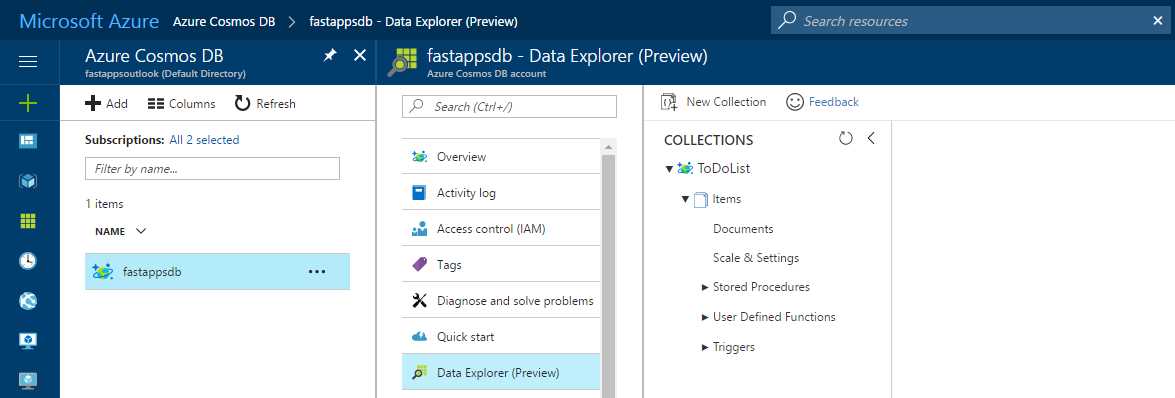
Figure 2-g: The Cosmos DB Data Explorer (Preview) Pane
We’ll be spending a bit of time in the Data Explorer (Preview) blade, so it will be our main starting point.
One of the downsides to using Azure services is that the UI is in constant flux. Therefore, by the time you read this, the UI will likely be slightly different from the figures in this e-book. However, changes will be minor and you'll have no trouble matching the figures to what you see.
But before we start adding documents and interacting with DocumentDB, let’s review quickly how it is internally structured.

Figure 2-h: DocumentDB Internal Structure (Image Courtesy of Microsoft Azure)
To understand this diagram better, note that a Cosmos DB account consists of a set of databases, each containing multiple collections, each of which can contain stored procedures, triggers, UDFs, documents, and related attachments.
A database also has associated users, each with a set of permissions to access various other collections, stored procedures, triggers, UDFs, documents, or attachments.
While databases, users, permissions, and collections are system-defined resources with well-known schemas, on the other hand stored procedures, triggers, UDFs, and attachments contain arbitrary and user-defined JSON content.
In my case, fastappsdb corresponds to the Cosmos DB account, ToDoList corresponds to the automatically created DocumentDB database that was created when I previously clicked the Create ‘Items’ collection button, and Items is the collection that was created.
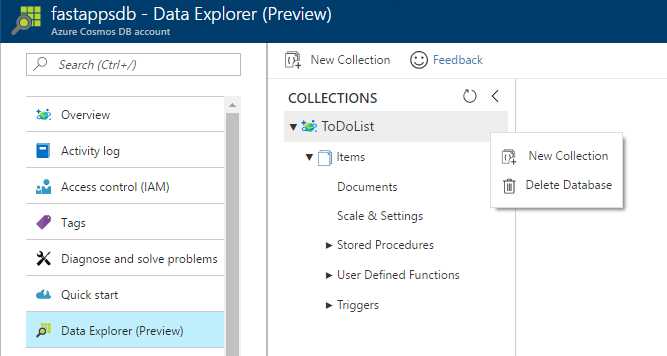
Figure 2-i: Our DocumentDB Database Containing the Items Collection
Notice that if you want you can choose to create a new collection on the existing DocumentDB database or delete it and later create a new one. For now, let’s leave things are they are.
Creating a new collection
Although we don’t need a new collection now, it is important to know how you can create one.
This can be done by simply clicking the New Collection button at the top of the Data Explorer (Preview) blade.
Alternatively, this can also be done at the database level by clicking the ellipsis (…) button, which will make a small menu appear, then clicking the New Collection option.
If you do this, a pane on the right side of the screen will appear where you can enter the name of your new collection.
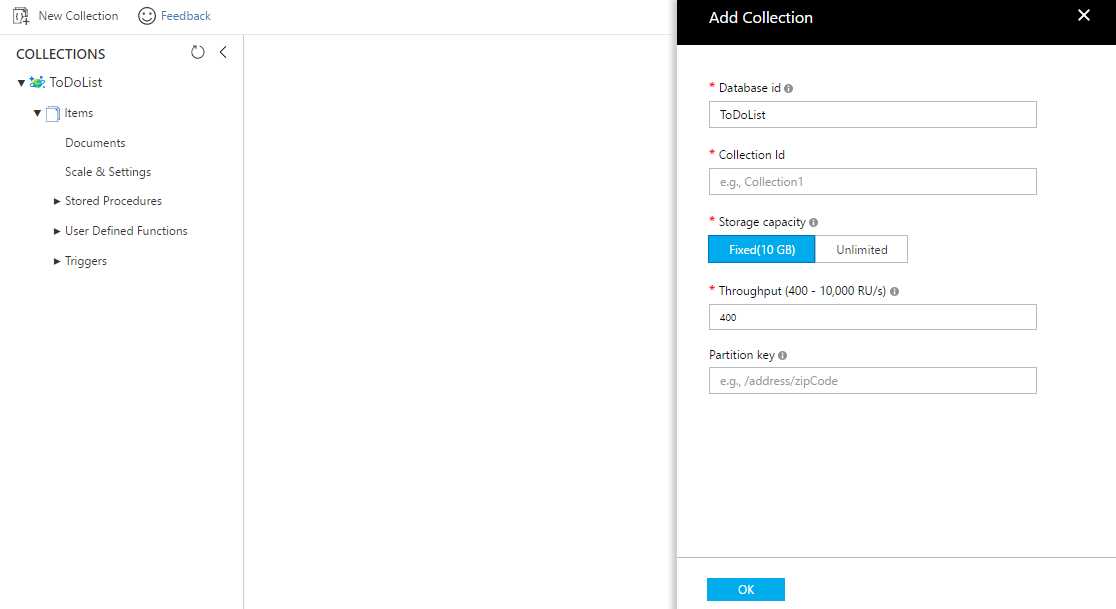
Figure 2-j: Add Collection Pane
Once there, specify a unique name that will be used for the Collection Id and then change the Throughput field if desired. You may also add a Partition key. You are now ready to create your collection. Let’s explore how we can add documents to an existing collection.
Adding a document
Within the Data Explorer (Preview) blade, expand the Items collection and then select the Documents option.
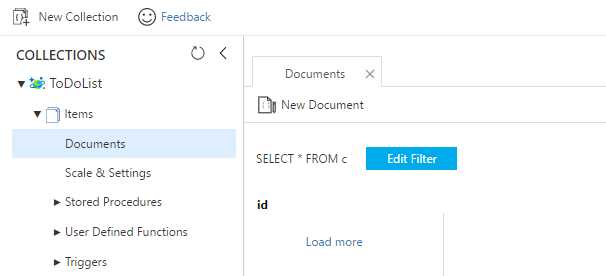
Figure 2-k: The Collection’s Document Explorer
Click the New Document button and the Document Explorer window will then change to edit mode and a template JSON document will be displayed. Remove the default JSON data and enter the following information.
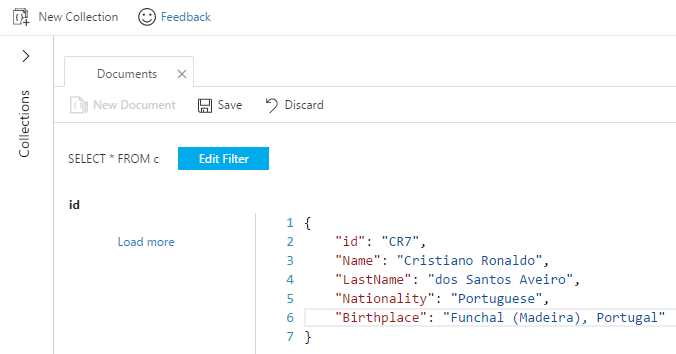
Figure 2-l: Creating a New Document with Document Explorer
This is a simple web-based text editor that enforces no rules and allows you to add pretty much any raw data to it.
We are creating a JSON document with basically any properties we wish. Once done, all we have to do is click Save and our document will be stored inside the collection.
Notice that a unique id has been provided and this must be unique across all documents within a collection. If you don’t provide a unique id, DocumentDB will automatically create one using a GUID.
The unique id property must be always a String no longer than 255 characters. It cannot be a Number, Date, Time, Boolean, or another object.
That’s all there is to creating JSON documents within the Azure Portal for a DocumentDB collection. Pretty easy.
Data migration into DocumentDB
A great way to get data into DocumentDB is to import it from a traditional relational data source such as SQL Server. However, that’s not the only way.
The open source project DocumentDB Data Migration Tool allows you to precisely achieve that. The binaries can be downloaded from here.
Furthermore, this tool allows you to import data not only from SQL Server, but also from various other sources such as Azure Table storage, JSON files, MongoDB, CSV files, RavenDB, Amazon DynamoDB, HBase, and even from other DocumentDB databases. It’s pretty handy.
Let’s go ahead and download this tool and then run it. The binaries are packaged as a zip file. Once downloaded, simply unzip to any folder.

Figure 2-m: The DocumentDB Data Migration Tool Binaries
Once unzipped, locate the file called dtui.exe and run it. You’ll then be presented with the following screen.
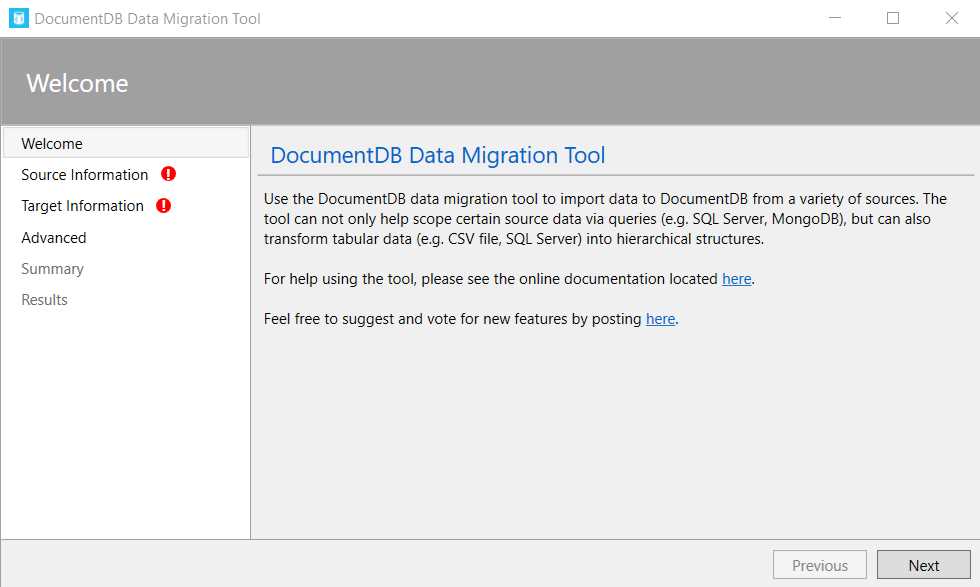
Figure 2-n: The DocumentDB Data Migration Tool Welcome Screen
The DocumentDB Data Migration Tool is quite intuitive and easy to use. Click Next and you’ll be asked to select the source from which you want to import. Then indicate the connection parameters required in order to retrieve the data.
In this example we’ll be importing data from an Azure Table.

Figure 2-o: Selecting an Import Source in the DocumentDB Data Migration Tool
Fill in the Connection String to the Azure Storage Table (which you can copy from the Azure management dashboard), the Table Name of the Azure table, and then, if you do not wish to fill in any of the other fields, click Next.

Figure 2-p: Target Information for the DocumentDB Data Migration Tool
Once this has been done, click Next to proceed. You’ll review the overall migration information and finalize the data migration process.
Given that there are multiple possibilities of importing data from various data sources, it is important to double check that the source and target information is correct so that the Data Migration Tool can correctly perform its job.
The Data Migration Tool is a handy way to get data into DocumentDB and get started. It is also a great way to get data from a standard SQL Server database system into DocumentDB. It’s a very easy to use tool that requires very little experimentation to get right. Use it to your advantage.
Summary
In this short chapter, we’ve gone through some of the basic steps required to get DocumentDB up and running and import data.
We’ve seen how to create a DocumentDB database and a collection, and add data to it. We’ve also looked at the different pricing tiers associated with performance levels when creating a collection.
In the next chapter we’ll look at using DocumentDB for running data queries using a very familiar SQL flavored syntax. Following that, we’ll explore building client applications and program directly on the DocumentDB server.
The real fun is about to begin. Thanks for reading!
- 1800+ high-performance UI components.
- Includes popular controls such as Grid, Chart, Scheduler, and more.
- 24x5 unlimited support by developers.