
Azure Bot Service Succinctly®

CHAPTER 3
Expanding the Bot
Overview
Conversational flows within bots are composed of different dialogs, which are connected one to the other.
In the previous chapter, we created the basics of our ZipcodeBot and added a new dialog. To be able to use that dialog, we need to invoke it. To do that, we need to start that dialog from a trigger.
So, we need to connect the get_zip dialog to the ZipcodeBot dialog—the bot's main dialog. To understand this better, let's look at the following figure.
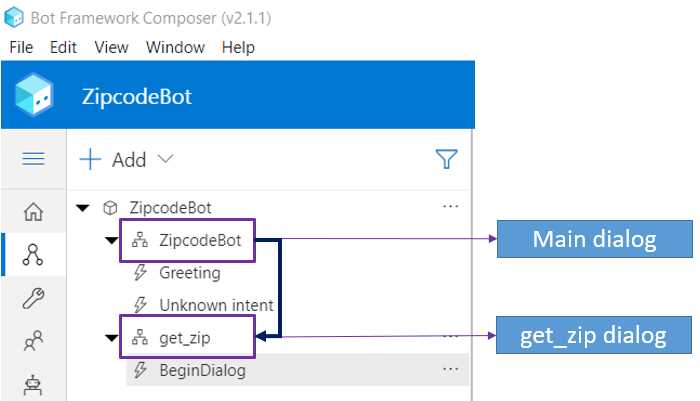
Figure 3-a: ZipcodeBot (Main) Dialog to get_zip Dialog Relationship
Executing the dialog from a trigger
Let's link the get_zip dialog to the bot's main dialog—ZipcodeBot. To do that, click the main dialog. Under Recognizer/Dispatch type, click Change—as seen in the properties pane in the following figure.
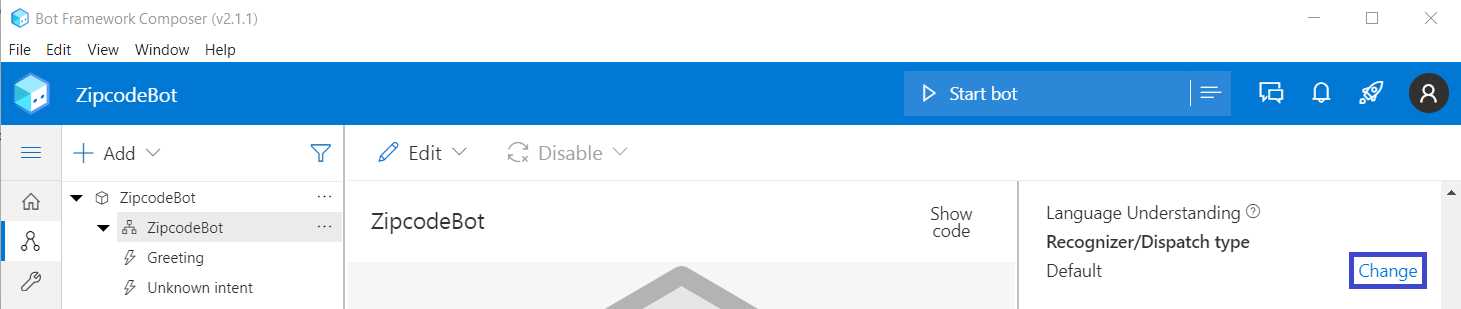
Figure 3-b: Composer – Properties Pane – Recognizer/Dispatch type – Change
A window will appear, which will allow us to choose a recognizer type. Click the Regular expression option and then click Done.
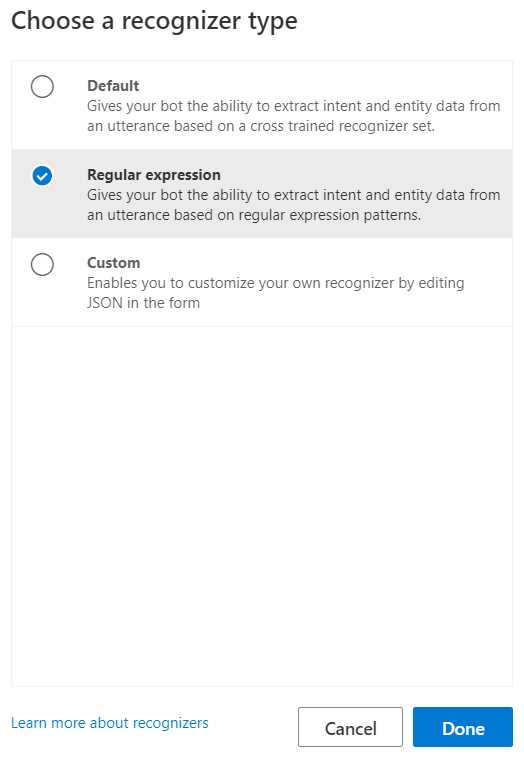
Figure 3-c: Choose a recognizer type Window
Next, click the ZipcodeBot dialog, click on the ellipsis (…), and click the + Add new trigger menu item.

Figure 3-d: Composer – ZipcodeBot – Add new trigger
Once those actions have occurred, an input dialog will appear, requesting the following info: trigger type, trigger name, and regEx pattern.
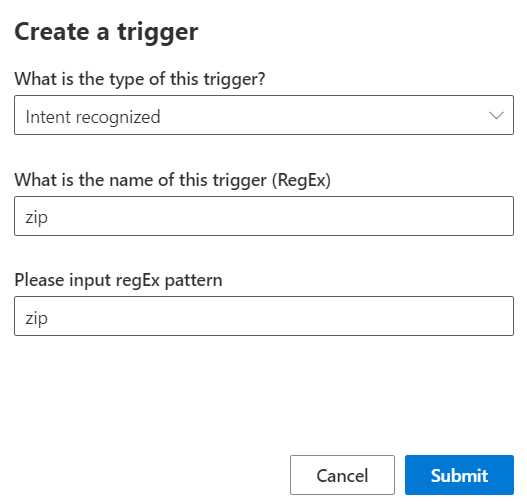
Figure 3-e: Create a trigger Dialog
For the type of trigger, we can leave the default value, which is Intent recognized. I will call the name of the trigger zip and use zip as the value of the regEx pattern. Next, click Submit.
The zip trigger will appear under Unknown intent in bot explorer. We can see that as follows.
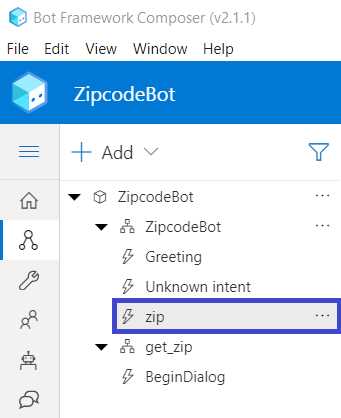
Figure 3-f: Composer – zip Trigger
Let’s recap what we've just done. The zip trigger instructs the ZipcodeBot to look for the word zip in any incoming message. To do that, we use regular expressions (also known as regEx).
Next, with the zip trigger selected, in the authoring canvas, click + > Dialog management > Begin a new dialog.

Figure 3-g: Composer – Dialog management – Begin a new dialog
Once the dialog appears, click the Dialog name dropdown and choose the get_zip option from the Dialog name on the properties pane.
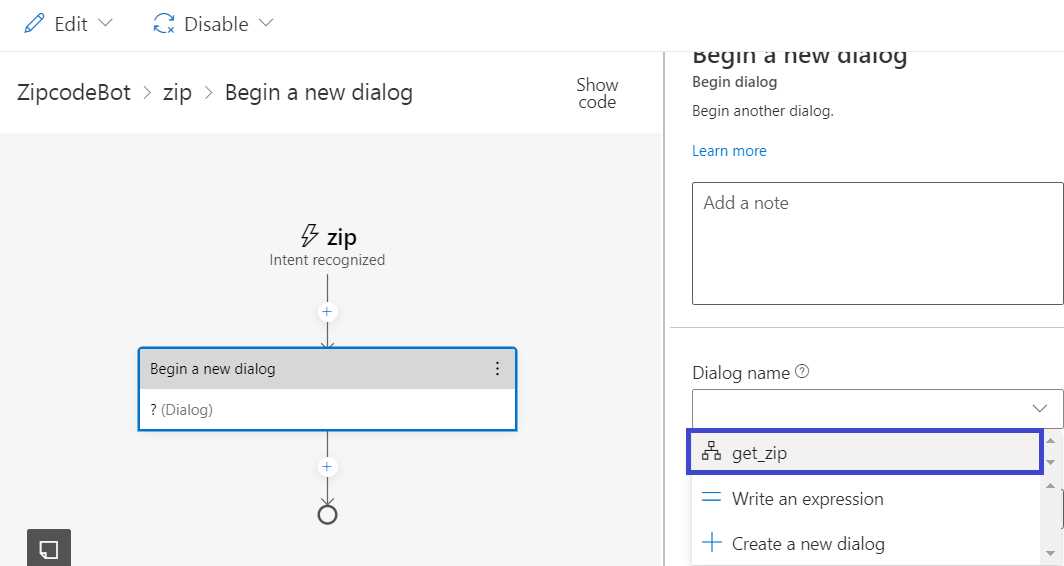
Figure 3-h: Composer – Dialog name – get_zip
We have just created a trigger and indicated that our ZipcodeBot could recognize regular expressions, using the word zip as the trigger.
Requesting user input
For the ZipcodeBot to get the relevant information regarding a zip code, the bot needs to request the user to enter the zip code, and for that, we need to use a Text input action.
Under the get_zip dialog within bot explorer, select BeginDialog and then click + under Begin a new dialog in the authoring canvas.
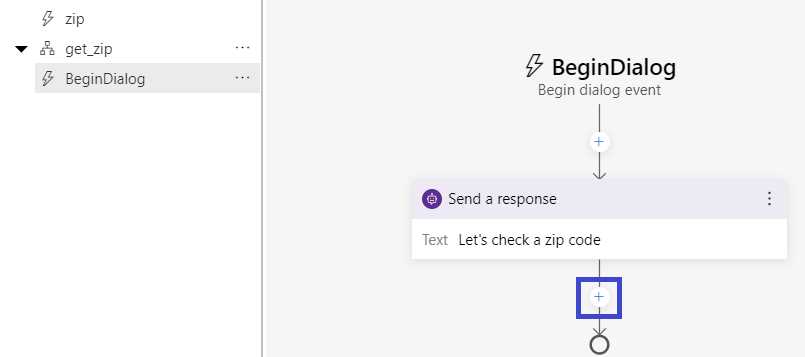
Figure 3-i: Composer – get_zip – BeginDialog
Next, click the Ask a question menu item and then Text.

Figure 3-j: Composer – get_zip – BeginDialog – Ask a question – Text
We are prompted to enter the Prompt for text followed by the User input.
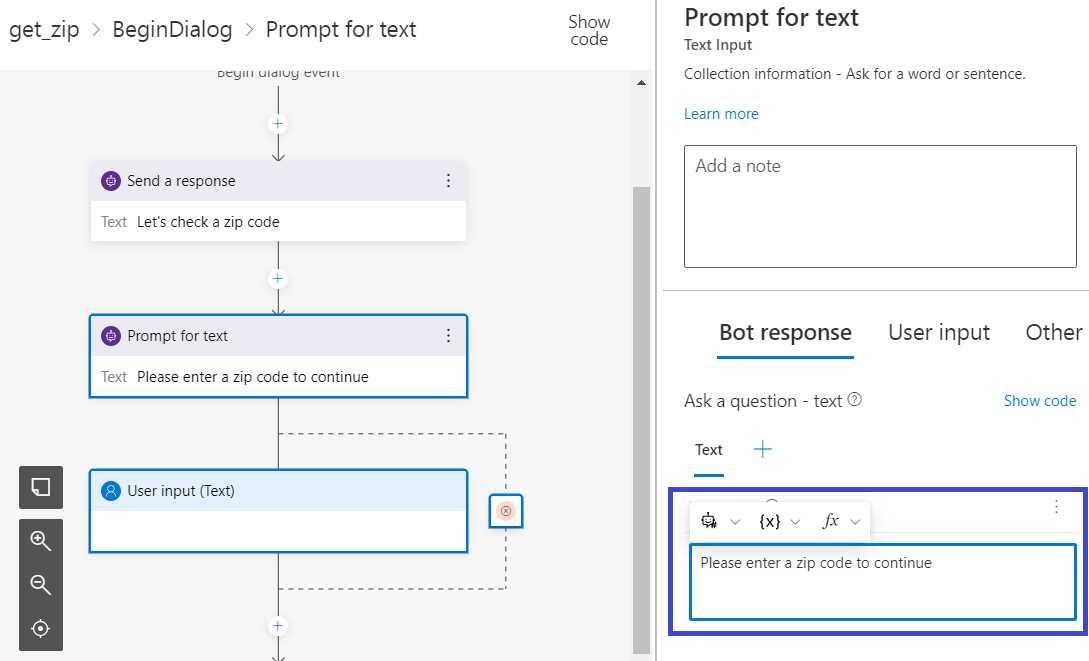
Figure 3-k: Composer – get_zip – BeginDialog – Prompt for text
Under Bot response, we can enter the following text: Please enter a zip code to continue. With that done, select the User input (Text) action. Under User input, enter user.zip within the Property box.

Figure 3-l: Composer – get_zip – BeginDialog – User input
Output format
Now that we have specified the user input, we need to indicate the output format. To do that, click the Output format box then enter the value trim(this.value) in the field.
The trim function is a prebuilt expression that removes leading and trailing spaces from a value, and this is useful in case the user enters the zip code with a leading or trailing space.
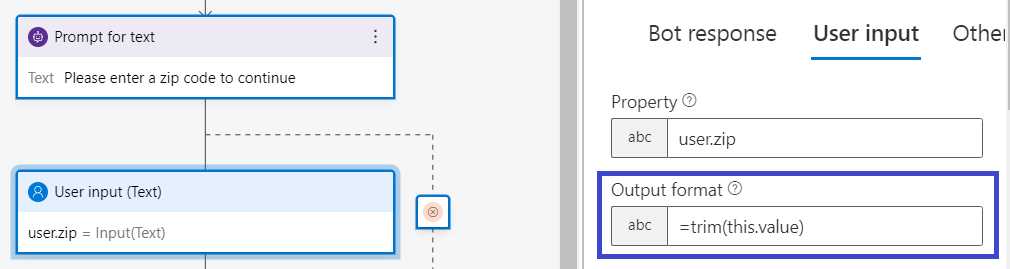
Figure 3-m: Composer – get_zip – BeginDialog – User input – Output format
Input validation
We have managed to gather the user's input and set the output format at this stage. So far, so good. Nevertheless, we need to ensure that the user's data is valid—an action known as input validation.
As the user will be entering a zip code, we should at least confirm that the zip code provided is a valid one. To do that, we can check if the zip code supplied is a valid U.S. zip code.
The Zipcodebase API is valid for multiple countries, and that's a lot of zip code country formats to validate, so let's limit the input validation to U.S. zip codes only.
If the user indicates a U.S. zip code with fewer than five characters or more than five characters, the input validation would be invalid. Otherwise, it would be valid.
Let's get that sorted. In the authoring canvas, click Other in the properties pane. Expand the Recognizers section, click Add alternative, and enter the text shown in the following figure.
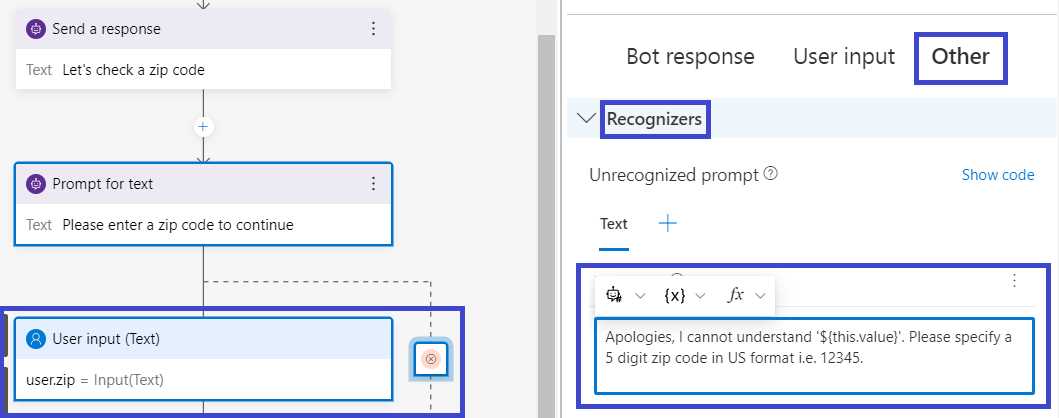
Figure 3-n: Composer – get_zip – BeginDialog – User input (Text) – Other – Unrecognized prompt
The text value is as follows: Apologies, I cannot understand '${this.value}'. Please specify a 5 digit zip code in US format i.e.12345.
That's the text response that the bot will return if the user input is not understood.
Next, we need to specify the validation rule to check whether the zip code entered is valid or not. Click the Validation section, then under Validation Rules click Add new > Write an expression.
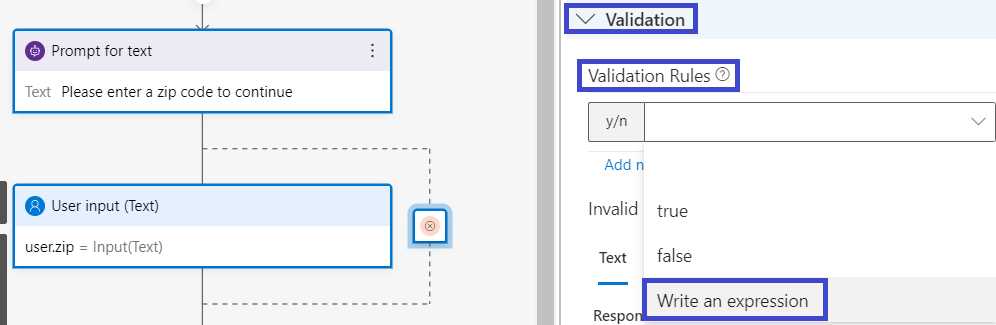
Figure 3-o: Composer – get_zip – BeginDialog – User input (Text) – Other – Validation Rules
Enter the expression length(this.value) == 5, which will ensure that the zip code value is five characters long.

Figure 3-p: Composer – (get_zip – BeginDialog – User input (Text) – Other – Validation Rules
We also want to add a response that the bot can send back to the user if the zip code length is different than five characters. We can do this by clicking Add alternative under Invalid prompt.
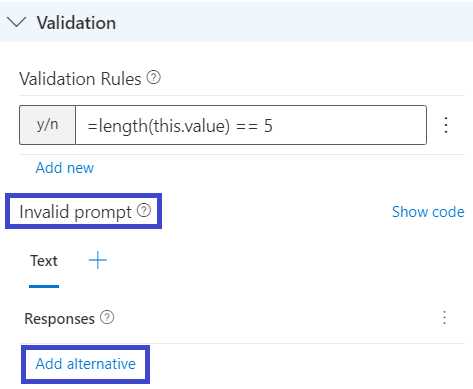
Figure 3-q: Invalid prompt – Add alternative
Enter the following text: The zip code '${this.value}' is not valid. Please enter a zip code that is 5 digits long.
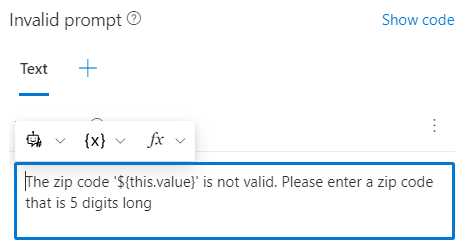
Figure 3-r: Invalid prompt – Text response
Default zip value
Although it is not strictly necessary, it’s also possible to add a default value for the zip code that the bot can return.
To do that, click Prompt configurations, and under Default value, enter a valid U.S. zip code. I'm going to enter 33165, but you may choose another.
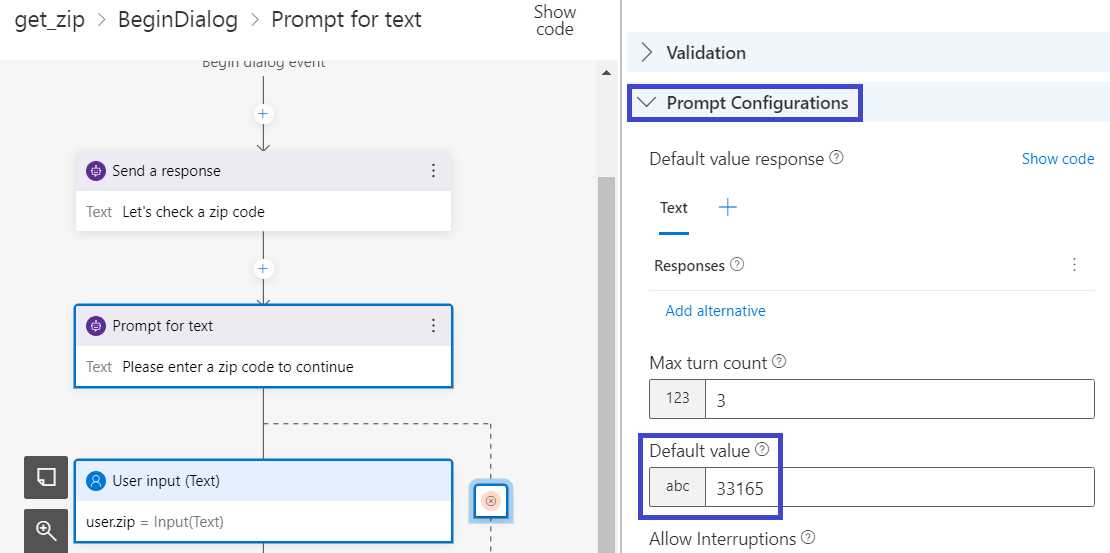
Figure 3-s: Composer – get_zip – BeginDialog – User input (Text) – Other – Prompt Configurations
Summary
We have set the bot up so that whenever a user enters the message zip, the bot will respond and request the user to indicate the zip code. If that value is valid, then it will be stored in the user.zip variable.
If the value is not a valid zip code (not equal to five characters), the bot sends an error message back to the user.
Next, we are going to explore how to make a call to the Zipcodebase API.
- 1800+ high-performance UI components.
- Includes popular controls such as Grid, Chart, Scheduler, and more.
- 24x5 unlimited support by developers.