
Aurelia Succinctly®

CHAPTER 4
Skeleton Navigation
Overview
Up until now, we have been talking about getting things set up and general development in JavaScript. Let’s dive into the focus of this book and take a look at the skeleton navigation. We will evaluate and look at what it takes to create an Aurelia application.
Skeleton Navigation demo
We will be using the skeleton-esnext-webpack version. You can start the server by executing the following command:
Code Listing 66
npm start |
Next, open up your favorite browser and navigate to the following URL: http://localhost:9000.
The application will spin for a second, and then you should see the following:
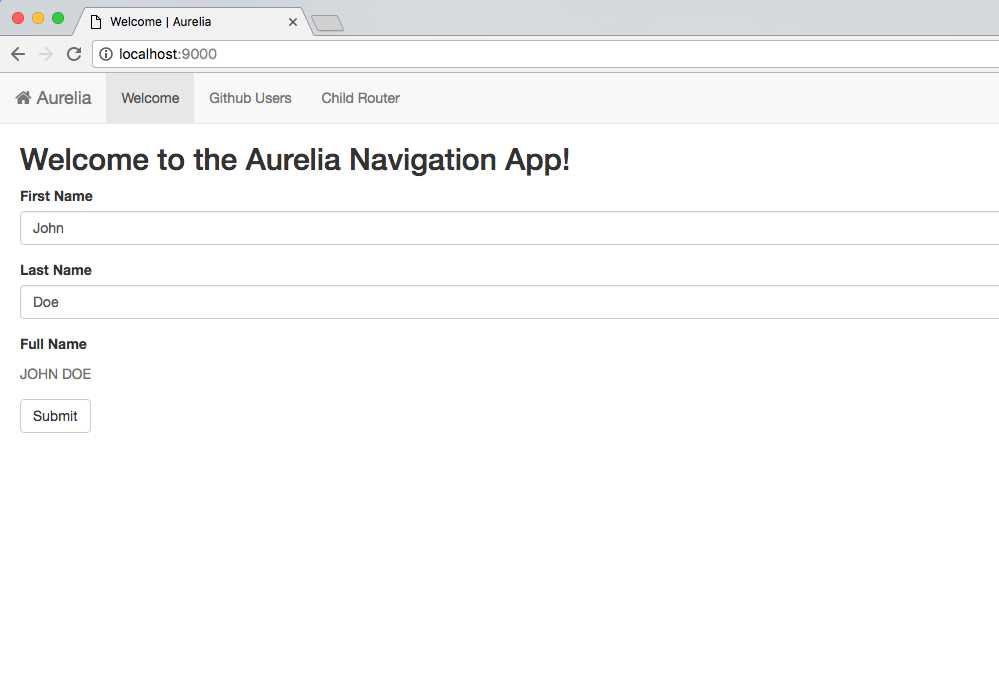
Figure 10: Skeleton Navigation
From this simple site, we will be able to start understanding how Aurelia works and how we can use it for our own applications.
Let’s look a little more at the Welcome page. We can intuit that we have two-way databinding and a computed property. If I were to use the first and last name input box fields to input “Matt Duffield,” I would get the following screenshot:
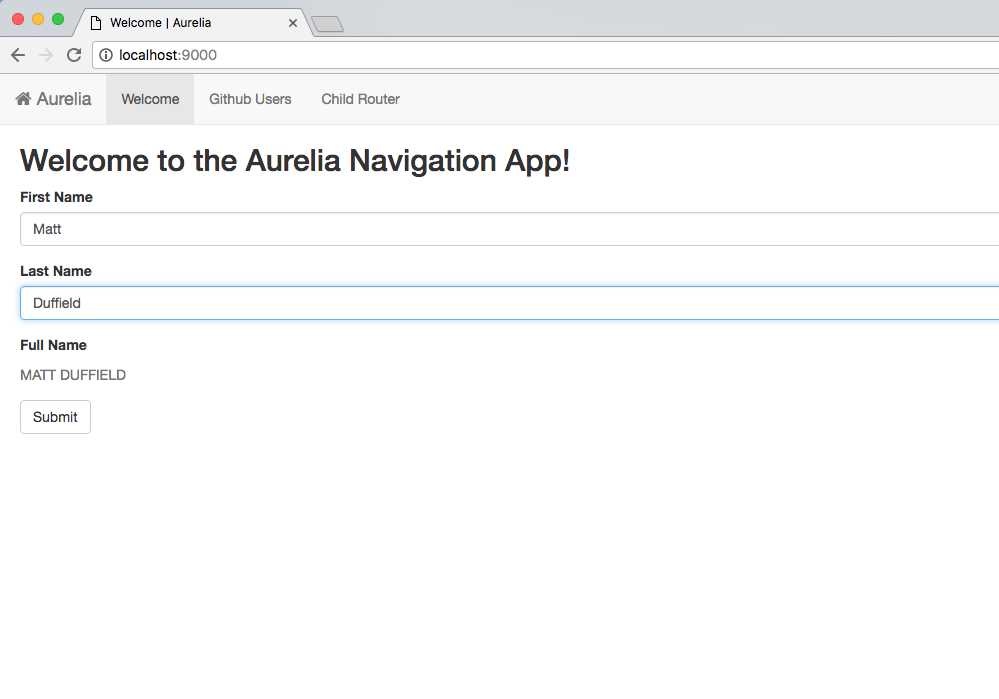
Figure 11: Demonstrating two-way databinding
Note: If you click on the Aurelia menu item on the far left, you will be redirected to the default page, which is the Welcome screen.
We also see that we have a Submit button, and when we click on it, we get the following output:
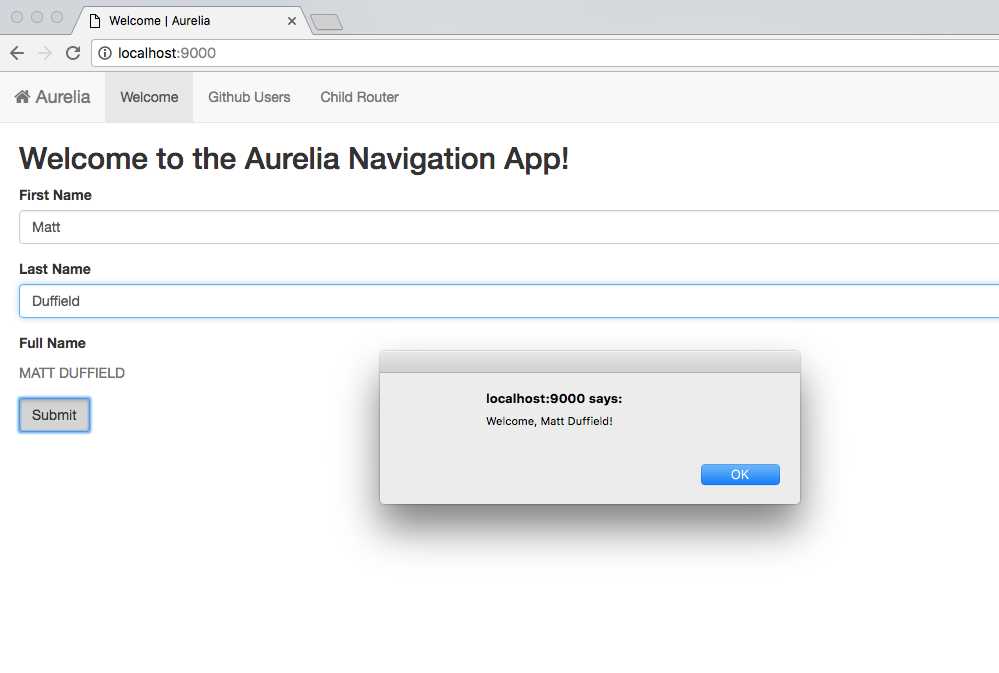
Figure 12: Demonstrating click delegate
Moving on, we see that we have a menu at the top that allows us to navigate to other pages. Let’s see what we get when we click on Github Users:
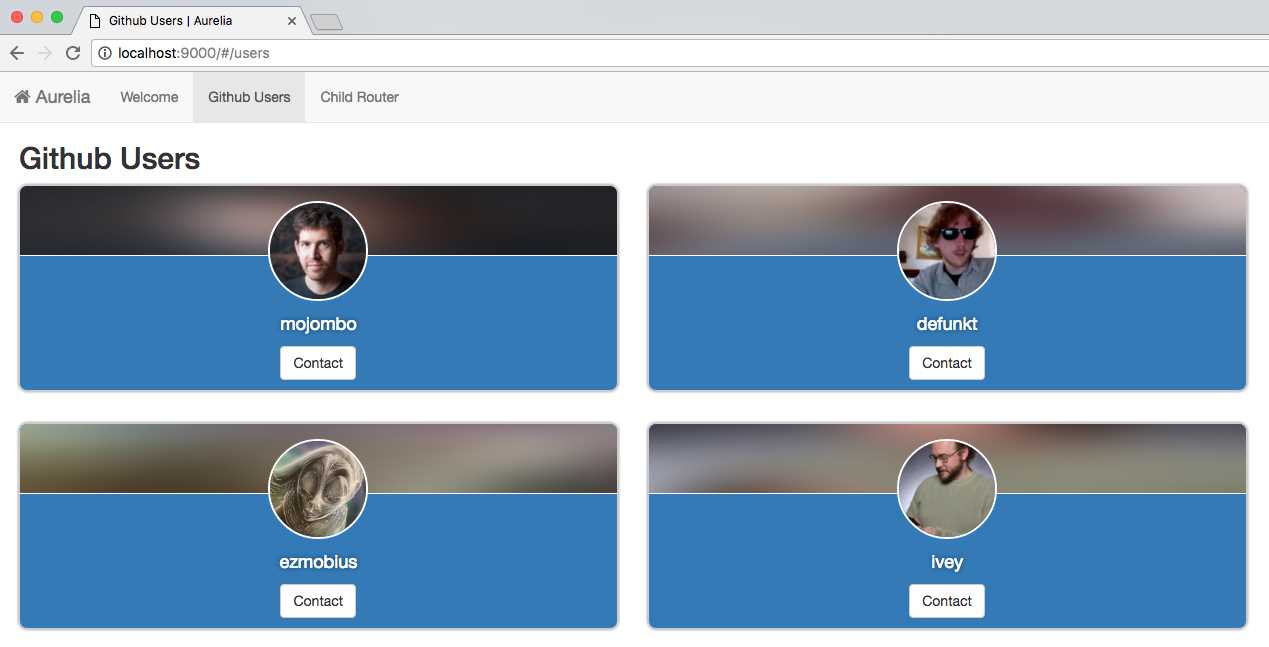
Figure 13: Demonstrating Web API call
As we will see in a later chapter, this page demonstrates making a Web API call and rendering the results to the screen.
Finally, let’s navigate to the Child Router menu item and repeat a couple times. You should see something similar to Figure 14:
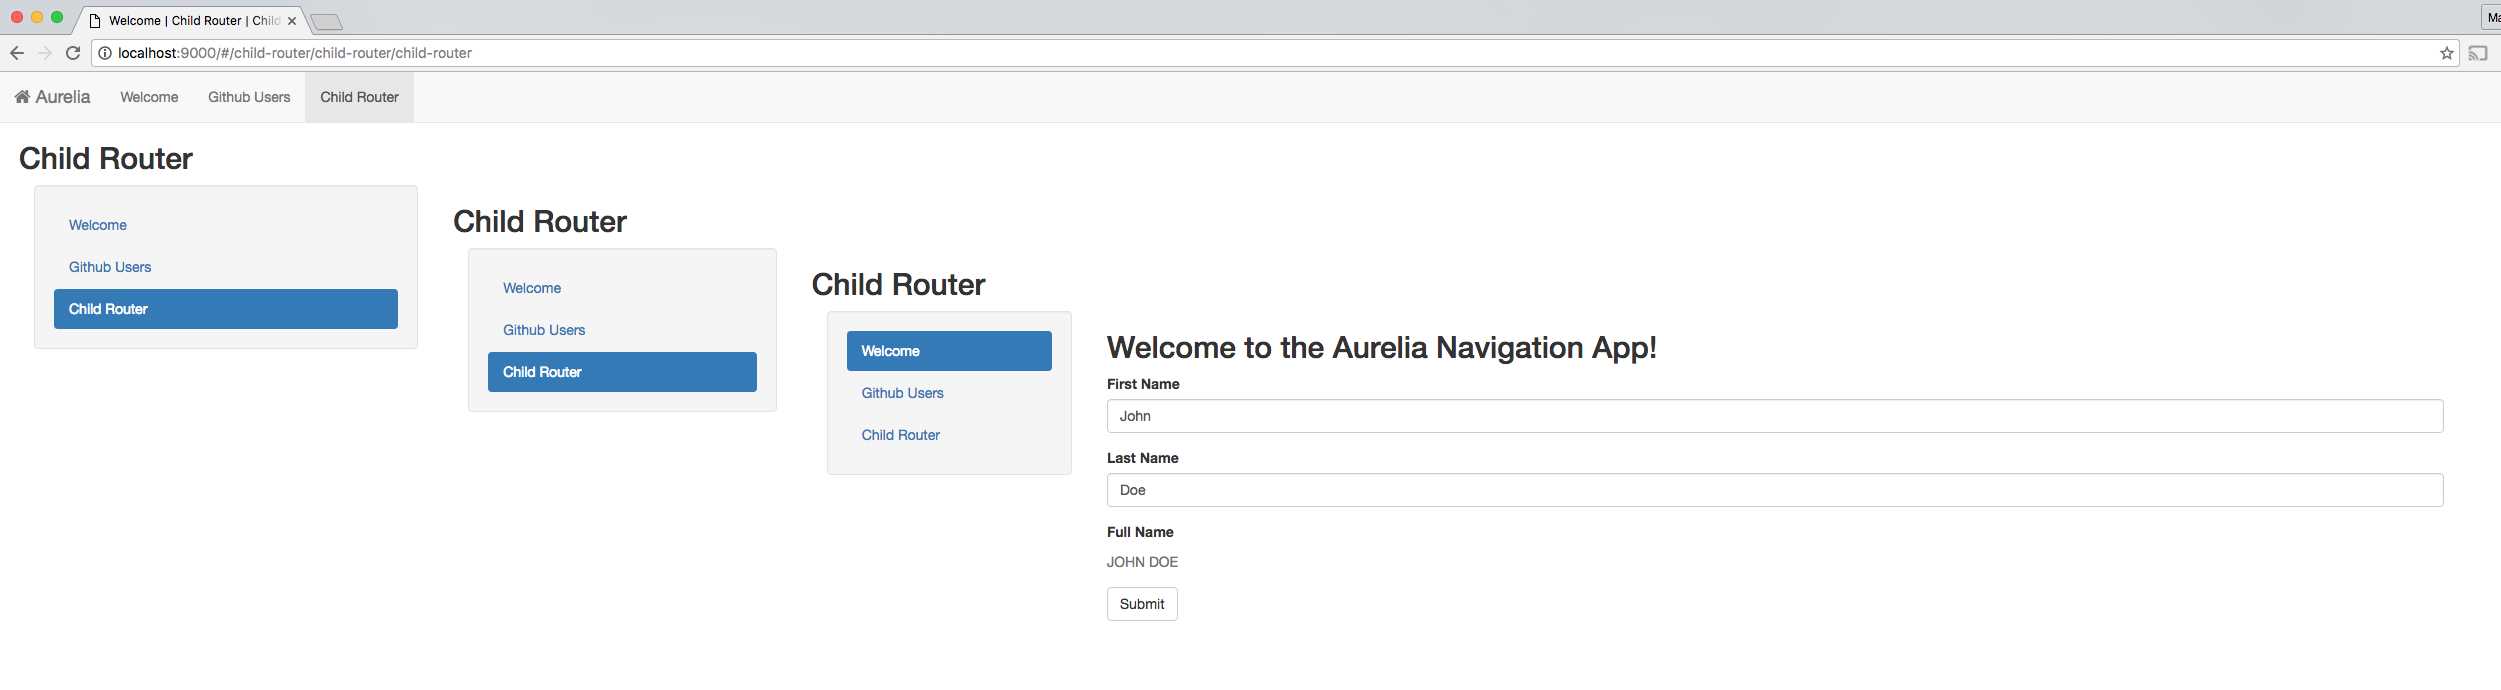
Figure 14: Demonstrating routing capabilities
If we consider what is happening here, we see that we are able to easily have a powerful hierarchical routing system. We will look at what it takes to perform this in a later chapter.
Skeleton Navigation architecture
We have seen how the application runs and behaves. Let’s take a look at what it takes to build the application. We will start by looking at the file structure of the project:
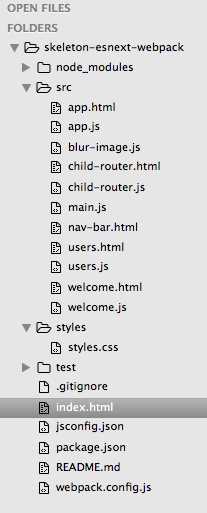
Figure 15: Skeleton navigation file structure
As you can see, all of our application source code is under the src folder. We also have another folder for our styles. We have a test folder that will give us examples of both unit and end-to-end testing. Finally, we have our root location where our index.html file resides.
Note: The structure of the skeleton navigation varies slightly depending on which project example you choose to evaluate.
index.html
Let’s start by looking at the index.html file:
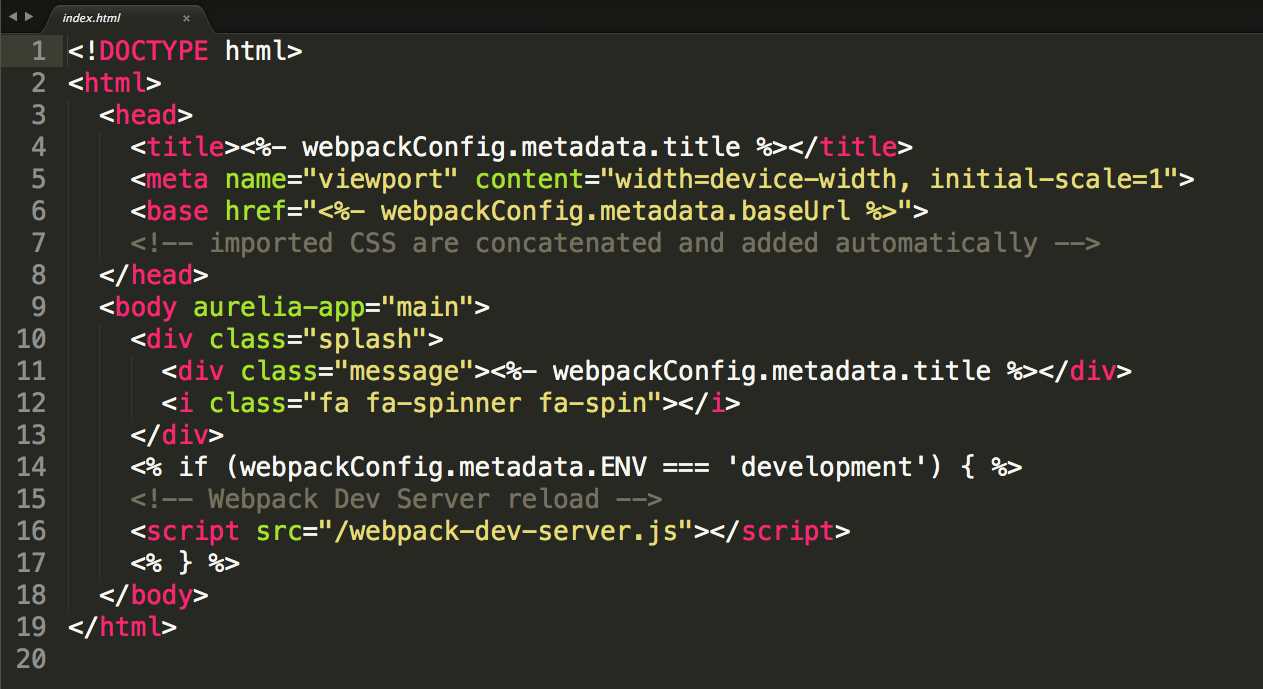
Figure 16: index.html
Inside our index.html file, we see that we are setting the title of our application by pulling it from the webpackConfig.metadata.title property. Next, we set the meta establishing our width and initial scale. Finally, we set the base tag href to the webpackConfig.metadata.baseUrl property.
Inside the body, we see our first references to Aurelia proper. We see the aurelia-app attribute with the value main. This lets Aurelia know that the entry point for our application will be to look for a file name, main.js. We can confirm that this is the case by finding the main.js file under the src folder in the Figure 6–Skeleton Navigation file structure.
Inside the body definition, we see a div that contains a class with the value splash. The div contains child elements with the title of our application contained in the webpackConfig.metadata.title property, and also a reference to Font Awesome for displaying a busy indicator. This div will become visible as our application loads a given screen. Once the activate function has returned, the div will then become hidden.
The last markup you see has a conditional requirement to only be utilized if our ENV has the value of development. If our ENV contains the value development, then we will be able to develop our application in our favorite editor, and when we save our files, the application in the browser will automatically refresh.
main.js
Now that we understand what is happening in the index.html file, let’s take a look at the main.js file and see what is happening there. Consider the following:
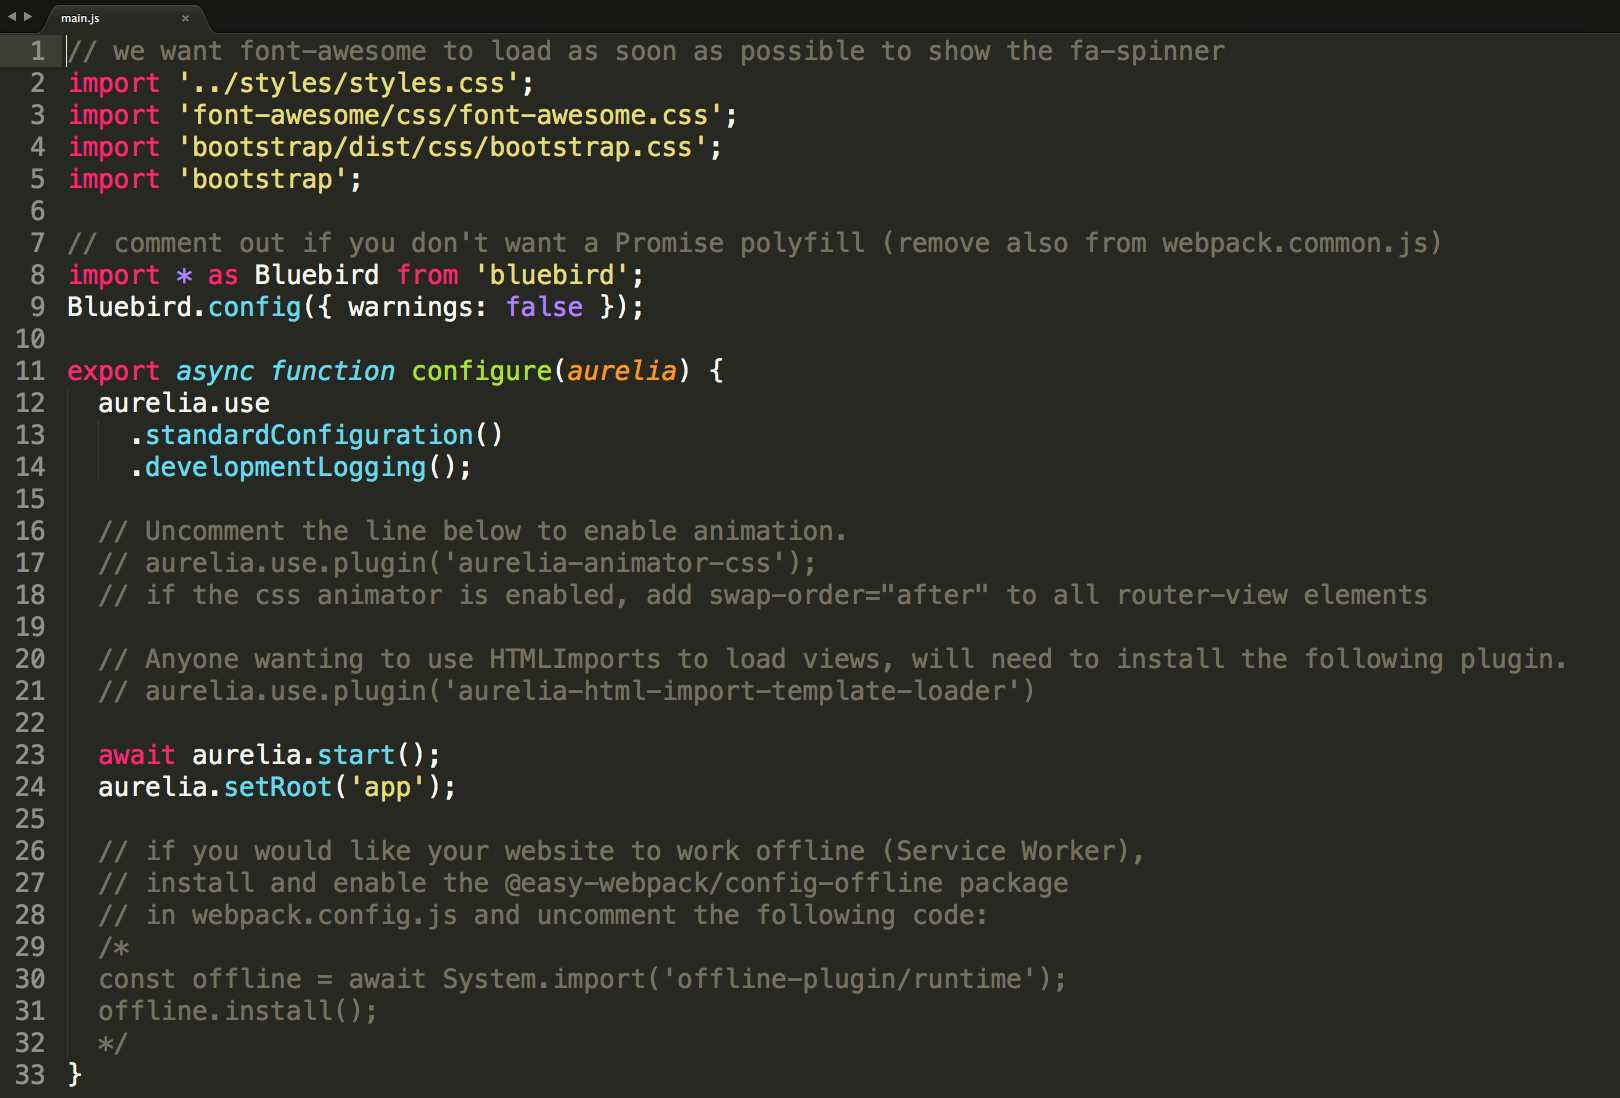
Figure 17: main.js
Starting from the top of the file, we see five import statements. This is new to ES6, and module loading allows us to ensure separation of concerns. We see that we are importing style.css, font-awesome.css, bootstrap.css, and finally, bootstrap. The first three references are CSS files, and the last one is the actual Twitter Bootstrap reference by the name bootstrap. We can verify that there exists an entry called bootstrap by looking quickly at our package.json file. Let’s look at a portion of this file now:
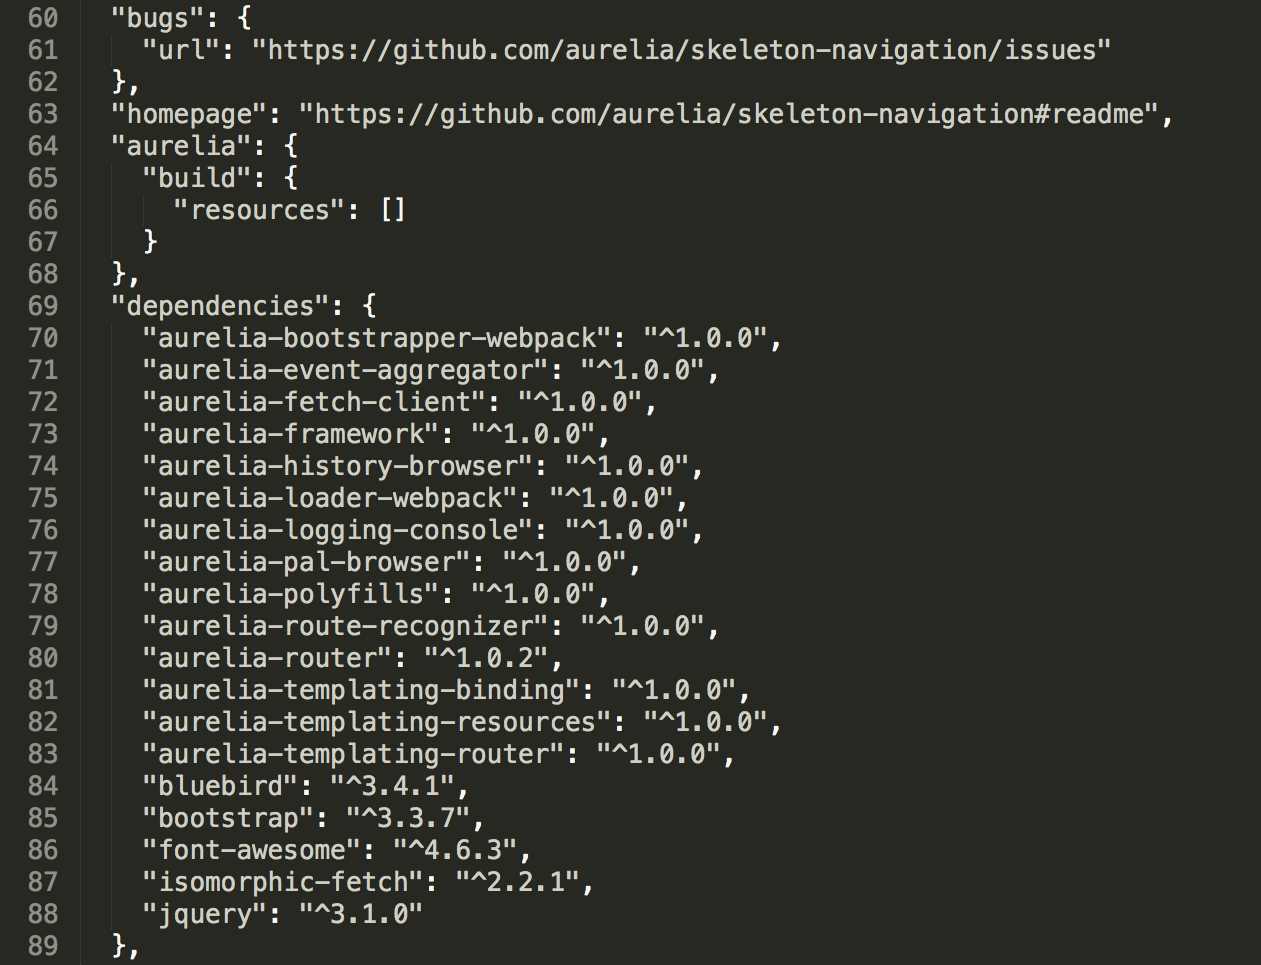
Figure 18: package.json snippet
We see from the snippet that our package.json file does contain an entry named bootstrap in the dependencies section. This name is what we use in our import statements, and you see that we bring in bluebird the same way. With Bluebird imported, we call its config function, passing in a JSON literal.
Next, we export a configure function and mark it as async. The function receives an Aurelia object as its parameter, and we use this object to configure our application.
On our aurelia object, we specify we want to use the standardConfiguration and turn on developmentLogging.
We make sure that we await the call to aurelia.start() so that we can set the root entry for the application to the value app. You will see that this value corresponds to the app.html and app.js in our src folder.
There are quite a few comments in this file, and we will come back to and look at how they are used in later chapters.
app.html and app.js
We are slowly unraveling how Aurelia performs its startup sequence. We now move on to our first view and view-model in the application. Let’s take a look at the app.html file:
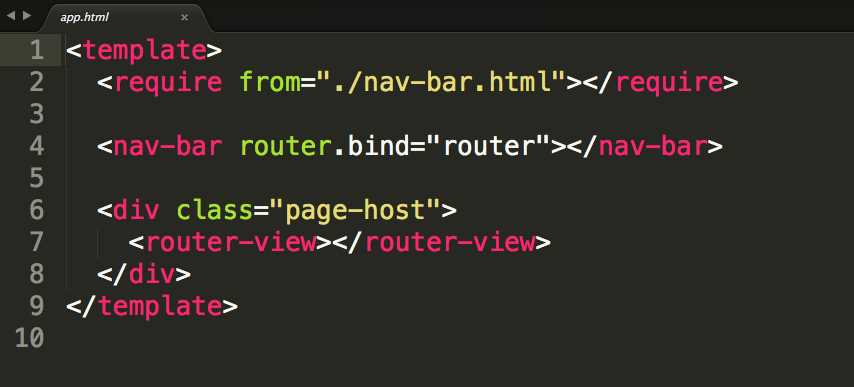
Figure 19: app.html
Every screen or page that is defined in Aurelia starts with a template tag containing all of the markup. Next, you will see a require tag that allows us to bring in custom elements. We immediately use the nav-bar custom element and bind the router property to a router object on our view-model, which we will see shortly.
After this, we see a div that contains a single class, page-host. Inside our div is an Aurelia custom element, router-view. It is through this element that we are able to inject our pages into this location.
Let’s look at the app.js file next:
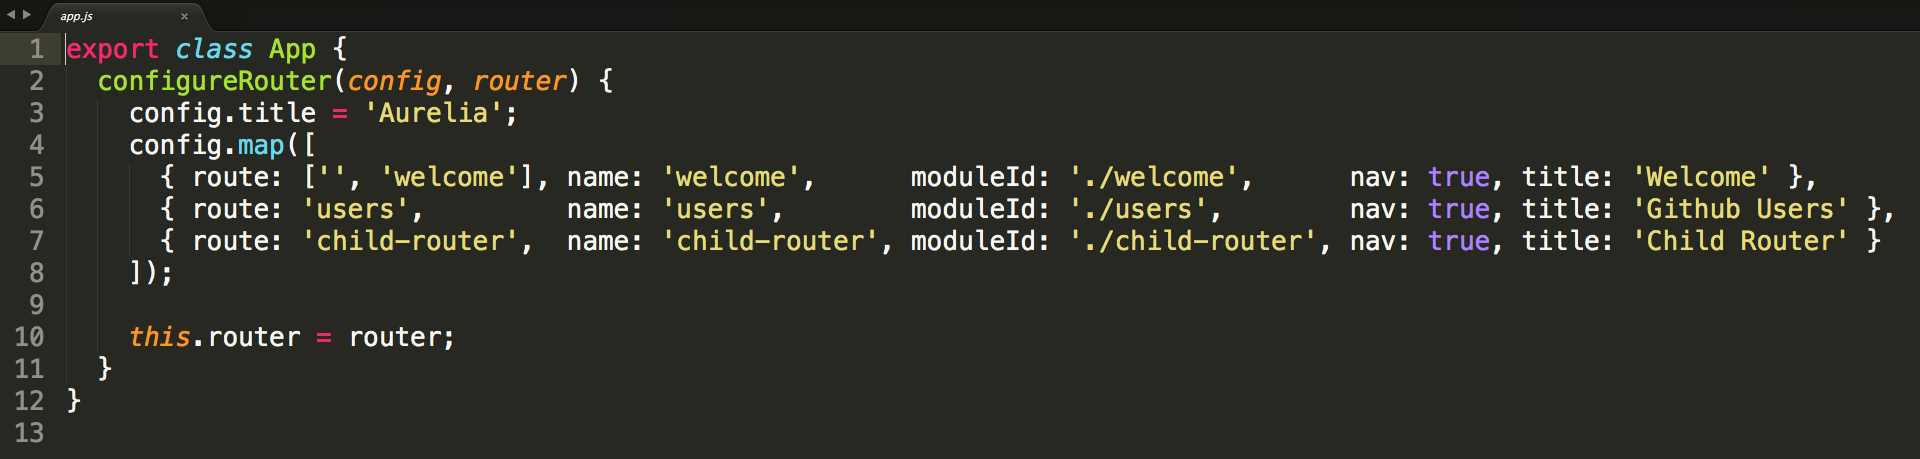
Figure 20: app.js
By convention, when we load our app.html file, Aurelia tries to find a corresponding view-model class with the same naming convention, but with the extension .js. We see that this file defines a class named App, and it has a single function, configureRouter, that takes in a config and router object.
The config object allows us to specify a title for our application. It is this title that shows up in the menu beside the home icon. We also provide an array to the map function. This array corresponds to the routes we wish to define in our application. Looking at the first entry in the array, we see a route property that has two entries: '' and welcome. This is how we are specifying our default route so that Aurelia knows which route to display when no route is passed, or when an invalid route is passed. We also have name, moduleId, nav, and title. We will look more carefully at the router in a later chapter.
Finally, we set the passed-in router object to a class-level property with the same name.
nav-bar.html
When we were looking at the app.html file, we required in a custom element, nav-bar.html. When Aurelia sees this tag, it will look for the nav-bar.html file relative to the app.html file. Let’s take a quick look at what was involved in creating this first custom element:
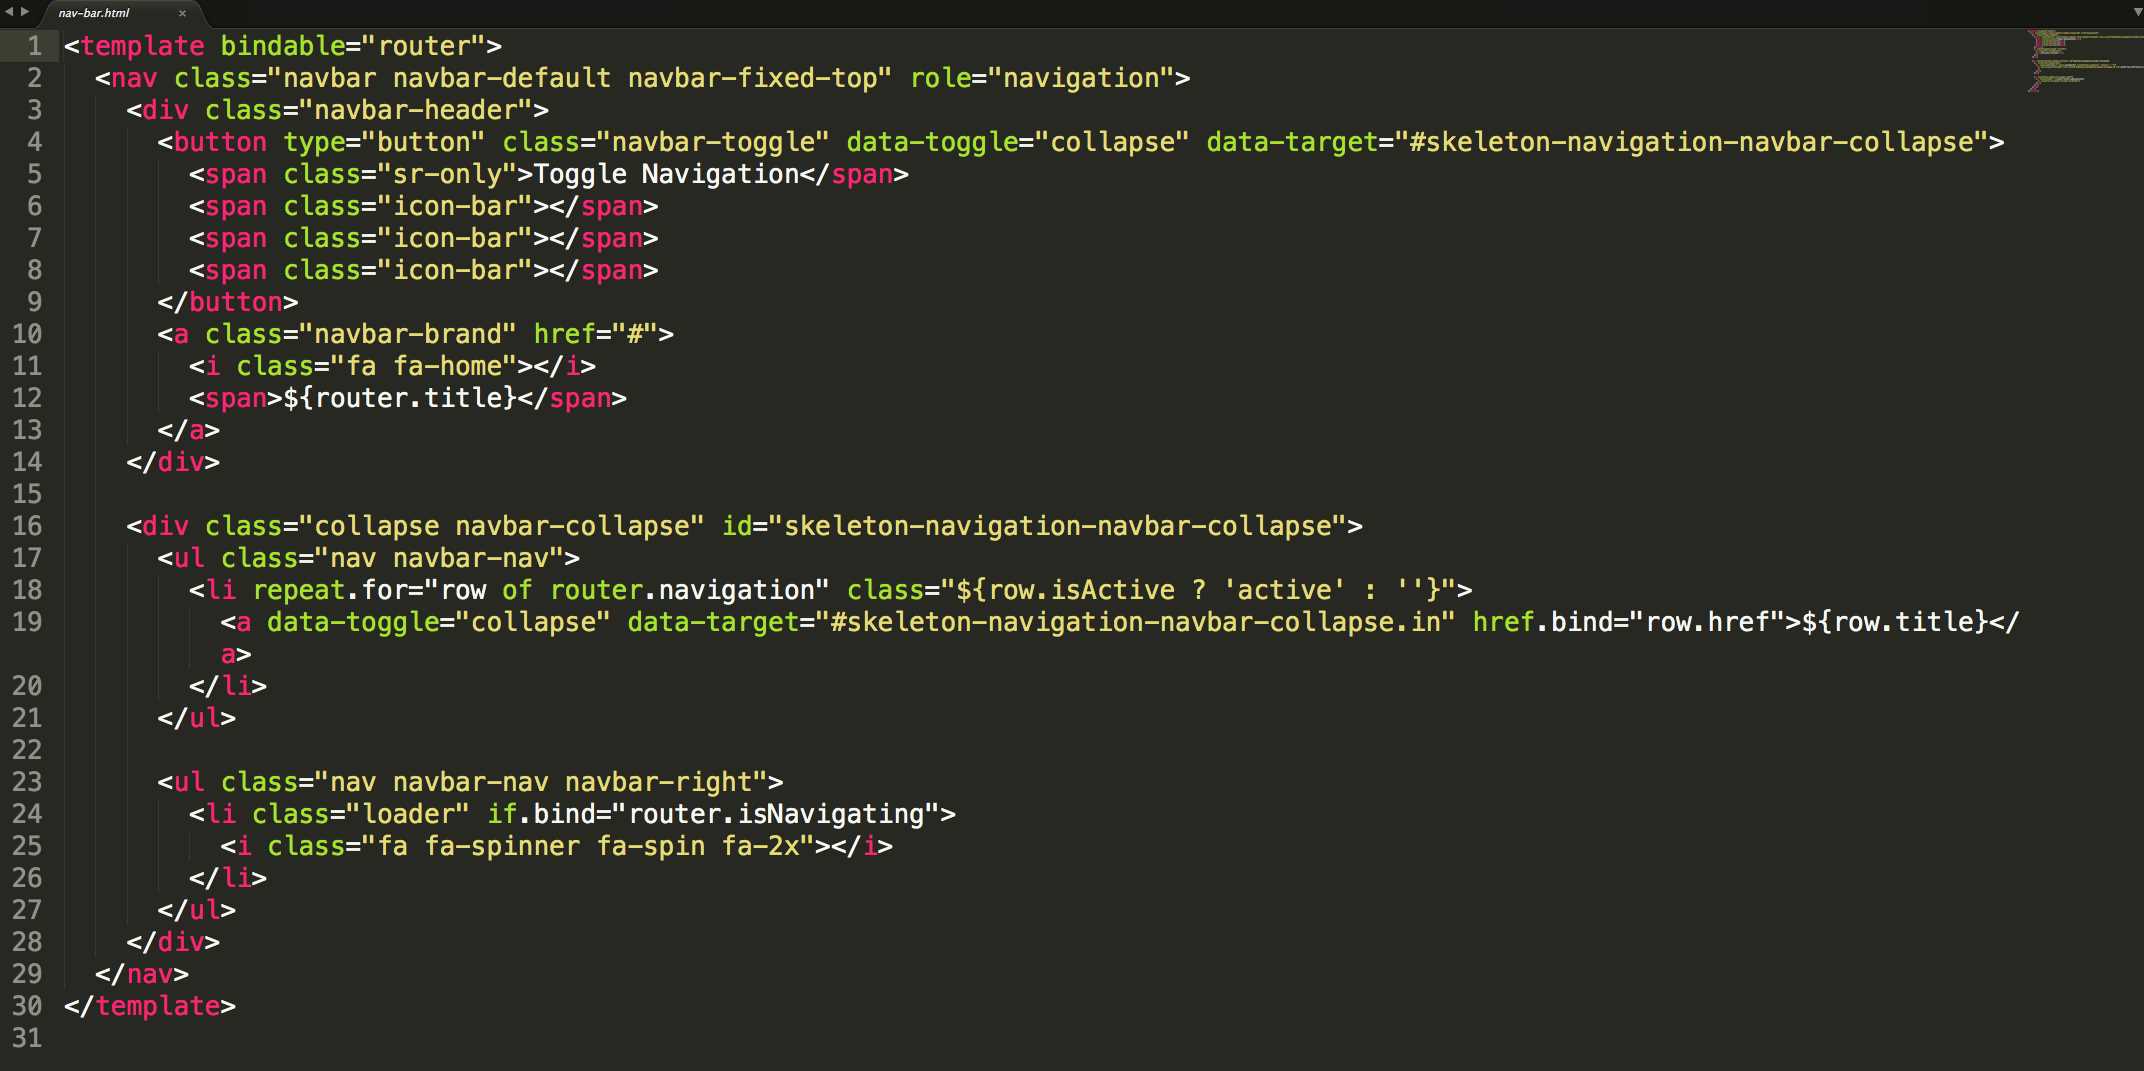
Figure 21: nav-bar.html
If you have played with Twitter Bootstrap, you will see that what is presented here is a Bootstrap menu with some Aurelia bindings. We will go into databinding in much more detail in the next chapter, but there are a couple things to note about this custom element. First, if you refer back to Figure 6, you will notice that there is no corresponding view-model file name, nav-bar.js. This is an example of a custom element that does not need any custom behavior defined in a view-model, and Aurelia is happy to provide a generic default view-model for such scenarios. Also notice that on the template tag, we see a bindable attribute. This lets Aurelia know that this custom element expects to have a property exposed on the view-model named router, and that you can bind to it.
That’s it for now! We will move right into databinding in the next chapter, so stay tuned.
- 1800+ high-performance UI components.
- Includes popular controls such as Grid, Chart, Scheduler, and more.
- 24x5 unlimited support by developers.