
Asynchronous Programming Succinctly®

CHAPTER 2
How Do I Use Async
Exploring async further
With the basics covered, we now need to explore async a little further to see what it is capable of and how it can benefit developers who want to improve the responsiveness of their applications. In order to do this, let’s look at the elements that constitute asynchronous code.
Async method return types
Let’s have another look at the return types. An async method can have one of three possible return types:
- void
- Task
- Task<TResult>
Void return type
The void returning method is used with event handlers, and if you completed Chapter 1, you will reognize that you have already created an async void event handler.
Code Listing 10
private async void button1_Click(object sender, EventArgs e) { string text = await ReadTextAsync(); lblName.Text = text; } |
While it is possible to call a nonreturning asynchronous method using void, this is generally considered bad practice. A void returning method simply performs a task and does not return anything to the calling code. Instead of using void for these async methods, good practice means returning Task instead. Also, note that the Main method in a console application cannot be marked with the async modifier.
Task return type
If the async method you are calling does not return anything, call it using Task instead of void. This means that the following two methods in Code Listings 11 and 12 are essentially the same in synchronous and asynchronous code.
Code Listing 11
private void FireAndForget() { // Code implementation } |
In Code Listing 12, the asynchronous method needs to be called with Task when nothing is returned.
Code Listing 12
Let’s next look at Code Listing 13, which shows an example of using and calling an async method that returns nothing.
Code Listing 13
private async void button3_Click(object sender, EventArgs e) { await ReadRemoteServerInfo(); } |
The event handler calling the void returning async method, as in Code Listing 14, simply calls the method with the await keyword.
Code Listing 14
private async Task ReadRemoteServerInfo() { await Task.Delay(TimeSpan.FromMilliseconds(6000)); lblServerInfo.Text = "Server Information Set Here"; } |
The async method sets the text of a label after a delay has been called. The delay here mimics the long-running process of reading information remotely via a web service or other data store.
Task<TResult> return type
The last return type is a Task<TResult>, which is used if your async method returns an object. In Code Listing 15, we are calculating the age of a person based on their birthday. It will return an integer value with the calculated age.
Code Listing 15
private async Task<int> GetAge(DateTime birthDay) { await Task.Delay(TimeSpan.FromMilliseconds(6000)); int age = DateTime.Today.Year - birthDay.Year; if (birthDay > DateTime.Today.AddYears(-age)) age--; return age; } |
In the click event, we call the async method as we would any other method that returns a type. We must simply remember to await the call to the GetAge(birthday) method.
Code Listing 16
private async void button4_Click(object sender, EventArgs e) { DateTime birthday = new DateTime(1975, 12, 21); int age = await GetAge(birthday); lblAge.Text = age.ToString(); } |
Putting the call and awaiting in separate statements is another way of writing this.
Code Listing 17
We can also return objects we create in code. Let us assume that we have created a Person class that contains information calculated and passed to it from the calling code. Using an async method containing a delay to simulate a long-running task, we can add following code to create a Person class. The class takes the date of birth as a parameter passed to it in the constructor and uses that to calculate the age of the person.
Code Listing 18
public class Person { public Person(DateTime birthDay) { int age = DateTime.Today.Year - birthDay.Year; if (birthDay > DateTime.Today.AddYears(-age)) age--; Age = age; } public string FirstName { get; set; } public string LastName { get; set; } public int Age { get; private set; } } |
We then create an async method that uses a factory pattern to return the created Person object.
Code Listing 19
Code Listing 20 shows how calling the code can be written.
Code Listing 20
We have seen that it is also possible to return an object from an async method. In fact, apart from using the async and await keywords along with the Task and Task<TResut> return types, we haven’t written anything differently. We have been writing the plain old C# code that we all use. This brings me to another benefit of async programming—writing async methods are incredibly easy. We have not done anything special. All the heavy lifting and hard work is done by the compiler.
Cancel an async task
As developers, we can exhibit control over the cancellation of an async method. We might need to do this if, for example, the user wants to stop the process before it completes. The .NET Framework gives us total control over the cancellation of an async method.
Cancel using a cancel button
The code listings that follow illustrate the concept of canceling by using a cancel button, but first we need to modify our Windows Form. Add a label called lblElapsedTime and add two buttons called Start Process and Cancel Process.
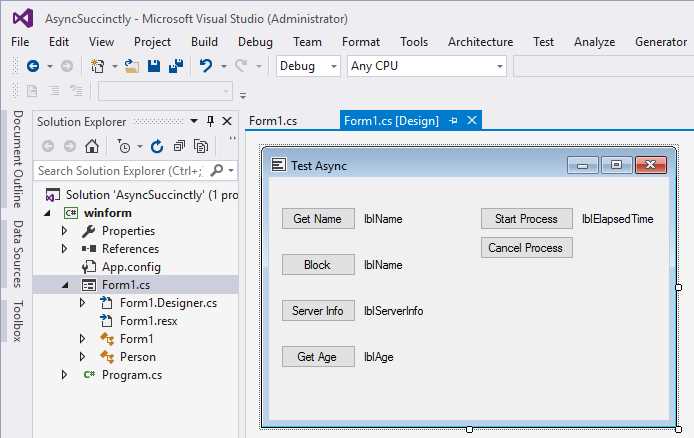
Figure 8: Cancel Async Method
In the code-behind, you will need to add the System.Threading namespace.
Code Listing 21
using System.Threading; |
This allows us to add a CancellationTokenSource object to the code. Note that this is added as globally in scope.
Code Listing 22
In the cancel button event, we need to call the Cancel() method of the CancellationTokenSource object if the object is not null.
Code Listing 23
private void btnCancelProcess_Click(object sender, EventArgs e) { if (cancelSource != null) cancelSource.Cancel(); } |
Our async method is simply delaying for six seconds in order to mimic the long-running task. It then returns the time taken for the process to complete. Note that we are passing a CancellationToken object to the async method as a parameter that is then used in the overloaded Delay() method. This is all we need in order to signal to the .NET Framework that the async process can be cancelled.
Code Listing 24
private async Task<DateTime> PerformTask(CancellationToken cancel) { await Task.Delay(TimeSpan.FromMilliseconds(6000), cancel); return DateTime.Now; } |
In the start button event handler, we should begin by adding a try/catch to the handler. When the async method is cancelled, it will return an OperationCancelledException. We therefore need to cater to this by adding it as a specific catch before the more general Exception clause. If the async method is not cancelled, it will complete in the six seconds specified in the Delay() time span.
Code Listing 25
private async void btnStartProcess_Click(object sender, EventArgs e) { try {
} catch (OperationCanceledException) {
} catch (Exception) {
} } |
Next, further expand the start event handler by instantiating a new object of type CancellationTokenSource(). In the catch statements, display the elapsed time. Lastly, at the end of the start button event handler, set the CancellationTokenSource object cancelSource to null.
Code Listing 26
private async void btnStartProcess_Click(object sender, EventArgs e) { cancelSource = new CancellationTokenSource(); DateTime start = DateTime.Now; try {
} catch (OperationCanceledException) { lblElapsedTime.Text = Convert.ToInt32((DateTime.Now - start).TotalSeconds).ToString(); } catch (Exception) { lblElapsedTime.Text = "Error"; } cancelSource = null; } |
Lastly, in the try clause, add the code to await the PerformTask method. It is here that we will be passing the cancelSource token to the async method.
Code Listing 27
private async void btnStartProcess_Click(object sender, EventArgs e) { cancelSource = new CancellationTokenSource(); DateTime start = DateTime.Now; try { DateTime end = await PerformTask(cancelSource.Token); lblElapsedTime.Text = Convert.ToInt32((end - start).TotalSeconds).ToString(); } catch (OperationCanceledException) { lblElapsedTime.Text = Convert.ToInt32((DateTime.Now - start).TotalSeconds).ToString(); } catch (Exception) { lblElapsedTime.Text = "Error"; } cancelSource = null; } |
Now run your application. When you click Start Process and leave it to complete, the delay of six seconds is displayed in the lblElapsedTime label.

Figure 9: Start Process
If, however, we had started the process and then, before the process completed, clicked the Cancel Process button, the async method would have been cancelled and the elapsed time displayed in the lblElapsedTime label.
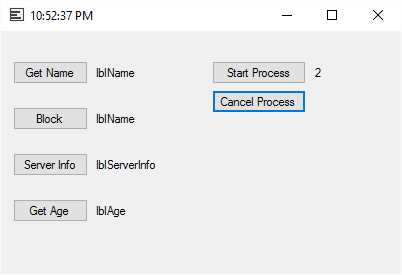
Figure 10: Cancel Process
You will notice that the time elapsed is less than the six-second delay, meaning that the delay never ran to completion.
Cancel after a specific time
Sometimes we need to specify a timeout associated with the async method. This might be because the process must be deemed a failure if the response isn’t received within the elapsed timeout period. Or perhaps there isn’t a cancel button that the user can click. For whatever reason, the .NET Framework can allow us to schedule a cancellation of the async method.
This is extremely easy. Before we await the async method, we must call the CancelAfter() method of the CancellationTokenSource() object by passing it the int milliseconds or TimeSpan. After this, the async method will be cancelled.
Code Listing 28
Code Listing 29 shows how your start button event handler will now look.
Code Listing 29
private async void btnStartProcess_Click(object sender, EventArgs e) { cancelSource = new CancellationTokenSource(); DateTime start = DateTime.Now; try { cancelSource.CancelAfter(3000); DateTime end = await PerformTask(cancelSource.Token); lblElapsedTime.Text = Convert.ToInt32((end - start).TotalSeconds).ToString(); } catch (OperationCanceledException) { lblElapsedTime.Text = Convert.ToInt32((DateTime.Now - start).TotalSeconds).ToString(); } catch (Exception) { lblElapsedTime.Text = "Error"; } cancelSource = null; } |
That’s all there is to it. If you run your application and click the Start Process button, the async method will cancel after three seconds without the user clicking on the Cancel Process button.
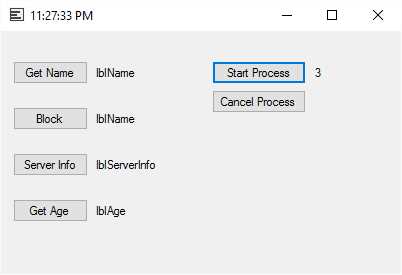
Figure 11: Cancel Async Method After a Timeout
Await in catch and finally
Some of you who are already using C# 6.0 might know that you can now await in the catch/finally when handling exceptions. This feature was not previously available to developers, but some very smart folks over in the C# design team figured it out, and now we can use async in catch/finally blocks.
Why would we want to do this? Let’s assume that we need to access a web resource. If the resource fails or times out, we might want to get the source from a backup location. In order to demonstrate something like this, we will create a Windows Form that uses the URL to a web page to download the source as a string. Then we output that string to a rich text box control.
In case the original URL fails for whatever reason, we have a default URL. In our example, we will pass the async method a bad URL and cause it to throw an exception. In order to illustrate the improvements in C# 6.0, I will show you how a developer might have handled an exception before C# 6.0 introduced await in catch/finally blocks. I will then modify the code to illustrate how C# 6.0 has made it easier to await in a catch/finally block.
First, we’ll start by creating a form similar to the one in Figure 12.

Figure 12: Exception Handling Demo
Add a reference to System.Net.
Code Listing 30
Now, we need to create an async method that returns a string. It will read the source from a URL as a string and return it to the calling code. Next, it will try to get the URL from the URL supplied (which, in our demo, is an incorrect URL). If the URL is incorrect, it will read the default URL.
As you can see, in the past C# 6.0 developers had to set a flag in the catch block. Depending on the value, we load the default URL.
Code Listing 31
public async Task<string> ReadURL() { WebClient wc = new WebClient(); string result = ""; bool downloaded; try { result = await wc.DownloadStringTaskAsync(new Uri(txtURL.Text)); downloaded = true; } catch { downloaded = false; } if (!downloaded) result = await wc.DownloadStringTaskAsync(new Uri(txtDefault.Text)); return result; } |
Lastly, we add the button click event to call the async method and return the result to the rich text box.
Code Listing 32
private async void btnReadURL_Click(object sender, EventArgs e) { string strResult = await ReadURL(); rtbHTML.Text = strResult; } |
Run the application and click Read URL.
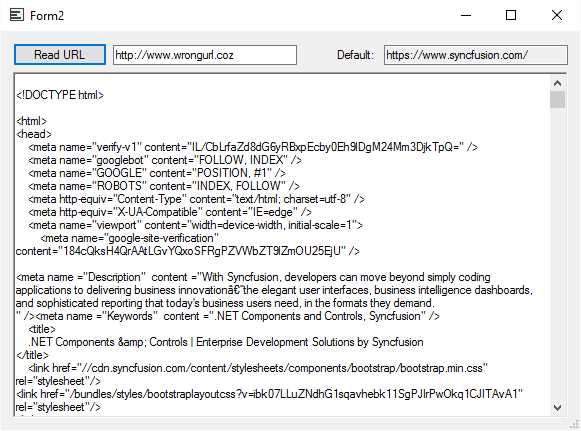
Figure 13: Default URL Source Read
As you can see, the code works. Personally, in the past I disliked having to write code this way. Luckily, now we can simply modify our code in the ReadURL() async method.
Code Listing 33
Instead of using the bool value to check if an exception has been thrown, we can simply tell the compiler to check the default URL if the URL in the try throws an exception. This code is cleaner and easier to read. Note that you can also await in the finally block.
Object Oriented Programming and async
Abstract classes
Let us have a look at abstract classes. The idea behind abstract classes is to ensure that inherited classes contain common functionality. This is great if you want your inherited class to always do a specific thing. But keep in mind that abstract classes can’t ever be instantiated—they merely describe what needs to be implemented in the derived classes. Your implementation detail therefore resides in the derived class.
We should also remember that async is an implementation detail. This means that you can’t define a method in an abstract class as an async method. So, what do we do? Well, remember that types are awaitable. Methods are not, which means you must then define your abstract method as returning a Task or Task<TResult>. With that, you should be good to go. Let’s look at an example.
Add two new classes to your Visual Studio solution. Call one Automation.cs and the other ProjectAutomation.cs.
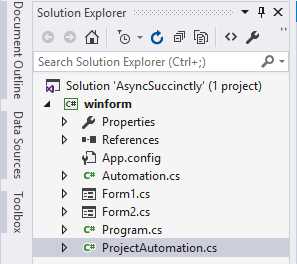
Figure 14: Classes in Solution
We are going to assume that a company creates various types of automated objects in the database. Sometimes they create new projects, other times they create jobs, and so on. All these objects are automations because once the entry is created in the database, another system picks up the creation of this object (e.g., ProjectAutomation or JobAutomation or TaskAutomation) and performs additional work in an external ERP system.
When these automations are completed, the database object is flagged as completed by the external system. Our application then purges the automation object. Add the System.Threading.Tasks namespace to both classes (Automation.cs and ProjectAutomation.cs).
Code Listing 34
Now add the code for the abstract Automation class. Notice that because we want the AutomationCompleted() and PurgeAutomation() methods to be async methods in the derived class, we specify the return types as Task<bool> and Task for the void returning async method.
Code Listing 35
When we create our derived class called ProjectAutomation, we specify that it has to inherit from the abstract class Automation. I have added a bit more meat to this derived class than necessary, but I want to focus your attention on the AutomationCompleted() and PurgeAutomation() methods. Because they are returning Task<TResult> and Task, we can use the async and await keywords here to mark them as async methods even though they are not defined as async in the abstract class.
Code Listing 36
public class ProjectAutomation : Automation { public int Owner { get; private set; } public int AutomationType { get; private set; } public override void StartUp(int ownerID, int automationType) { Owner = ownerID; AutomationType = automationType; // Create the automation in the database. } public override async Task<bool> AutomationCompleted() { await Task.Delay(TimeSpan.FromMilliseconds(3000)); // Read the completion flag in the database. return true; } public override async Task PurgeAutomation(int ownerID, DateTime purgeDate) { await Task.Delay(TimeSpan.FromMilliseconds(3000)); } } |
Interfaces
This e-book wouldn’t be complete without us taking a look at interfaces. If you guessed that you can’t define interface methods as asynchronous, you guessed correctly. The same applies to interfaces as for abstract classes. The method of creating async methods in the derived class is identical to the method we followed for abstract classes.
Let’s create a new class file called IHydratable.cs. This interface will mark the automation object as able to rehydrate itself from the database.
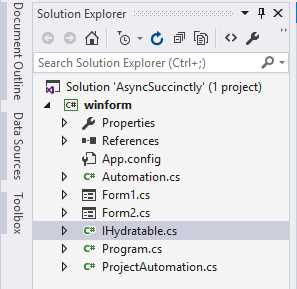
Figure 15: Add Interface to Solution
You will need to add the System.Threading.Tasks namespace to your interface IHydratable.
Code Listing 37
As you can see, Code Listing 38 will define your interface simply by specifying that the RehydrateAutomation() method returns a type of Task<int>.
Code Listing 38
|
{ interface IHydratable { Task<int> RehydrateAutomation(int ownerID, int automationType); } } |
In order to implement the interface in our existing ProjectAutomation class, we add it after we have declared that the ProjectAutomation class inherits from the abstract class Automation.
Code Listing 39
The RehydrateAutomation() method is added to the end of the ProjectAutomation class, and we can then define it as an async method by adding the async and await keywords.
Code Listing 40
public class ProjectAutomation : Automation, IHydratable { public int Owner { get; private set; } public int AutomationType { get; private set; } public override void StartUp(int ownerID, int automationType) { Owner = ownerID; AutomationType = automationType; // Create the automation in the database. } public override async Task<bool> AutomationCompleted() { await Task.Delay(TimeSpan.FromMilliseconds(3000)); // Read the completion flag in the database. return true; } public override async Task PurgeAutomation(int ownerID, DateTime purgeDate) { await Task.Delay(TimeSpan.FromMilliseconds(3000)); } public async Task<int> RehydrateAutomation(int ownerID, int automationType) { Owner = ownerID; AutomationType = automationType; await Task.Delay(TimeSpan.FromMilliseconds(3000)); // Read the purged automation in the database and return the record ID. return 0; } } |
Note: The RehydrateAutomation() method does not do anything but return an integer of zero. All the methods in this class await on Task.Delay to mimic the process of a long-running task.
- 1800+ high-performance UI components.
- Includes popular controls such as Grid, Chart, Scheduler, and more.
- 24x5 unlimited support by developers.