
ASP.NET WebHooks Succinctly®

CHAPTER 4
Creating a WebHook Receiver
In previous chapters we have discussed how to consume existing WebHook receivers in our applications. To consume an existing Webhook receiver, we need to take a few steps (already discussed) and customize for our own application. At times it might be the case that the available WebHook receiver does not fit your design needs. In that case, you can create your own WebHook easily. We will dedicate this chapter to creating a new WebHook receiver for Zendesk. We will also walk through all steps for the creation of our new WebHook receiver.
Getting started
Any WebHook receiver is created for receiving notifications from a sender. In the same way, our purpose in creating a Zendesk WebHook receiver is to receive notifications from the Zendesk app.
Before we can start receiving notifications, we need to know what URI to register our WebHook with Zendesk. Additional information is also required, such as available Zendesk events, actions, and notifications available for subscription.
Note: To learn more about Zendesk push notifications, refer here.
Everything is documented at the Zendesk developers’ website, which describes the expectations for push notifications for Android devices. The documentation summarizes all that is required to register our application and our device. A valid account is required with Zendesk portal for the registration process.
Tip: If you do not have an account with Zendesk, request a trial account to test your receiver.
Prerequisite
The following are prerequisites to get started with Zendesk WebHook Receiver:
- A valid account with Zendesk
- Understanding of the push notifications for Android devices from the Zendesk developer documentations portal
- Knowledge of ASP.NET Web
- Visual Studio 2015 or later
- Knowledge of ASP.Net WebHooks
Categories of WebHook receivers
I divided WebHooks receivers into two categories based on their availability for end users (who want to receive notifications) and developers (who implement these to their own applications). It will not always be the case that you want to make your WebHook Receivers available for everyone. Sometimes, there might be requirements to use a WebHook receiver internally within your own application or a in private network.
You can give any appropriate name to these categories. These names are based on my own views and understanding of WebHook receivers.
Private WebHook receivers
These WebHook receivers are not available publicly, so there are no publicly available NuGet packages for these receivers. However, you can create NuGet packages and use them on a private NuGet server (within your organization).
The main advantages of these WebHook receivers are:
- There are no development rules defined to write code. You can write code as per your own convenience, and in your own styles and coding standards.
- ASP.NET WebHooks source code is not required, so there’s no need to set up a Github repository.
- No source code is required, so there’s no need to make any pull request.
The only thing you should require for the creation of WebHook receivers is NuGet packages to setup base for WebHook Receiver, and these are:
- Microsoft.AspNet.WebHooks.Common (available here) – provides a common functionality and can be used for both Receiver and Sender
- Microsoft.AspNet.WebHooks.Receivers (available here) – provides a standard way to receive WebHooks.
Public WebHook receivers
These WebHook receivers are available publically and can be easily obtained as NuGet packages. Anyone can download NuGet packages and start their own implementation. These WebHook receivers are also part of ASP.Net WebHooks repository and can be released as official WebHook Receivers.
To start with public WebHook receivers, you need:
- To set up GitHub repository
- Follow documentation to write code
- While you write code, you should follow TDD (Test Driven Development)
- WebHook Receiver project name should be in the pattern of Microsoft.AspNet.WebHooks.Receivers.<product-name-for-which-this-receiver-is>. In our case, it will be Microsoft.AspNet.WebHooks.Receivers.Zendesk.
- All pull requests should be on Dev branch of the repository.
Your WebHook receiver will available once it’s approved and the pull request is merged into the Dev branch. NuGet packages will be available once released.
Note: We will create Public WebHook receivers, so our Zendesk WebHook receiver will be available as a NuGet package.
Started writing code
In preceding sections, we covered the basic steps to create our Zendesk WebHook receiver. As we are going to create public WebHook receivers, we need to set up a GitHub repository so we can get the source code and make a pull request.
We won’t discuss setting up GitHub repository, and getting the source code, or making a pull request, since these are all already discussed in Chapter 2. If you skipped it, please refer to Chapter 2 before proceeding.
Finally, we are ready to start adding a project and code for our Zendesk WebHook receiver.
Adding a project
Start Visual Studio and add a new Library Project under the folder src, and name it Microsoft.AspNet.WebHooks.Receivers.Zendesk.
Configuring the project
Open Solution Explorer and right-click on the project to get the Properties page of the project. Here you need to make few changes:
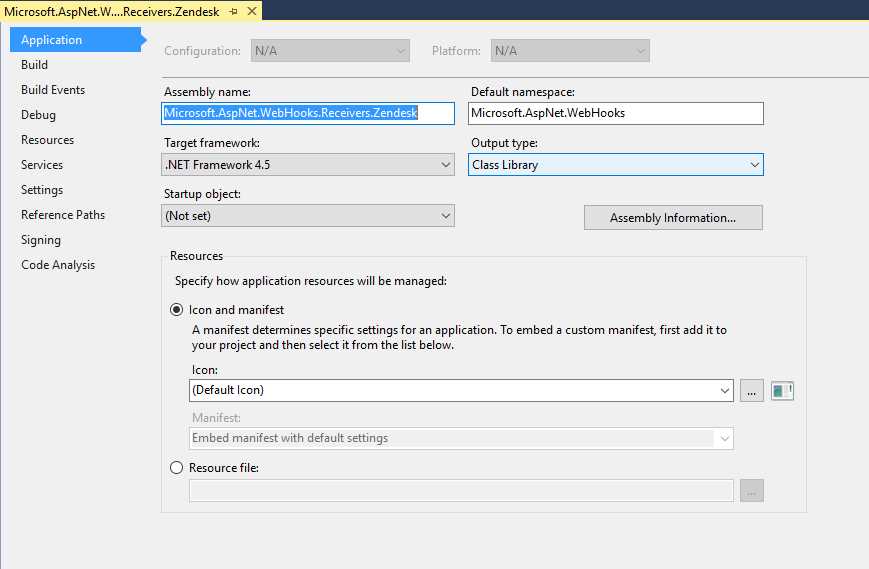
Figure 26: Project properties
Application
In this section of Project properties page, enter the Assembly name Microsoft.Aspnet.WebHooks.Receivers.Zendesk, and set the Default namespace to Microsoft.AspNet.WebHooks.
Build
Set Conditional compilation symbols as CODE_ANALYSIS;ASPNETWEBHOOKS.
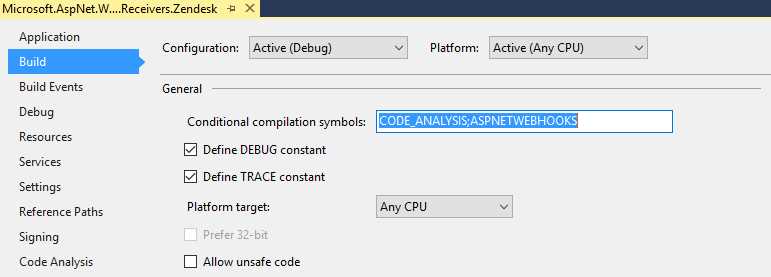
Figure 27: Conditional compilation symbols
Set Output to the common bin folder, including XML documentations.
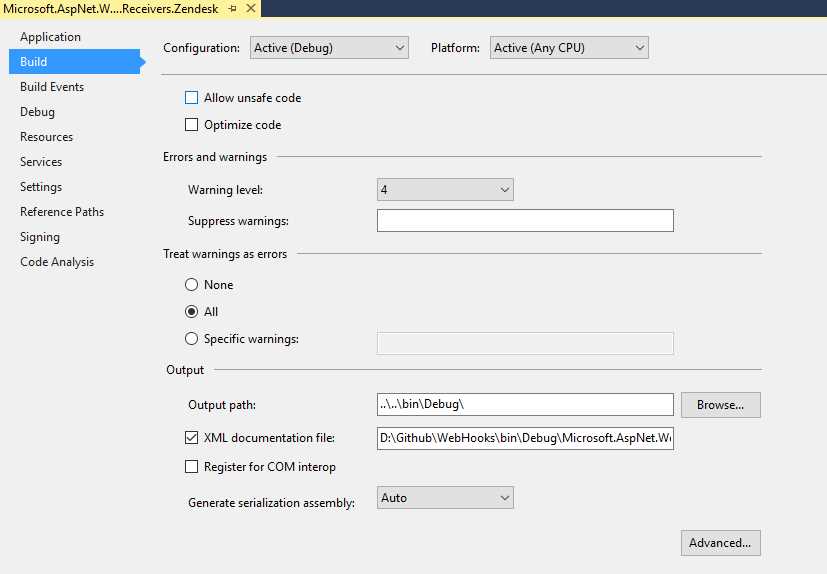
Figure 28: Setting output path
Signing
In the Signing section, choose a strong name key file, 35MSSharedLib1024.snk, it is available here.
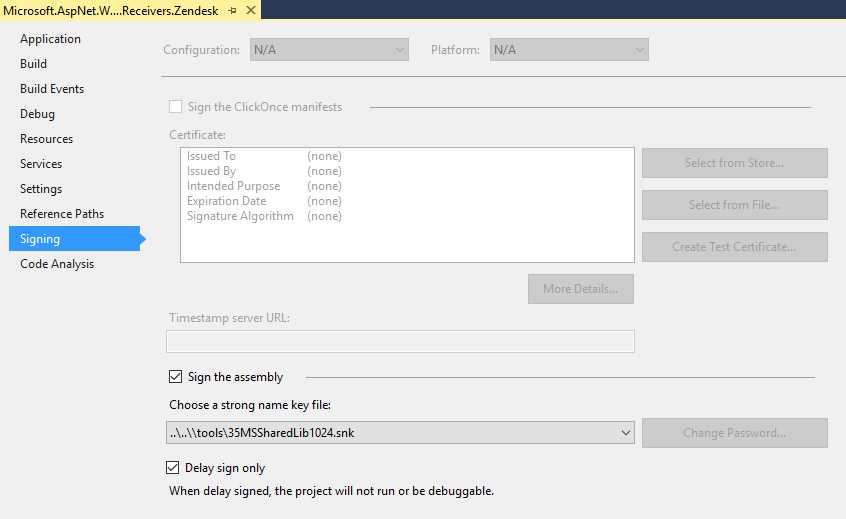
Figure 29 Sign the assembly
Code analysis
In the Code Analysis section, set FxCop rules and select the file FxCop.rulset available here.
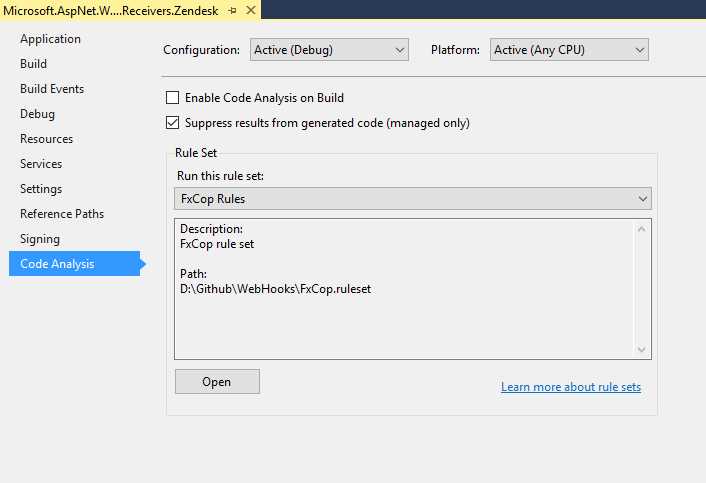
Figure 30: Setting Code Analysis rules
After all the changes, click Save to save the changes, and close the Properties pages.
Adding required files to project
To start writing actual code, we need to add certain files.
- Open Solution Explorer, right-click on the project name, and select Existing Item. Select CustomDictionary.xml and add as a link. Now, right-click on the name of the same file from Solution Explorer and set Build Action as CodeAnalysisDictionary.
- Open Solution Explorer and add the folders Extensions and Webhooks
- Add the file HttpConfigurationExtensions.cs under the Extensions folder.
- Under the WebHooks folder, add these files:
- ZendeskDevice.cs
- ZendeskNotification.cs
- ZendeskPost.cs
- ZendeskWebHookReceiver.cs (which is our main file, and responsible for receiving notifications).
- You also need to set a common assembly and a resource file.
Initialization of WebHook
Our extension file HttpConfiguration Extension.cs is responsible for initializing the Zendesk WebHook receiver when in use from the application. It contains a simple extension method:
Code Listing 28
public static void InitializeReceiveZendeskWebHooks(this HttpConfiguration config) { WebHooksConfig.Initialize(config); } |
Writing the WebHook Receiver class
We have the WebHook receiver ZendeskWebhookReceiver, which implements the abstract class WebHookReceiver. Add the following code to this class:
Code Listing 29
public override async Task<HttpResponseMessage> ReceiveAsync(string id, HttpRequestContext context, HttpRequestMessage request) { if (id == null) { throw new ArgumentNullException(nameof(id)); } if (context == null) { throw new ArgumentNullException(nameof(context)); } if (request == null) { throw new ArgumentNullException(nameof(request)); } if (request.Method == HttpMethod.Post) { // Ensure that we use https and have a valid code parameter await EnsureValidCode(request, id); // Read the request entity body. JObject data = await ReadAsJsonAsync(request); // Call registered handlers return await ExecuteWebHookAsync(id, context, request, new string[] { DefaultAction }, data); } else { return CreateBadMethodResponse(request); } } |
We are done with the creation of Zendesk WebHook receivers. Please note that we did not write tests as per test-driven development (TDD); we should write tests simultaneously.
Writing tests
We should follow test-driven development while writing Zendesk WebHook receivers. To start with writing the test, we should follow these steps:
- Add new test project under the Test folder.
- Name the project Microsoft.AspNet.WebHooks.Receivers.Zendesk.Test
- Open the project Properties page and perform customization (refer to the “Configuring Project” section of Chapter 4).
- Add the folders Webhooks and Messages
- Under folder WebHooks, add the following files:
- ZendeskDeviceTest.cs
- ZendeskNotificationTest.cs
- ZendeskPostTest.cs
- ZendeskWebHookReceiverTest.cs (the main test file)
- Add NuGet package of xunit
Here is a code snippet of our test file:
Code Listing 30
[Fact] public void ReceiverName_IsConsistent() { // Arrange IWebHookReceiver rec = new ZendeskWebHookReceiver(); string expected = "zendesk"; // Act string actual1 = rec.Name; string actual2 = ZendeskWebHookReceiver.ReceiverName; // Assert Assert.Equal(expected, actual1); Assert.Equal(actual1, actual2); } [Fact] public async Task ReceiveAsync_Throws_IfPostIsNotUsingHttps() { // Arrange Initialize(TestSecret); _postRequest.RequestUri = new Uri("http://some.no.ssl.host"); // Act HttpResponseException ex = await Assert.ThrowsAsync<HttpResponseException>(() => ReceiverMock.Object.ReceiveAsync(TestId, RequestContext, _postRequest)); // Assert HttpError error = await ex.Response.Content.ReadAsAsync<HttpError>(); Assert.Equal("The WebHook receiver 'ZendeskWebHookReceiverProxy' requires HTTPS in order to be secure. Please register a WebHook URI of type 'https'.", error.Message); ReceiverMock.Protected() .Verify<Task<HttpResponseMessage>>("ExecuteWebHookAsync", Times.Never(), TestId, RequestContext, _postRequest, ItExpr.IsAny<IEnumerable<string>>(), ItExpr.IsAny<object>()); } |
Committing and creating a pull request
We are done with the creation of our Zendesk WebHook receiver, and now we have to commit our changes to the repository and make a pull request. We are not going to discuss this in details. Refer to GitHub Succinctly book for more details.
Tip: To learn more about creating a pull request, refer to this article.
We created a pull request for Zendesk, which has been approved and is now available publicly as a NuGet package here.
Conclusion
In this chapter we have discussed the creation of a WebHook receiver with a sample application.
- 1800+ high-performance UI components.
- Includes popular controls such as Grid, Chart, Scheduler, and more.
- 24x5 unlimited support by developers.