
ASP.NET Web API Succinctly®

CHAPTER 2
Hello Web API
Hello World
Let’s start by creating our first Web API project to see how it looks and to see what’s inside.
The Web API template is part of the ASP.NET MVC 4 project template by default in Visual Studio 2012. For older versions of Visual Studio, you have to install the templates by downloading them from the http://asp.net website.
So let’s create a new ASP.NET MVC 4 web application and in the second step choose the Web API template. Once created, the Web API project is almost identical to a classic ASP.NET MVC project, and in fact it keeps a lot of concepts from that kind of project.
Here it is: the solution structure as it appears after creating the project.
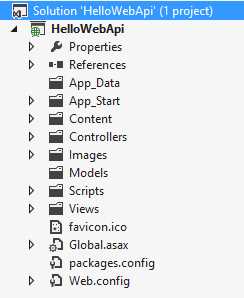
The Web API project structure
The most important things to note are:
- The Controllers, Models, and Views folders are taken from ASP.NET MVC. As we will see later, the Web API uses the same MVC pattern, so we will have controllers and models. There is a Views folder too, but it’s not very useful in an API context, even if we could return a view to our caller.
- As well as the Views folder, there are Images, Scripts, and Content folders. These are not used often since an API is generally used to return data, not a user interface.
- The App_Start folder is used to configure the API. It contains various configurators to set up the behavior of the API. This folder also contains some configuration for the ASP.NET MVC part.
As you can see with this project template, we could build ASP.NET MVC applications as well as Web API applications, since the two have a lot in common.
Let’s go a little deeper by opening the Controllers folder and having a look at the ValuesController class:
using System.Collections.Generic; using System.Web.Http; namespace HelloWebApi.Controllers { public class ValuesController : ApiController { // GET api/values public IEnumerable<string> Get() { return new string[] { "value1", "value2" }; } // GET api/values/5 public string Get(int id) { return "value"; } // POST api/values public void Post([FromBody]string value) { } // PUT api/values/5 public void Put(int id, [FromBody]string value) { } // DELETE api/values/5 public void Delete(int id) { } } } |
After the using and the namespace, we find a class declaration. The class ValuesController inherits from ApiController. This class is not relative to the controller base class used in ASP.NET MVC, even though it has a lot of similarities. It serves as a base class for all the resources that we decide to expose via the API.
Inside this class we find all the default verbs to manipulate the Value resource: GET, POST, PUT, and DELETE. The name of the methods here matters, since the ASP.NET Web API runtime uses conventions to find the action to call against an HTTP request. So the two Get(…) methods are used to get a collection of values and to get a single value given its ID. The Post(…) and Put(…) are used to insert and modify the Value resource, while the Delete(…) method is used to delete a resource given the ID.
As you can see, the five methods are the actions that are called against a GET, POST, PUT, or DELETE HTTP request.
We will go further into conventions and other details about the previous code in the next chapters. For now we will focus on the overview of an ASP.NET Web API project.
Like an ASP.NET MVC web application, Web API projects use a routing system. The configuration of the routes is in a file called WebApiConfig.cs in the App_Start folder. Here is the content of that file:
using System.Web.Http; namespace HelloWebApi { public static class WebApiConfig { public static void Register(HttpConfiguration config) { config.Routes.MapHttpRoute( name: "DefaultApi", routeTemplate: "api/{controller}/{id}", defaults: new { id = RouteParameter.Optional } ); } } } |
This class has one method that is invoked from the WebApiApplication class in the global.asax. This method registers the routes needed by the application. By default, the ValuesController defined before responds to the URI /api/Values, as we can see in the previous code. Note that these routes, even though very similar to the ASP.NET MVC routes, are a completely different stack. In this case, the route type is IHttpRoute and the implementation is contained in the System.Web.Http assembly, so it’s completely new and is not tied to System.Web.
Even if they are different, they are implemented almost in the same way: each route has a name and a template that is tokenized to match the input patterns.
So until now, we have seen the Values controller that has the duty to manage the Values resource and a simple routing system to route the request to the matching controller. Let’s run the Web API application to see how it works.
Once executed, it opens a local web server to a specific port. We can use a tool like Postman, which is a Chrome extension that works like an HTTP client.
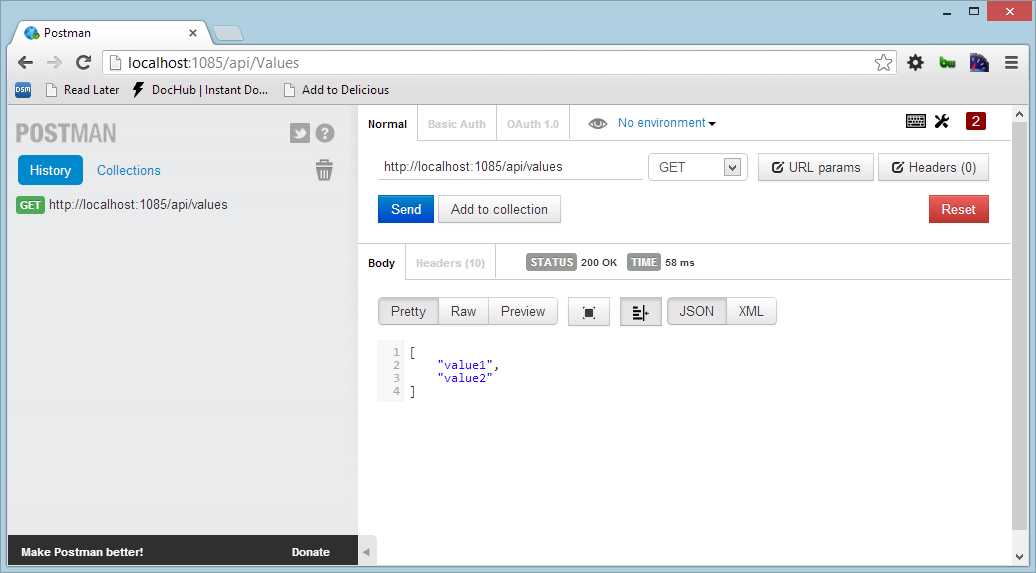
Executing a GET request
When we place a call to http://localhost:1085/api/values, the application responds with a JSON array that contains the two values defined in the controller.
The last thing that we could try is to change the Accept header to see what happens. In Postman, add a header to ask the server to give us text/xml:
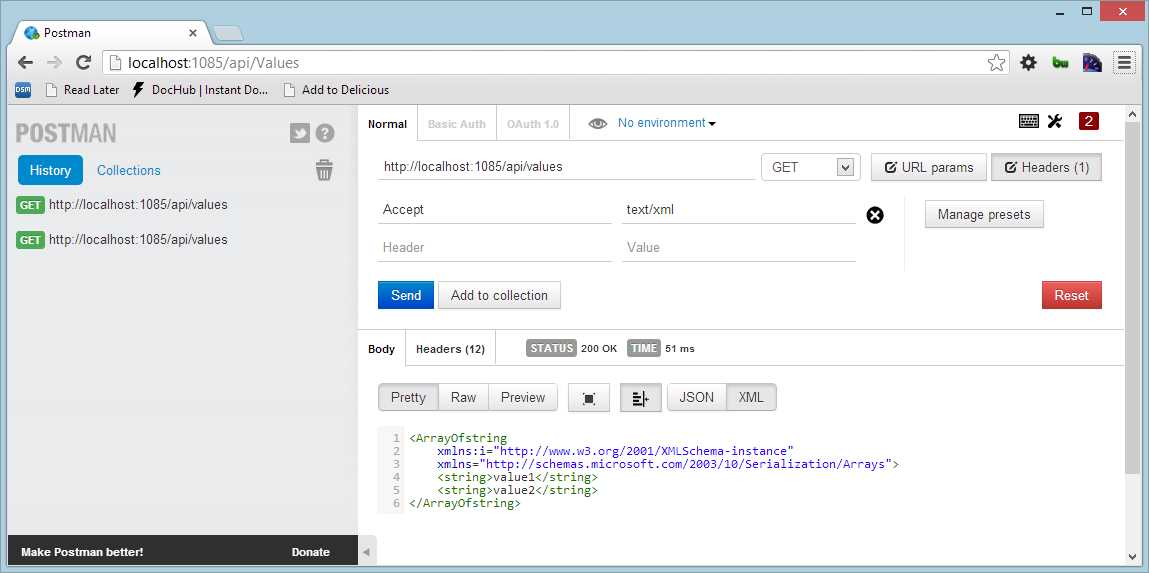
Executing a GET request specifying the accept header
What we obtain is an XML response that contains the same two values. We don’t need to change our code for these two types of responses since they are native in ASP.NET Web API.
Summary
We just had a quick look at the various parts of the Web API project template, and tried to run it to see what happens on the client. Now it is time to dig inside to understand the process model, the routes, and all the facilities that this ASP.NET Web API gives us.
- 1800+ high-performance UI components.
- Includes popular controls such as Grid, Chart, Scheduler, and more.
- 24x5 unlimited support by developers.