
ASP.NET MVC Succinctly®

CHAPTER 6
MVC Scaffolding
In Chapter 2, while creating controllers and views, I noted that there were options to specify scaffolding templates. At the time, I suggested that you ignore these options, with the intention that we would return to them at a later point. In this chapter, we will explore those options in more detail.
It is helpful to understand how the pieces fit together before handing control over to something such as a scaffolder. Now that we have this background and perspective, let’s explore what the framework and Visual Studio can do to simplify matters for us.
A scaffolder is a code generator designed to give you a head start on writing code. When you select a scaffolder, the code associated with that template will be evaluated to give you a starting point. In many cases, this takes care of a lot of the more tedious pieces of code. In some cases, the template may include comments offering guidance on what you need to do as you start working with the code.
Unlike most typical code generators, a scaffolder is not intended to be the end of the code. A scaffolder is not designed to provide the complete solution with all of the code that will be needed. Instead, a scaffolder allows you to start with the broad strokes laid out for you, with the expectation that you will fill in the rest. This is “one-time-only, code-only” code generation so you do not have to worry about losing any code changes that you make.
This is one of the most substantial productivity boosts that MVC offers.
Controllers
When you create a new controller, you can specify a template in the scaffolding options. So far, we have stayed with the default empty controller, but there are other built-in options available.
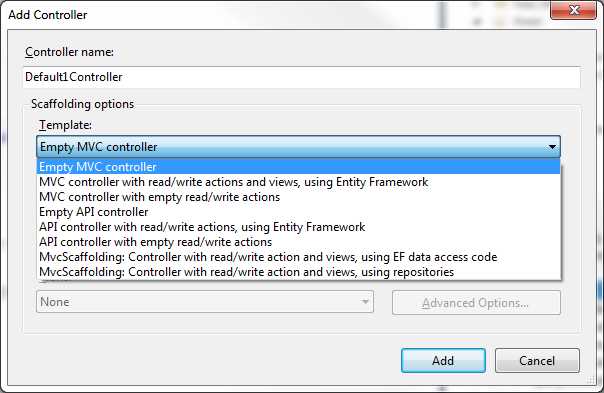
- Controller scaffolding options
These templates provide varying degrees of boilerplate code that is already written for you. This is “one-time-only” code generation to jump-start your development. If, for example, you choose MvcScaffolding: Controller with read/write action and views, using repositories, you will have a fully functional controller with a complete set of views built with a set of well-architected classes for data access—all without writing any code yourself.
Depending on your development standards, this may be all that you need. Just specify the model and a repository, and let Visual Studio do the rest.
Thanks to the scaffolding, you do not have to look at an empty class and wonder what’s next. Let the framework do as much of the heavy lifting as possible; you have enough to worry about.
Views
The scaffolding templates for views are much more modest. Specify a model and then select from one of six actions.
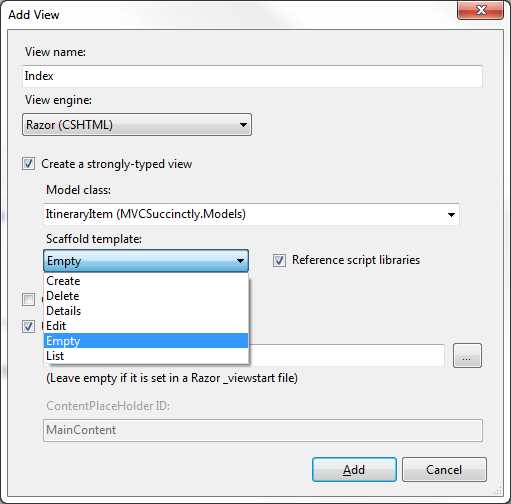
- View scaffolding options
- Scaffolding template options
Create | Creates a view for creating a new instance of the associated model. |
Delete | Creates a view that will display the details for the associated model along with prompts to delete the item. |
Details | Creates a view for displaying a read-only copy of the associated model. |
Edit | Creates a view for editing the details for an existing instance of the associated model. |
Empty | Creates an empty view with no details from the associated model. |
List | Creates a view that includes a table for showing the details for a list of model items. |
You will get some decent markup.
<h2>Create</h2> @using (Html.BeginForm()) { @Html.AntiForgeryToken() @Html.ValidationSummary(true) <fieldset> <legend>ItineraryItem</legend> <div class="editor-label"> @Html.LabelFor(model => model.When) </div> <div class="editor-field"> @Html.EditorFor(model => model.When) @Html.ValidationMessageFor(model => model.When) </div> <div class="editor-label"> @Html.LabelFor(model => model.Description) </div> <div class="editor-field"> @Html.EditorFor(model => model.Description) @Html.ValidationMessageFor(model => model.Description) </div> <div class="editor-label"> @Html.LabelFor(model => model.Duration) </div> <div class="editor-field"> @Html.EditorFor(model => model.Duration) @Html.ValidationMessageFor(model => model.Duration) </div> <div class="editor-label"> @Html.LabelFor(model => model.IsActive) </div> <div class="editor-field"> @Html.EditorFor(model => model.IsActive) @Html.ValidationMessageFor(model => model.IsActive) </div> <div class="editor-label"> @Html.LabelFor(model => model.Confirmed) </div> <div class="editor-field"> @Html.EditorFor(model => model.Confirmed) @Html.ValidationMessageFor(model => model.Confirmed) </div> <div class="editor-label"> @Html.LabelFor(model => model.ContactNumber) </div> <div class="editor-field"> @Html.EditorFor(model => model.ContactNumber) @Html.ValidationMessageFor(model => model.ContactNumber) </div> <p> <input type="submit" value="Create"/> </p> </fieldset> } <div> @Html.ActionLink("Back to List", "Index") </div> @section Scripts { @Scripts.Render("~/bundles/jqueryval") } |
Code Listing 46: Generated editor
In most cases, you should be able to get the look you want without changing anything in the generated markup beyond reordering the controls. Remember from our earlier discussions that the EditorFor HTML helper can be quite sophisticated in finding the correct editor.
Whether the views are created by the controller scaffolding or the views scaffolding, you will get the same markup. But what if you do not like this markup or the code generated for the controller? Are there any other options?
Enter Text Template Transformation Toolkit
The code generated by the scaffolding templates uses the Text Template Transformation Toolkit, or T4. T4 is one of the best-kept secrets in .NET development.
This is a toolkit for creating code generators regardless of the language of the code being generated. In fact, calling it a code generator sells it short. We can use T4 to generate any text-based output. T4 transforms metadata through the template we specify to generate an appropriate output. This metadata can be input from any of the following scenarios:
- C# code
- VB.NET code
- SQL code
- HTML
- Razor
- Change logs
We can drive the code generation with any .NET language, typically C# or VB.NET. Our examples will all use C#.
Because the scaffolding templates are based on T4, we can edit these templates to change the code that is generated. You may want to do this to create a controller template that is based on NHibernate instead of Entity Framework, or you may want to create a list view template that does not use a table to display the list. The possibilities are limited only by your imagination.
A full discussion of T4 is beyond the scope of this book, but we will not need all of the capabilities of T4 here. In general, our changes will be minor.
First, we need to find the templates used by the scaffolding so that we can edit them to do what we require. These templates are stored with your installation of Visual Studio. So, the full path depends on whether you are running 32-bit or 64-bit, your version of Visual Studio, the language you want to end up with, and which view engine you are using. To find the templates used by a 32-bit version of Visual Studio 2013 for C# using Razor, look in:
C:\Program Files (x86)\Microsoft Visual Studio 12.0\Common7\IDE\ItemTemplates\CSharp\Web\MVC 4\CodeTemplates\AddView\CSHTML
And
C:\Program Files (x86)\Microsoft Visual Studio 12.0\Common7\IDE\ItemTemplates\CSharp\Web\MVC 4\CodeTemplates\AddController
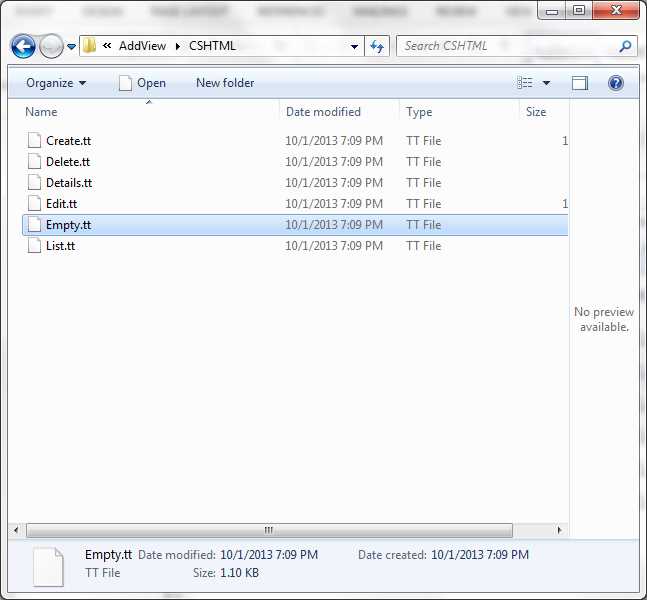
- View template location
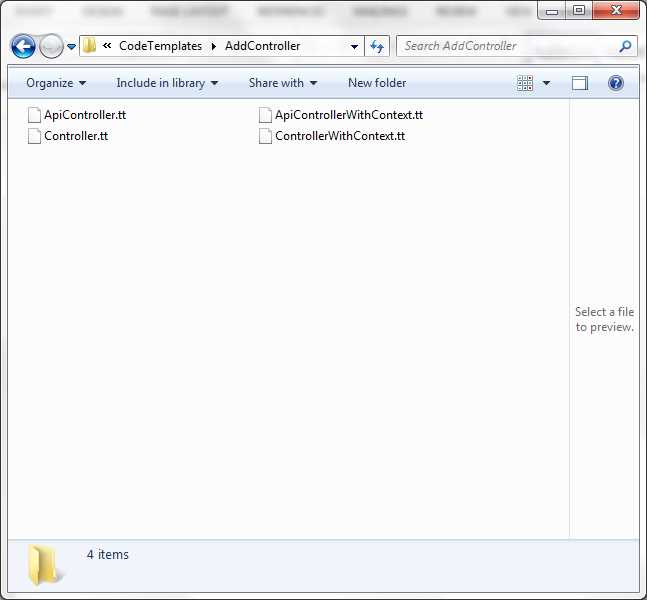
- Controller template location
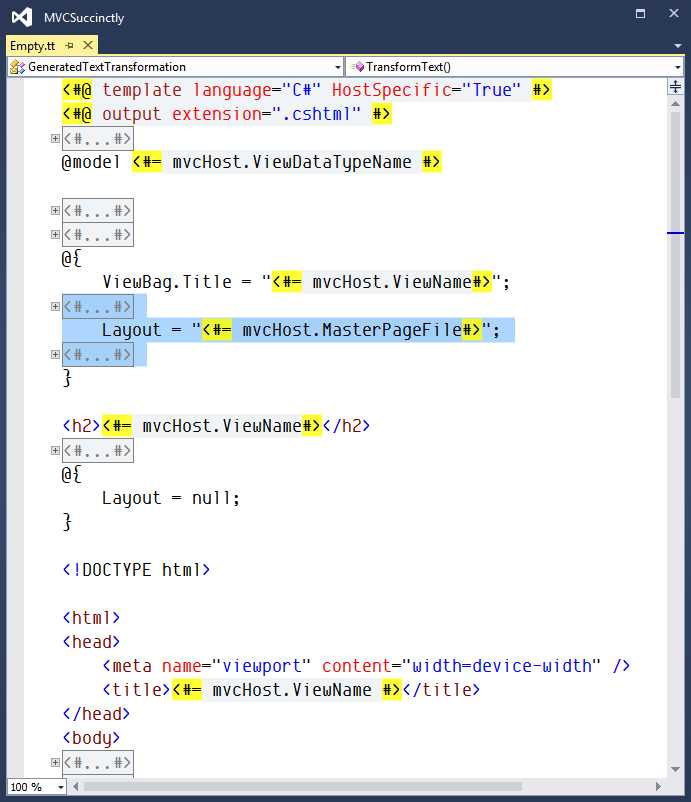
Let’s start by looking at Empty.tt. This will be the simplest template because it literally creates an empty shell with no regard for the metadata associated with the model.
By default, when you open a .tt file in Visual Studio, it will look a bit rough with no syntax highlighting. This is true through community previews for Visual Studio 2015.
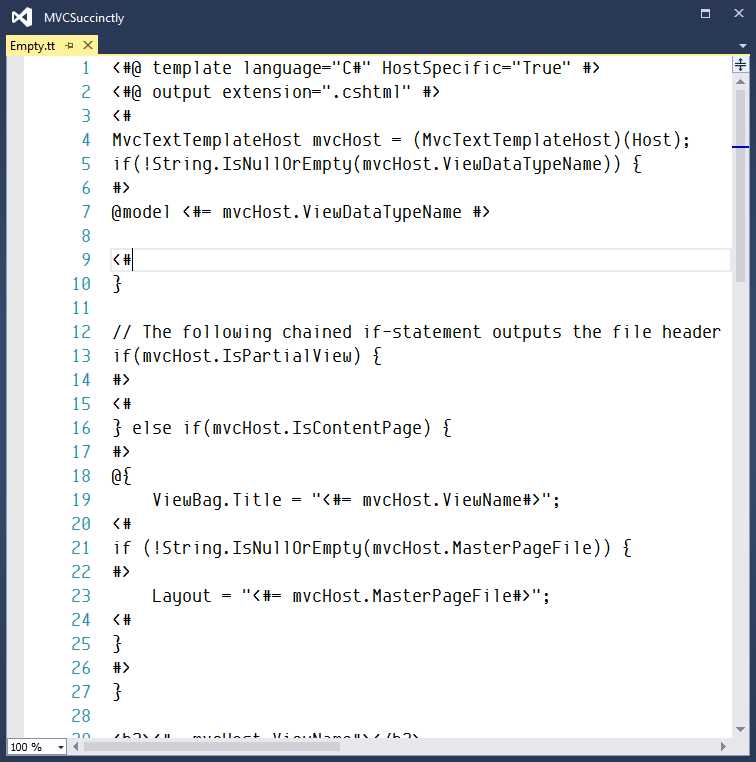
- Editing a template without an extension
Syntax highlighting is always nice but it is even more important for a code generator—especially if the language used to drive the generation is the same language that will be generated. If you are using C# to generate C#, it can be difficult to separate template code from generated code.
We are also missing IntelliSense support out of the box. This is, potentially, a huge hurdle. IntelliSense is a substantial productivity boost. We all feel the impact if it is missing. Finally, out of the box, there is no support for debugging the template. This will probably not be a big deal initially, but eventually your templates may become complex enough that you will need this type feature.
Fortunately, there are several extensions available to fill in this gap.
The screenshots and discussions that follow are based on the Tangible T4 extension.
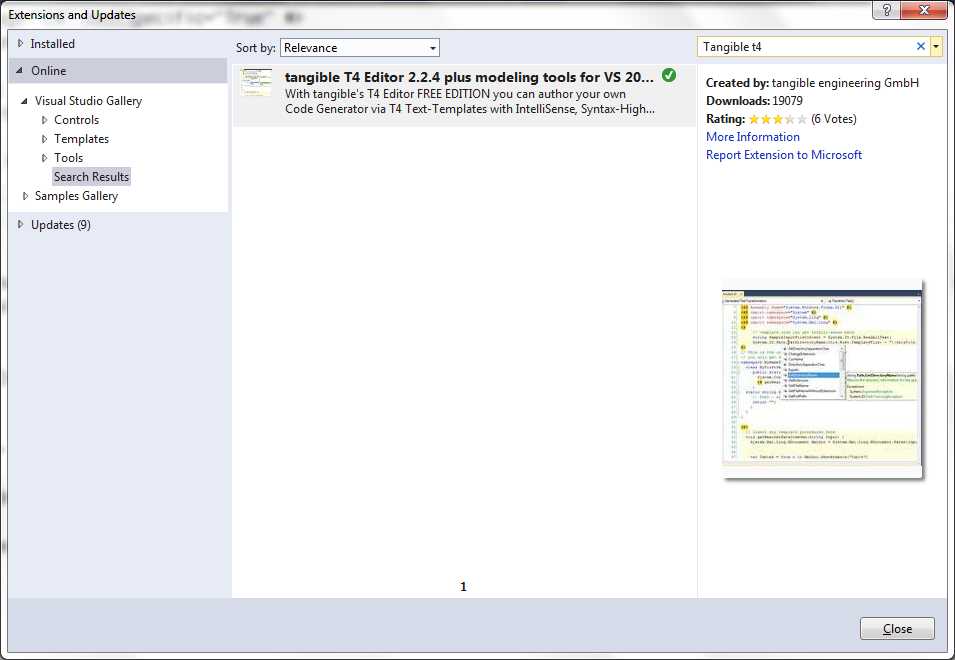
- The Tangible T4 extension
This will add some much needed syntax highlighting and IntelliSence support.
Note: The Tangible extension is the one that I use. There are others available, so it’s worth looking around. Tangible is available as a free community version and a paid professional version. If you plan on doing anything major with T4, the professional version is worth the investment.
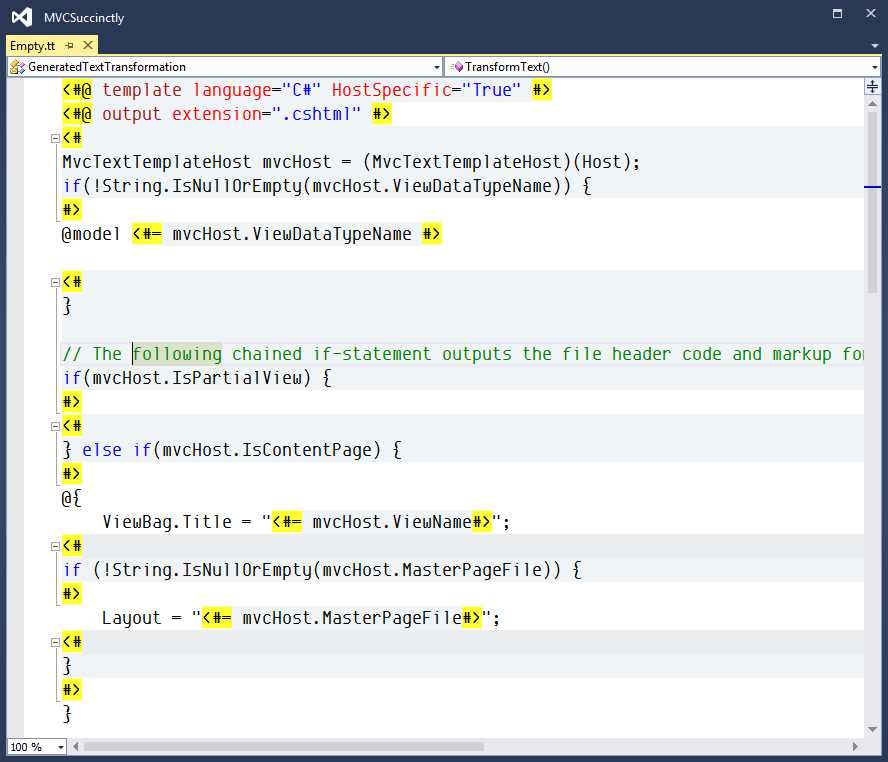
- Editing with an extension
With syntax highlighting, the structure of the file becomes easier to navigate and understand.
The first two lines are T4 directives stipulating the language and file extension for the generated file. If you've ever used ASPX files in any of your previous projects, there's a good chance that the T4 syntax will immediately make sense to you. The basic tags are as follows:
- <#= #> specifies variable substitution.
- <# #> delimits a code block.
- <#@ assembly name = “” #> defines a referenced assembly used by your T4 code.
- <#@ import namespace = “” #> defines a referenced namespace that will be used by your T4 code.
The Tangible editor also gives us a new menu with an option to Collapse all T4.
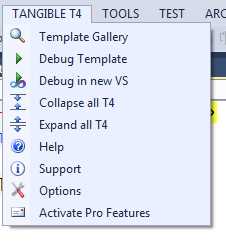
- Tangible T4 menu
This will collapse all of the T4 code blocks and leave us with just the generated code. This makes it a lot easier to see what the output will look like.
- Empty.tt with T4 code collapsed
Study the way the generated code looks in the template. Compare this to the code that is generated. At this point, we do not really care about the T4 code used to drive the generation. We are more interested in the final product.
Edit.tt
Let’s move on to the Edit.tt file. This template is much more interesting because it loops through the properties in the specified model. The easiest change to make is to add comments to the generated output. Let’s start by simply adding a comment to give the developer a bit of guidance about what needs to be done next.
Our template should now look like the following figure.
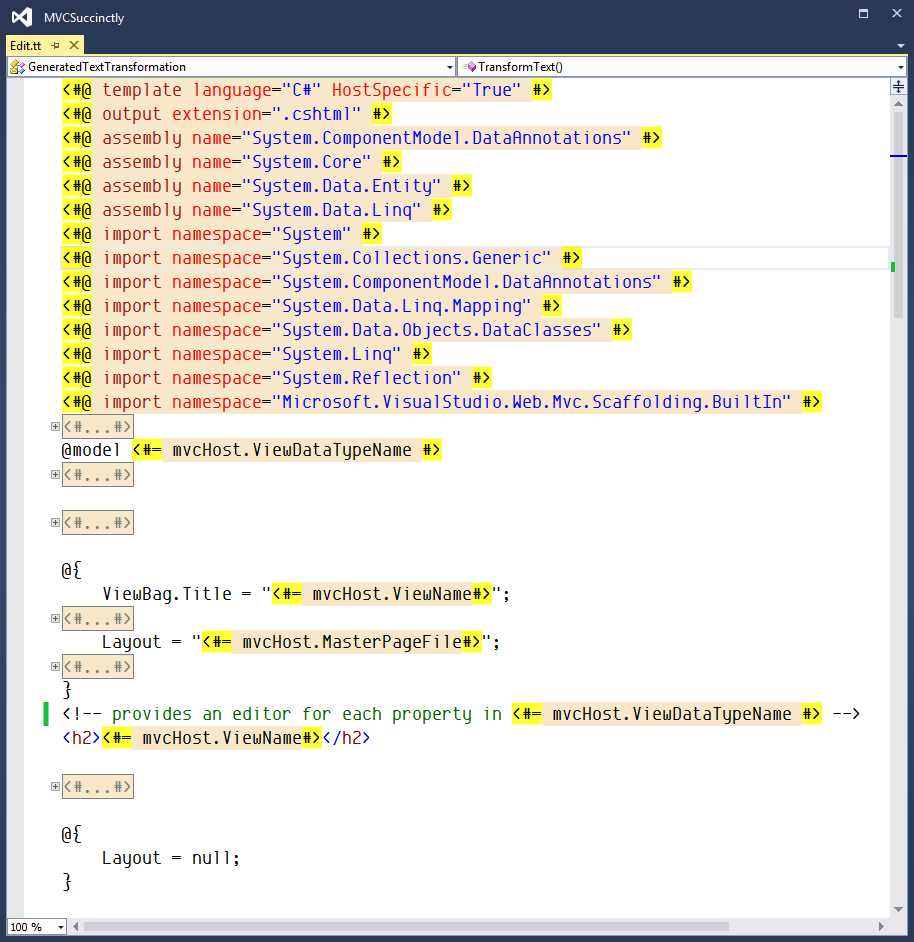
- Our updated editor template
Once we have created a new Edit view, we can see the results of this simple change.
@model MVCSuccinctly.Models.ItineraryItem @{ ViewBag.Title = "Edit"; } <!-- provides an Editor for each property in MVCSuccinctly.Models.ItineraryItem --> <h2>Create3</h2> @using (Html.BeginForm()) { @Html.AntiForgeryToken() @Html.ValidationSummary(true) <fieldset> <legend>ItineraryItem</legend> @Html.HiddenFor(model => model.Id) <div class="editor-label"> @Html.LabelFor(model => model.When) </div> <div class="editor-field"> @Html.EditorFor(model => model.When) @Html.ValidationMessageFor(model => model.When) </div> |
Code Listing 47: Generated code with our new comment
Now let’s move on to something a bit more interesting. Suppose your style wants to group a label, input control combination as a unit, and be able to show two per line. To support this, let’s wrap the two in a div tag.
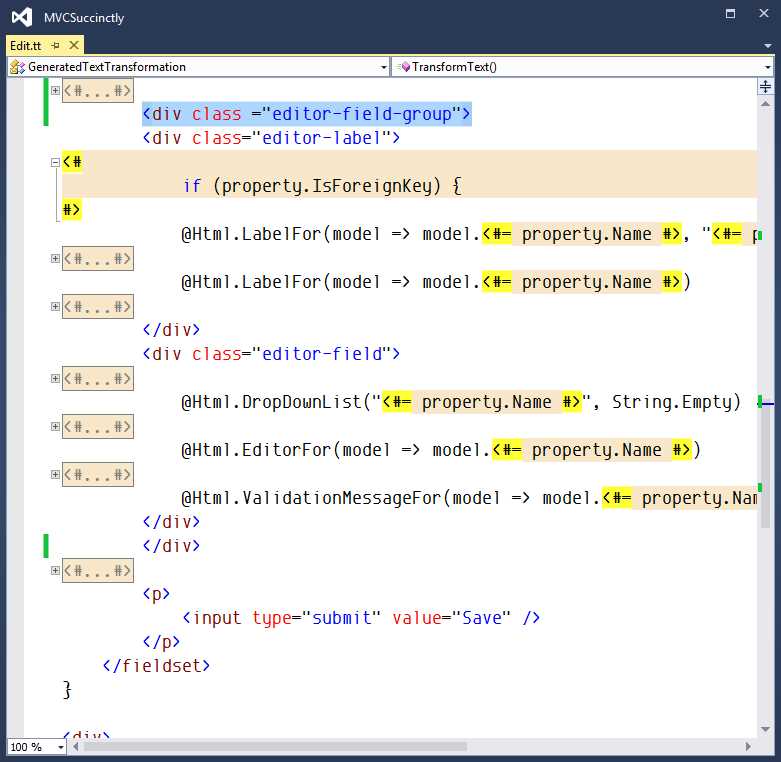
- Our editor, updated to support a two-column layout
Here, we have added a new div tag that wraps around both the label and the input control. Now when we create a new view, we get the following:
|
@Html.AntiForgeryToken() @Html.ValidationSummary(true) <fieldset> <legend>ItineraryItem</legend> @Html.HiddenFor(model => model.Id) <div class="editor-field-group"> <div class="editor-label"> @Html.LabelFor(model => model.When) </div> <div class="editor-field"> @Html.EditorFor(model => model.When) @Html.ValidationMessageFor(model => model.When) </div> </div> <div class="editor-field-group"> <div class="editor-label"> @Html.LabelFor(model => model.Description) </div> <div class="editor-field"> @Html.EditorFor(model => model.Description) @Html.ValidationMessageFor(model => model.Description) </div> </div> <div class="editor-field-group"> <div class="editor-label"> @Html.LabelFor(model => model.Duration) </div> <div class="editor-field"> @Html.EditorFor(model => model.Duration) @Html.ValidationMessageFor(model => model.Duration) </div> </div> <div class="editor-field-group"> <div class="editor-label"> @Html.LabelFor(model => model.IsActive) </div> <div class="editor-field"> @Html.EditorFor(model => model.IsActive) @Html.ValidationMessageFor(model => model.IsActive) </div> </div> <div class="editor-field-group"> <div class="editor-label"> @Html.LabelFor(model => model.Confirmed) </div> <div class="editor-field"> @Html.EditorFor(model => model.Confirmed) @Html.ValidationMessageFor(model => model.Confirmed) </div> </div> <div class="editor-field-group"> <div class="editor-label"> @Html.LabelFor(model => model.ContactNumber) </div> <div class="editor-field"> @Html.EditorFor(model => model.ContactNumber) @Html.ValidationMessageFor(model => model.ContactNumber) </div> </div> <p> <input type="submit" value="Save"/> </p> </fieldset> |
Code Listing 48: Generator output supporting two columns
I've noted my changes in Code Listing 48 in bold to make it easier to see what I've changed from the original file.
Adding Our Own T4 Code
Continuing with the example that we have been building upon, let’s create a completely custom file. Let’s modify the generated markup to draw a distinction between the columns in our two-column display. We will keep track of whether or not the input control is in the first column or the second column.
This contrived example will allow us to define some conditional logic where we determine whether or not this is an even or an odd input control set.
To support this, we will add two new style sheet classes—even and odd—that will be added to the editor-field-group tag.
To determine which class to add to each of our editor-field-groups, we need to keep track of how many input controls we have added so far. If this count is even, then we will add the class even. If it is odd, then we will add the class odd. Our updated template should now look like the following.
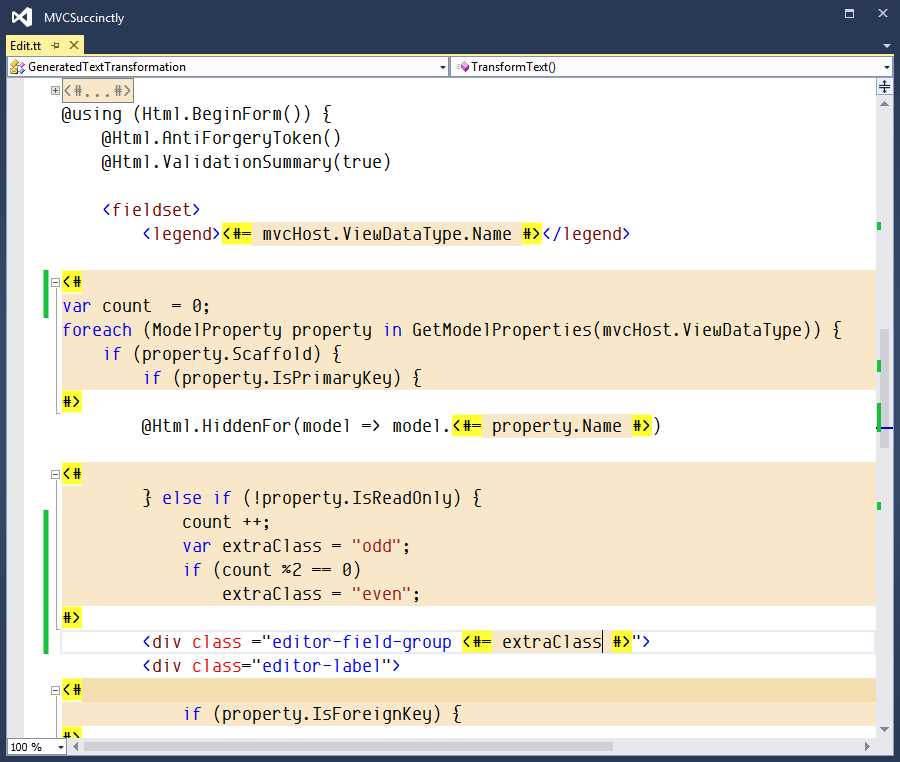
- Updated template without our logic added
Note: There are many ways of using T4 technology to help provide solutions to the scenarios highlighted in this section. The path I've chosen here is just one of those ways. I encourage you to experiment and develop others to meet any of your needs and to fulfill any requirements your projects may have.
The generated code will look like the following code listing.
@using (Html.BeginForm()) { @Html.AntiForgeryToken() @Html.ValidationSummary(true) <fieldset> <legend>ItineraryItem</legend> @Html.HiddenFor(model => model.Id) <div class="editor-field-group odd"> <div class="editor-label"> @Html.LabelFor(model => model.When) </div> <div class="editor-field"> @Html.EditorFor(model => model.When) @Html.ValidationMessageFor(model => model.When) </div> </div> <div class="editor-field-group even"> <div class="editor-label"> @Html.LabelFor(model => model.Description) </div> <div class="editor-field"> @Html.EditorFor(model => model.Description) @Html.ValidationMessageFor(model => model.Description) </div> </div> <div class="editor-field-group odd"> <div class="editor-label"> @Html.LabelFor(model => model.Duration) </div> <div class="editor-field"> @Html.EditorFor(model => model.Duration) @Html.ValidationMessageFor(model => model.Duration) </div> </div> <div class="editor-field-group even"> <div class="editor-label"> @Html.LabelFor(model => model.IsActive) </div> <div class="editor-field"> @Html.EditorFor(model => model.IsActive) @Html.ValidationMessageFor(model => model.IsActive) </div> </div> <div class="editor-field-group odd"> <div class="editor-label"> @Html.LabelFor(model => model.Confirmed) </div> <div class="editor-field"> @Html.EditorFor(model => model.Confirmed) @Html.ValidationMessageFor(model => model.Confirmed) </div> </div> <div class="editor-field-group even"> <div class="editor-label"> @Html.LabelFor(model => model.ContactNumber) </div> <div class="editor-field"> @Html.EditorFor(model S=> model.ContactNumber) @Html.ValidationMessageFor(model => model.ContactNumber) </div> </div> <p> <input type="submit" value="Save"/> </p> </fieldset> } |
Code Listing 49: Output from the generated code updated to support even and odd columns
With a bit of creativity and patience, T4 opens up a lot of possibilities. We have stepped through a couple of contrived examples here, but there is a great deal of power at your disposal.
Summary
In this chapter, we have seen how Visual Studio can write much of the code for controllers and views. Scaffolding includes built-in templates that can automatically add most of the code needed to have a fully functional controller with associated views to support basic create, read, update, and delete operations.
We have also seen how we can extend the built-in templates by changing the associated T4 templates. Changes can be simply including comments in the generated code, or complex additions to the T4 code.
- 80+ high-performance ASP.NET MVC controls, including DataGrid, Charts, and Scheduler.
- Feature demos teach you how to make the most of the controls.
- Lightweight and user-friendly.
- Stunning built-in themes.