
ASP.NET MVC Succinctly®

CHAPTER 5
MVC Meets jQuery
Modern web apps are expected to be fast, engaging, and interactive. This means that the old model of full postbacks to get data or process partial data are no longer enough. Part of the problem with full postbacks is that we send and receive more data than is necessary. This distracts users, puts more of a load on the network and servers, and slows everything down.
MVC, combined with jQuery, makes it easy to avoid these pitfalls. We can limit the initial download to only what is immediately required and then retrieve the rest as needed. We can also update smaller sets of data as needed, asynchronously, without having to send everything back every time or wait until the user has edited all of the data before processing any of the results. This makes the app more engaging and more responsive.
Out of the gate, the templates for both intranet apps and Internet apps come ready to incorporate jQuery. At most, you may want to update to a later version of jQuery. If you do upgrade and need to support older versions of Internet Explorer (IE), cap yourself at the latest 1.x version. Starting with 2.0, jQuery dropped support for IE prior to version 9. If you know that you will not support the older versions of IE, upgrade to the latest 2.x version. The files will be substantially smaller.
NuGet Package Manager
NuGet is designed to make it easier to manage external libraries such as jQuery, and has been available in Visual Studio since Visual Studio 2010. You can access it from the Tools menu in Visual Studio.

- NuGet menu options
Select Manage NuGet Packages for Solution to get a list of the packages that have updates available.
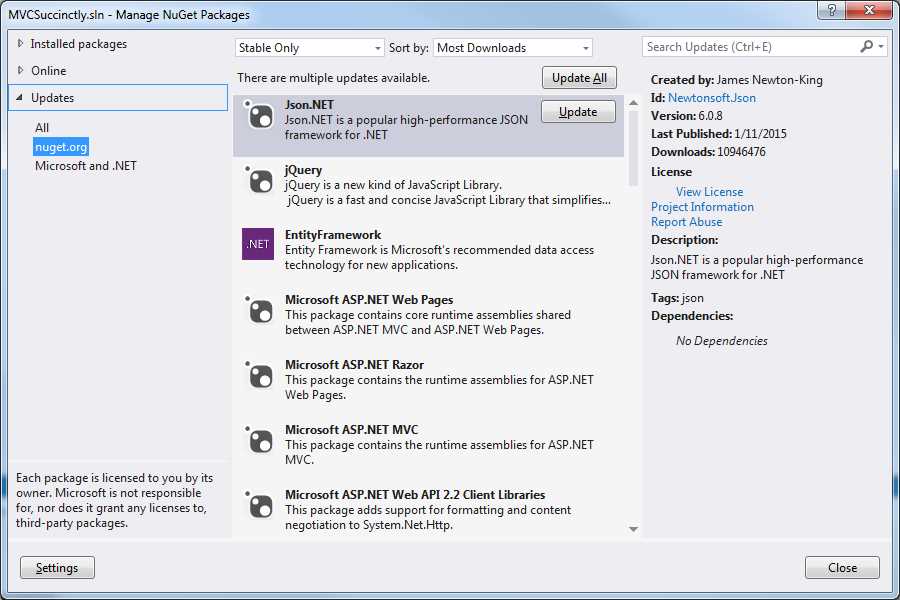
- Update packages
You can easily update any package by simply clicking Update. This is convenient but can be problematic given the previous warnings about IE compatibility. The update command here will update you to the latest version, which may not be what you want.
Tip: To update to a specific version, use the Package Manager Console instead. From the console, enter the command:
Install-Package jQuery -Version 1.11.2
If you press Tab after you type Version, you will get a list of the available versions. Simply select the version that you want.
JavaScript Background
Some basic familiarity with jQuery and JavaScript will be helpful at this point. It's highly advised that you have at least an idea of what jQuery is and how JavaScript works before proceeding with the rest of this chapter. In the sections that follow, we will focus on how jQuery interacts with MVC; this will not be a tutorial on how jQuery works.
Note: Syncfusion has many books in the Succinctly series, including titles on jQuery and JavaScript. Downloading them and keeping them handy as a reference for the rest of this chapter will help you a great deal.
Before we get started, let’s review some best practices:
- AJAX endpoints should be actions in the controller responsible for the view. This keeps related functionality together. This action is free to do whatever it needs to do, but any developer should be able to go back to the controller to trace how the functionality is implemented.
- These actions should be configured to accept only POSTs. MVC will throw an exception when returning JSON from a GET, but this provides an extra layer of protection against leaking sensitive information.
- Actions should accept models as parameters where practical so the model binder will handle the conversions as well the validations.
- Actions should always strive to return JsonResult even if they are returning a single scalar type. This is the recommended transport type and jQuery will handle the conversions on the other end.
Tip: Keep a good JavaScript reference handy.
With these best practices in mind, let’s explore some possibilities. In the remaining part of this chapter, we will go through a couple of interactions that you are likely to see in a typical app:
- Download part of the page after the page has initially loaded.
- Retrieve text for help messages only if the user triggers the request.
- Delete an item from a list of items.
Download Part of the Page after the Page has Loaded
We may often find that part of the page may not be needed when the page first loads, but we do not necessarily want the user to have to do anything to get it. We do not want the user to miss it, but do not want to hold everything up waiting on the content.
For example, we might wait to download the menu until after the page has loaded. We might have advertising along the side that we want the user to see but not have to wait on. In both cases, we want to trigger an AJAX call at the appropriate point to ensure this happens as expected.
Note: Most calls of this nature are launched from the document ready event handler. This is a jQuery-provided piece of functionality that allows us to synchronize the loading of our MVC page with a piece of JavaScript so that the provided code will run once our MVC page is fully downloaded. You can find more about this event in any jQuery reference.
In this example, we will download some advertisements after the page has finished downloading. To do this, we need to add just a bit of markup in the page. We need to make sure that the page includes a div tag with an id of ads. We do not care where this tag is located or how it is styled. For our purposes, all we need is for the id to be properly set. Styling is entirely up to your app’s style guides.
Our JavaScript code will look like the following code listing.
|
$(document).ready(function() { $.ajax({ url: '@Url.Action("GetAdsSimple")', dataType: "json", type: "POST", success: function(result) { $("#ads").append(result); } }); }); </script> |
Code Listing 34: AJAX call to the GetAdsSimple action
As you can see, this will require an action in our controller called GetAdsSimple. We will call this method as a POST and expect JSON back. In this simple implementation, we will receive a raw string of formatted HTML.
Note: Code Listing 34 includes a Razor call to the helper function Url.Action. This function is useful for creating the full URL. In this case, all we specified was the name of the action. This method will build out the rest to generate a complete URL, after making the assumption that the controller will be the same controller that served up the view.
A simple implementation could look like this:
[HttpPost] public JsonResult GetAdsSimple() { var data = new StringBuilder(); data.Append("<ul>"); data.Append("<li><img src='http://placehold.it/180x100'></li>"); data.Append("<li><img src='http://placehold.it/180x100/ffffff/aaaaff'></li></ul>"); return Json(data.ToString( )); } |
Code Listing 35: GetAdsSimple action
Here, we simply output a list of images. How you structure your markup is entirely up to you. If it is just a bit of markup, returning everything in a simple string may be all you need. But, if the markup is more complex or if you want the client to have more control over the generated HTML, we have other options.
Note: Rarely will this be an acceptable option. A good best practice is to keep all markup out of the controller. This protects testability, plus we want to keep all of the look and feel considerations in the hands of the views.
Consider the following slightly more complex JavaScript code.
<script> $(document).ready(function() { $.ajax({ url: '@Url.Action("GetAdParts")', dataType: "json", type: "POST", success: function(result) { var content = "<ul>"; $.each(result, function (key, value) { content += "<li ><a href = '" + value.url + "' title='" + value.caption + "'>" + value.image + "</a></li>"; }); content += "</ul>"; $("#ads").append(content); } }); }); </script> |
Code Listing 36: AJAX call to GetAdParts
In this case, we have switched to calling a new action, GetAdParts, and this time, we expect the action to return a list of JSON objects that we will build up to produce the ads. This bit of extra complexity pulls generating the markup out of the controller and puts it back into the hands of the view. Different views could take these parts and format the ads differently based on whether they were being displayed on a desktop, tablet, or smartphone. You get a lot of power and flexibility by just transferring the ad parts and letting the client-side view decide how best to render these parts.
While the JavaScript might be a bit more complex, our action turns out to be a bit more straightforward because we can avoid all of the annoying string manipulation to generate the markup.
[HttpPost] Public JsonResult GetAdParts() { var data = new List<AdParts>(); data.Add(new AdParts { image = "<img src='http://placehold.it/180x100'>", caption = "Lorem ipsum dolor sit amet, consectetur adipiscing elit". url = "http://#" }); data.Add(new AdParts { image = "<img src='http://placehold.it/180x100'>", url = #", caption = "Donec adipiscing eros eget dui aliquet, nec tur." }); return Json(data); } |
Code Listing 37: GetAdParts action
public class AdParts { public string image { get; set; } public string url { get; set; } public string caption { get; set; } } |
Code Listing 38: AdParts definition
Either approach will give us a reasonably attractive set of ads as shown in the following figure.
- After the ads have loaded
Retrieve Help Text When the User Triggers the Request
This scenario is similar to the one we just created for showing advertisements; the main difference is that the AJAX call is now triggered by the user rather than automatically. Usually the user will click a trigger that will be used to initiate the action. In the following example, we will use an image that has a question mark to open the help and an X to close the help.
For this to work, we need two HTML components to be created. First, we need a div with an id of helpTrigger. Second, we need a div with an id of helpContent. How you set up these components depends on your style guidelines. Here, we will make the trigger a div tag that will be styled to pull its image from a sprite and a CSS that will ensure this image will always be in the upper right corner of the page. The CSS will look like the following code listing.
.helpTrigger { position: fixed; top: 1em; right: 1em; height: 50px; width: 50px; background: url('HelpClose.png') 0px 0px; } .closeTrigger { position: fixed; top: 1em; right: 1em; height: 50px; width: 50px; background: url('HelpClose.png') 0px 50px; } #helpContent { border: solid 1px black; border-right: 3em; min-height: 4em; border-radius: 1em; box-shadow: 1px 1px 15px black; position: fixed; top: 5em; right: 5em; height: 25em; width: 60em; overflow: auto; background-color: whitesmoke; padding: 1.5em; } |
Code Listing 39: Styling the helpTrigger and helpContent
Here, we have a sprite that includes two images that are each 50px by 50px.
![]()
- A sprite for the help trigger and close trigger
For the help trigger, we want to display the top image and, to close it, we want to display the bottom image.
To add the trigger, we simply add our div tag anywhere we want to on the page.
<div id="helpTrigger" class="helpTrigger"></div> |
Code Listing 40: The help trigger
To add the helpContent, we will add a similar div but note that we start with it hidden.
<div id="helpContent" style="display:none"></div> |
Code Listing 41: Help content
Note: As a best practice, avoid using inline styles. This was done here merely to simplify the tutorial.
Once the div is in place, we will then use jQuery to add a different type of event handler called a click event. Similar to the ready event we used earlier in the chapter, this is functionality provided by jQuery, not by MVC. It allows us to be informed when the user clicks our div element. The event code will not only show our help text, it will also change the image sprite we placed in our div to convey the current opened or closed state of our text.
To simplify this switching around, we will define our event handlers as named functions in JavaScript instead of putting their implementations inline.
function getHelp() { $.ajax({ url: '@Url.Action("GetHelp")', dataType: "json", type: "POST", success: function (result) { $("#helpContent").empty().append(result); $("#helpContent").show(); $("#helpTrigger").removeClass("helpTrigger") .addClass("closeTrigger"); $("#helpTrigger").unbind("click"); $("#helpTrigger").click(closeHelp); } }); } |
Code Listing 42: AJAX call to GetHelp
function closeHelp() { $("#helpContent").empty(); $("#helpContent").hide(); $("#helpTrigger").removeClass("closeTrigger") .addClass("helpTrigger"); $("#helpTrigger").unbind("click"); $("#helpTrigger").click(getHelp); } |
Code Listing 43: jQuery logic to close the helpContent
Note: Here we rely on the action sending back formatted HTML, but all of the options that we explored in the previous example on how to structure and generate the markup are still available.
Our view, complete with the handy help trigger ready to bring us help, will look something like the following figure.

- Our simple page showing the help trigger
And once the sprite image has been clicked, the help content, along with its close trigger, will look like the following.

- Our view showing the help content
Note: You would return something useful based on the originating page or some similar context. You may want to include maintenance of this help message in an admin section and simply retrieve formatted HTML from the database.
Delete an Item from a Grid
You may often display a list of items and allow users to click a trigger to remove an item from the list. This may be a list of messages to acknowledge, items in a shopping cart that can be removed, or a list of tasks that could be completed.
In each case, we need to call an action in the controller, passing the id for the item clicked. The controller will update the back end to remove the item from the list of items to display. When the AJAX call is finished, we will use jQuery to remove the item from the display.
Once again, we have a couple of special considerations regarding how we structure our markup.
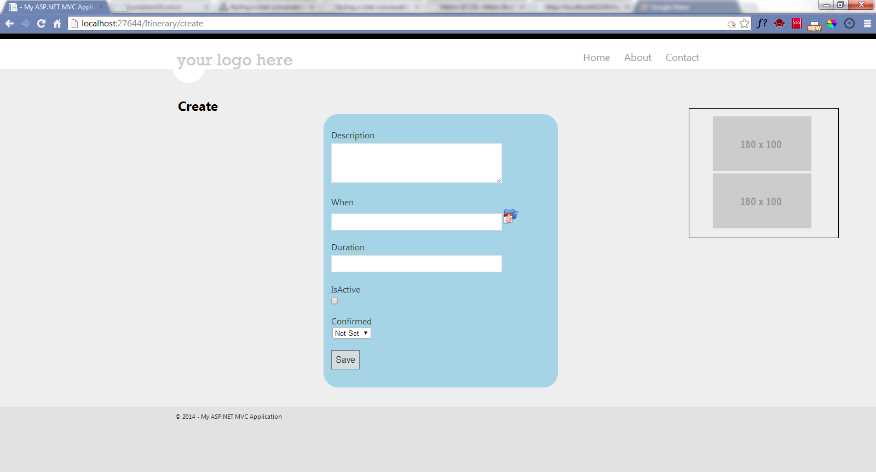
Consider the following example list of itinerary items. We want users to be able to cancel any item as needed.

- A grid with a cancel option for each item
<div id="Itinerary376"> <div class="span10">8/11/2014 10:10:55 PM</div> <div class="span15">Sample itinerary item7</div> <div class="span5">45</div> <div class="span5 cancel"> Cancel</div> </div> <div id="Itinerary370"> <div class="span10">8/12/2014 10:10:55 PM</div> <div class="span15">Sample itinerary item1</div> <div class="span5">20</div> <div class="span5 cancel"> Cancel</div> </div> <div id="Itinerary375"> <div class="span10">8/12/2014 10:49:59 PM</div> <div class="span15">Sample itinerary item6</div> <div class="span5">30</div> <div class="span5 cancel"> Cancel</div> </div> <div id="Itinerary373"> <div class="span10">8/14/2014 12:41:18 AM</div> <div class="span15">Sample itinerary item4</div> <div class="span5">60</div> <div class="span5 cancel"> Cancel</div> </div> <div id="Itinerary379"> <div class="span10">8/14/2014 10:43:55 PM</div> <div class="span15">Sample itinerary item10</div> <div class="span5">10</div> <div class="span5 cancel"> Cancel</div> </div> |
Code Listing 44: Markup to display a grid of itinerary items
If a user clicks the Cancel link (see the Tip that follows), we want to call an action in the controller. In this action, we should retrieve the item that the user selected and mark it as cancelled. Back in the web browser, we need to retrieve the parent of the cancel link and hide it.
Tip: Even though I refer to this as a “Cancel link,” it should be obvious from the markup that this is not a link; we just want it to look like one to the user. More importantly, we want to make sure that it does not look like one to a web crawler. It would truly be tragic for a web crawler to follow a bunch of links and cancel all of the events on your itinerary.
Any action that can manipulate data should be treated as a POST to prevent the user or a web crawler from accidentally “getting“ data that could result in data manipulation.
.cancel { text-decoration: underline; cursor: pointer; } |
With this markup in place, we can add the event handlers as follows.
$(".cancel").click(function() { var id = ($(this).parent().attr("id")) .replace("Itinerary", ""); var parent = $(this).parent(); $.ajax({ url: '@Url.Action("CancelItineraryItem")', dataType: "json", type: "POST", data : {id : id}, success: function (result) { parent.hide(); } }); }); |
Code Listing 45: AJAX call to CancelItineraryItem action
Note: The rules for this in JavaScript are subtle, but in this case, it refers to the element that triggered the event. We wrap it in a jQuery function call to convert it to a jQuery object. It is also worth noting that we have to put this in a local variable to be used by the success event handler because in this event handler, this will have a different meaning.
The fancy footwork with the parent, getting the id, and stripping off the key word Itinerary will give us the id that we will pass back to the action. This will be the unique identifier for the ItineraryItem back in the database.
Summary
In this chapter, we have seen how MVC can work with jQuery to create webpages that will load faster by reducing the amount of content that needs to be initially sent down. We explored two different options to trigger pulling down the rest of the content: automatically downloading the content after the page is fully loaded, and downloading the content when the user explicitly clicks a trigger. We have also seen how we can leverage jQuery to make AJAX calls to update part of the page, without having to refresh the entire page. Actions in controllers make natural endpoints for AJAX calls and the clean markup typical of MVC makes it easier to build effective selectors and control the markup through jQuery. jQuery and MVC combine well to facilitate creating dynamic, responsive web apps.
- 80+ high-performance ASP.NET MVC controls, including DataGrid, Charts, and Scheduler.
- Feature demos teach you how to make the most of the controls.
- Lightweight and user-friendly.
- Stunning built-in themes.