
ASP.NET Core Succinctly®

CHAPTER 7
Tools used to develop ASP.NET Core Apps
At the beginning of the book we said that ASP.NET Core is a cross-platform framework, but we are almost at the end of the book, and apart from a simple example in Chapter 1, we've always used Visual Studio on Windows.
This last chapter closes the gap between platforms by showing how ASP.NET Core applications can be developed without Visual Studio.
Using dotnet CLI
Throughout this book you have used the dotnet command line tool to create projects, to build, and to publish applications. In this chapter, you will go more in depth and see more advanced usages of the tool.
The dotnet tool is called by first specifying the command, followed by the arguments specific to the command, and finally the options.
The commands available from the dotnet tool are:
- new, to create a new .NET Core project.
- restore, to download all dependencies from NuGet.
- build, to compile the projects.
- publish, to generate a self-contained folder used for deployment.
- run, to run a project, building it if not already built.
- pack, to package the project as a NuGet package.
- msbuild, used as a proxy for the standard MSBuild command.
Let's start by looking in greater detail at the new command. When called without any option, it just lists all the possible types of projects it can create, but by specifying an argument, it directly creates a project. Using console, it creates a C# console application; with mvc, it makes a full-featured ASP.NET Core application with MVC; or with classlib, it creates a library project.
For both build and publish, you can specify the framework, the runtimes, and the configuration (debug or release) you want for compiling. These options are not very useful if you built your application only to target one framework or runtime. However, they are meaningful if, for example, you want to create a utility that can run on multiple machines as a native application.
If you want to build a sample console app for Windows and for Mac, you have to first specify in the project file that you want to support additional runtimes.
.NET Core supports a lot of different systems, but each of them has a very specific identifier, which is in the format [os].[version]-[arch] (e.g, osx.10.11-x64). But despite the templated look, they are unique strings, so before using a new RID, you have to make sure it's supported and has the right name. Refer to the RID Catalog on Microsoft’s docs site.
The runtimes and application support have to be specified inside the RuntimeIdentifiers property of the project file as a list of RIDs separated by semicolons (;). Leave no space after the semicolon or the restore will fail.
Code Listing 7-1
<PropertyGroup> |
Once the file has been modified, run dotnet restore again. This will download all packages—for other runtimes too—as shown in the following command prompt window.
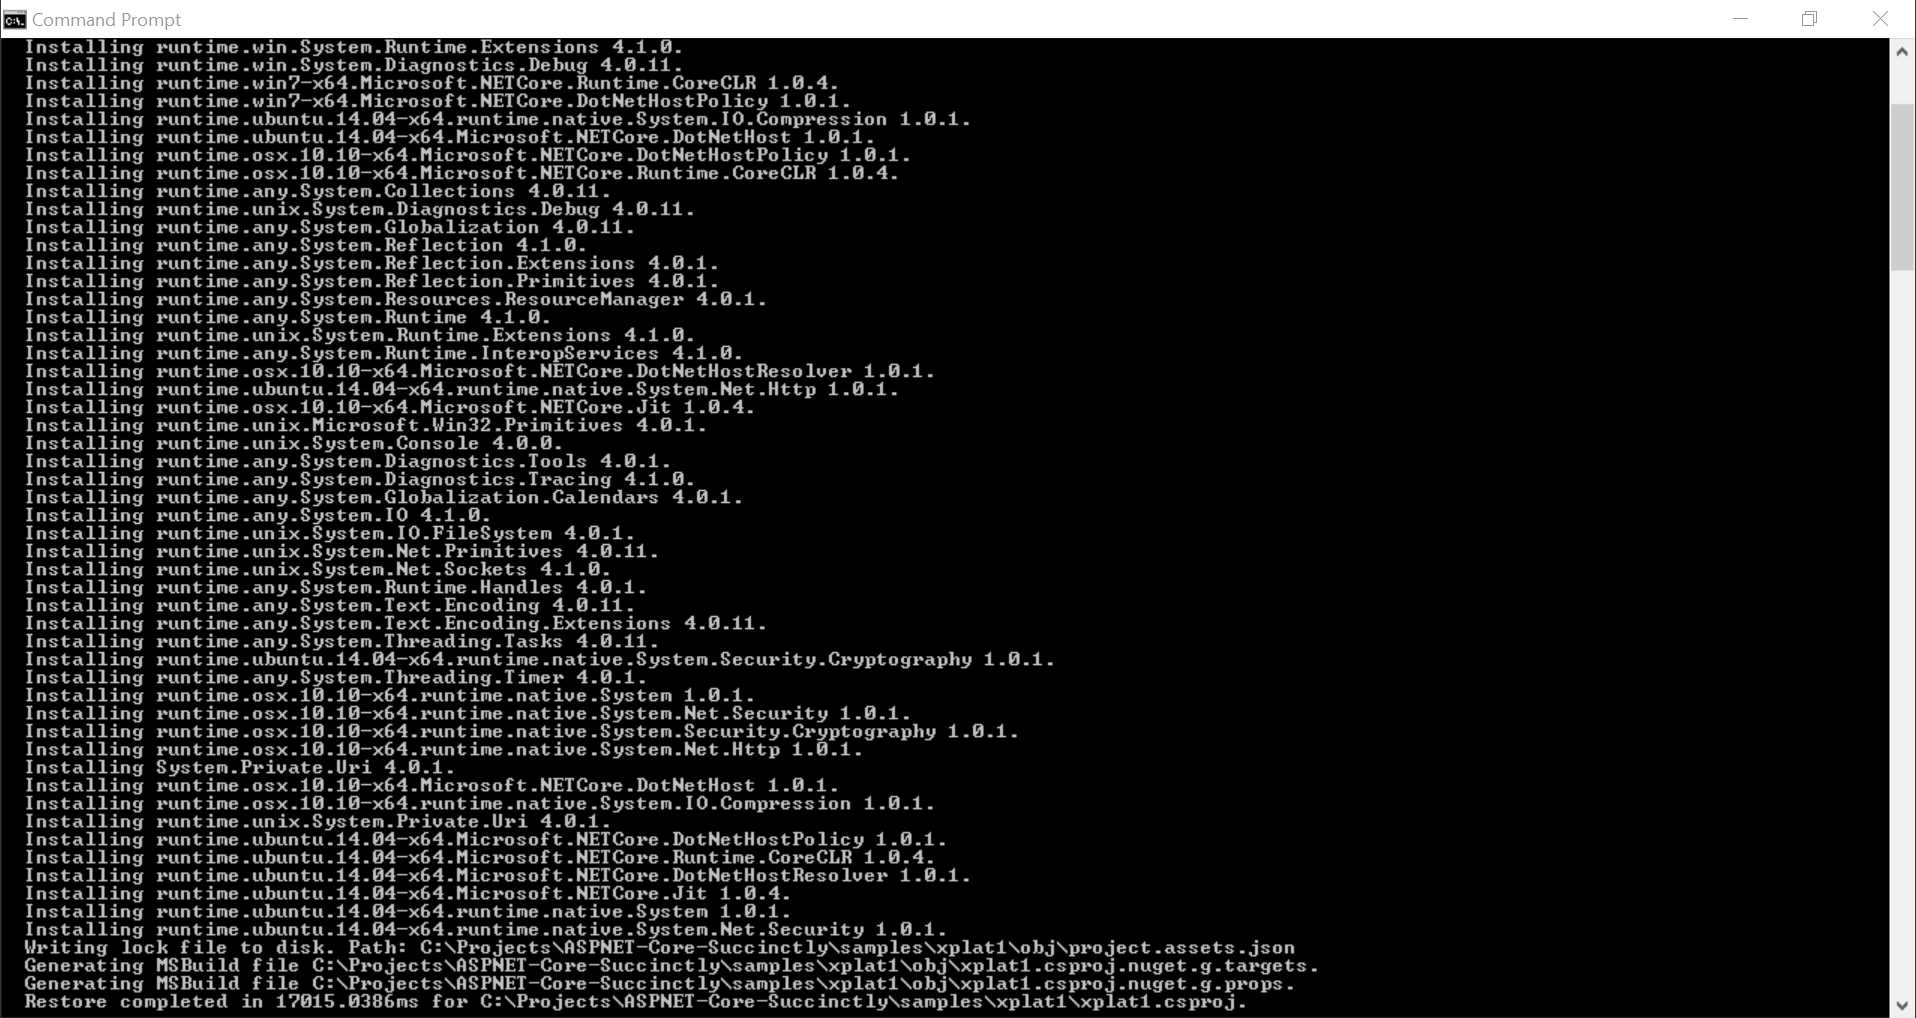
Figure 7-1: Command Prompt Output
You can now publish an app for all three runtimes, thus creating self-contained folders that contain native binary executables that can be copied directly to the target machine.
To publish them, run the dotnet publish command three times, one per each runtime you want to build.
Code Listing 7-2
dotnet publish -r win10-x64 |
These commands create three folders under the bin folder of the project, one per runtime.
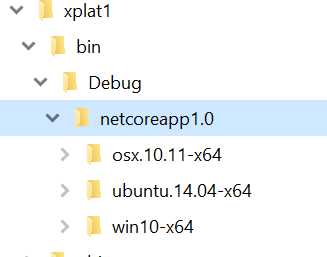
Figure 7-2: Folder Output
The dotnet CLI is extensible, so although it has very basic features now, it can be expanded with external libraries like the iis-publish tool seen in Chapter 4. Expect its features to grow as time passes.
Developing ASP.NET Core Using Visual Studio Code
With the CLI, you can create a new project first and compile and publish it later, but the CLI doesn't help you develop the application. If you don't want to use full-fledged Visual Studio 2015 or 2017, you can use any modern text editor for which an OmniSharp plugin is available.
OmniSharp
OmniSharp is a set of open source projects working together to bring .NET development to any text editor. It's made from a base layer that runs Roslyn and analyzes project files. This layer builds a model of the project that can be queried via APIs (REST over HTTP or via pipes) from text-editor extensions to display IntelliSense, autocomplete, suggestions, and code navigation. At the moment, there are OmniSharp extensions for five popular text editors: Atom, Sublime Text, Vim, Emacs, and Visual Studio Code, the new cross-platform, open source text editor developed by Microsoft.
In this chapter, we are going to show how to develop a simple ASP.NET Core application using Visual Studio Code and the OmniSharp extension.
Setting up Visual Studio Code
Installing Visual Studio Code is easy: Just go to code.visualstudio.com and download the version for your operating system: Windows, Mac, or Linux.
Visual Studio Code is a general-purpose editor that relies on extensions to support specific languages. To develop and debug ASP.NET Core applications, install the C# extension by clicking on the extension pane in Visual Studio Code and then typing @recommended in the search bar.
Once the extension is installed, you can open an ASP.NET Core project created using the dotnet new -t web command by selecting its folder. Visual Studio Code understands it's a .NET Core project and will show a warning like the one in the following figure.
![]()
Figure 7-3: VS Code Warnings
The first warning says that some configuration files are missing. Once you click Yes, two new files will be added to .vscode folder: launch.json and tasks.json. These two files tell Visual Studio Code how to compile a .NET Core project and how to launch a debugging session. But don't worry too much about them, as all the correct values are added by the C# extension.
Developing with Visual Studio Code
Now that all is ready, developing an ASP.NET Core application with Visual Studio Code is just as productive as doing it with the full of Visual Studio 2017, if not more.
For example, you have IntelliSense and code completion.
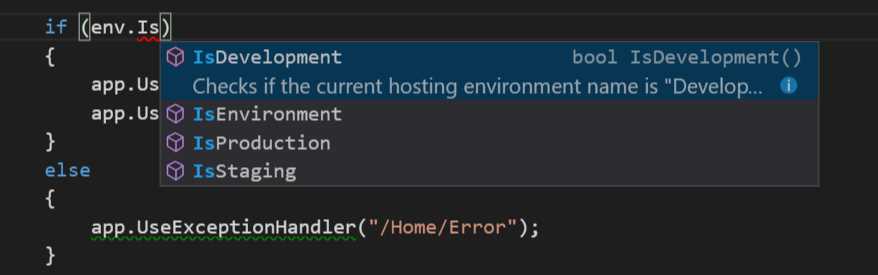
Figure 7-4: VS Code IntelliSense
You also have the same linting and refactoring suggestions. They appear as squiggle underlines (red or green) with messages in the bottom panels and icons in the status bar. Figure 7-5 shows all the locations in the UI where suggestions appear.
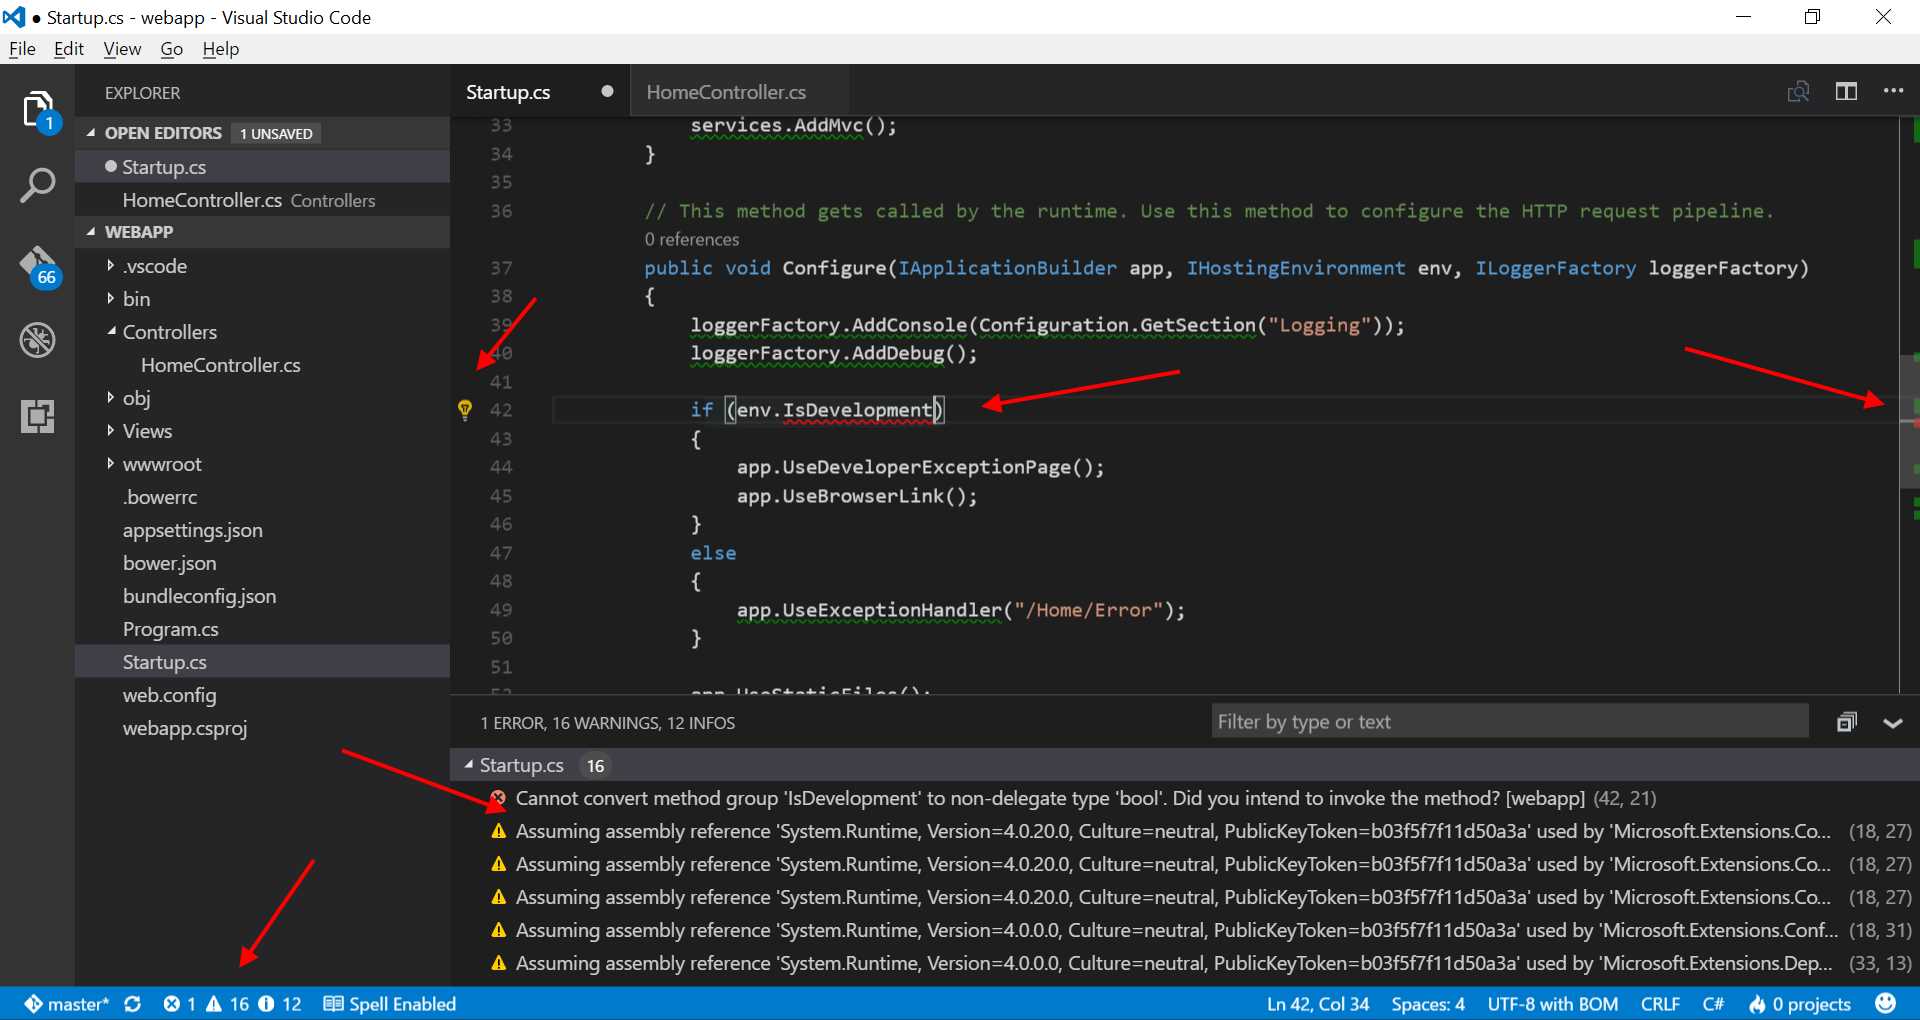
Figure 7-5: VS Code Suggestions
Another example of a good Visual Studio Code feature is code-navigation. Like any other editor, you can go to the definition of a variable and peek at it without leaving the current file.
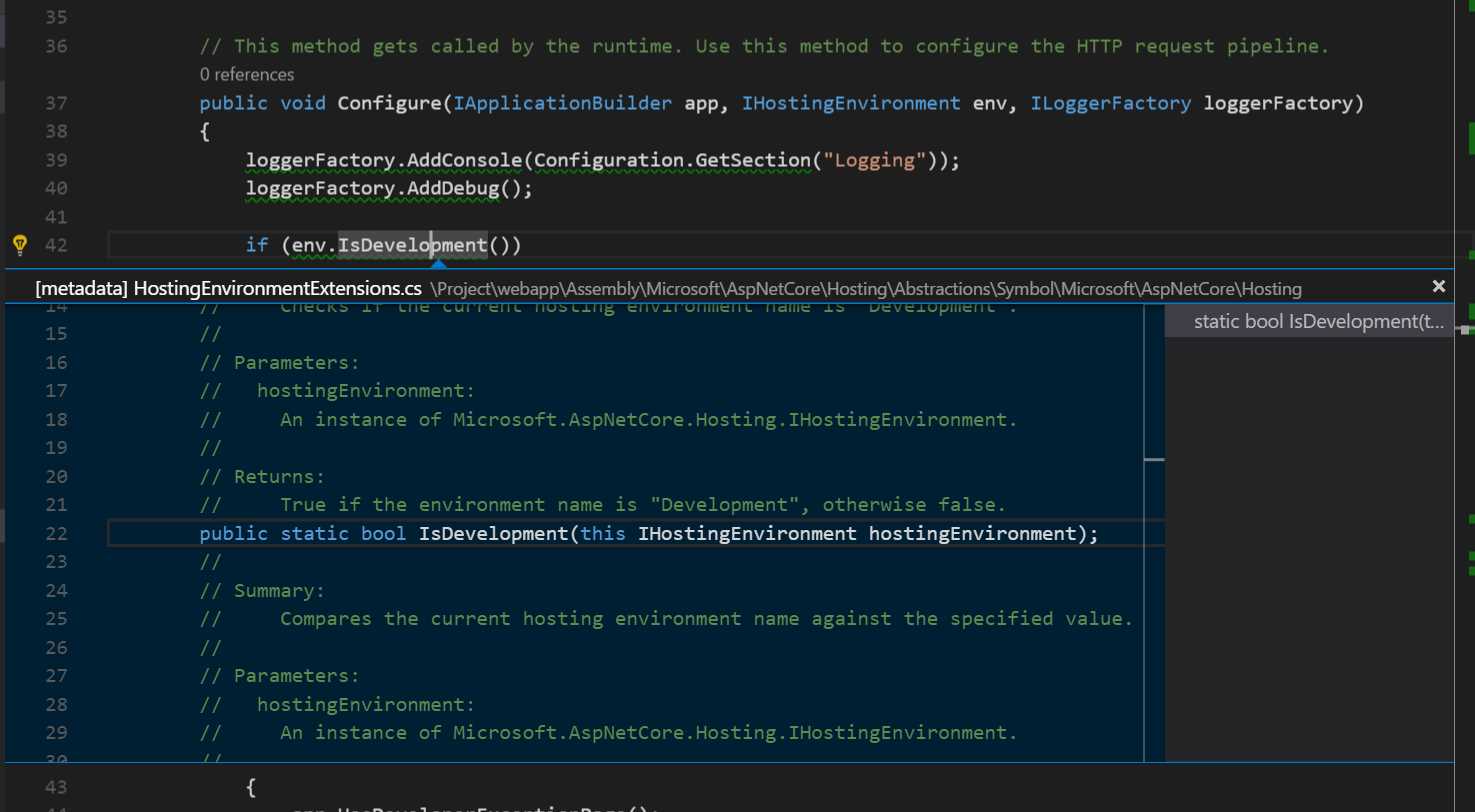
Figure 7-6: VS Code Navigation
Debugging with Visual Studio Code
Once the application has been developed, it's time to make sure it works. From within Visual Studio Code, you can launch the application, set breakpoints, and inspect variables.
To do so, go the Debug panel (by clicking the bug icon), and click on the debug icon (the green run icon, same as in Visual Studio) to launch the application. To set a breakpoint, click next to the line number in the editor. Then you can step through the instructions like any other code debugger.
The figure below shows the debugging interface of Visual Studio Code, while debugging the HomeController.
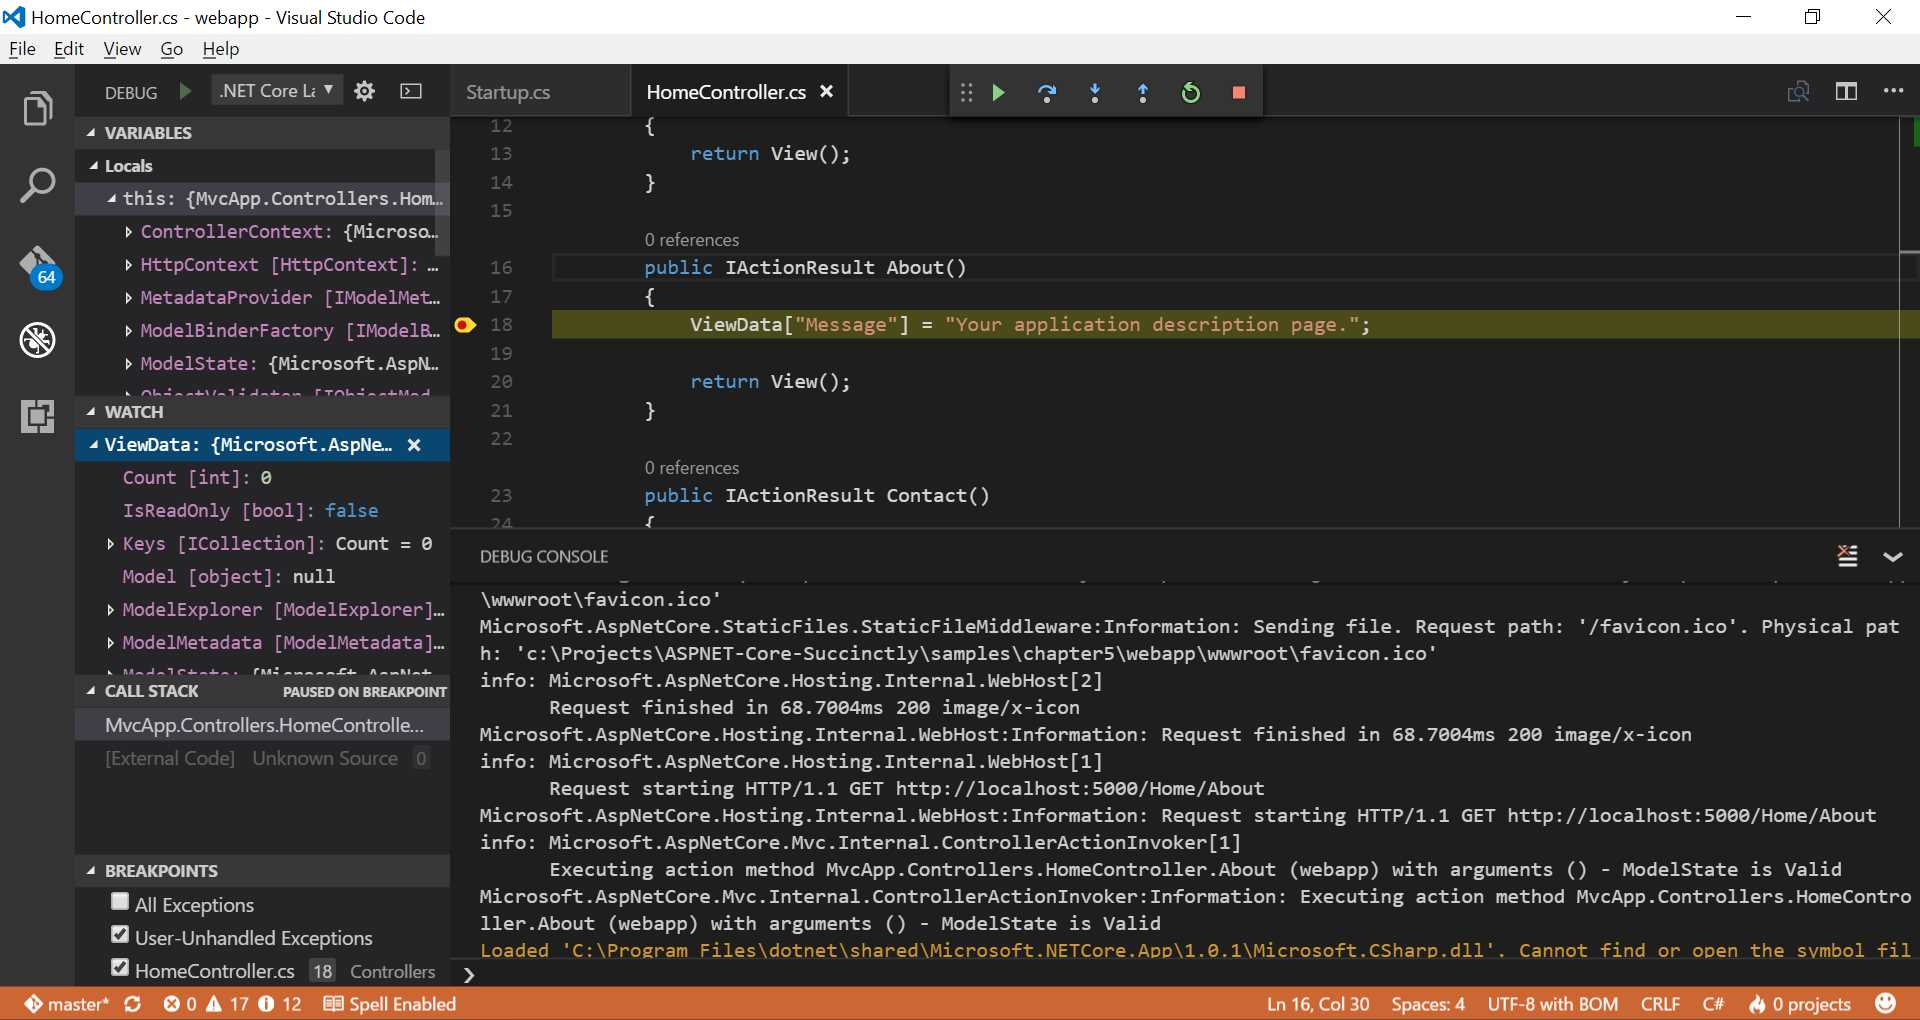
Figure 7-7: VS Code Debugging
You can basically do everything you can normally do with the full of Visual Studio, but in a lighter way and on all operating systems.
Conclusion
In this chapter, you saw that you do not need a Windows machine with Visual Studio to develop ASP.NET Core applications. You can use a Mac and develop using the CLI and Visual Studio Code.
In addition to what we've shown in this chapter, Visual Studio Code can do many more things. It is a Git client, a Node.js and client-side JavaScript editor and debugger, and it is also a very good Markdown editor. In fact, this whole book has been written in Markdown within Visual Studio Code, and later converted to Word format using Pandoc.
- 80+ high-performance ASP.NET Core controls, including DataGrid, Charts, and Scheduler.
- Lightweight and responsive.
- Modular and touch-friendly.
- Built-in themes.