
ASP.NET Core 6 Succinctly®

CHAPTER 4
Why Use Dependency Injection?
Dependency injection (or DI) is a concept that you will come across sooner or later, if you haven’t already. This design pattern supports the development of loosely coupled code. Let’s have a look at how dependency injection works and why it is so beneficial.
Note: Briefly, dependency injection allows a class to accept dependencies at runtime rather than instantiating dependencies at compile time.
What is dependency injection?
Dependency injection supports the implementation of two concepts: inversion of control and the dependency inversion principle. The ASP.NET Core framework relies heavily upon dependency injection, as it is a foundational concept of ASP.NET Core. It is therefore recommended that developers make use of it when creating solutions with ASP.NET Core.
To illustrate the architectural problem that dependency injection solves, let's have a look at an application that uses the minimal API we created earlier to get the weather details from AfriGIS’s Weather API. The application is a simple web application that displays the data returned from the API call as shown in Figure 71.
Note: The previous chapter dealt with the creation of the minimal API to call an external API to return weather data. The API must be deployed or running in Visual Studio if you want to test against the service in this example. You can, however, just create a dummy service that returns static data instead of doing a call to the minimal API. Also note that the example is simply a way to illustrate dependency injection, and not an example of how to correctly call an external web service (and all the error handling that goes with it).
You can follow along in the code found on GitHub, or you can create your own weather service manager to return dummy data. The real point here is to illustrate how dependency injection solves the problem we have with a tightly coupled dependency.
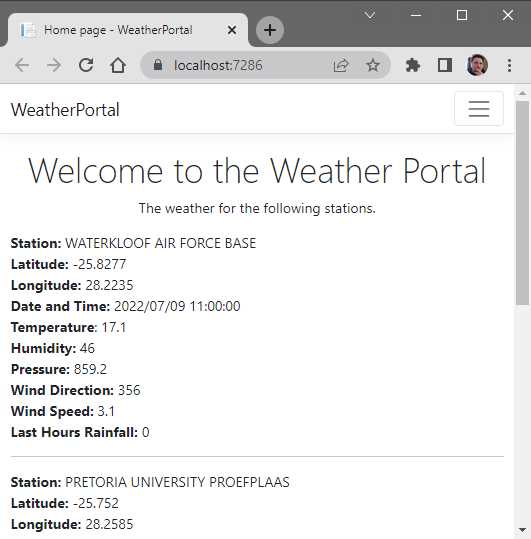
Figure 71: The Weather Portal Web Application
The Razor page model called Index.cshtml.cs is shown in Code Listing 50. The OnGetAsync method will populate the model that, in turn, is used to create the index page’s content.
Code Listing 50: The Razor Page for the Weather Portal
using Microsoft.AspNetCore.Mvc.RazorPages; using WeatherPortal.Core; namespace WeatherPortal.Pages { public class IndexModel : PageModel { public WeatherResults WeatherResults { get; set; } = new WeatherResults(); public IndexModel() {
} public async Task OnGetAsync() { var weatherManager = new WeatherManager(); WeatherResults = await weatherManager.GetWeatherAsync(); } } } |
The OnGetAsync method is currently using a class called WeatherManager to make a call to the minimal API via the GetWeatherAsync method and returning the weather details to the page. What we have here is a dependency between the OnGetAsync method of the IndexModel class and the WeatherManager class.
This is because the OnGetAsync method is responsible for creating an instance of the WeatherManager class on which it depends. You can see this dependency when you look at the line var weatherManager = new WeatherManager(); in the OnGetAsync method.
As seen in Figure 71, the application works correctly and returns the data as expected, but there are some problems with this approach. Because the OnGetAsync method is responsible for the creation of the WeatherManager class, it is tightly coupled to the WeatherManager implementation.
Tight coupling is considered an anti-pattern in software development. This is because as time goes on, it becomes harder to maintain the code, and any changes (such as implementing an improved WeatherManager class) might require many classes to be updated that are dependent on the WeatherManager class. Let’s see how to solve this problem. We’ll start by using an interface.
Creating interfaces
According to the dependency inversion principle, classes should rely on abstractions rather than implementations. Because the IndexModel is tightly coupled to the WeatherManager implementation, it does not meet this requirement.
We will therefore have to refactor our code to create an abstraction so that we can reduce the coupling between classes and their dependencies. An interface will allow us to do this. The code for the WeatherManager class is illustrated in Code Listing 51.
Note: Code Listing 51 contains hard-coded strings specific to my machine with regards to the BaseAddress URL port. If you want to use your minimal API in the WeatherManager class, you will need to change your port.
The implementation code in the WeatherManager class does not matter. You can just return some hard-coded data if you like. I just thought it would be fun to use the minimal API created in the previous chapter.
Code Listing 51: The WeatherManager Class
using Newtonsoft.Json; using System.Net.Http.Headers; namespace WeatherPortal.Core { public class WeatherManager { private static readonly HttpClient _client = new(); public WeatherManager() { _client.BaseAddress = new Uri("https://localhost:44349/"); _client.DefaultRequestHeaders.Accept.Clear(); _client.DefaultRequestHeaders.Accept.Add(new MediaTypeWithQualityHeaderValue("application/json")); } public async Task<WeatherResults> GetWeatherAsync() { var response = await _client.GetAsync("sa-weather"); if (response.IsSuccessStatusCode) { string apiResp = await response.Content.ReadAsStringAsync(); var results = JsonConvert.DeserializeObject<WeatherResults>(apiResp); return results ?? new WeatherResults(); } return new WeatherResults(); } } } |
To easily extract an interface from our WeatherManager class, place your cursor on the class name and press Ctrl+. or right-click and select Quick Actions and Refactorings from the context menu.
Next, click Extract interface (Figure 72) to create an interface called IWeatherManager, as seen in Code Listing 52.

Figure 72: Extract an Interface from the WeatherManager Class
With the interface created, you will notice that the WeatherManager class now implements the IWeatherManager interface, as seen in the excerpt in Code Listing 53.
Code Listing 52: The IWeatherManager Interface
namespace WeatherPortal.Core { public interface IWeatherManager { Task<WeatherResults> GetWeatherAsync(); } } |
You will notice in Code Listing 52 that the GetWeatherAsync method is a member of the created IWeatherManager interface.
Code Listing 53: The IWeatherManager Interface Implemented
public class WeatherManager : IWeatherManager { private static readonly HttpClient _client = new(); |
This easy refactoring is the first improvement made so that we can decouple the code moving forward. With his improvement made, we can now think about using constructor injection to inject the WeatherManager service into our methods.
Using constructor injections
Constructor injection will allow us to pass dependencies to our class via the constructor instead of the class having to create instances of the dependencies it requires. To achieve constructor injection, we can make dependencies parameters of the constructor. To illustrate this, consider the code in Code Listing 54 for the IndexModel class.
Code Listing 54: Injecting the Dependency via the Constructor
using Microsoft.AspNetCore.Mvc.RazorPages; using WeatherPortal.Core; namespace WeatherPortal.Pages { public class IndexModel : PageModel { private readonly IWeatherManager _service; public WeatherResults WeatherResults { get; set; } = new WeatherResults(); public IndexModel(IWeatherManager service) { _service = service; } public async Task OnGetAsync() { //var weatherManager = new WeatherManager(); //WeatherResults = await weatherManager.GetWeatherAsync(); WeatherResults = await _service.GetWeatherAsync(); } } } |
Here we are applying a version of the inversion of control principle to invert control of the creation of the WeatherManager dependency. We allow another component to take responsibility for creating an instance of the dependency and passing that dependency to the constructor of the class that depends on the WeatherManager. We are now able to achieve loose coupling in our code.
A private readonly field called _service is created and assigned from within the constructor. Our code now supports the dependency injection pattern. We now need to complete the inversion of control so that ASP.NET Core can take responsibility for creating and injecting the required WeatherManager dependency. For that, we need to register our service. Let’s do that next.
Registering services in the ServiceCollection
The last thing we need to do is use the Microsoft dependency injection container built into ASP.NET Core. The dependency injection container gets configured when the application starts and we can register the services we need via the IServiceCollection. If we do not register our dependencies with the IServiceCollection, we will experience runtime exceptions when classes try to use these injected dependencies.
Services are registered in the Program.cs file. It is the entry point for our application, and as seen in Code Listing 55, it contains top-level statements.
Code Listing 55: The Program.cs File with Top-Level Statements
var builder = WebApplication.CreateBuilder(args); // Add services to the container. builder.Services.AddRazorPages(); var app = builder.Build(); // Configure the HTTP request pipeline. if (!app.Environment.IsDevelopment()) { app.UseExceptionHandler("/Error"); app.UseHsts(); } app.UseHttpsRedirection(); app.UseStaticFiles(); app.UseRouting(); app.UseAuthorization(); app.MapRazorPages(); app.Run(); |
As mentioned earlier, we register services with the IServiceCollection of the WebApplicationBuilder. The single line of code that we need to add is simply builder.Services.AddScoped<IWeatherManager, WeatherManager>();, and the complete code for the Program.cs file is illustrated in Code Listing 56.
Code Listing 56: Registering our IWeatherManager Service
using WeatherPortal.Core; var builder = WebApplication.CreateBuilder(args); // Add services to the container. builder.Services.AddRazorPages(); builder.Services.AddScoped<IWeatherManager, WeatherManager>(); var app = builder.Build(); // Configure the HTTP request pipeline. if (!app.Environment.IsDevelopment()) { app.UseExceptionHandler("/Error"); app.UseHsts(); } app.UseHttpsRedirection(); app.UseStaticFiles(); app.UseRouting(); app.UseAuthorization(); app.MapRazorPages(); app.Run(); |
What we are saying here is that the container will attempt to create and return an instance of WeatherManager when resolving a request for IWeatherManager. In layman's terms, when a class uses IWeatherManager, give it the WeatherManager implementation.
Running your Weather Portal application now will correctly resolve the required dependency from within the dependency injection container and display the weather data returned from the minimal API. You have successfully changed the application to make use of dependency injection.
AddScoped vs. AddTransient vs. AddSingleton
When you register a service with the container, you need to specify the lifetime of the service—in other words, how long must a service live after it has been created. Service lifetimes are defined by using one of three extension methods on the IServiceCollection. These are:
· Scoped
· Transient
· Singleton
In our application, we used Scoped, but it is important to know what each of these lifetimes means and when to use them.
Transient
When specifying Transient, we are telling the container to create a new instance every time the service is invoked. In other words, every class that receives a transient service via dependency injection will receive its own unique instance of that dependency. This does mean a bit more work for the garbage collector, but using Transient is the safest choice if you are unsure of the lifetime required for your use case.
Singleton
When registering a service with a Singleton lifetime, we are telling the container to only create a single instance of that service for the lifetime of the container (in other words, for the lifetime of the web application). Because the service is registered for the lifetime of the container, it does not require disposal or garbage collection.
Scoped
Considering Scoped services, we can think of them as sitting between Transient and Singleton. A Scoped service instance will live for the length of the scope from which it is resolved. Therefore, in an ASP.NET Core application, a scope is created for each request that is handled.
Finally
A lot more can be said regarding dependency injection. In fact, it is a topic on its own, and does require a more detailed look. In this book, I wanted to illustrate the bare bones of what dependency injection is, and why it is something you need to use in your ASP.NET Core 6 applications.
- 80+ high-performance ASP.NET Core controls, including DataGrid, Charts, and Scheduler.
- Lightweight and responsive.
- Modular and touch-friendly.
- Built-in themes.