
ASP.NET Core 6 Succinctly®

CHAPTER 3
Minimal APIs
Web APIs evolved from the MVC pattern that uses controllers and action methods. This has been the standard way of creating APIs. With ASP.NET Core 6.0, one of the biggest new features is the addition of minimal APIs. Minimal APIs provide an alternative API pattern for developers to use. In this chapter, we will have a closer look at what minimal APIs are and how to build one.
What are minimal APIs?
The naming of minimal APIs does not mean that these APIs are limited in features or functionality. Still supporting most of the common features of .NET APIs, minimal APIs support middleware, dependency injection, parameter binding, Swagger, and so on.
The “minimal” part of the name refers to the syntax, dependencies, and the overall structure of the feature. With this said, minimal APIs do have some limitations:
· Minimal APIs do not support filters. This means that you can’t use action filters, authorization filters, result filters, or exception filters.
· Form bindings are also not supported. According to some documentation, this will be added in the future.
· Built-in validation support (for example, using the IModelValidator interface) is also not supported.
The question now becomes: when should you use minimal APIs, and when should you use controllers? The short answer is that it all depends on your use case. If you are creating a complex back-end service for an enterprise-scale application, then a controller-based approach will be best. This is especially true if you will need to use some features in your API that only controllers provide.
If, however, you want to create a small and simple API that just returns some data, then a minimal API approach should work for you. It keeps things simple and saves some time when creating the API. You can also easily migrate your minimal API to a controller-based API without too much effort.
It seems wrong to use the word “older,” but if you prefer to use the older approach to create APIs, then rest assured that they are still fully supported in ASP.NET Core 6.0. With all this said, let’s start by creating a minimal API in the next section.
Creating a minimal API
In Visual Studio 2022, create a new project. In the Create a new project dialog screen, search for Web API and select ASP.NET Core Web API, as seen in Figure 40.

Figure 40: Search for Web API in Create a New Project Dialog
As seen in Figure 41, I am just calling this API MinAPI, but you can call it what you like.

Figure 41: Choose Where to Create the Project
Click Next.
On the Additional information screen (Figure 42), you will see some options available to you. Make sure that you select .NET 6.0 as the Framework, and very importantly, clear the option to use controllers. Doing this will use the minimal API approach. You can also select the option to allow Visual Studio 2022 to create the project without top-level statements. For this project, however, we will be using top-level statements.

Figure 42: Clear the Use Controllers Option
Note: It does not matter if you select not to use top-level statements in your projects. ASP.NET Core 6.0 is fully compatible with using Program.cs and Startup.cs, just as it is with using a single Program.cs using top-level statements.
Click Create to create your minimal API with the standard Weather Forecast boilerplate code. Have a look at the code contained in the Program.cs file (Code Listing 27).
Code Listing 27: The Minimal API Program File
var builder = WebApplication.CreateBuilder(args); // Add services to the container. // Learn more about configuring Swagger/OpenAPI at https://aka.ms/aspnetcore/swashbuckle builder.Services.AddEndpointsApiExplorer(); builder.Services.AddSwaggerGen(); var app = builder.Build(); // Configure the HTTP request pipeline. if (app.Environment.IsDevelopment()) { app.UseSwagger(); app.UseSwaggerUI(); } app.UseHttpsRedirection(); var summaries = new[] { "Freezing", "Bracing", "Chilly", "Cool", "Mild", "Warm", "Balmy", "Hot", "Sweltering", "Scorching" }; app.MapGet("/weatherforecast", () => { var forecast = Enumerable.Range(1, 5).Select(index => new WeatherForecast ( DateTime.Now.AddDays(index), Random.Shared.Next(-20, 55), summaries[Random.Shared.Next(summaries.Length)] )) .ToArray(); return forecast; }) .WithName("GetWeatherForecast"); app.Run(); internal record WeatherForecast(DateTime Date, int TemperatureC, string? Summary) { public int TemperatureF => 32 + (int)(TemperatureC / 0.5556); } |
Nice and minimal, isn’t it? Minimal APIs do not have controllers or action methods. Requests are all handled via the methods in the Program file. Below the middleware pipeline setup (below the app.UseHttpsRedirection(); line), you will see that an array is used to store the weather summary.
The MapGet method will handle incoming GET requests to the weather service. It has a string of /weatherforecast that maps the URL that the GET request should map to.
Note: You will notice the WithName method after the MapGet method that takes a string GetWeatherForecast. This names the MapGet method for use with OpenAPI and Swagger UI.
Before you run your API, have a look at the project properties by right-clicking the MinAPI project and selecting Properties from the context menu.

Figure 43: The MinAPI Debug Properties
The project properties will be displayed (Figure 43), and in the Debug > General tab, click Open debug launch profiles UI.
In the Launch Profiles window, select IIS Express and scroll down until you see the Launch browser option. Clear this option, as seen in Figure 44.

Figure 44: Clear Launch browser Option
Scrolling down a little more, you will see the option to Use SSL. Ensure that this option is selected, as shown in Figure 45, and make a note of the App SSL URL and port. This is the URL that you will be using in Postman.

Figure 45: Note the App SSL URL
When you are done, close the Launch Profiles UI and run your API from Visual Studio, ensuring that you have IIS Express selected in the Debug dropdown.

Figure 46: The GET Request in Postman
Because the App SSL URL is set to https://localhost:44349/, as seen in Figure 45, and the endpoint URL path on the MapGet method (seen in Code Listing 27) is set to /weatherforecast, we can create a GET request in Postman using the URL https://localhost:44349/weatherforecast (as seen in Figure 46).
This returns the weather data from the weather forecast API as expected.

Figure 47: The Weather Forecast in Chrome
I like using Postman to test my APIs, but you can also use your browser to make the GET request, as seen in Figure 47. Minimal APIs also have full Swagger support, as seen in Code Listing 27, higher up in the Program file.
Go back to your properties and click to modify the Launch Profile for IIS Express, as shown in Figure 48. Select the option Launch browser.

Figure 48: Select to Launch the Browser

Figure 49: Viewing Your API in Swagger
Running your API again, you will see the browser launch and the Swagger page displayed for your weather forecast API. Under the MinAPI name at the top of our page, click the link https://localhost:44349/swagger/v1/swagger.json to view the Swagger JSON file. This file is shown in Code Listing 28.
The file displays the details of the minimal API based on the OpenAPI specification. You can see the details we set in the WithName method in Code Listing 27 show up in the operationId in the Swagger JSON file in Code Listing 28.
Other extension methods, such as WithTags, are available for use in your API to add metadata, so have a look at what there is on offer.
Code Listing 28: The Swagger JSON File
{ "openapi": "3.0.1", "info": { "title": "MinAPI", "version": "1.0" }, "paths": { "/weatherforecast": { "get": { "tags": [ "MinAPI" ], "operationId": "GetWeatherForecast", "responses": { "200": { "description": "Success", "content": { "application/json": { "schema": { "type": "array", "items": { "$ref": "#/components/schemas/WeatherForecast" } } } } } } } } }, "components": { "schemas": { "WeatherForecast": { "type": "object", "properties": { "date": { "type": "string", "format": "date-time" }, "temperatureC": { "type": "integer", "format": "int32" }, "summary": { "type": "string", "nullable": true }, "temperatureF": { "type": "integer", "format": "int32", "readOnly": true } }, "additionalProperties": false } } } } |
All this was achieved without the need to write code for controllers or action methods. Minimal APIs work with a very minimalistic approach to structure and design. This is, however, still just a very basic API that only returns hardcoded data. We would ideally like to consume a service to provide this information to our API. Let’s have a look at how to use services and dependency injection in the next section.
Implement dependency injection
I want to use a service to get the books from my LocalDB’s BookRepo database. I can go ahead and create new projects to implement the core and data layers of my book repository, but it will be much easier to just reference the existing projects as set up in the BookRepository project that we migrated to .NET 6.0 back in Chapter 1.
To do this, right-click the MinAPI solution in Solution Explorer and click Add > Existing Project from the context menu, as shown in Figure 50.

Figure 50: Add an Existing Project
Navigate to the location on your hard drive where you have saved your converted BookRepository project.
Note: If you didn’t go through the exercise of upgrading your book repository project to ASP.NET Core 6.0 in Chapter 1, don’t worry. You can find the upgraded project in the GitHub repo for this ebook.
From here, add the BookRepository.Core and BookRepository.Data projects to your MinAPI project. When you have done this, your solution should look as illustrated in Figure 51.

Figure 51: The Added BookRepository Projects
You can see that the MinAPI solution now contains the projects we upgraded in the BookRepository project in Chapter 1, but we can’t use them without a little more work on our MinAPI project.
First, we need to add a reference to Entity Framework Core. Right-click the MinAPI project and click Manage NuGet Packages from the context menu. On the NuGet Package Manager screen, browse for and add the latest version of Microsoft.EntityFrameworkCore and Microsoft.EntityFrameworkCore.Design to your MinAPI project.
Note: At the time of writing this book, version 6.0.6 is available, but if a newer version is available for you, be sure to add this version to your MinAPI project.
The package references in your MinAPI solution should now look as illustrated in Figure 52.

Figure 52: The Referenced EntityFrameworkCore NuGet Package
With this bit added, we have most of the components ready to use the book repository service to read the books in our database.
Open the appsettings.json file and add the connection string, as shown in Code Listing 29. This will be used by the service to connect to the localdb database.
Code Listing 29: The appsettings.json File
|
"Logging": { "LogLevel": { "Default": "Information", "Microsoft.AspNetCore": "Warning" } }, "AllowedHosts": "*", "ConnectionStrings": { "BookConn": "Data Source=(localdb)\\MSSQLLocalDB;Initial Catalog=MinAPIBookRepo;Integrated Security=True" } } |
Now all that remains for us to do is add the service to our Program.cs file and consume it in a MapGet method via dependency injection. Then, before we can call the service, we need to run our database migrations to create the database.
Open the Program.cs file and register the data access service with the built-in dependency injection container. It is added as a scoped service in the services collection. In essence, we are telling our minimal API that whenever something in our project asks for IBookData, then it must provide the SqlData class.
We also need to tell the DbContext about our database connection. The AddDbContextPool specifies that DbContext pooling should be used, which allows for increased throughput because the instances of DbContext are reused, instead of having new instances created per request. You can see the code in Code Listing 30.
Code Listing 30: Adding the Scoped Service and DbContextPool
builder.Services.AddScoped<IBookData, SqlData>(); builder.Services.AddDbContextPool<BookRepoDbContext>(dbContextOptns => { _ = dbContextOptns.UseSqlServer(builder.Configuration.GetConnectionString("BookConn")); }); |
Inject the service into a MapGet method as a parameter to our delegate. We can now use our IBookData service in our MapGet method as seen in Code Listing 31. We also need to specify the URL path of /listbooks and use the service to return the list of books from our data service. Lastly, add the endpoint name as List Books. This will now be the REST endpoint we will use to return a list of all books in our database.
Code Listing 31: Adding the End Point to List Books
app.MapGet("/listbooks", async (IBookData service) => { return await service.ListBooksAsync(); }) .WithName("List Books"); |
The completed code for the Program.cs file is provided in Code Listing 32. If you come from the Program.cs and Startup.cs file structure before top-level statements were introduced, the code might feel slightly uncomfortable to write. It sure feels strange to me to be writing code like this using top-level statements. This, however, is not a better way of writing your code. It’s just a different, more succinct way of writing your code that produces the same result as before top-level statements were introduced.
Code Listing 32: The Complete Program.cs File
using BookRepository.Data; using Microsoft.EntityFrameworkCore; var builder = WebApplication.CreateBuilder(args); // Add services to the container. // Learn more about configuring Swagger/OpenAPI at https://aka.ms/aspnetcore/swashbuckle builder.Services.AddScoped<IBookData, SqlData>(); builder.Services.AddDbContextPool<BookRepoDbContext>(dbContextOptns => { _ = dbContextOptns.UseSqlServer(builder.Configuration.GetConnectionString("BookConn")); }); builder.Services.AddEndpointsApiExplorer(); builder.Services.AddSwaggerGen(); var app = builder.Build(); // Configure the HTTP request pipeline. if (app.Environment.IsDevelopment()) { app.UseSwagger(); app.UseSwaggerUI(); } app.UseHttpsRedirection(); app.MapGet("/listbooks", async (IBookData service) => { return await service.ListBooksAsync(); }) .WithName("List Books"); var summaries = new[] { "Freezing", "Bracing", "Chilly", "Cool", "Mild", "Warm", "Balmy", "Hot", "Sweltering", "Scorching" }; app.MapGet("/weatherforecast", () => { var forecast = Enumerable.Range(1, 5).Select(index => new WeatherForecast ( DateTime.Now.AddDays(index), Random.Shared.Next(-20, 55), summaries[Random.Shared.Next(summaries.Length)] )) .ToArray(); return forecast; }) .WithName("GetWeatherForecast"); app.Run(); internal record WeatherForecast(DateTime Date, int TemperatureC, string? Summary) { public int TemperatureF => 32 + (int)(TemperatureC / 0.5556); } |
We’re almost ready to call our service. If you do not already have a LocalDB instance containing the database, you need to create that before we can go any further. Luckily for us, we have our database migrations in the BookRepository.Data project.
LocalDB is usually installed when Visual Studio is installed. To check if LocalDB is installed, run sqllocaldb info from the command prompt, as shown in Figure 53.

Figure 53: Check if LocalDB is Installed
You can then use sqllocaldb info mssqllocaldb in the command prompt to see more information about the MSSQLLocalDB instance (Figure 54).

Figure 54: Get More Information About MSSQLLocalDB
Next, you need to navigate to the BookRepository.Data directory in the command prompt.
Note: The next few steps will be dependent on where your projects exist in relation to each other. Bear this in mind when you run the commands in the following steps.
The project locations for the projects used in this book might be different for you than for me. My projects are located under a single directory, and are as follows:
· BookRepositoryAPI
· BookRepositoryAPIv5_0
· DependencyInjection
· EssentialCSharp10
· IsolatedCSS
· MinAPI
The easiest way to get to the BookRepository.Data project is to right-click the project in your solution and select Open Folder in File Explorer from the context menu. Copy the directory path and change the directory to this location in the command prompt.
Then, run the following command seen in Code Listing 33, using the -s switch to specify the MinAPI startup project relative to the BookRepository.Data project path.
Code Listing 33: Get the DbContext Information
dotnet ef dbcontext info -s ..\..\MinAPI\MinAPI.csproj |
The MinAPI project is located relative to my BookRepository.Data project at ..\..\MinAPI.
Tip: If at any time you see the message that the Entity Framework tools version is older than that of the runtime, update the tools by typing dotnet tool update --global dotnet-ef in the Command Prompt.
After running the command in Code Listing 33, you will see the output illustrated in Figure 55.

Figure 55: The Output from the Command in Code Listing 33
Pay special attention to the database name returned. It should be MinAPIBookRepo, as defined in the appsettings.json file in Code Listing 29. If you see this, you are ready to create your database by running the command in Code Listing 34 from the command prompt.
Code Listing 34: Create the MinAPIBookRepo Database
dotnet ef database update -s ..\..\MinAPI\MinAPI.csproj |
After running the command, you will see the output in the command prompt, as illustrated in Code Listing 35.
Code Listing 35: The Output in the Command Prompt
Build started... Build succeeded. info: Microsoft.EntityFrameworkCore.Infrastructure[10403] Entity Framework Core 6.0.6 initialized 'BookRepoDbContext' using provider 'Microsoft.EntityFrameworkCore.SqlServer:6.0.5' with options: MaxPoolSize=1024 info: Microsoft.EntityFrameworkCore.Database.Command[20101] Executed DbCommand (159ms) [Parameters=[], CommandType='Text', CommandTimeout='60'] CREATE DATABASE [MinAPIBookRepo]; info: Microsoft.EntityFrameworkCore.Database.Command[20101] Executed DbCommand (62ms) [Parameters=[], CommandType='Text', CommandTimeout='60'] IF SERVERPROPERTY('EngineEdition') <> 5 BEGIN ALTER DATABASE [MinAPIBookRepo] SET READ_COMMITTED_SNAPSHOT ON; END; info: Microsoft.EntityFrameworkCore.Database.Command[20101] Executed DbCommand (5ms) [Parameters=[], CommandType='Text', CommandTimeout='30'] SELECT 1 info: Microsoft.EntityFrameworkCore.Database.Command[20101] Executed DbCommand (20ms) [Parameters=[], CommandType='Text', CommandTimeout='30'] CREATE TABLE [__EFMigrationsHistory] ( [MigrationId] nvarchar(150) NOT NULL, [ProductVersion] nvarchar(32) NOT NULL, CONSTRAINT [PK___EFMigrationsHistory] PRIMARY KEY ([MigrationId]) ); info: Microsoft.EntityFrameworkCore.Database.Command[20101] Executed DbCommand (0ms) [Parameters=[], CommandType='Text', CommandTimeout='30'] SELECT 1 info: Microsoft.EntityFrameworkCore.Database.Command[20101] Executed DbCommand (12ms) [Parameters=[], CommandType='Text', CommandTimeout='30'] SELECT OBJECT_ID(N'[__EFMigrationsHistory]'); info: Microsoft.EntityFrameworkCore.Database.Command[20101] Executed DbCommand (2ms) [Parameters=[], CommandType='Text', CommandTimeout='30'] SELECT [MigrationId], [ProductVersion] FROM [__EFMigrationsHistory] ORDER BY [MigrationId]; info: Microsoft.EntityFrameworkCore.Migrations[20402] Applying migration '20211107110645_Initial'. Applying migration '20211107110645_Initial'. info: Microsoft.EntityFrameworkCore.Database.Command[20101] Executed DbCommand (2ms) [Parameters=[], CommandType='Text', CommandTimeout='30'] CREATE TABLE [Books] ( [Id] int NOT NULL IDENTITY, [ISBN] nvarchar(max) NULL, [Title] nvarchar(max) NULL, [Description] nvarchar(max) NULL, [Publisher] nvarchar(max) NULL, CONSTRAINT [PK_Books] PRIMARY KEY ([Id]) ); info: Microsoft.EntityFrameworkCore.Database.Command[20101] Executed DbCommand (2ms) [Parameters=[], CommandType='Text', CommandTimeout='30'] INSERT INTO [__EFMigrationsHistory] ([MigrationId], [ProductVersion]) VALUES (N'20211107110645_Initial', N'6.0.6'); Applying migration '20211107125009_BookModelUpdate1'. info: Microsoft.EntityFrameworkCore.Migrations[20402] Applying migration '20211107125009_BookModelUpdate1'. info: Microsoft.EntityFrameworkCore.Database.Command[20101] Executed DbCommand (2ms) [Parameters=[], CommandType='Text', CommandTimeout='30'] ALTER TABLE [Books] ADD [Author] nvarchar(max) NULL; info: Microsoft.EntityFrameworkCore.Database.Command[20101] Executed DbCommand (0ms) [Parameters=[], CommandType='Text', CommandTimeout='30'] INSERT INTO [__EFMigrationsHistory] ([MigrationId], [ProductVersion]) VALUES (N'20211107125009_BookModelUpdate1', N'6.0.6'); Done. |
You will notice that a few things have happened here. The database MinAPIBookRepo was created using the CREATE DATABASE command. A database table called Books was also created. This table will match our Book entity located in the BookRepository.Core project.
Lastly, you will need to create some book data in your database. You can view the database in Visual Studio by going to the View menu and clicking the SQL Server Object Explorer menu. Expanding the Databases folder under MSSQLLocalDB, you will see the created MinAPIBookRepo database. You can then expand the Tables folder, right-click the Books table, and select View Data from the context menu. Here you can manually add some book data to the table.
For your convenience, I have added an INSERT script to the GitHub repository called MinAPIBookRepoData.sql that contains some book data. Open this script and copy the INSERT statements. Then right-click the MinAPIBookRepo database and click New Query from the context menu. Paste the copied INSERT script into the query window and run the script by clicking Execute or pressing Ctrl+Shift+E.
Note: Phew, this was a lot of work to get here. Notice though that most of the work was setting up the data service and creating the database. Implementing dependency injection only comprised the code in Code Listings 30 and 31.
Run your API, and when your SwaggerUI loads, you will see the /listbooks endpoint listed along with the /weatherforecast endpoint (Figure 56).

Figure 56: The ListBooks and WeatherForecast Endpoints in Swagger
Execute the /listbooks endpoint in Swagger, and you will see the results as illustrated in Figure 57.

Figure 57: The ListBooks Response in Swagger
As always, I’m a fan of Postman, and while your API is running, you can perform a GET request in Postman by entering the URL https://localhost:44349/listbooks and clicking Send. Just note that your port might be different from mine.

Figure 58: The ListBooks Response in Postman
With the book data returned from our book repository using our minimal API, we have a fully functioning REST endpoint that returns books stored in our LocalDB database. Hooking up the data service was more work than actually implementing the dependency injection of the data service. The next logical thing to do is to be able to add, update, and delete books from our book repo database. Let’s have a look at how to implement these next.
Implement CRUD operations
Being able to add, edit, and delete books in our book repository is essential for completing the minimal API service. It is this functionality that will allow us to maintain our book repository and keep it up to date.
Implementing the async methods in our endpoints is quite straightforward. Let’s take the endpoints one by one and make each one functional, starting with adding a new book to the repository.
Code Listing 36: The MapPost Endpoint to Add a Book
app.MapPost("/book", async (Book book, IBookData service) => { _ = await service.SaveAsync(book); }) .WithName("Add Book"); |
As shown in Code Listing 36, app.MapPost will use /book as the URL path for the incoming HTTP verb POST. It also takes a parameter of Book that contains the book data from the POST request body that .NET has mapped to the Book object. app.MapPost also takes the IBookData service, which is required to call the SaveAsync method to save the book data bound to the Book object via model binding.
Run the application and have a look at the Swagger UI that launches. It will show the new POST endpoint as shown in Figure 59.

Figure 59: The New POST Endpoint Listed in Swagger UI
Expand the POST endpoint and you will see a sample request and expected responses, as shown in Figure 60.

Figure 60: Example POST Request Listed in Swagger UI
Click Try it out, add the code in Code Listing 37, and then click Execute.
Code Listing 37: Adding a Dummy Book
{ "isbn": "test777", "title": "test777", "description": "test777", "publisher": "test777", "author": "test777" } |
The code in Code Listing 37 is just dummy data, but we want to see the book created with our minimal API. After creating a book, call the /listbooks endpoint, and you will see the book that you just created returned from the GET request.
Note: Make a note of the ID returned here. We will be using it in our PUT request later in the chapter.
The book data is somewhat silly, so we need a way to change this data.
Code Listing 38: Updating the Dummy Book
app.MapPut("/updatebook", async (Book book, IBookData service) => { _ = await service.UpdateAsync(book); }) .WithName("Update Book"); |
The next endpoint that we want to add is the PUT. This will allow us to update a book in our book repository. The code is almost identical to the POST in Code Listing 36. The only difference here is that the endpoint URL has changed to /updatebook, and the WithName method specifies Update Book.

Figure 61: The PUT Endpoint Listed in Swagger UI
Running the API again, you will see the newly created PUT endpoint listed, as seen in Figure 61.

Figure 62: Sample Request Body for the PUT
Expanding the PUT endpoint will allow you to see a sample request body. What I want to do though, is change the book we added earlier using the POST in Code Listing 37. The book that I added earlier was created with an ID of 1024. The ID of the book that you added will be different than mine. This will be the ID you noted earlier. Use this ID to perform the PUT request and change some of the data for the book, as seen in Code Listing 39.
Code Listing 39: Updating the Newly Added Book with PUT
{ "id": 1024, "isbn": "test888", "title": "test888", "description": "test888", "publisher": "test888", "author": "test888" } |
Calling the GET endpoint after executing the PUT will return the modified book data.
Code Listing 40: Adding the MapDelete Endpoint
app.MapDelete("/deletebook", async ([FromBody]Book book, IBookData service) => { _ = await service.DeleteAsync(book); }) .WithName("Delete Book"); |
Adding the /deletebook endpoint is, again, similar to the /updatebook endpoint. Only this time, you need to add [FromBody] to tell .NET that the parameter should be bound using the request body.

Figure 63: The Delete Endpoint in Swagger UI
Running your minimal API will display the /deletebook endpoint in Swagger UI, as seen in Figure 63.

Figure 64: The Sample Request for the Delete
By expanding the endpoint and clicking Try it out, you can pass the same code as in Code Listing 39 to the /deletebook endpoint to delete the dummy book we added earlier. As before, your ID will differ from mine, and you should use the ID you noted earlier.
In reality, while this delete works, I would ideally like to pass the /deletebook endpoint just the ID of the book to delete. This will make it easier when calling the API. I will leave it up to you to figure this out, but I won't leave you high and dry.
Code Listing 41: Delete a Book by ID
app.MapDelete("/deletebook/{id}", async (int id, IBookData service) => { var result = await service.DeleteAsync(id); return result ? Results.Ok() : Results.NotFound(); }) .WithName("Delete Book by ID"); |
The code in Code Listing 41 is the completed MapDelete endpoint that accepts a book ID as a parameter. You need to complete the following:
· Modify the IBookData interface to tell it that any implementing classes need to contain a DeleteAsync method that accepts a book ID as a parameter.
· Add the implementation to the SqlData class to find the book entity and delete it. Also, handle errors when the supplied book ID is not found.
The complete code is on GitHub, so if you would like to see the solution, please have a look there.
Improving endpoint responses
Something that has been added to the MapDelete endpoint, but not any of the others, is improved responses. Ideally, when an endpoint is called, we would like the responses to tell the user what happened. Let’s use the current endpoint for adding a new book, as shown in Code Listing 42.
Code Listing 42: The Current Add Book Endpoint
app.MapPost("/book", async (Book book, IBookData service) => { _ = await service.SaveAsync(book); }) .WithName("Add Book"); |
If we had to add a book, the Swagger UI would display the response shown in Figure 65.

Figure 65: The Current Add Book Response
What we should be doing, though, is returning a status code for the action that took place. In the case of adding a book, we want to return a status 201 for created.
Code Listing 43: The Improved Add Book Endpoint
app.MapPost("/book", async (Book book, IBookData service) => { var createdBookId = await service.SaveAsync(book); return Results.Created($"/book/{createdBookId}", book); }) .WithName("Add Book"); |
The modification is simple, as seen in Code Listing 43. The created book ID is returned from the SaveAcync method, and Results.Created is used to display the result to the user. Adding another book to the book repository will result in a nice 201 response, as shown in Figure 66.

Figure 66: The Improved Add Book Response
The endpoint used to update a book can also be improved. With the current endpoint, if I modify the dummy book with ID 1029 added earlier, I will receive a very generic response. The code for my modified book is illustrated in Code Listing 44.
As before, the ID of 1029 is probably not going to exist in your book repo, so be sure to update a book returned when calling your /listbooks endpoint.
Code Listing 44: The Modified Book with ID 1029
{ "id": 1029, "isbn": "1455502782", "title": "Arguably: Essays by Christopher Hitchens", "description": "For nearly four decades, Hitchens has been telling us, in pitch-perfect prose, what we confront when we grapple with first principles-the principles of reason and tolerance and skepticism that define and inform the foundations of our civilization-principles that, to endure, must be defended anew by every generation.", "publisher": "Twelve", "author": "Christopher Hitchens" } |
Calling the /updatebook endpoint will return the response shown in Figure 67.

Figure 67: The Current /updatebook Endpoint Response
This endpoint response can also be improved, as illustrated in Code Listing 45. Here we are simply saying after the PUT, return NoContent, which is a 204 status code.
Code Listing 45: The Modified /updatebook Endpoint
app.MapPut("/updatebook", async (Book book, IBookData service) => { _ = await service.UpdateAsync(book); return Results.NoContent(); }) .WithName("Update Book"); |
Modifying a book with these code changes in place will result in the 204 being returned, as seen in Figure 68.
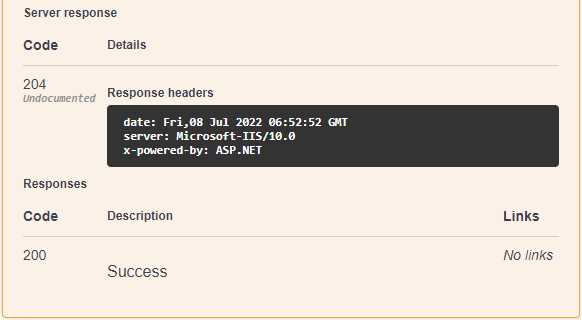
Figure 68: The NoContent 204 Response
The decision of which response to return here will likely differ from developer to developer. I like to see the resource that was modified being returned in the response, but that is just my preference. It is perfectly acceptable to also return Results.Ok from a PUT. I will leave this up to you to experiment with.
Calling an external API
Writing and consuming APIs is something every developer will do during their career. It is essential for interconnected systems. Even though people don’t realize it, somewhere during their daily routine they are touching the results of an API call. Whether through a bank transaction, browsing social media, or calling an Uber, APIs make connection and integration convenient and easy.
It is, therefore, conceivable for APIs to call other APIs—that’s what we’ll be doing in this section. Our minimal API contains a /weatherforecast endpoint that just returns some dummy data. If we wanted to provide this functionality from our book repository, we would need to return real weather data.
Luckily for us, there are more weather APIs out there than you can shake a stick at, and setting up your minimal API to consume an external API is simple. In this example, I will be consuming the AfriGIS Weather API. You will find information about this API on the AfriGIS website.
To talk to an external API, we need to use ASP.NET’s HTTP client. At the top of our Program.cs file, we need to register an HTTP Client Factory as part of our setup code. The line we need to add is builder.Services.AddHttpClient();. Once it’s added, your code should look as illustrated in Code Listing 46.
Code Listing 46: Adding the HTTP Client Factory
using BookRepository.Core; using BookRepository.Data; using Microsoft.AspNetCore.Mvc; using Microsoft.EntityFrameworkCore; var builder = WebApplication.CreateBuilder(args); // Add services to the container. // Learn more about configuring Swagger/OpenAPI at https://aka.ms/aspnetcore/swashbuckle builder.Services.AddScoped<IBookData, SqlData>(); builder.Services.AddDbContextPool<BookRepoDbContext>(dbContextOptns => { _ = dbContextOptns.UseSqlServer(builder.Configuration.GetConnectionString("BookConn")); }); builder.Services.AddEndpointsApiExplorer(); builder.Services.AddSwaggerGen(); builder.Services.AddHttpClient(); // Add HTTP Client Factory. var app = builder.Build(); |
The next thing I need to do is create a WeatherResults entity. This will allow me to specify the target type to deserialize to when calling the weather API from my minimal API. Add the WeatherResults class to your BookRepository.Core project, as shown in Figure 69.

Figure 69: The Added WeatherResults Class
You can see the complete code for the WeatherResults class in Code Listing 47.
Code Listing 47: The WeatherResults Entity
using System; namespace BookRepository.Core { public class WeatherResults { public int code { get; set; } public string source { get; set; } public Result[] result { get; set; } } public class Result { public Station_Details station_details { get; set; } public Station_Readings[] station_readings { get; set; } } public class Station_Details { public float latitude { get; set; } public float longitude { get; set; } public int distance { get; set; } public int synop_no { get; set; } public string station_name { get; set; } } public class Station_Readings { public DateTime datetime { get; set; } public float temperature { get; set; } public int humidity { get; set; } public float pressure { get; set; } public int wind_direction { get; set; } public float wind_speed { get; set; } public float last_hours_rainfall { get; set; } } } |
This will allow the JSON data that is returned from the AfriGIS Weather API to be deserialized into an object that I can use.
Tip: To quickly create a class from JSON data, for example, copy the JSON you want to deserialize. Then in Visual Studio, go to the Edit menu and select Paste Special > JSON as Classes. This will create a class for you that is inferred from the JSON data you copied. You can do the same for copied XML. Easy peasy lemon squeezy.
We can now start creating an endpoint that will call out to the AfriGIS Weather API in an asynchronous way. You can find the complete code in Code Listing 48.
Code Listing 48: The AfriGIS Weather API Call
app.MapGet("/sa-weather", async (IHttpClientFactory factory) => { var client = factory.CreateClient(); var baseUrl = "https://saas.afrigis.co.za/rest/2"; var endP = "weather.measurements.getByCoord/myapisamples"; var auth = "bBFMNngfUSqQ80kFWUwmihszdPs"; var latlong = "-25.808589,28.255833"; var range = 10000; var count = 3;
var response = await client.GetFromJsonAsync<WeatherResults>($"{baseUrl}/{endP}/{auth}/?location={latlong}&location_buffer={range}&station_count={count}"); return Results.Ok(response); }) .WithName("Get SA Weather"); |
We start with adding app.MapGet, and give it a route of /sa-weather. We then provide an async lambda that takes an IHttpClientFactory called factory. Using an async method here is a good idea, especially when making an external API call.
Inside the delegate, we have to create an instance of the client by calling factory.CreateClient. This creates a new HttpClient using the default configuration. The rest is just the mechanics to construct the external API call, and these settings, such as the base URL, authentication key, and so on, should be in a configuration file. For ease of use here, I’ve just added it directly to the delegate.
Lastly, we do an async call to the AfriGIS Weather API using our WeatherResults as a type parameter, and use the constructed URL to call the endpoint. We then just respond with Results.Ok, returning the response from the AfriGIS Weather API.
When you run your API, you will see that the Swagger UI lists the /sa-weather endpoint, as shown in Figure 70. Execute the GET in Swagger, and the JSON illustrated in Code Listing 49 will be returned.
Code Listing 49: The Data Returned from AfriGIS
{ “code”: 200, “source”: “weather.measurements.api”, “result”: [ { “station_details”: { “latitude”: -25.8277, “longitude”: 28.2235, “distance”: 3872, “synop_no”: 68264, “station_name”: “WATERKLOOF AIR FORCE BASE” }, “station_readings”: [ { “datetime”: “2022-07-09T07:00:00Z”, “temperature”: 13.3, “humidity”: 67, “pressure”: 861.4, “wind_direction”: 26, “wind_speed”: 0.9, “last_hours_rainfall”: 0 } ] }, { “station_details”: { “latitude”: -25.752, “longitude”: 28.2585, “distance”: 6275, “synop_no”: 68260, “station_name”: “PRETORIA UNIVERSITY PROEFPLAAS” }, “station_readings”: [ { “datetime”: “2022-07-09T07:00:00Z”, “temperature”: 13.5, “humidity”: 63, “pressure”: 874.1, “wind_direction”: 69, “wind_speed”: 0.9, “last_hours_rainfall”: 0 } ] }, { “station_details”: { “latitude”: -25.7663, “longitude”: 28.2005, “distance”: 7263, “synop_no”: 68269, “station_name”: “PRETORIA UNISA” }, “station_readings”: [ { “datetime”: “2022-07-09T07:00:00Z”, “temperature”: 10.7, “humidity”: 81, “pressure”: 866.6, “wind_direction”: 0, “wind_speed”: 1.1, “last_hours_rainfall”: 0 } ] } ] } |
As you can see, calling external APIs is simple and easy.

Figure 70: The AfriGIS Weather API Call in Swagger UI
Apart from the minor limitations with minimal APIs, they provide an alternative to traditional web APIs. Minimal APIs use top-level statements, a single Program.cs file, and implicit usings to minimize the boilerplate code required.
The MapGet, MapDelete, MapPut, and MapPost helper methods allow binding incoming requests to handler methods for common verb types. Supporting basic parameter binding from the URL, minimal APIs also support binding from the request body when using JSON.
Minimal APIs also support middleware pipelines such as cross-origin requests, logging, and authentication. Minimal APIs allow us to provide results for API calls that help to improve the developer experience. Last, but not least, dependency injection is also supported, allowing us to inject services into the handler methods. In the next chapter, we will take a closer look at dependency injection in ASP.NET Core 6.
- 80+ high-performance ASP.NET Core controls, including DataGrid, Charts, and Scheduler.
- Lightweight and responsive.
- Modular and touch-friendly.
- Built-in themes.