
Application Insights Succinctly®

CHAPTER 2
How Do We Start?
The Application Insights service is available through Azure, Microsoft’s cloud, so we need a subscription for this platform to begin.
Tip: Microsoft Azure is a cloud computing service that provides Software-as-a-Service (SaaS), Platform-as-a-Service (PaaS), and Infrastructure-as-a-Service (IaaS) to individuals and companies to help them perform better in their business. Visit azure.microsoft.com for more information.
There are various kinds of subscriptions for Azure, and it’s easy to start a free one just to try Application Insights, or start a pay-as-you-go subscription to use the free Basic pricing option for Application Insights.
If you are a developer using Microsoft’s technologies, you should already have Visual Studio 2013 or a newer version installed. In this book, we will be using Visual Studio Community 2017.
If you own a Visual Studio with MSDN subscription, please refer to the terms of use and remember that the credits are available for development and testing only, so it cannot be utilized in a production environment.
There is no minimum configuration regarding hardware because all the information from Application Insights can be gathered through a web browser.
Pricing options for Application Insights
At the time of writing this book, there are two pricing options available for Application Insights, known as Basic and Enterprise. The details are shown in the following figure.
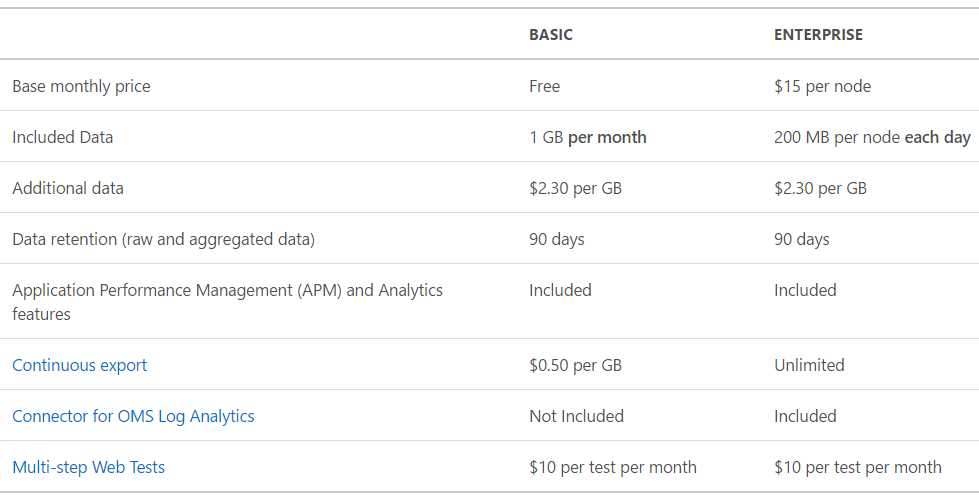
As you can see from Figure 1, the Basic option is free but limited, and can be used to create Application Insights resources for debugging or for low-traffic applications.
When we have more traffic on our site, we can decide to switch to the Enterprise option, which has a monthly cost and more powerful features, such as a greater amount of data included and an unlimited “continuous export” feature. We will explore the continuous export feature in the following chapters.
Microsoft Azure subscription
In this chapter, we’ll explore how to create an Application Insights resource within the Azure portal and connect it to an existing web application. Then we will repeat this step, creating an ASP.NET web application with an Application Insights resource directly from Visual Studio. Even if the end result of both procedures is the same, the latter mode is more convenient if you usually work with Visual Studio.
To create your first Application Insights resource, navigate to the Azure portal.
Tip: Bookmark the URL https://portal.azure.com since we’ll use it as the entry point to the Azure portal throughout this book.
If you have no subscription for Azure, you will need to create a new one, as explained previously. The Basic option is usually enough to get started with Application Insights.
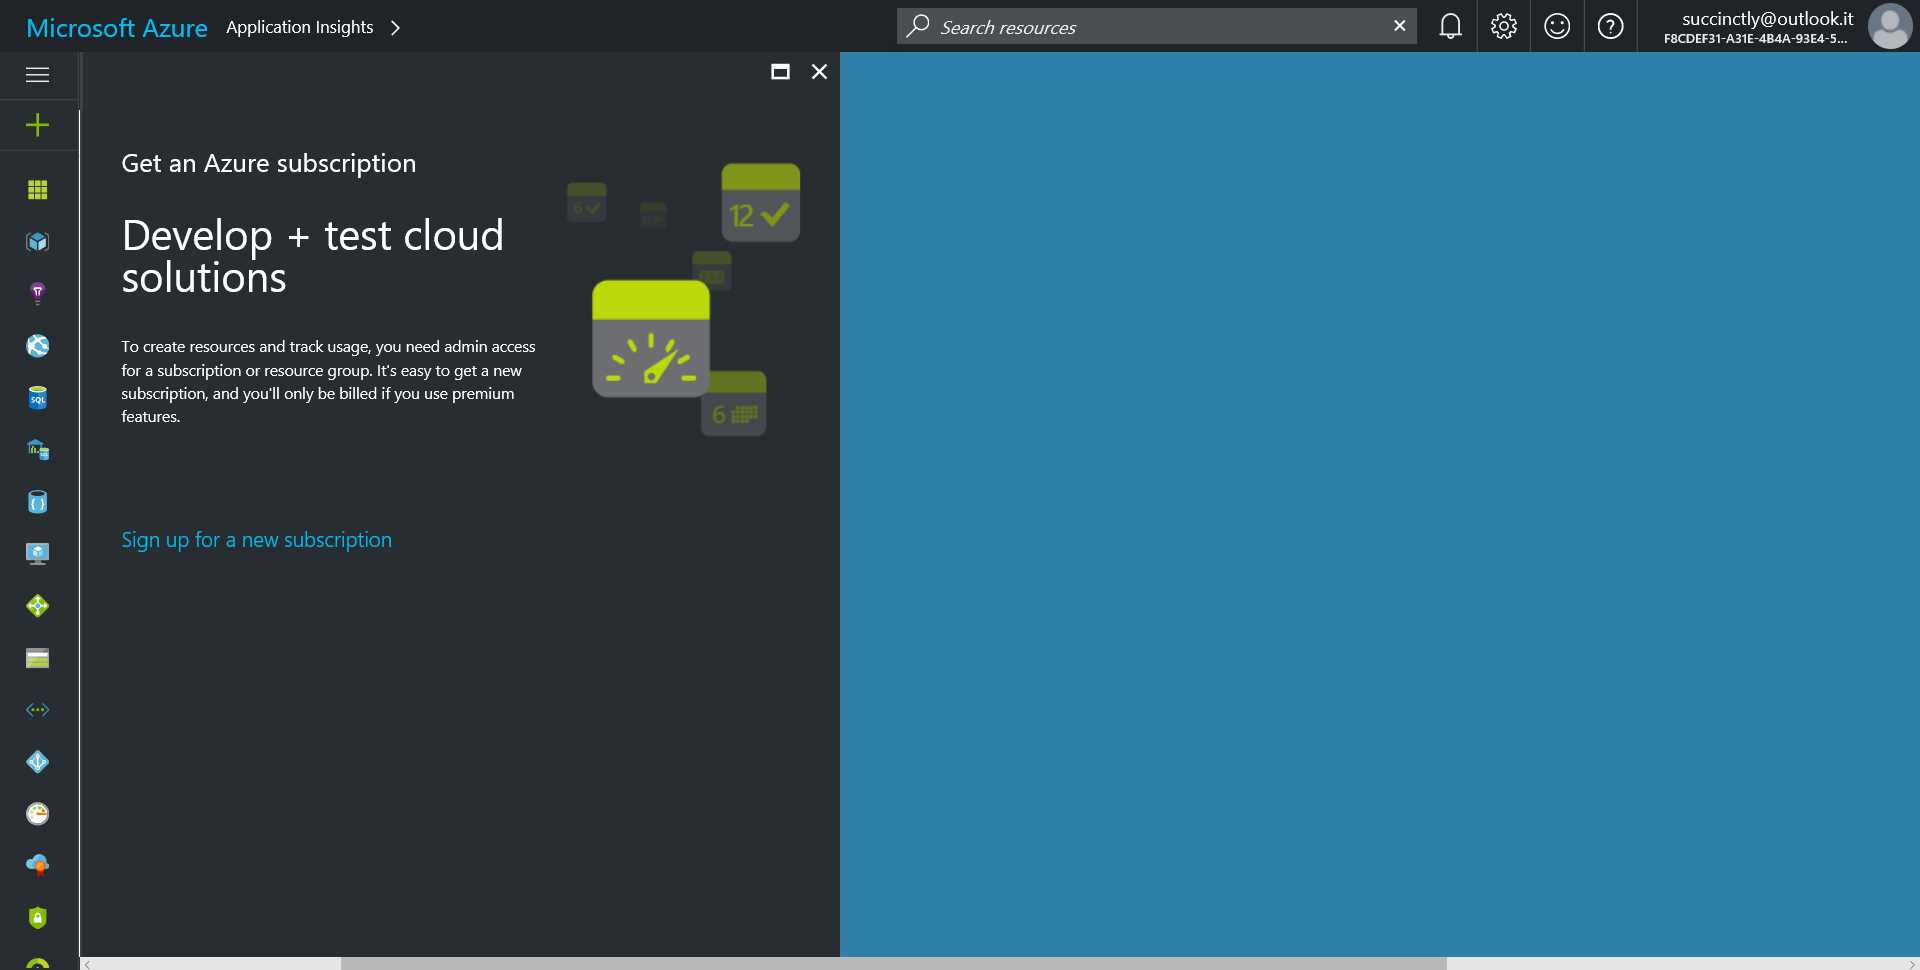
Figure 2: Azure Portal
Note: Since Azure is not really the topic of this book, it is assumed that you have already signed up for this service.
Creating our first Application Insights resource
On the left-hand side of the Azure portal, you will find a vertical bar with a green + symbol—this will open the Marketplace blade. Here you can locate the Application Insights item located in the Developer Tools section.
Note: The term “blade” on Microsoft Azure represents a vertical panel that is usually a container for other information. The drill-through navigation on this portal is designed using a progressive blade opening on the right-hand side of the previous blade.
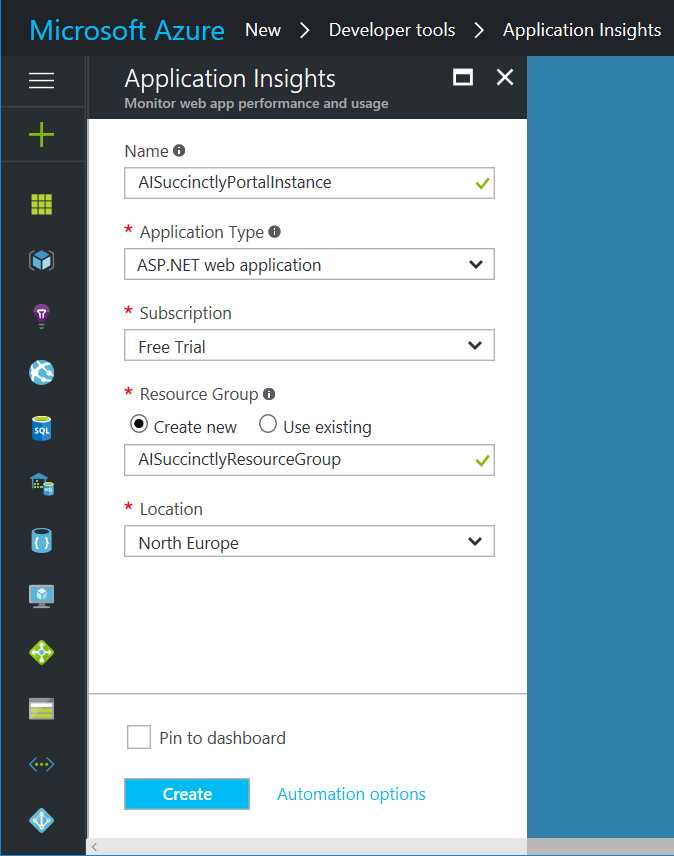
Figure 3: The Application Insights New Resource Blade
The following information is required to create an Application Insights resource:
- Name: This is the name of the resource. It must be unique in your Azure subscription.
- Application Type: This is the kind of implementation that we will monitor. It could be one of the following values:
- ASP.NET web application: A typical ASP.NET web application, such as an ASP.NET MVC application, a Web Forms application, or a WCF Service.
- Java web application: A typical Java web application.
- HockeyApp bridge application: This option is to allow Application Insights to use data gathered with HockeyApp. When you select this option, two additional fields will be displayed (HockeyApp Token and HockeyApp Application) to complete the connection between Application Insights and the HockeyApp environment.
- General: An HTML-based application, regardless of the development language.
- Subscription: The Azure subscription the resource is associated with.
- Resource Group: This is the resource group in which the resource is collected. It is a sort of resource container, useful for Azure resource management.
- Location: The geographic location where the resource will be running. Currently the available options are East U.S., South Central U.S., North Europe, and West Europe.
Once you click the Create button, the resource will be created in seconds.
Tip: Since the Azure portal interface is designed to be as simple as possible, you can explore the different sections yourself to look at what is available for each resource.
At this point you should have your own Application Insights resource ready to go. In the next chapter we will explore the dashboard to understand the available features for that resource.
- 1800+ high-performance UI components.
- Includes popular controls such as Grid, Chart, Scheduler, and more.
- 24x5 unlimited support by developers.