
Application Insights Succinctly®

CHAPTER 7
Consuming and Exporting Data
If you take a look back at Figure 1, you can see that whatever the pricing option is, the data redemption policy is no longer than 90 days. Therefore, if you want to keep a history of your web application’s usage, you need to export the data from the Application Insights resource and store it in another place. Various features help to accomplish this goal, so we should consider all the available options to get the telemetry data out of Application Insights.
Consuming data with Power BI
If you’re a Power BI user, you can connect to your Application Insights resource directly with it.
Note: Power BI is a suite of business analytics tools available from Microsoft to analyze data. Using this suite, a company can monitor its business using rich dashboards available on every device. For more information, visit powerbi.microsoft.com or check out Syncfusion’s e-book, Power BI Succinctly by Pierstefano Tucci.
To connect Power BI to Application Insights, you need an account on Power BI.
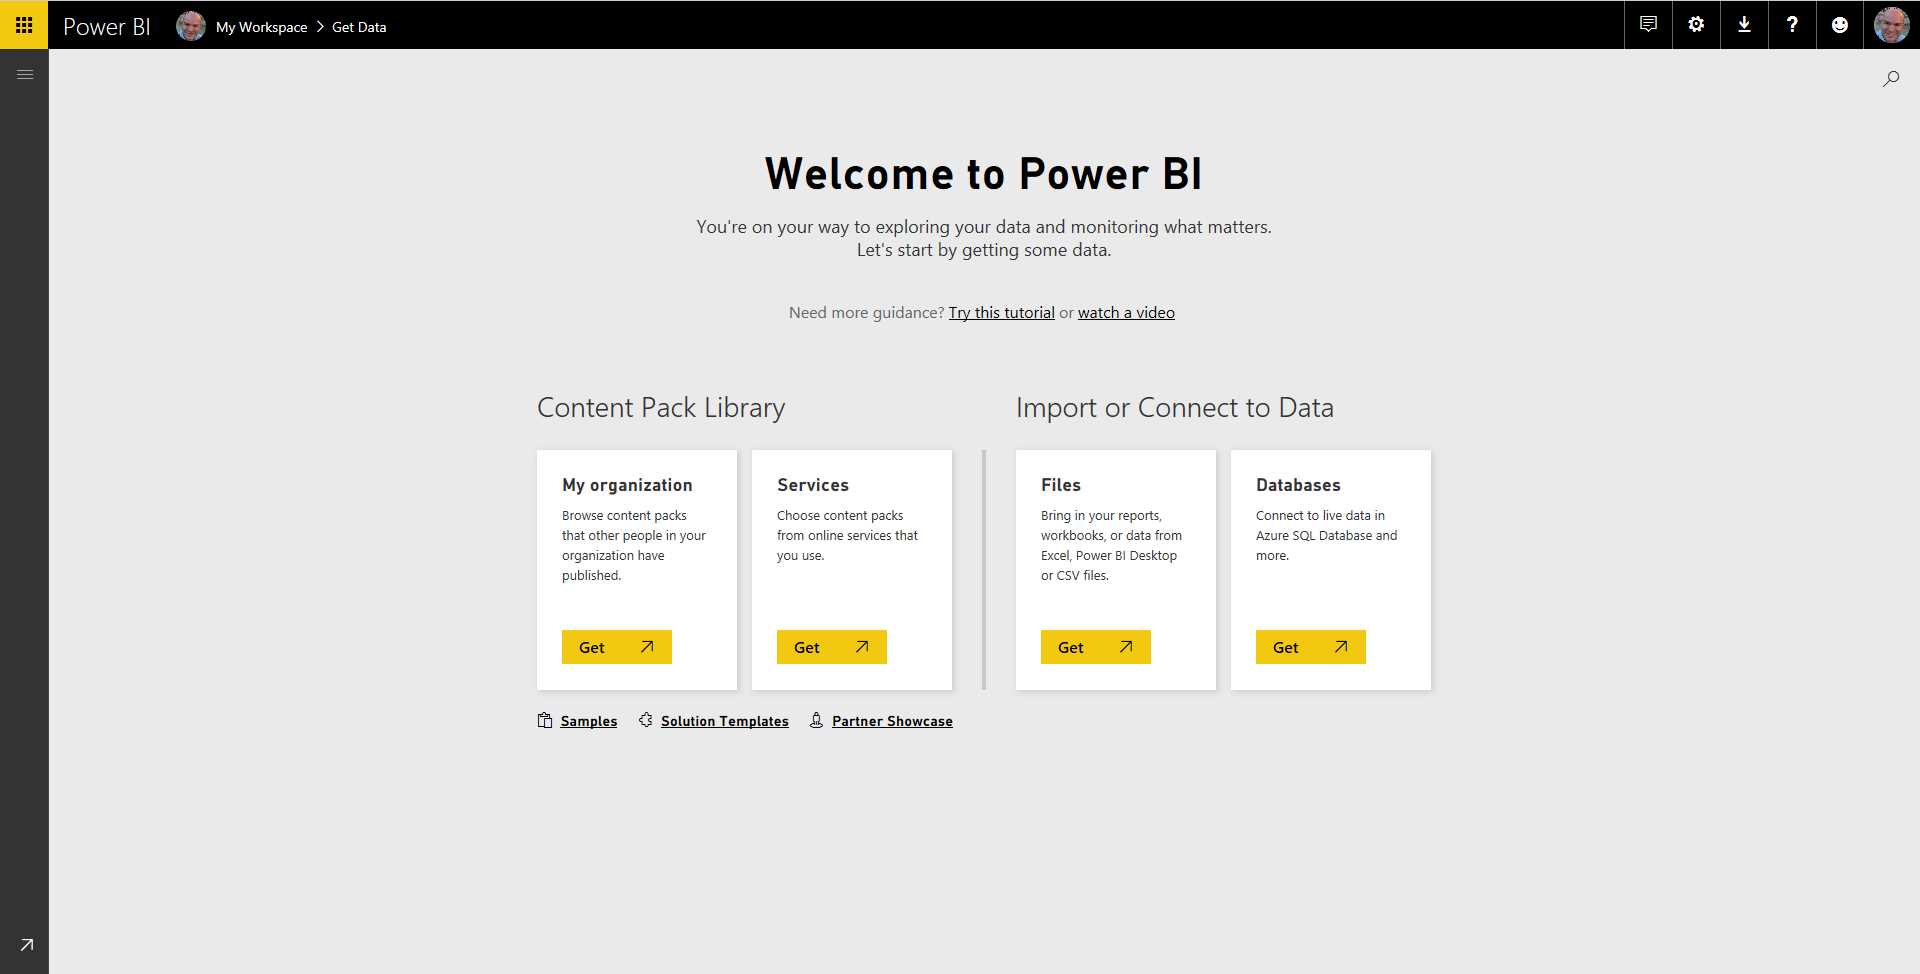
Figure 21: The Power BI Main Page
On the main page, you must use Services, and filter out the content packs available to find the right one in order to connect to Application Insights.

Figure 22: Power BI Content Packs
Once you’ve selected the right content pack, you need to enter the information required (Resource Name, Resource Group, and Azure Subscription ID) to connect to the Application Insights resource.
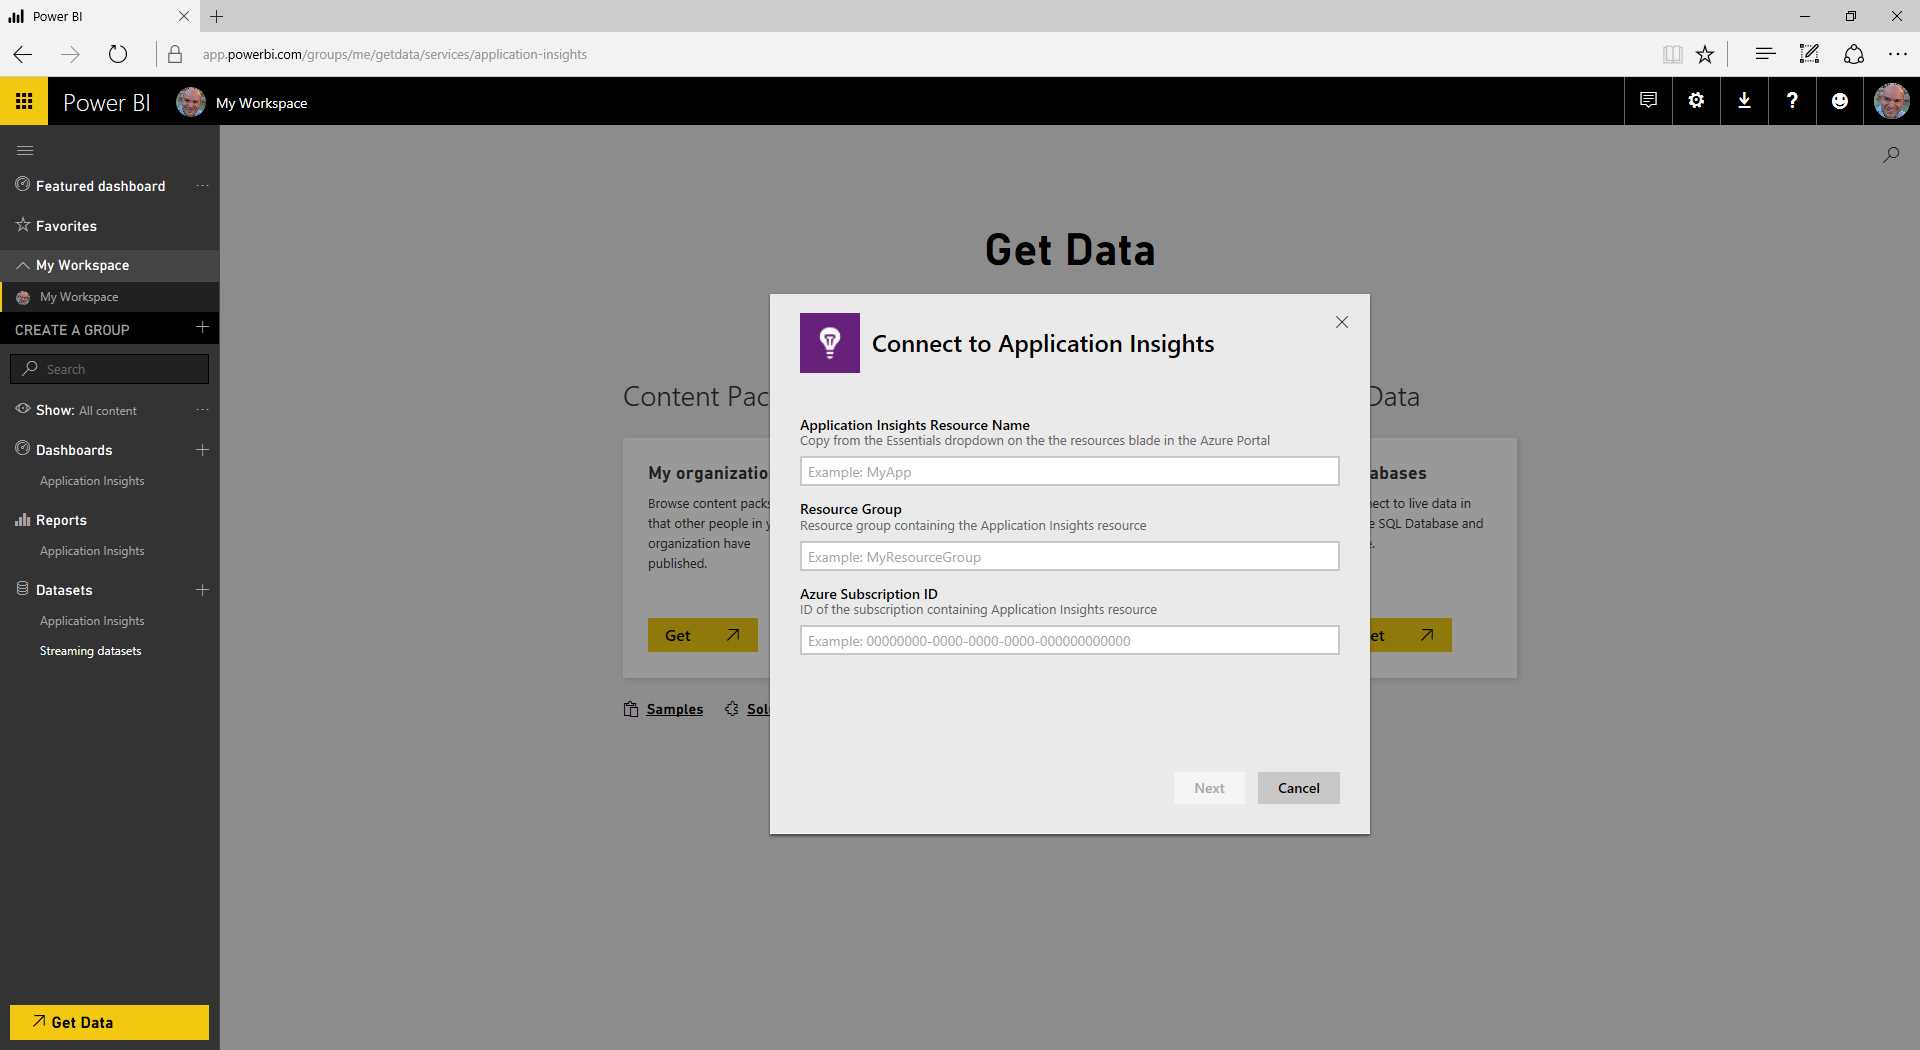
Figure 23: Connecting to the Application Insights Resource
Finally, once you complete the sign-in, you will have access to Application Insights data from Power BI, just as you would with any other source type.
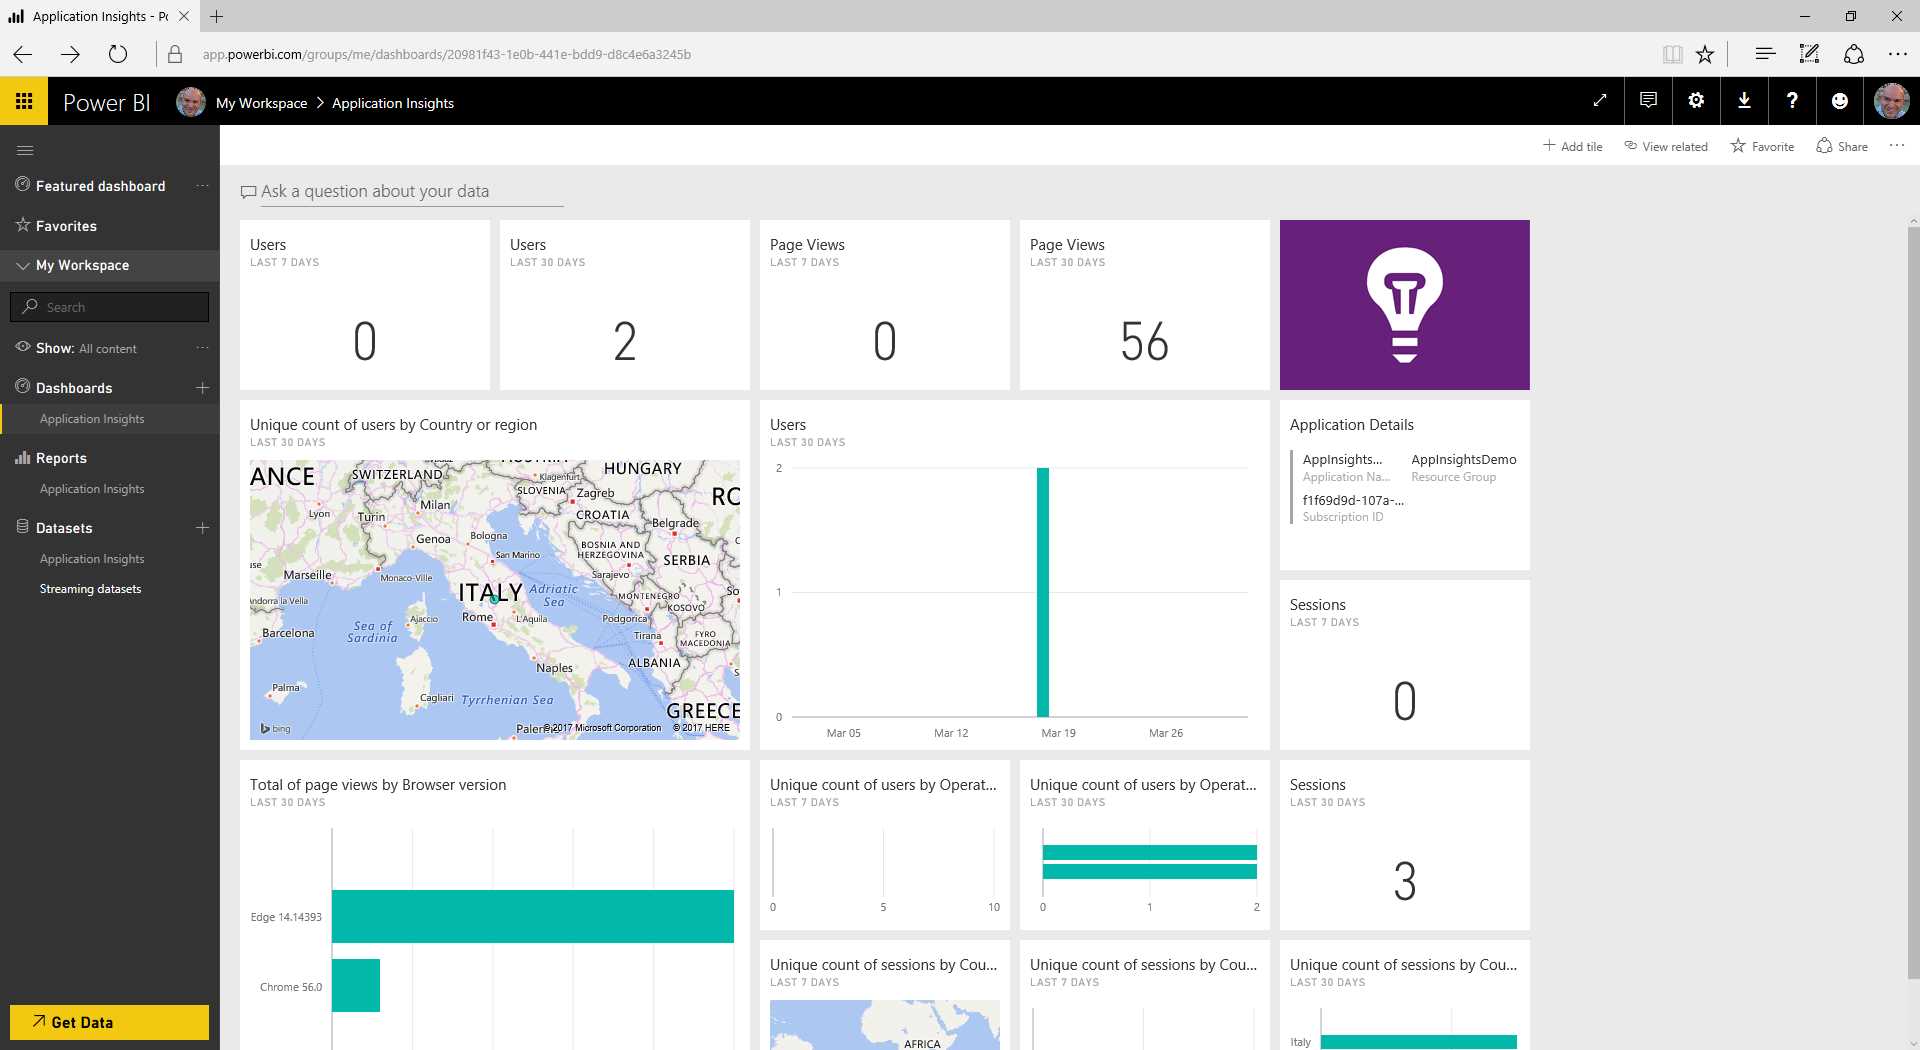
Figure 24: Power BI Connected to an Application Insights Resource
Application Insights REST API
The Application Insights REST API is a programmatic way to get data from Application Insights using a REST API service. It is available here.
Tip: At the time of writing this book, this feature is available in public preview. This means the development is still in progress, so things can change (more or less significantly) on the road to the final release. For information on changes, refer to this changelog.
This REST API lets you query data about your Application Insights resource.
Before you can use this API, you must configure access to it. To do this, open the API Access blade in the Configure section to create an API key.
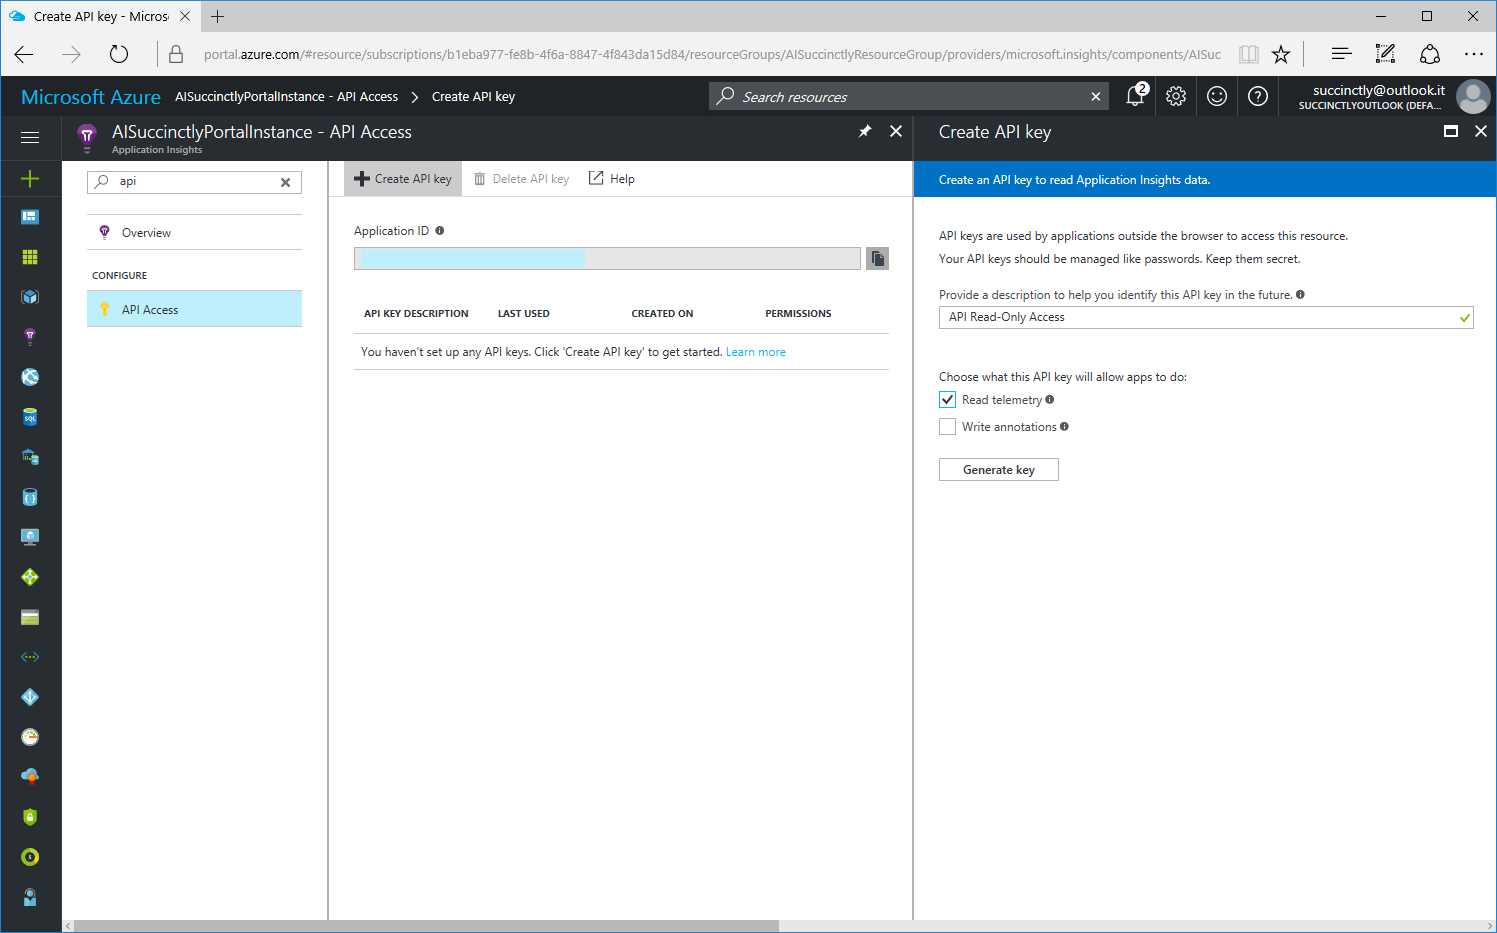
Figure 25: The API Access Blade
When you create access for your data, you can specify a name for your API key, and one or both of the following permissions:
- Read telemetry: Allows you to read data from your Application Insights resource.
- Write annotations: Allows you to write annotations (not data) in your Application Insights resource. Annotations are additional information about a significant event.
With the Generate key button, you will be able to complete the operation and receive an API key with the name and permissions you provided to it.
Tip: You may need multiple API keys. For instance, you can create one key per business application using that data, even if they have the same permission. This way, you can change or revoke rights at any time without affecting the other business applications involved.
Before using this API key (for instance, from within a consumer application), you can try it from the API Explorer page.
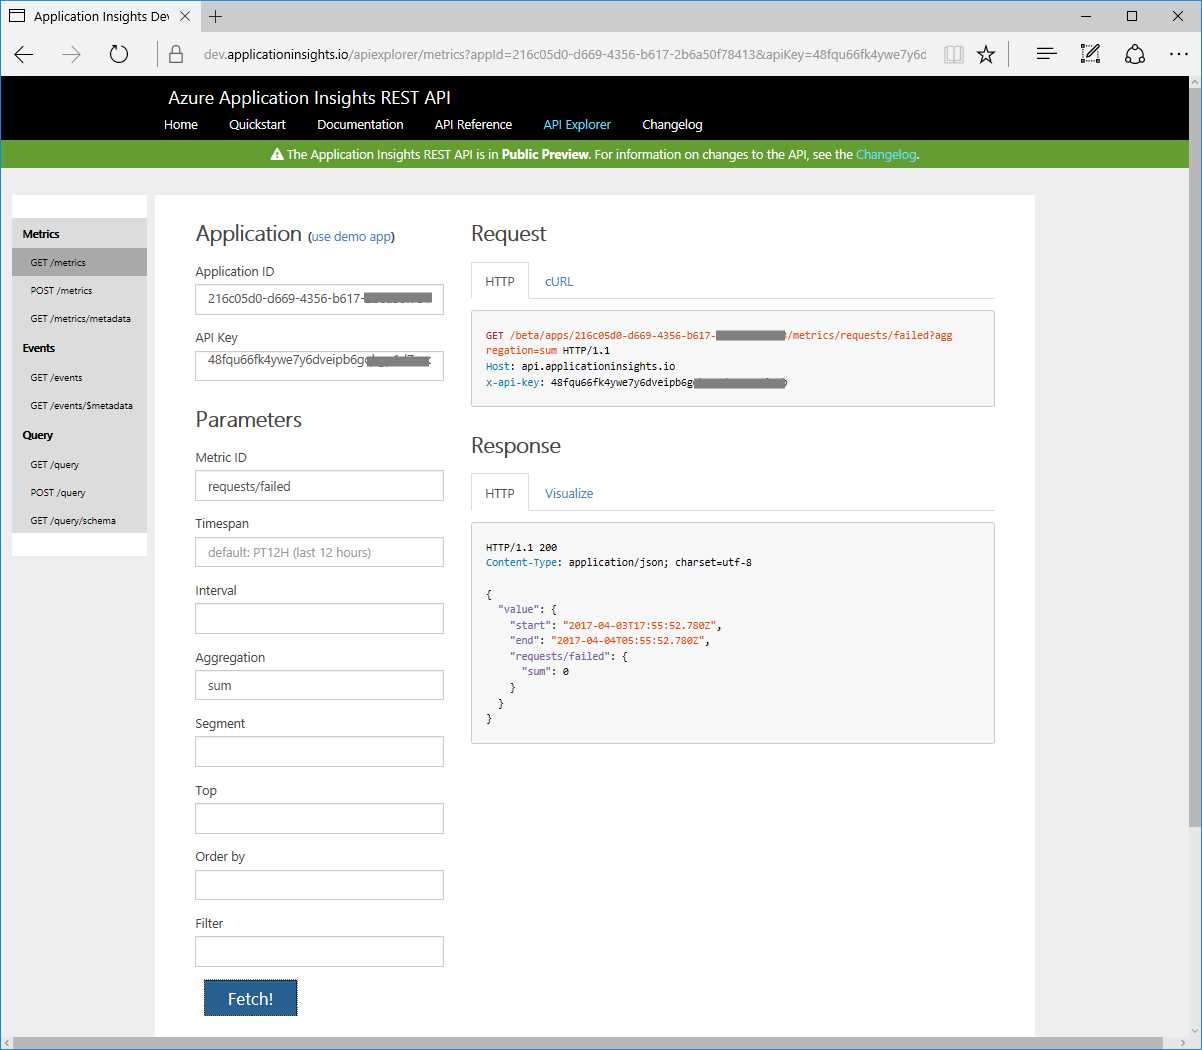
Figure 26: The API Explorer Page
To use this testing tool, you need an API Key and Application ID. The application ID is available in the API key blade in the Azure portal.
Using the Metric ID field, you can choose the appropriate one from a list of metrics to get data from the API. On this form, most of the fields are straightforward and easy to understand since you only have to choose one of the suggested items from the list.
The goal behind this feature is to let you see if the data coming back from the API is exactly what you are looking for before you use the API in a business application. Here you can set the different parameters to filter out the result, such as the aggregation type or time span.
As you can see in Figure 26, you can preview both the API request and response.
Once you’ve tested the appropriate API, you can use it in your business application like any other REST API service.
Continuous export
Since data retention is not unlimited, we should export data from our Application Insights resource at a scheduled time if we want to preserve information.
This capability is available in both the Basic and Enterprise pricing plans, but while there is a fee per gigabyte used in the first (free) option, the second option can be used without any limitation.
To use this feature, select Continuous Export from the Configure section of the Application Insights features blade. To create a continuous export item, we must configure a few parameters, as you can see in Figure 27.
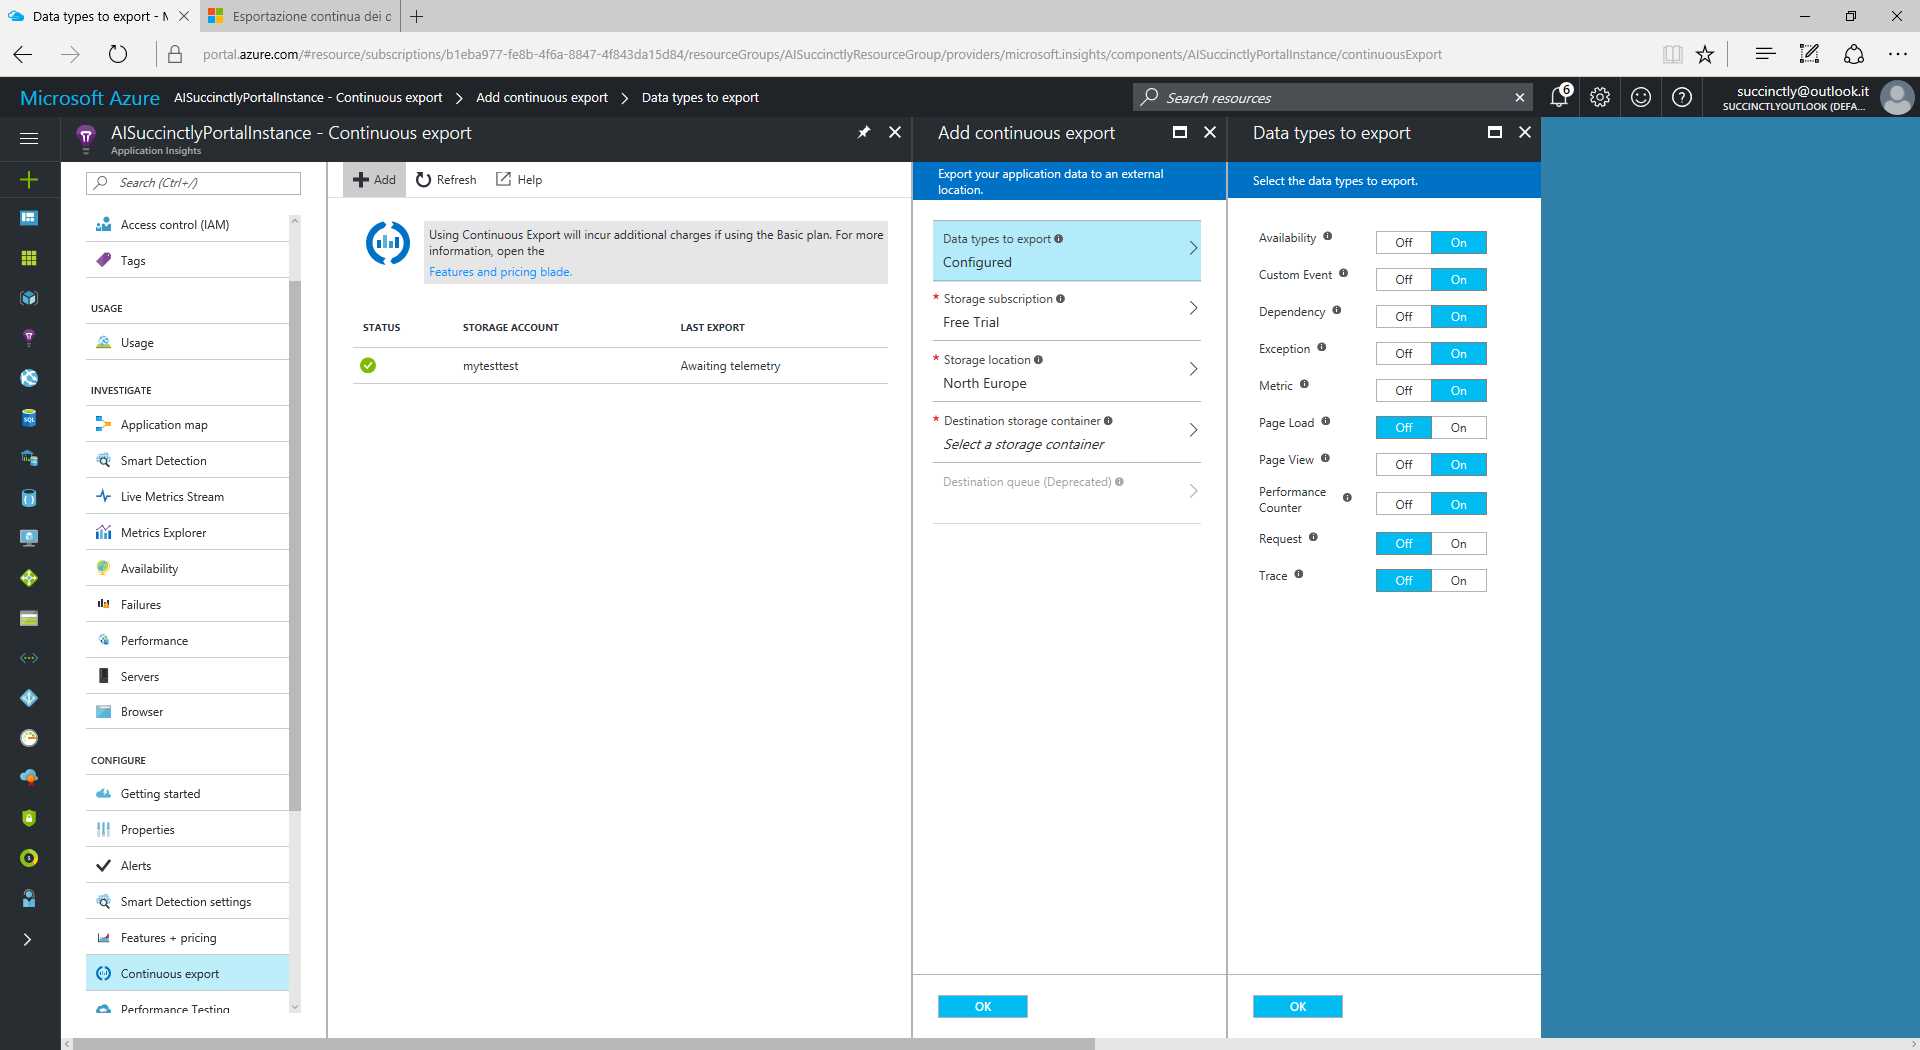
Figure 27: The Continuous Export Feature
The first of these parameters represents the data to export, so we can define the exact kind of information we would like to collect:
- Availability: Data results for all the web tests of our application.
- Custom Event: All the information registered with the TrackEvent() method (see Chapter 9).
- Dependency: All the time usage data related to external resources (DBs, services, etc.).
- Exception: Data results for all server exceptions and exception data registered with the TrackException() method (see Chapter 9).
- Metric: All the information recorded with the TrackMetric() method (see Chapter 9).
- Page Load: The time taken to load a page in the browser.
- Page View: The page view count of our web application.
- Performance Counter: Performance counters collected by Application Insights Status Monitor.
- Request: Information about HTTP requests received by the server.
- Trace: Log telemetry and all the data registered with the TrackTrace() method (see Chapter 9).
Since we need to use an Azure Storage resource (which is the only container type supported), all other parameters are related to the storage in which we want to export the data collected.
Note: We will not cover the creation of storage on Azure, which is beyond the scope of this book. If you’d like to know more about this, refer to this documentation.
- Storage location parameter: The value suggested is the same as the Application Insights resource area, and if you change it, you can incur additional charges.
Once we have selected the destination storage, we must choose (or create) a container for it. This feature will work immediately after you create it, while you may stop it by using the Disable button on the blade.
Tip: Remember that using continuous export may cause you to incur additional charges; refer to the Pricing options for Application Insights section for further details. Note that Visual Studio MSDN subscribers cannot use this feature.
The exported data will be in JSON format and will represent the raw telemetry that Application Insights receives from the web application.
The exported data could appear in the storage up to an hour after it has been recorded, so don’t consider this feature a real-time export.
Exported data can stay within the storage for as long as you want, although you’ll be paying a fee for its use. Of course, you can export data to your local storage to avoid high storage payments.
The next step is interacting with the Application Insights resource from within your code. In the next chapter, you will see Visual Studio in action.
- 1800+ high-performance UI components.
- Includes popular controls such as Grid, Chart, Scheduler, and more.
- 24x5 unlimited support by developers.