
Ansible Succinctly®

CHAPTER 3
Environment Setup
Before starting to work with Ansible, we need to set up the environment against which we will be performing the examples and exercises.
For simplicity, this book assumes you are using Microsoft Windows 10 on a desktop computer. Therefore, we will be using Microsoft Windows 10 to perform the basic setup. Windows 10 will be purely used to host the VM. The rest of the examples will be run on CentOS 8 Linux.
Figure 3 depicts the set of virtual machines we are going to create, which will be installed locally (on your desktop computer). The virtual machines are all based on CentOS 8 and will be running on VirtualBox. To have them up and running, you will need to have about 6GB of RAM available. However, it’s not necessary that all the servers run at the same time, if that’s the limitation you have in your environment.
The environment presented is a possible setup for a web application that is load balanced, that can be possibly scaled out (by attaching more web servers), and that has a backend system serving the data (database).

Figure 3: Development environment
Let’s briefly explain each of the hosts mentioned in Figure 3.
Table 1: Server (Hosts) List
Server Purpose | Hostname | Description | (Static) IP Address |
|---|---|---|---|
Ansible Manager Server | amgr | This is the virtual machine where Ansible will be installed. We will perform all of the Ansible operations directly from this server against other hosts. | 192.168.3.100 |
Load Balancer | lb | Host responsible for redirecting HTTP requests to either web server 1 or web server 2. | 192.168.3.200 |
Web Server | web160 web161 | Server hosting the web application. | 192.168.3.160 192.168.3.161 |
DB Server | db | Server hosting the database. | 192.168.3.199 |
Note: It would be good to familiarize yourself with Table 1, since we will be using these hostnames and IP addresses throughout the examples in the book. |
In order to have the recommended setup, you need to install the following tools on your desktop machine:
- Vagrant
- VirtualBox
- Git
- Visual Studio Code
Let’s just briefly explain the tools, their purpose, and the installation procedure.
Vagrant
“Vagrant is a tool for building and managing virtual machine environments in a single workflow. With an easy-to-use workflow and focus on automation…” (Vagrant website).
We need Vagrant to create the Linux VMs, as stated previously.
You can install the Vagrant software by downloading it here. Just follow the installation wizard, which is quite straightforward. If there is already a version of Vagrant installed, it will be upgraded. You might need to restart your computer.
After the installation, please verify that the software has been installed correctly by opening the command prompt (PowerShell) and typing the following command.
Code Listing 3: Checking the Vagrant version
PS C:\>vagrant -v |
You should receive no errors, and the result should be something like Vagrant 2.2.15, which is the version used at the time of writing this book.
We need also to install a Vagrant plugin called vagrant-hostmanager, which will help us in setting up the connectivity between hosts by manipulating the /etc/hosts file at the time of provisioning of the machines.
Please run the following command.
Code Listing 4: Installation of the vagrant-hostmanager plugin
PS C:\>vagrant plugin install vagrant-hostmanager |
The version used at the time of writing is 1.8.9. To check that the plugin got installed (and the version), we can run the following command.
Code Listing 5: Check the installed Vagrant plugins
PS C:\>vagrant plugin list |
VirtualBox
According to its website, VirtualBox is a powerful virtualization product for enterprise as well as home use. We will be using VirtualBox in order to run the aforementioned virtual machines.
On Windows, you can install VirtualBox by visiting this site. After downloading the application, install it by following the wizard. You can simply keep the default options.
Tip: Keep in mind that only one hypervisor can be active at the same time, so if your Windows 10 has the Hyper-V (or other) installed and active, you might need to deactivate it in order to run VirtualBox.
After installing VirtualBox, please also install the VirtualBox Extension Pack. The link to the extension pack is typically in the link provided.
At the time of writing, the version of the Virtual Box application is 6.1.18.
Visual Studio Code
Visual Studio Code is a free and open-source code-editing app we are going to use to work with Ansible scripts. Please install Visual Studio Code by following this link. The version used in this book is 1.55.2.
After installing the tool, please install some plugins that will help you with the scripting, such as the ones listed in the following table.
Table 2: Visual Studio Code Plugins
Plugin Name | Plugin Identifier | Short Description |
Vagrantfile Support | marcostazi.vs-code-vagrantfile | Provides syntax highlighting support for Vagrantfile, which is the Vagrant configuration file. |
Jinja | wholroyd.jinja | Jinja template editing support. |
Ansible | haaaad.ansible |
Ansible language support. |
Remote ssh connections support | ms-vscode-remote.remote-ssh | Microsoft plugin to connect to remote servers via ssh. |
Remote ssh connections support | ms-vscode-remote.remote-ssh-edit | Microsoft plugin to connect to remote servers via ssh and edit files. |
Remote ssh connections support | ms-vscode-remote.vscode-remote-extensionpack | Microsoft plugin. |
Ansible Mod | sysninja.vscode-ansible-mod | Ansible editing helper functions. |
By using the following commands and running them from the PowerShell command line, you can automate the installation of the plugins mentioned in the previous table.
Code Listing 6: Visual Studio Plugin Installation via command line
code --install-extension marcostazi.vs-code-vagrantfile code --install-extension wholroyd.jinja code --install-extension haaaad.ansible code --install-extension ms-vscode-remote.remote-ssh code --install-extension ms-vscode-remote.remote-ssh-edit code --install-extension ms-vscode-remote.vscode-remote-extensionpack code --install-extension sysninja.vscode-ansible-mod |
Infrastructure installation procedure
Now that the tools are installed, please create a folder in which we will place the Vagrantfile configuration.
For example, I have created the following two folders:
- C:\AnsibleSuccinctly to hold all the Ansible scripts.
- C:\AnsibleSuccinctly\Vagrant (subfolder) to place the Vagrantfile to start the environment.
You can execute in the command line (PowerShell) the following script.
Code Listing 7: Folder creation
PS C:\>mkdir AnsibleSuccinctly\Vagrant |
After creating the folders, we also need to create the Vagrantfile.
Code Listing 8: Create Vagrantfile via command line
PS C:\>New-Item C:\AnsibleSuccinctly\Vagrant\Vagrantfile |
Let’s open the folder in Visual Studio Code.
Code Listing 9: Opening the folder with Visual Studio Code
PS C:\>code C:\AnsibleSuccinctly\ |
You should now have the basic folders and a file called Vagrantfile created and opened in Visual Studio Code.

Figure 4: Creation of the Vagrantfile
After running the commands, you should also see Visual Studio Code opening the folder AnsibleSuccinctly. You should get something similar to the following figure.

Figure 5: Visual Studio Code view of the folder
Open the file called Vagrantfile, paste the following content, and save the file, which contains the script that will be executed to create the VMs.
Code Listing 10: Vagrantfile content
# -*- mode: ruby -*- # vi: set ft=ruby : BOX_IMAGE = "Dougs71/CentOS-8.1.1911" BOX_VERSION = "1.0.0" Vagrant.configure("2") do |config| config.hostmanager.enabled = true config.hostmanager.manage_host = false #Ansible manager definition config.vm.define "amgr" do |amgr| amgr.vm.box = BOX_IMAGE amgr.vm.box_version = BOX_VERSION amgr.vm.hostname = 'amgr' amgr.vm.network :private_network, ip: "192.168.3.100" amgr.vm.provider :virtualbox do |v| v.memory = 2048 v.cpus = 4 v.name = "amgr" v.customize ["modifyvm", :id, "--natdnshostresolver1", "on"] end end #Load balancer definition config.vm.define "lb" do |lb| lb.vm.box = BOX_IMAGE lb.vm.box_version = BOX_VERSION lb.vm.hostname = 'lb' lb.vm.network :private_network, ip: "192.168.3.200" lb.vm.provider :virtualbox do |v| v.memory = 1024 v.cpus = 1 v.name = "lb" end end #Database definition config.vm.define "db" do |db| db.vm.box = BOX_IMAGE db.vm.box_version = BOX_VERSION db.vm.hostname = 'db' db.vm.network :private_network, ip: "192.168.3.199" db.vm.provider :virtualbox do |v| v.memory = 1024 v.name = "db" end end #Creation of the web application servers (160..161).each do |host| config.vm.define "web#{host}" do |web| web.vm.box = BOX_IMAGE web.vm.box_version = BOX_VERSION web.vm.hostname = 'web#{host}' web.vm.network :private_network, ip: "192.168.3.#{host}" web.vm.hostname = "web#{host}" web.vm.provider :virtualbox do |v| v.memory = 1024 v.cpus = 1 v.name = "web#{host}" end end end end |
Finally, let’s create the VirtualBox images by running the following command in the Vagrant folder.
Note: Vagrant needs to download the CentOS 8 image from the Vagrant online repository. The speed will depend on speed of your internet connection. As an indication, you might experience 3–5 minutes of waiting time for the creation of all five machines.
Code Listing 11: Starting the VM creation
PS C:\>AnsibleSuccinctly\Vagrant>vagrant up |
You might open VirtualBox at the same time and see in real time how the VMs are getting created. The result should look similar to what is shown in the following figure.

Figure 6: VirtualBox virtual machine status
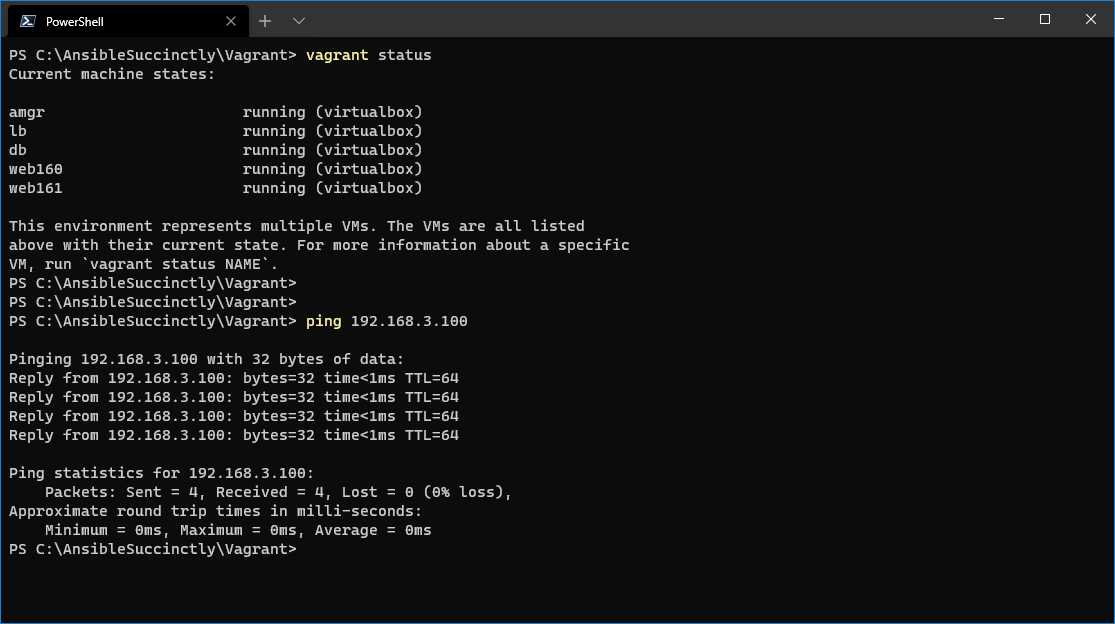
When you run the status command, it should give you the view on the status of the VMs.
Code Listing 12: Vagrant status checking
PS C:\>AnsibleSuccinctly\Vagrant>vagrant status |
Please note that, in the result, we can also see that we can ping the newly created server, as shown in the following figure.
Tip: At every restart of your PC/workstation, you might need to run the vagrant up command to start the VMs. Unless you destroy and recreate a VM, the state of the VM will remain intact.
Accessing the servers
There are two ways of accessing the servers that you should use.
Table 3: Accessing the VM via ssh
vagrant ssh <machine-name> | By using vagrant ssh, you may easily access any machine created by Vagrant. The following command: vagrant ssh amgr will automatically log you in to the amgr machine without asking for username and password. This command has to be run in the folder where the Vagrantfile is located, in our case C:\AnsibleSuccinctly\Vagrant. Examples:
|
ssh vagrant@<machine_ip> | This is the standard ssh command. The vagrant machines have been set up so that they can be accessed from the Windows 10 client, but only by the IP address. But we have to supply the credentials: username = vagrant password = vagrant Examples: |
Other Vagrant commands
Vagrant has several commands you should be aware of.
Table 4: Vagrant commands
vagrant up | Given the presence of a Vagrantfile with the infrastructure definition, creates or starts the infrastructure. Use this command every time you want to start the VMs. |
vagrant destroy | It can only be executed in the folder where the Vagrantfile is located. It destroys the VMs created, by literally deleting all of the files and configuration. |
vagrant reload | Reloads the virtual machine by applying new settings from the Vagrantfile. Useful when you need to change network or synced folder settings. |
vagrant ssh | It connects to a running Vagrant VM. |
vagrant halt | Stops (pauses) the virtual machine. |
Most of the time, we will be using vagrant ssh.

Figure 8: Using Vagrant ssh
Tip: Anytime you think you’ve done something wrong within the VM, you can always destroy it by running vagrant destroy <machine_name> and vagrant up <machine_name>. It’s a very convenient way to experiment with machines and reset the environment at any time—and all of this within minutes.
Visual Studio Code: connecting with the manager node
This step is optional, and while you might use vi, vim, nano, or your other favorite editor to edit the files directly on the Linux amgr node, I personally find it very useful to work from Visual Studio Code while being connected remotely to the amgr node.
VS Code gives us a very easy way of doing so. After starting up the VM with the vagrant up command, we can connect remotely to the amgr node by executing the following steps:
- Open Visual Studio Code and click the Remote Explorer icon on the left-hand side of the editor.
- Choose SSH Targets from the drop-down menu and click the + icon, as shown in Figure 9.
Follow the wizard by entering the following.
Code Listing 13: Connection settings VS Code
When you are prompted with Select SSH configuration file to update, choose the folder location as in the Code Listing.
Code Listing 14: Storing configuration settings
C:\ProgramData\ssh\ssh_config |

Figure 9: Add new remote connection
At the end of the process, you should see something like the following.

Figure 10: Setting up the remote connection
If not already present, make sure there is a path selected for the config file in the remote connection settings. To do so in VS Code, press Ctrl+Shift+P and type Remote-SSH: Settings. When the settings are open, specify the full path to the config file in the RemoveSSH: Config File entry, as shown in the following figure.

Figure 11: Remote.SSH: config file setting
On the Remote Explorer, right-click the IP address and choose Connect to Host in Current Window. The process of connecting to the remote server starts.
You will be prompted for the password twice, so please enter vagrant as the password.
At the end of the process, you should have the result shown in Figure 12. You can open any folder on the server by choosing File >Open Folder.

Figure 12: Opened folder on remote server
Now you can create your own folders, edit files, and execute commands directly from Visual Studio Code.
Note: All the figures in this book are showing examples using the command line. Use what you will find more convenient vagrant ssh, ssh [email protected], or VS Code remote connections.
- 1800+ high-performance UI components.
- Includes popular controls such as Grid, Chart, Scheduler, and more.
- 24x5 unlimited support by developers.