
Ansible Succinctly®

CHAPTER 7
Connecting to Remote Environments
In order to execute any code, Ansible has to first connect to the host that is targeted for changes. That host could be of various types, such as Linux, Windows, or Kubernetes.
The beauty of Ansible is the pluggable architecture and its support for various environments. As shown in the following picture, there are various methods that Ansible supports given the targeted host type.
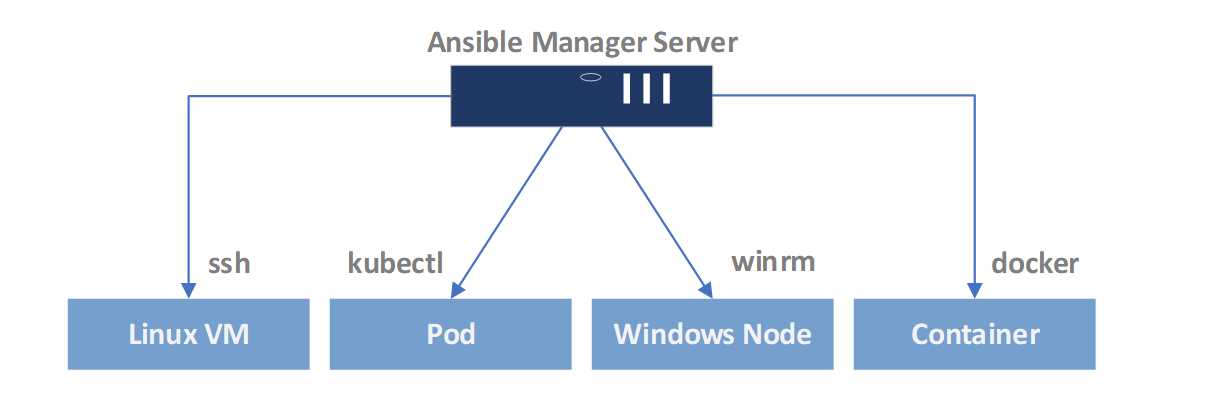
Figure 20: Ansible pluggable architecture
When it comes to connecting to the Linux hosts, the typical way is to use the OpenSSH (ssh). For connecting to Microsoft Windows hosts, the default is the winrm technology supported by Microsoft Windows, and so on.
Ansible supports other plugins, as well; you can find a full list here.
You can find the list of available and installed plugins by running the following command.
Code Listing 36: Find the list of connection plugins
(avenv) [vagrant@amgr ~]$ ansible-doc -t connection -l |
The result shows the list of plugins currently available, as seen in Figure 21.
We won’t go into the details of those connection types other than ssh, as this is the default mechanism used in Linux, and since all of our machines are Linux-based, this would be the context of this book.
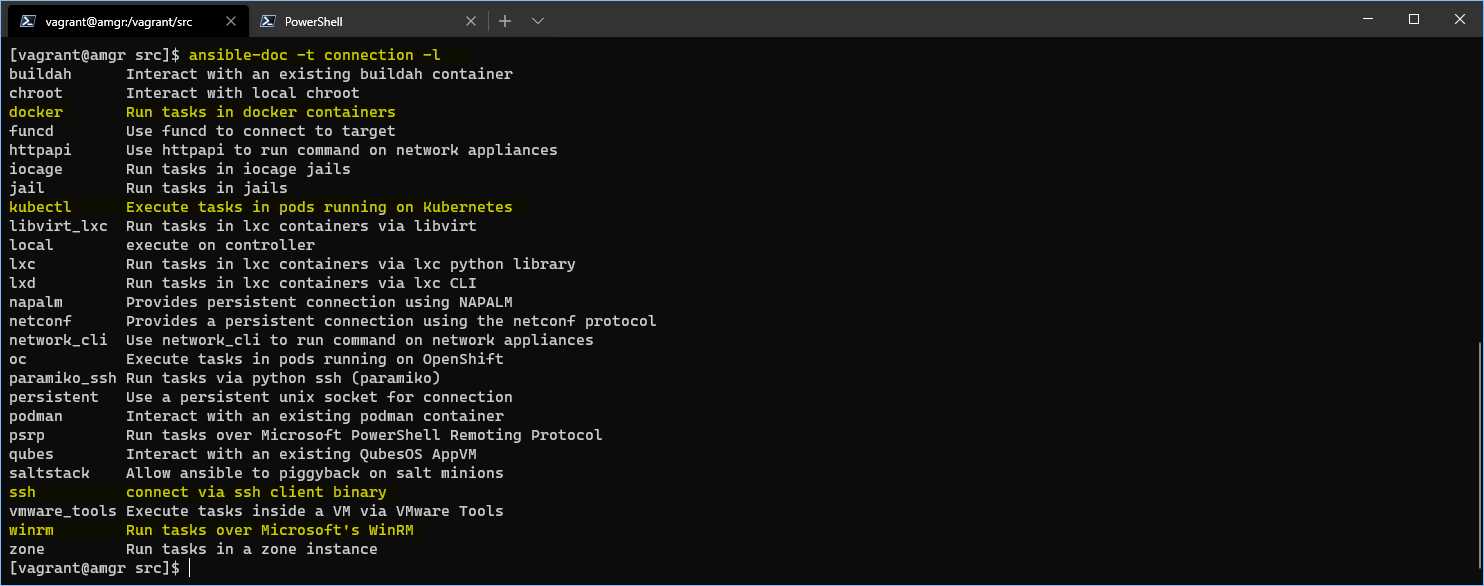
Figure 21: Ansible connection plugins result
Ansible Manager Server configuration
One of the most common ways of connecting to remote hosts in Linux is to use ssh. When using Ansible, it’s recommended to use the ssh key-based authentication.
To run the commands, Ansible should be using the unprivileged account that can use sudo to become root without supplying a password. Requiring a password during the command running can be cumbersome, as the operator needs manual interaction.
If we look at the ansible.cfg [privilege_escalation] section, we can see that Ansible by default is configured to support what I just described (the # in front of the key means that this setting is just commented out, making it de facto a default value).
Code Listing 37: Privilege escalation defaults
[privilege_escalation] #become=True #become_method=sudo #become_user=root #become_ask_pass=False |
However, these settings can be also placed in the playbook to override the default settings, as we are going to see later.
Note: By default, Ansible will connect to the other host by using the user executing commands.
Generation of the ssh key
Before using Ansible without providing the username and password, we have to create the ssh key (as a file) and push this file to all the hosts we’d like to manage.
First, log in to the amgr server, and at the shell prompt, type the following command.
[vagrant@amgr ~]$ ssh-keygen -t rsa
You will be prompted for the location of the key file, and you can just keep the default values as supplied in the command prompt. Please do override the id_rsa file.

Figure 22: Overriding id_rsa
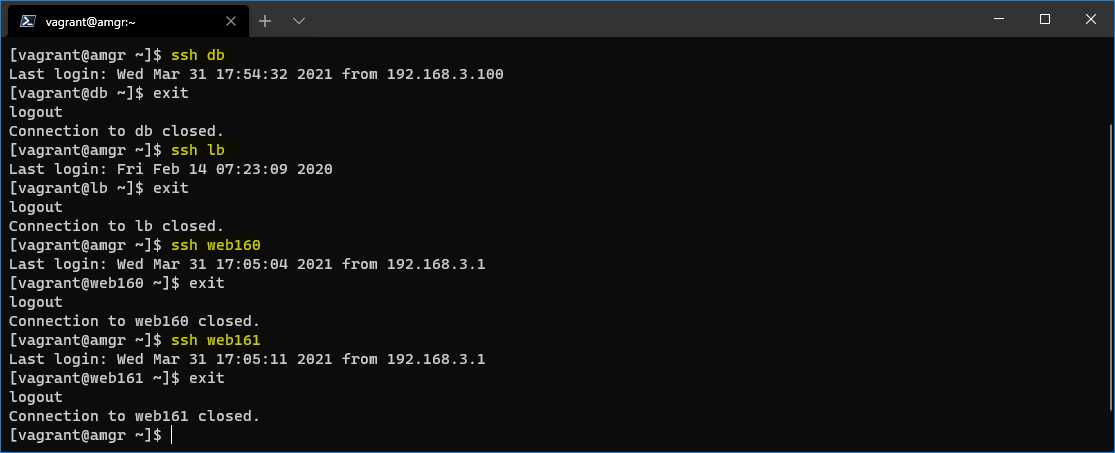
Once the ssh key is generated, we need to copy it to all the hosts. We can accomplish this by running the following command. You will be asked to provide a password for each server. Hopefully this is just a one-time operation.
Code Listing 38: Copy ssh key to remote hosts
[vagrant@amgr ~]$ hosts="web160 web161 db lb" [vagrant@amgr ~]$ for host in $hosts; do > ssh-copy-id -i ~/.ssh/id_rsa.pub vagrant@$host -o StrictHostKeyChecking=no -f > done |
You can see that now we can log into the servers without supplying any username and password, as shown in the following figure.
- 1800+ high-performance UI components.
- Includes popular controls such as Grid, Chart, Scheduler, and more.
- 24x5 unlimited support by developers.