
Ansible Succinctly®

CHAPTER 16
Ansible Galaxy
In the previous chapter, we saw that we can create roles from scratch. We introduced the concept of code sharing and code reuse. We also used the ansible-galaxy command line to initiate the role skeleton.
Ansible has taken this concept further and created Ansible Galaxy, Ansible’s official hub for sharing Ansible content. You can visit the web application here.
Ansible Galaxy is essentially a large public repository of Ansible roles. We can programmatically interact with the repository by using the already mentioned command line tool ansible-galaxy.
We can use the ansible-galaxy tool to list, install, or remove existing roles prepackaged and maintained by someone else.
By running the following command, we can see all the operations supported by the tool.
Code Listing 107: Ansible-Galaxy role help command
$ ansible-galaxy role --help |
Table 14 describes some useful commands.
Table 14: Ansible Galaxy useful commands
ansible-galaxy search <role-name> | Searches for a role on the Ansible Galaxy platform with a given role name. |
ansible-galaxy install <role-name> example: ansible-galaxy install geerlingguy.apache ansible-galaxy install -r requirements.yml | Installs the package from the repository. By specifying the roles_path in the ansible.cfg file or using the --roles-path attribute on the command directly, we can tightly control where the role gets installed. Multiple roles can be installed at once by specifying the list in a file (requirements.yml) and using the -r attribute in the command line to specify the file name. |
ansible-galaxy remove <role-name> | Removes (deletes) the role from the local folder. |
ansible-galaxy info <role-name> | Retrieves more information about the package itself. |
Using roles
In this chapter, we are going to see how we can use the prebuilt roles and integrate them in our solution, where we will:
- Install and configure the httpd server on our two web servers.
- Deploy a simple webpage to the webserver(s).
- Configure the load balancer to route the calls to the web server.
This is a typical setup for a web infrastructure where we expect a higher load and ability to scale out by adding additional web servers over time. This is why we placed a load balancer that can efficiently distribute incoming network traffic across a group of backend servers (in our case, web servers).

Figure 55: Load-balanced websites
Web server setup
Let’s start by creating the inventory file where we will specify the web servers and the load balancer server.
Code Listing 108: inventory file
[loadbalancer] lb ansible_host=192.168.3.200 [webservers] web160 ansible_host=192.168.3.160 web161 ansible_host=192.168.3.161 |
The ansible.cfg is very basic, and it contains only a reference to the inventory file, something we have seen previously in roles_path, which is the directory from where the roles will be installed or loaded.
Code Listing 109: Ansible.cfg file
[defaults] inventory = ./inventory roles_path = ./roles |
So far, we have enough information to start working on the playbook for the web server. We can now try to work with the role downloaded; in our case, this will be the package called geerlingguy.apache. It’s a very good practice to navigate to the role project website where we can see some examples of usage and customization. Links to the pages are typically shown in the Ansible Galaxy website, if needed. The number of downloads and the score are a sign of the quality of the package itself.
Alternatively, we could also consult the README.md file bundled with the installation, which contains similar information.

Figure 56: Extract from the galaxy.ansible.com on the role
This package is responsible for installing the Apache Server (httpd) on various Linux distributions (RedHat, Debian, etc.), and it’s quite generic in what it can do.
Let’s start exploring it by installing the role with the following command.
Code Listing 110: Installing apache role
$ ansible-galaxy install geerlingguy.apache |
After running the command, we can see that in the ./roles folder, we have the fully downloaded role.
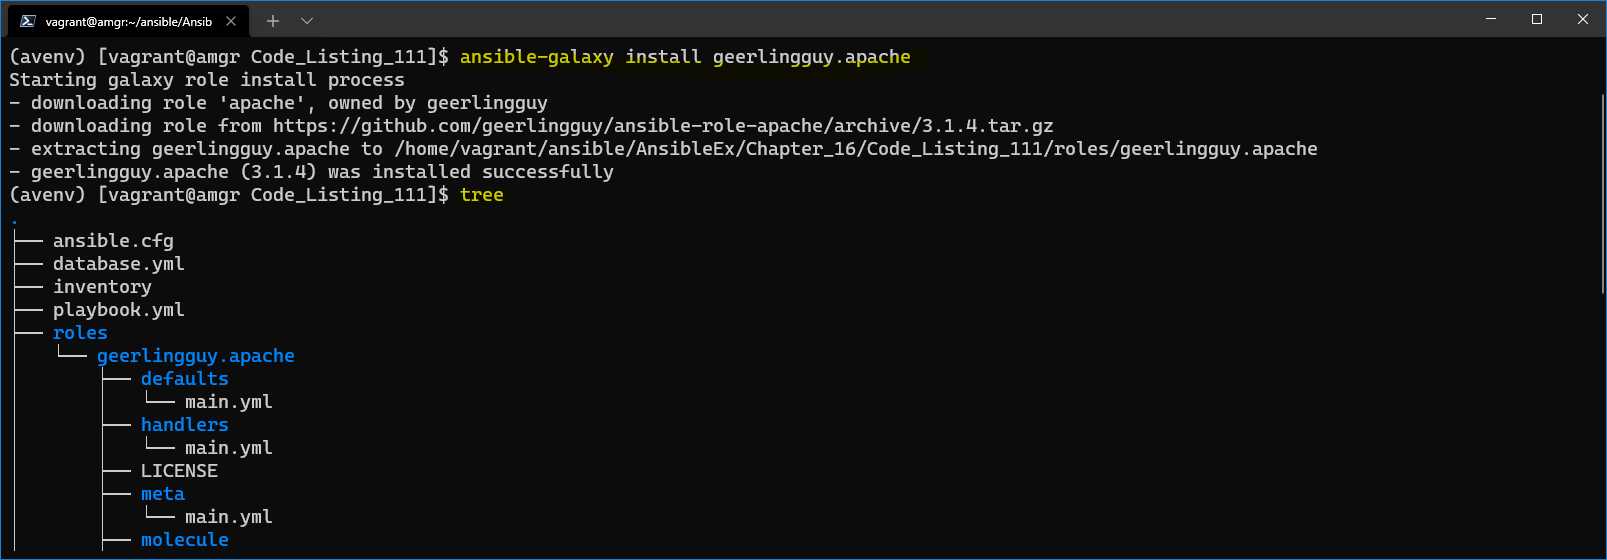
Figure 57: Role downloaded and installed in the ./roles directory
In our case, we will simply use the default options without any customizations. Now we can create a webserver.yml playbook. As we can see, it has very basic information that we have already seen previously, including hosts against which to act, elevation by using the become keyword, and the role section itself.
An additional point to mention is that we are also installing the PHP package as a dependency needed to run the website.
Code Listing 111: Webserver.yml playbook
--- - hosts: webservers become: true
tasks: - name: Enable running PHP code on Apache yum: name: "{{ item }}" update_cache: yes state: latest loop: - php notify: restart apache roles: - role: geerlingguy.apache |
After running the playbook, we can check if the outcome of the installation is correct.
The full output is quite large, but we can see in Figure 58 that the task has executed correctly, and that the script includes the task called setup-RedHat.yml. We mentioned previously that this role supports various Linux distributions.
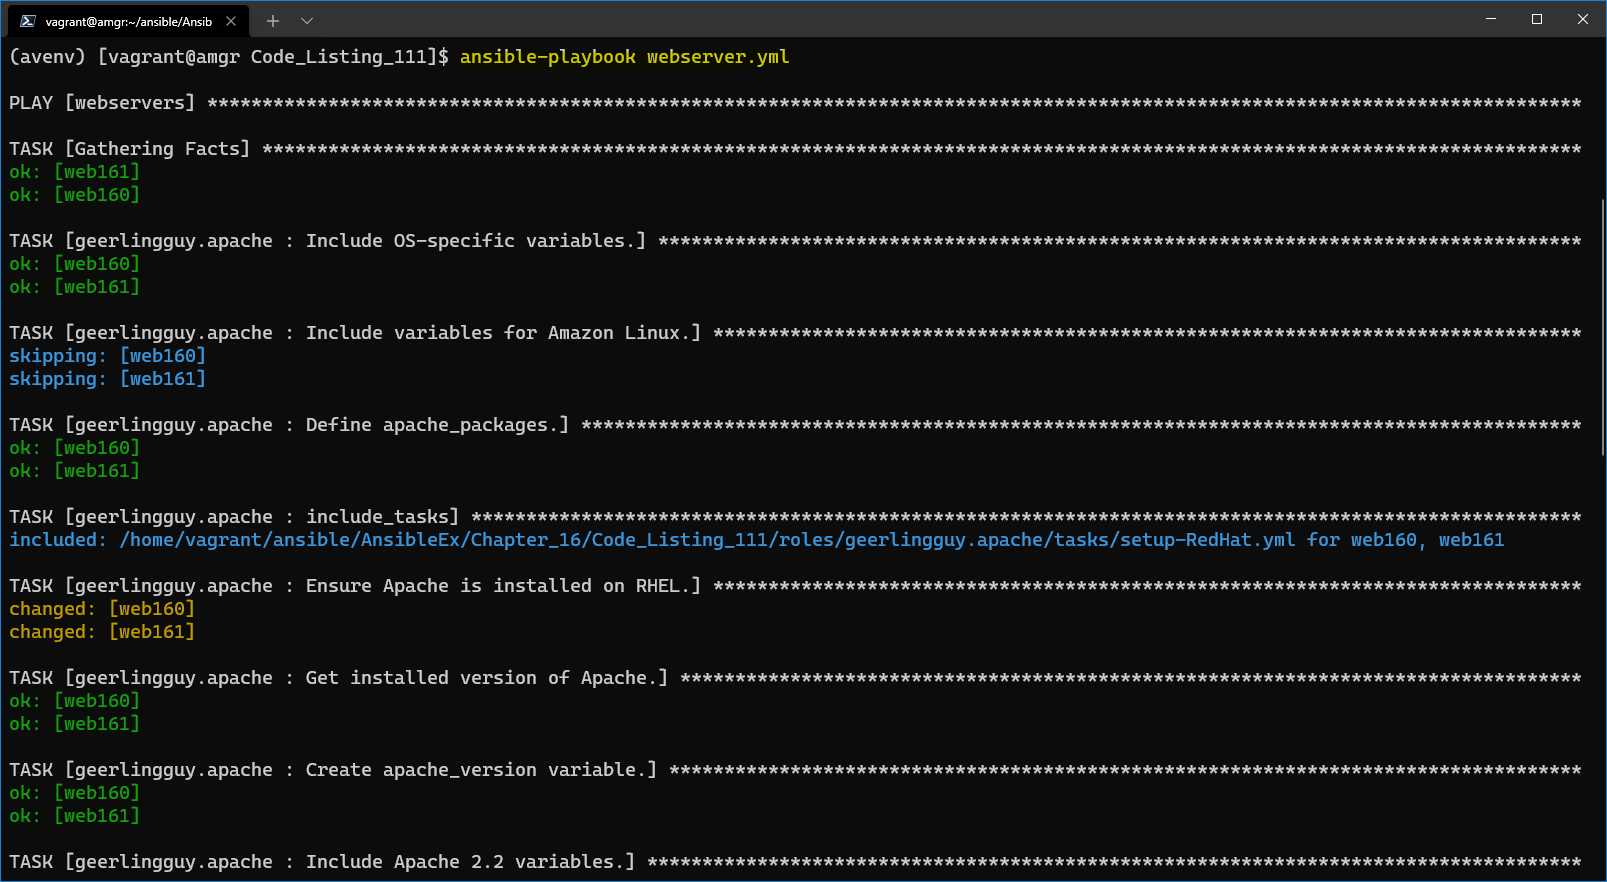
Figure 58: Result of running the webserver.yml playbook
Now we can check if the web server is running properly on both the web servers by calling the http://192.168.3.160 on the desktop machine, and we will notice that result is not being returned.
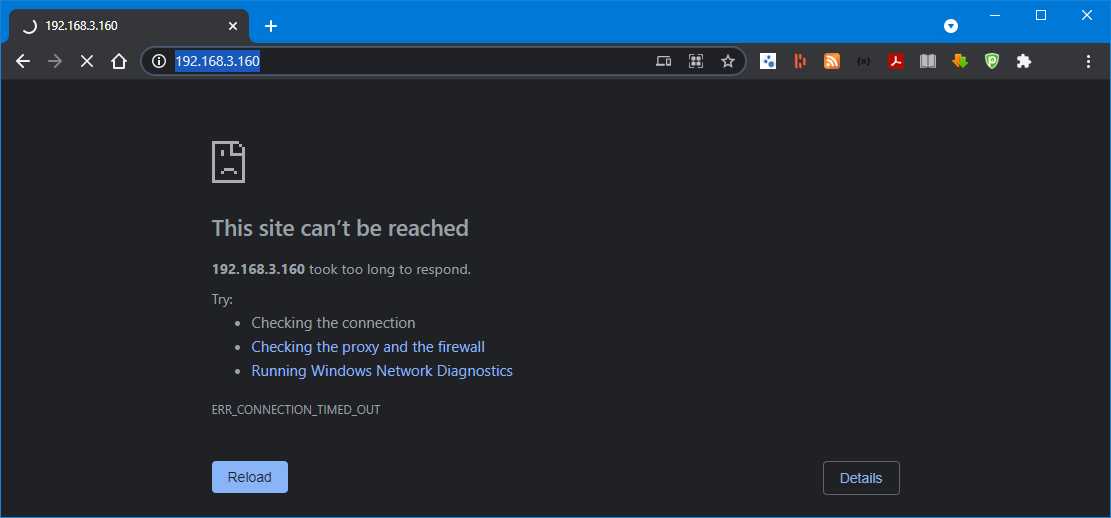
Figure 59: Website not displaying
This is mainly because on the web server, the default firewall ports are not open. So, let’s change our playbook by adding two more tasks. Firewall has to be open for both http and https protocols on the two web servers. The two additional tasks to be added to playbook are as follows.
Code Listing 112: Open Firewall to ports 80/443
- name: Open firewall firewalld: service: "{{ item }}" state: enabled immediate: yes permanent: yes loop: - http - https - name: Restart Firewall systemd: name: firewalld state: restarted |
After rerunning the playbook, we can see the two tasks being executed and completing.
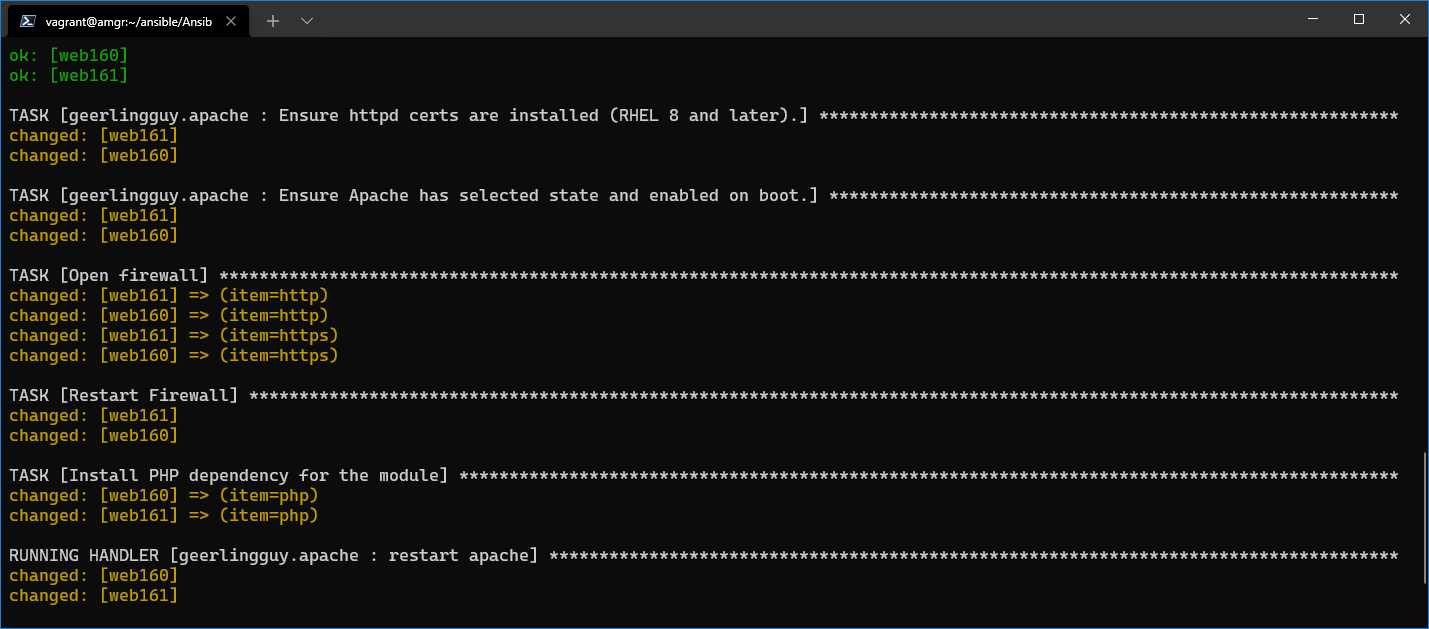
Figure 60: Firewall tasks executed successfully
Now we can also retry checking the browser to see if the page will be displayed properly. Refreshing the page now, we get the result: the default page that Apache Server displays upon installation. We will get the same result for both web servers.
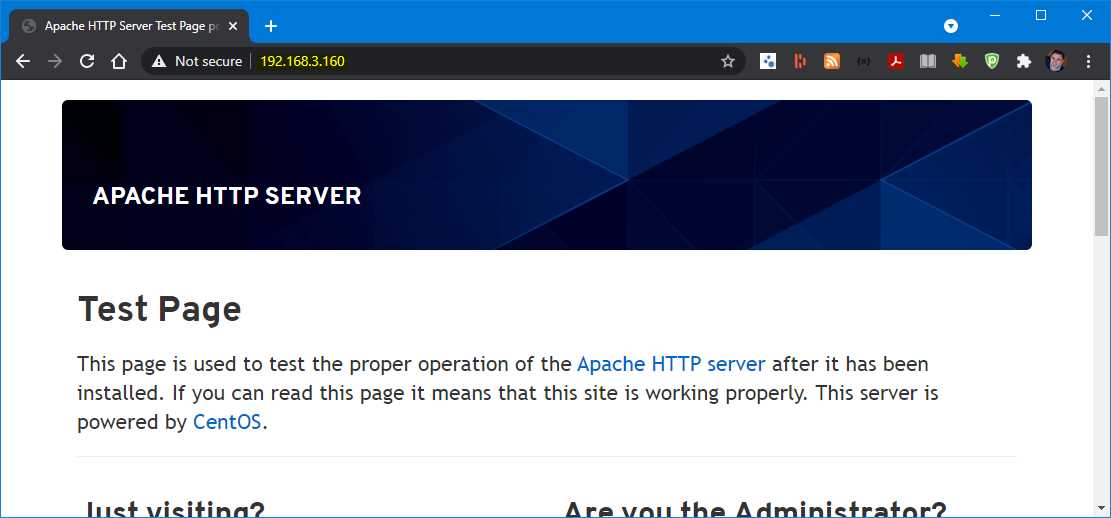
Figure 61: Browsing the webpage on the web servers
Deploying the website
The next step is to deploy our own website. We are going to do this by first downloading the files from GitHub locally to the Ansible Manager Server, and then uploading them to the web servers. This is one of the ways to perform the deployment. The alternative would be to execute the git clone directly on the webservers. The way to go would depend on the limitations applied to the network, for instance, as the servers will not always have internet connection.
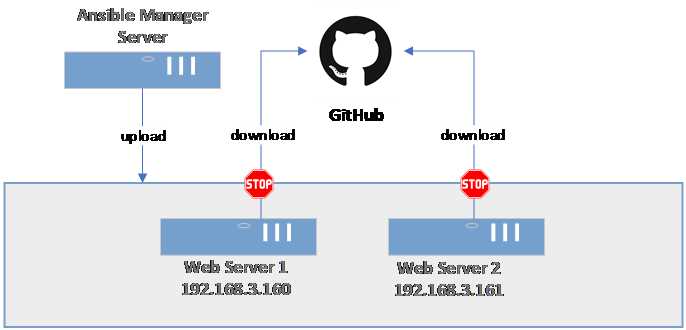
Figure 62: Site deployment
Now we will add two new tasks to the webservers.yml file to be able to perform the checkout locally, and after the checkout, to deploy the files to the remote server.
Code Listing 113: Code needed to deploy the application (code previously shown is omitted)
… vars: local_git_directory: site … - name: Check out a git repository on the control node local_action: module: ansible.builtin.git repo: https://github.com/zoranmax/ansible-succinctly-book.git dest: "{{ local_git_directory }}" force: yes run_once: true tags: [never, deploy]
- name: Copy web site copy: src: "{{ local_git_directory }}/website/" dest: /var/www/html tags: [never, deploy] … |
Checkout
To check out the repository from GitHub, we will use the local_action module in combination with ansible.builtin.git, which we haven’t seen before.
The local_action will execute the code on the control node (amgr) rather than on the managed machine (in our case, web servers). We also had to specify that this task should be run only once: run_once: true.
The Git module used supports several attributes; here we are only using what is really strictly necessary:
- repo: Specifies the URL to the Git repository.
- dest: Defines the destination directory where the code will be checked out.
- force: If set to true, will override the folder with new data.
In this example, the repository is a real repository hosted on GitHub, and it only contains two files: index.php and the syncfusion logo. The idea is simply to show the concept rather than deploying large websites.
The task will check out the files in the folder defined in the local_git_directory variable, defined at the top of the playbook, which in our case is a local folder ./site.
Copy the website
Copying files involves the module called copy. This module can copy single files or directories:
- src: File or folder to be copied over.
- dest: Destination on the managed server.
In our case, we will copy the content of the checkout GitHub code we previously placed in the ./site folder to the default Apache Server folder where the website is hosted: /var/www/html.
Running the code
Both deployment tasks have been marked with the tags [never, deploy], so they would never be invoked unless we explicitly specify the tag to run, which we will be doing this time.
$ansible-playbook webserver.yml -t deploy
Once executed, the result will look like the following.
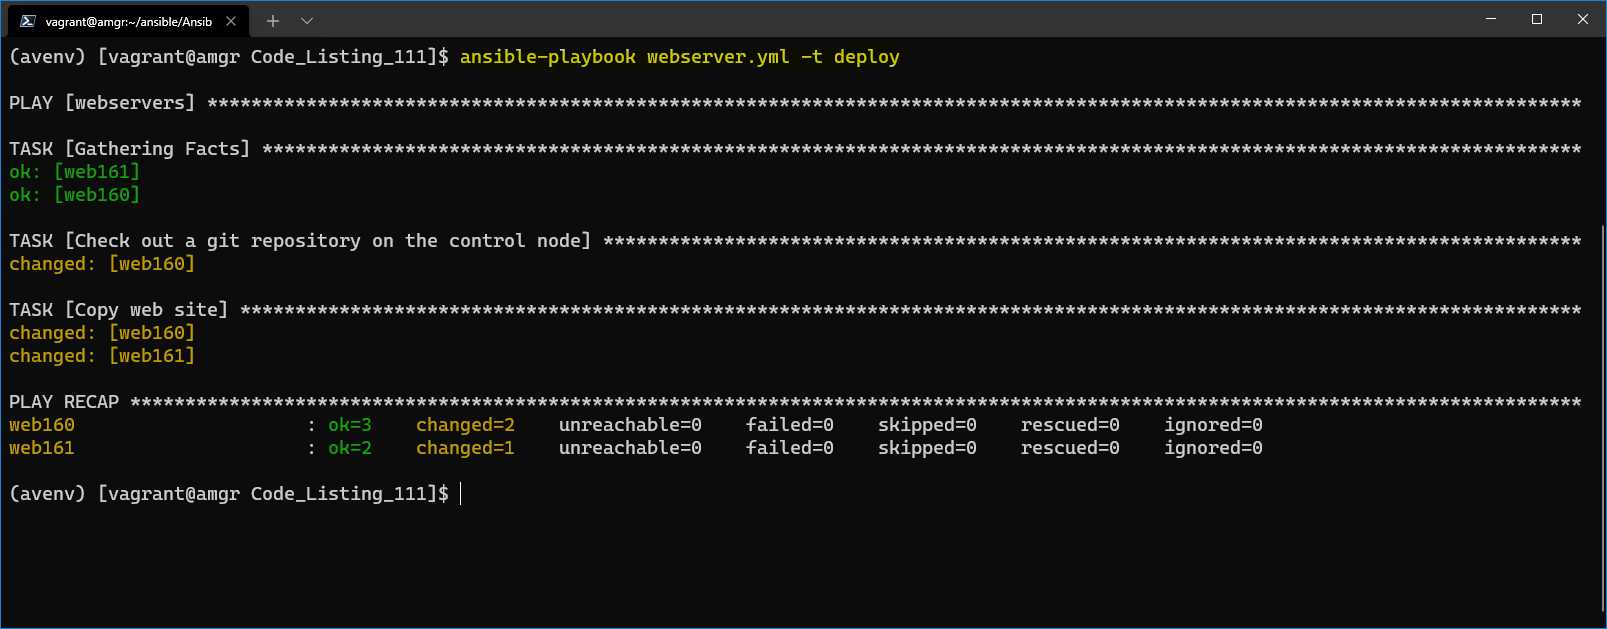
Figure 63: Result—deploying website
Now that we have deployed the simple website to both servers, we can navigate through the browser and check if the deployment was successful.
We can now open the URL directly from the Windows desktop and navigate to http://192.168.3.160 or http://192.168.3.161, which are the two IP addresses of the web servers we originally set up.
The page should be displayed as shown in the following image.
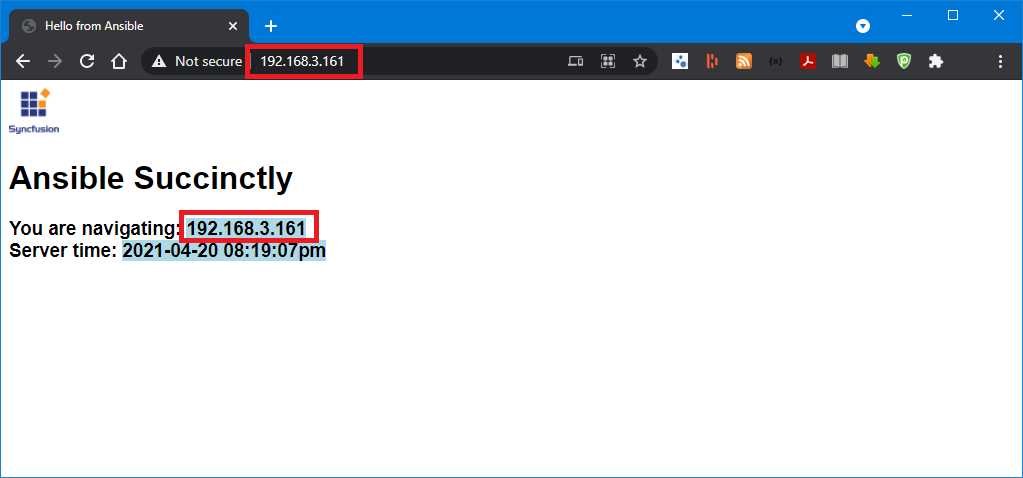
Figure 64: Browser showing the deployed page
Load balancer example
So far, we have seen how to configure a simple website by using Ansible and Apache Server, and how to deploy the application.
The next step is to configure the load balancer (or reverse-proxy).
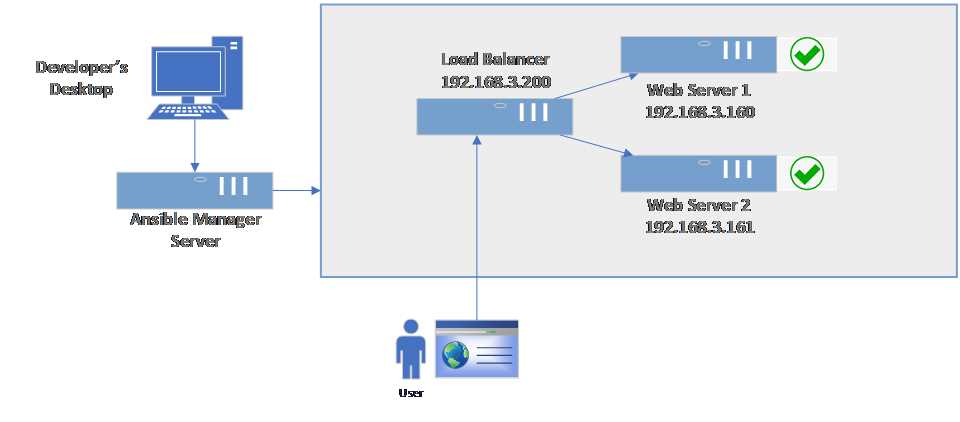
Figure 65: Load balancer (reverse proxy) setup
There are many great software load balancers that can be used for this purpose, such as Nginx, HAProxy, and Citrix ADC.
In our example, we are going to use HAProxy, which is an open-source product, so we can also benefit from the fact that it is free.
We can reuse the same directory where we defined the playbook for the web server, and download the role geerlingguy.haproxy.
We are already familiar with the command, so we can simply run it.
Code Listing 114: Installing geerlingguy.haproxy
$ansible-galaxy install geerlingguy.haproxy |
The next step is to create a new playbook called load_balancer.yml with the following content.
Code Listing 115: Load_balancer.yml playbook
--- - hosts: loadbalancer become: true vars: haproxy_backend_balance_method: 'roundrobin' haproxy_backend_servers: - name: webserver1 address: 192.168.3.160:80 - name: webserver2 address: 192.168.3.161:80 tasks: - name: Open firewall firewalld: service: "{{ item }}" state: enabled immediate: yes permanent: yes loop: - http - https - name: Restart Firewall systemd: name: firewalld state: restarted roles: - role: geerlingguy.haproxy |
By looking at the documentation of the role on GitHub, we can see that it has many configuration options. By checking the defaults/main.yml, we can see all available options. We are going to configure the basic ones to let us perform the work:
- haproxy_backend_balance_method: Defines the algorithm the HAProxy software is going to use, such as roundrobin, leastconn, or source. We will use roundrobin in this example. roundrobin will just pick the next server and start over at the top of the list.
- haproxy_backend_servers: Sets the list of servers that would be included in the load-balanced list. This means the servers in this list will be handled by the load balancer.
By running the playbook load_balancer.yml, we get the following result.
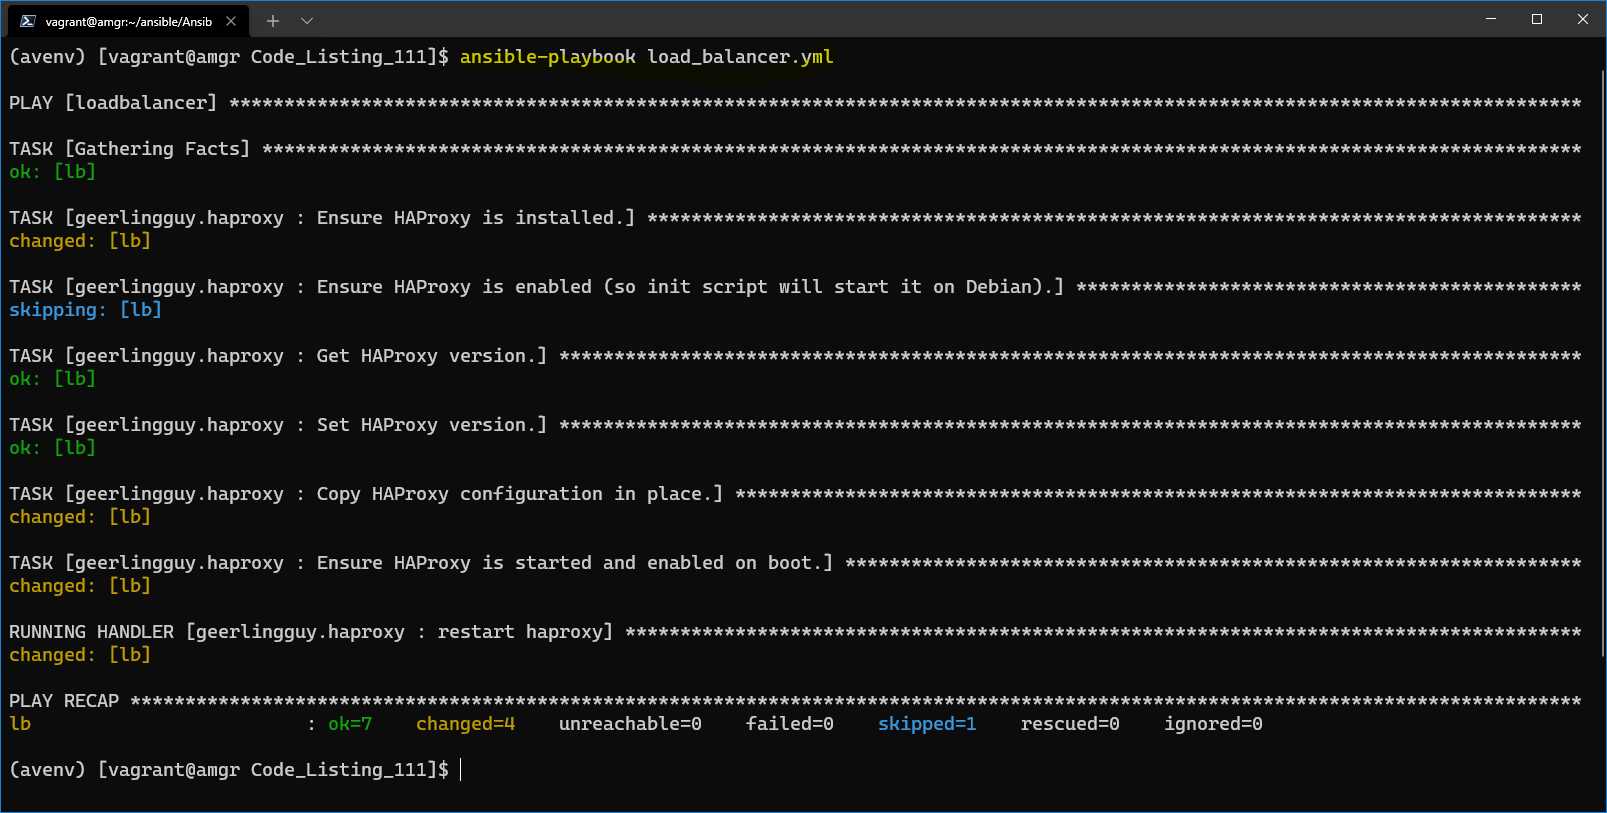
Figure 66: Installation of the HAProxy on the load balancer server
Everything seems to be working okay. To test that the load balancer (lb 192.168.3.200) will return any data, we can again browse the content by using the browser by navigating to http://192.168.3.200. Now we can clearly see that the HAProxy is redirecting the calls to one of the servers we previously configured.
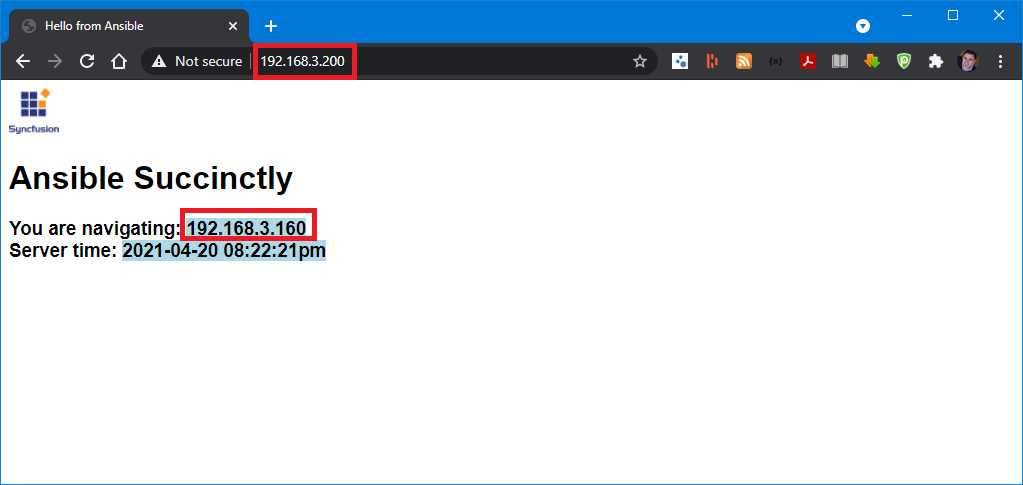
Figure 67: HAProxy using the content from web160 (192.168.3.160)
To demonstrate that the reverse-proxy will redirect the URL in a round-robin way, we can also use the curl command, and issue 10 calls in a sequence by running the following bash command on the amgr server.
Code Listing 116: Call the reverse-proxy URL 10 times in a sequence
$for ((i=1;i<=10;i++)); do curl -s http://192.168.3.200 | grep 192.168.3; done |
In the result, we will clearly see that the servers are going to be selected alternatively.
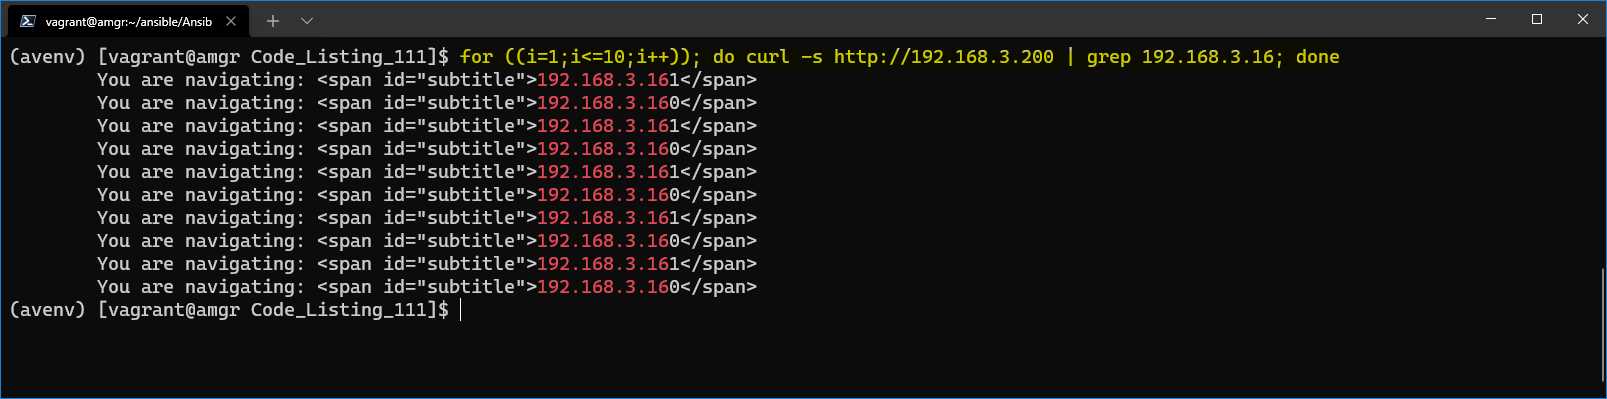
Figure 68: Servers returning the result
- 1800+ high-performance UI components.
- Includes popular controls such as Grid, Chart, Scheduler, and more.
- 24x5 unlimited support by developers.