
AngularDart Succinctly®

CHAPTER 1
Setup
Before starting
This book is going to follow a very practical and hands-on approach to learning AngularDart by building the DocExpire web app into a fully functional application.
If you have not done any previous Angular development, I highly recommended that you first get acquainted with AngularDart’s architecture and the basic concepts and terminology that are going to be covered. You can download the project’s full source code here.
Setup prerequisites
To set up a new AngularDart project, we first need to install the Dart SDK. My computer uses the Windows operating system, so the steps that follow are specific to setting up an AngularDart project on Windows. However, you should be able to easily install the Dart SDK on any other operating system by following the official Dart SDK documentation.
To install the Dart SDK on Windows, you can download the SDK as a zip file, or you can use the Chocolatey package manager (my preferred and recommended option) and execute the following command, preferably as an administrator. You’ll need to have Chocolatey installed.
Code Listing 1-a: Command to Install the Dart SDK Using Chocolatey
choco install dart-sdk |
If you have the Dart SDK already installed like I do, you can upgrade to the latest version by running the following command, preferably as an administrator.
Code Listing 1-b: Command to Upgrade the Dart SDK Using Chocolatey
choco upgrade dart-sdk |
Before you execute this command, make sure you have no processes running that use the Dart SDK. When you execute this command, you will see an output similar to the following one.
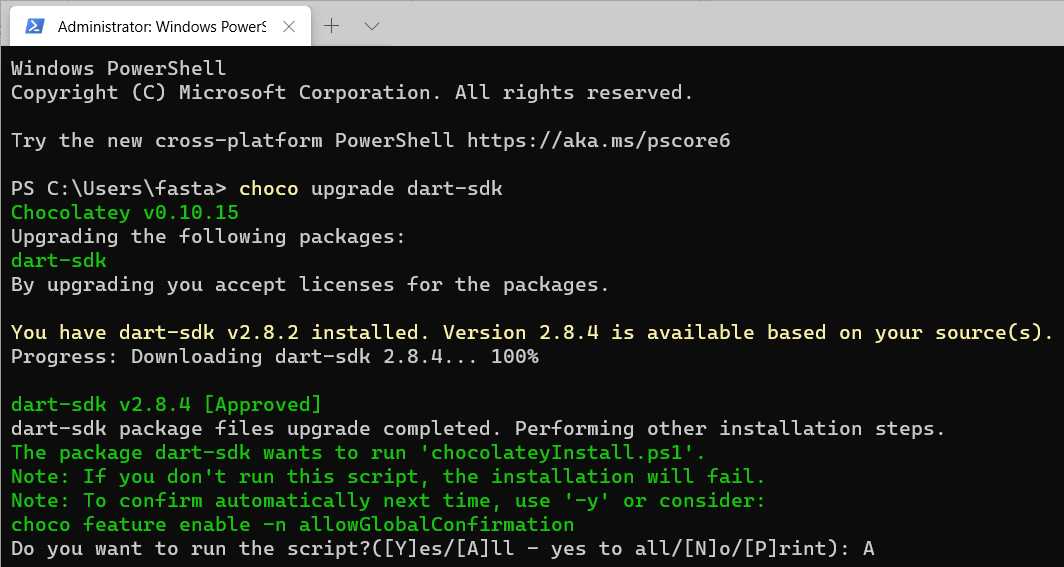
Figure 1-a: Upgrading the Dart SDK
When prompted to run the script, type Y for yes or A for all. Once the Dart SDK has been upgraded or installed, the next thing to do is to set up your editor of choice. In my case, I’ll be using Visual Studio Code (VS Code).
To set up VS Code for working with Dart, it is necessary to install the Dart extension, which provides tools for editing, running, and working with AngularDart web apps.

Figure 1-b: The Dart VS Code Extension
With the Dart extension installed, the next prerequisite is to install webdev, which will be used to compile AngularDart code into JavaScript and serve our web app.
To install webdev globally on your machine, you’ll need to run the following Dart utility command, preferably as an administrator.
Code Listing 1-c: Command to Install webdev
pub global activate webdev |
With webdev installed, we are ready to set up our AngularDart project.
AngularDart project setup
We are now ready to create our AngularDart project, which we will use as a basis to create the DocExpire web application we will be building throughout this book.
First, create a folder on your machine where the project will reside. Then, with VS Code open, click the View menu, and then the Command Palette option.

Figure 1-c: Command Palette Option - VS Code
You’ll see the following options. Type in the word Dart.
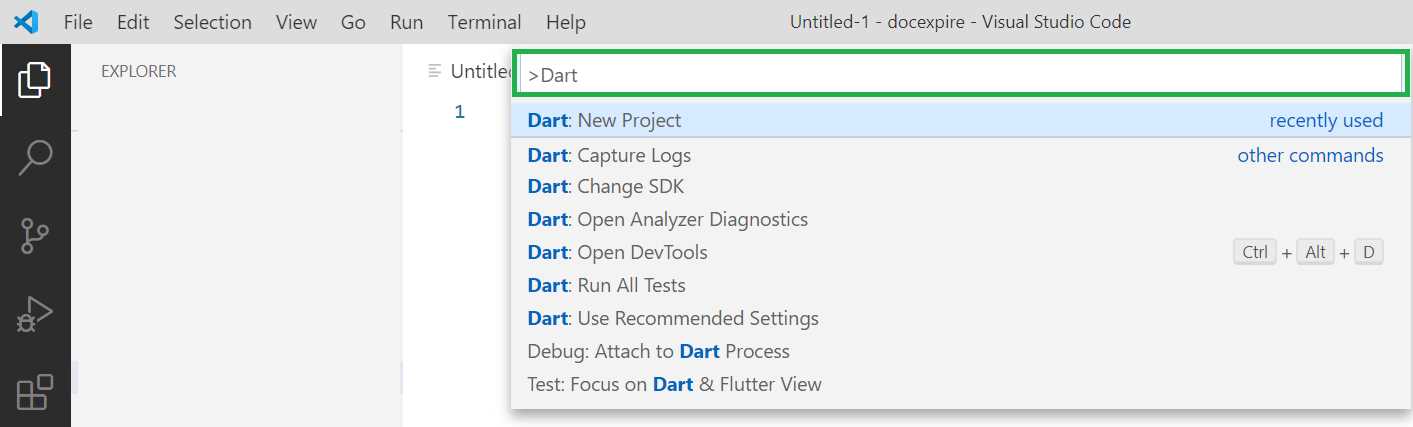
Figure 1-d: Command Palette Option (using Dart) - VS Code
Click the Dart: New Project option, which will then present the following project templates.
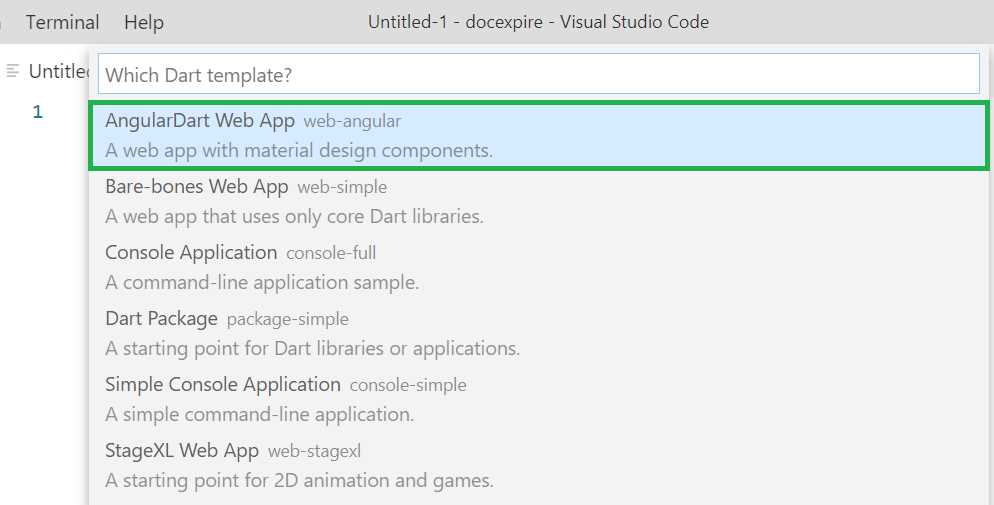
Figure 1-e: Command Palette Option (Dart Templates) - VS Code
Select the AngularDart Web App project template. You’ll be asked to enter a name for your project. Dart project names should all be in lowercase. Let’s name it docexpire.

Figure 1-f: Command Palette Option (Dart Project Name) - VS Code
Once you have entered the name of the project, select the folder that was previously created, where the project will reside.
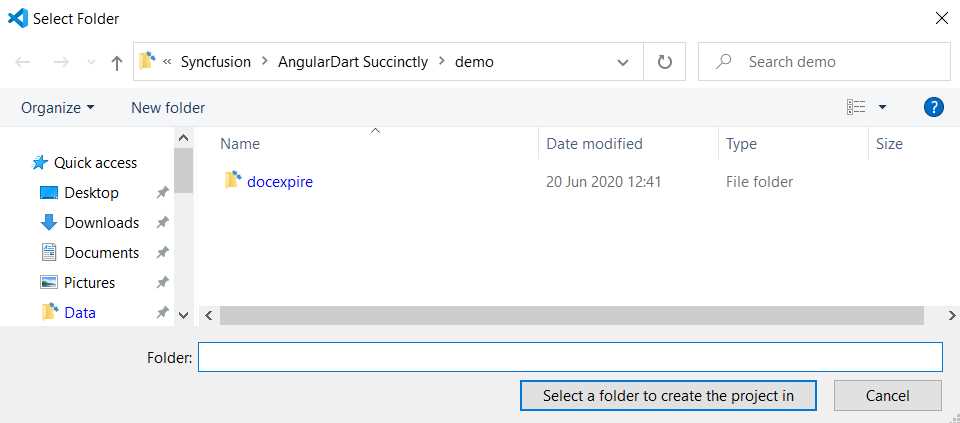
Figure 1-g: Selecting the AngularDart Project Folder - VS Code
The project will be scaffolded and created. Once the project creation steps have finished, you will see your project created within VS Code as follows.
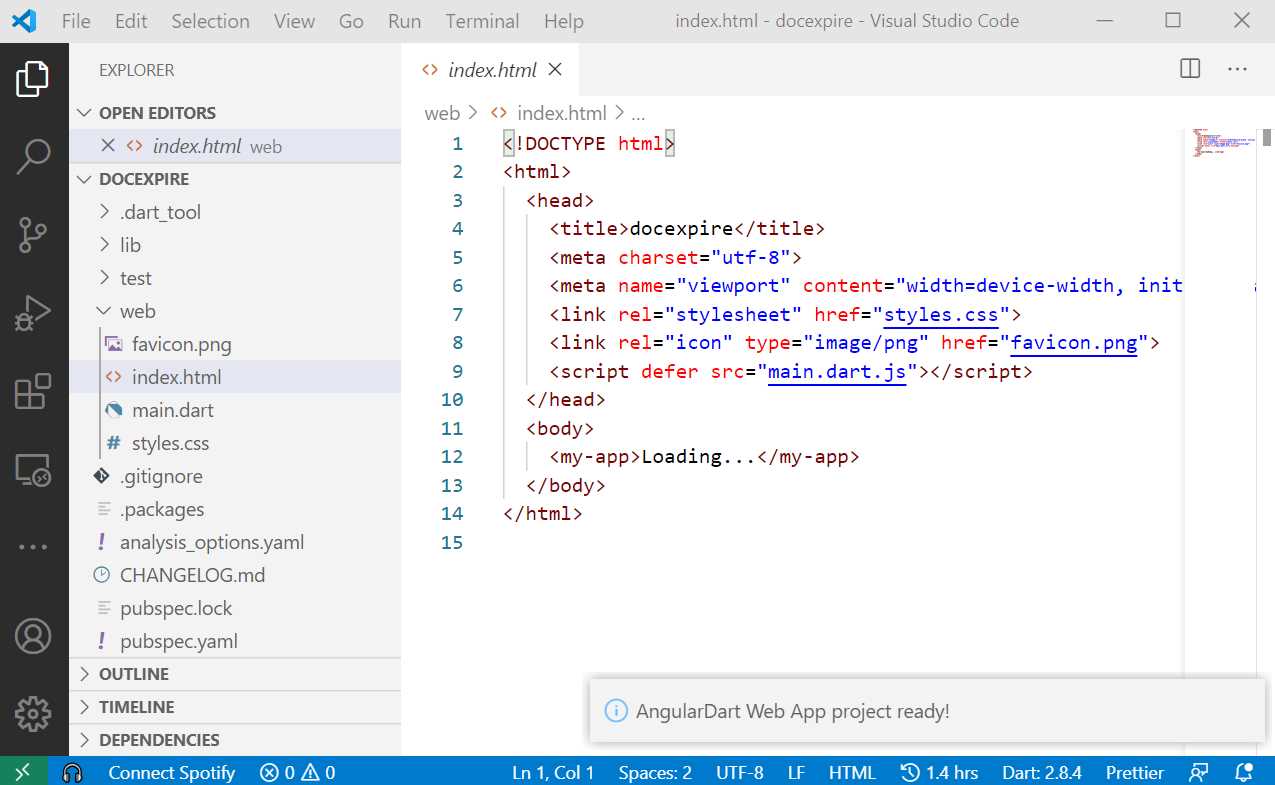
Figure 1-h: AngularDart Project Created - VS Code
Project verification
The project has been scaffolded—this means our app has been created using the default AngularDart web application template.
It’s now time to verify that the project creation was successful. To do that, we need to run the application. We can do this by using the built-in terminal within VS Code. Select the New Terminal option from the Terminal menu.
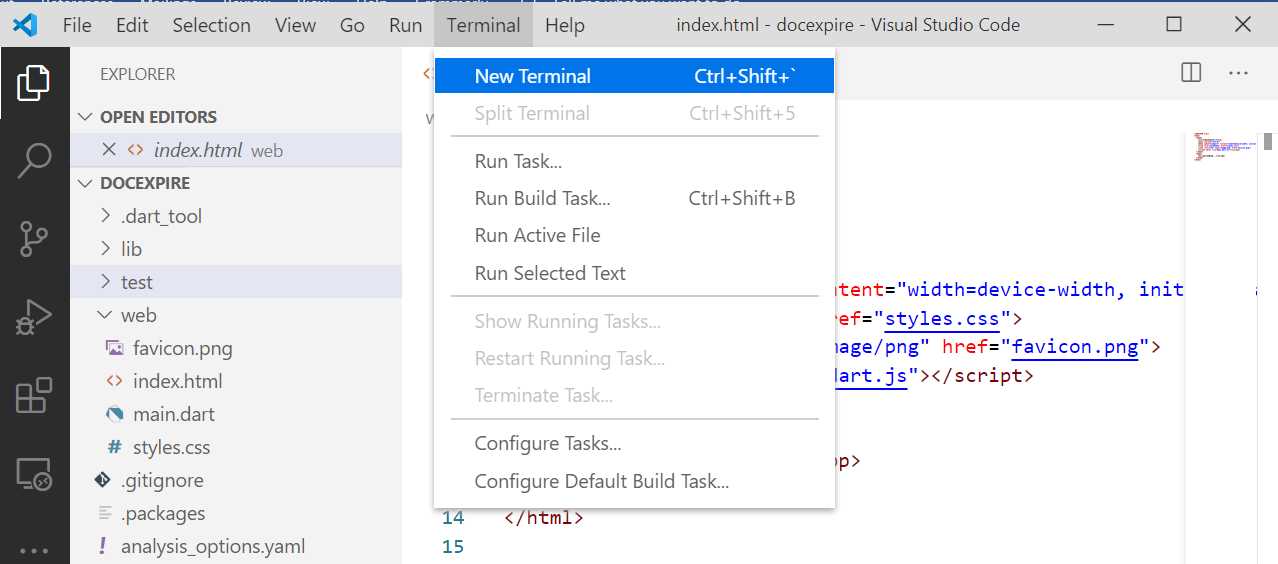
Figure 1-i: Opening the Built-In VS Code Terminal
The built-in terminal will open and become visible within VS Code, which can be seen as follows.
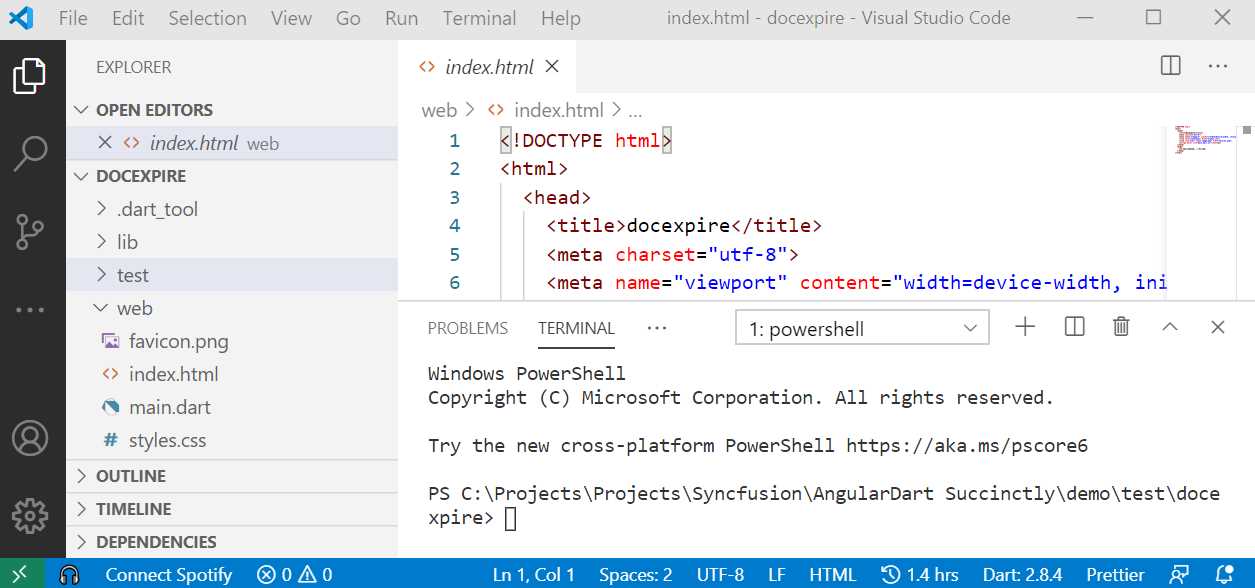
Figure 1-j: VS Code Terminal
Now we can execute the application and verify that it has been created successfully by running the following command.
Code Listing 1-d: Command to Run and Serve the Web Application
webdev serve |
After executing this command, VS Code will connect to the Dart compiler to compile and build the application. Notice that a command line pop-up window might appear, as shown in Figure 1-k. This indicates that the Dart compiler (dart.exe) is running.
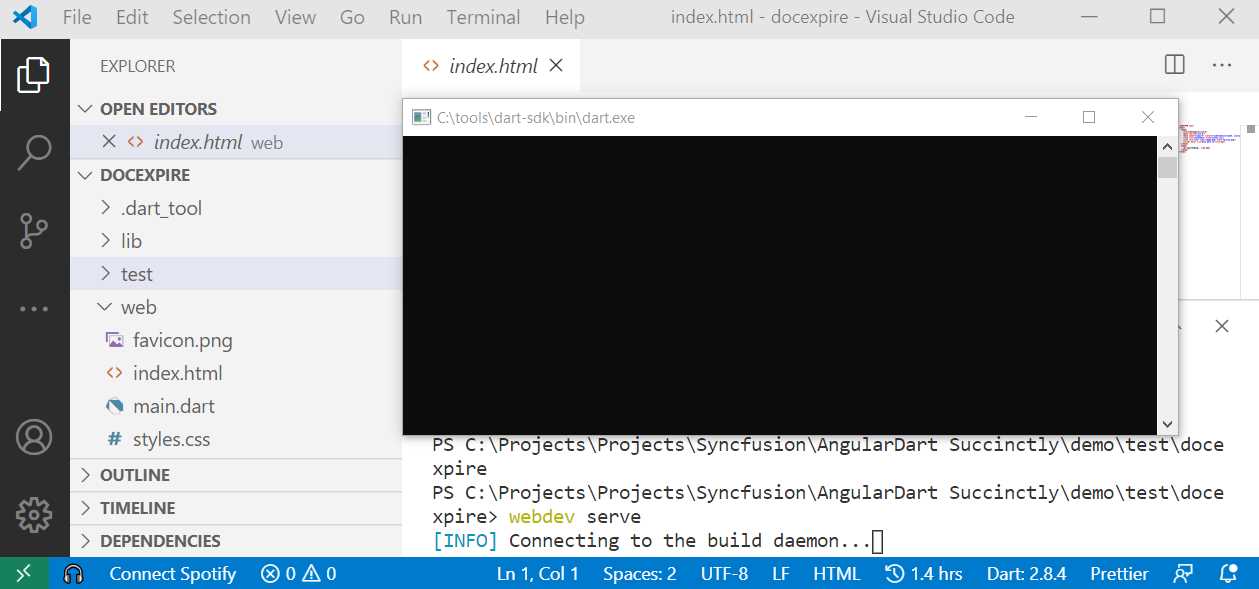
Figure 1-k: Connecting to the Dart SDK Runtime
Once the connection to the Dart SDK has been initialized, the app’s prebuilt code is compiled from Dart into JavaScript and the application is served on the URL, as highlighted in the following figure.
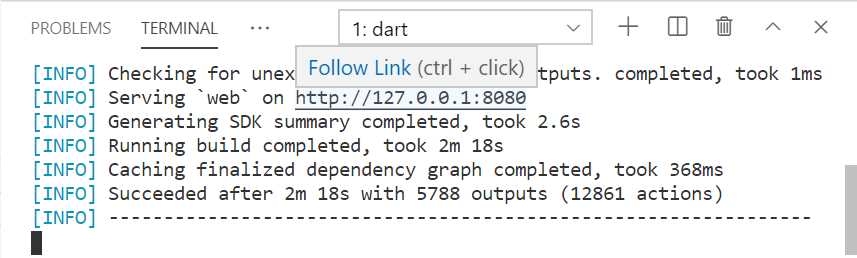
Figure 1-l: The Web App Running (VS Code Terminal)
To open the application, we can press the Ctrl key and click the URL link as indicated within the terminal. A browser window will open, and we’ll be able to see the application running as follows.
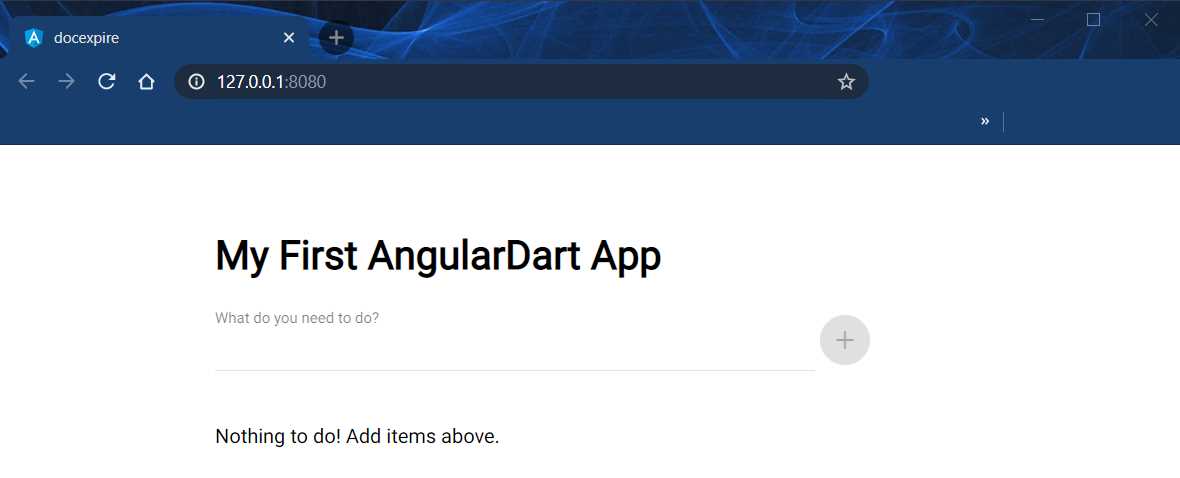
Figure 1-m: The Web App Running (Web Browser)
Awesome! We have now checked that the project has been successfully created and scaffolded.
Summary
Throughout this chapter, we have explored what AngularDart is and how to get started. We were able to do this by installing the Dart SDK and Dart extension for VS Code.
By using the VS Code Dart extension, we were able to set up an AngularDart project using a predefined template. We were able to verify it by running it through the built-in VS Code command line.
In the next chapter, we will slightly modify the structure of the project created by adding some additional subfolders and files, and also make some changes to the pubspec.yaml and index.html files, so our web app can start taking shape.
- 80+ high-performance Angular components, including DataGrid, Diagram, and Scheduler.
- Support for AOT compilation and tree shaking.
- Lightweight and user-friendly.