
AngularDart Succinctly®

CHAPTER 7
Service Provider
Overview
We’ve reached the most exciting part of our journey—which is to bring our application to life. That’s what the service provider is all about. The service provider is a layer of AngularDart logic that is going to use the model and allow the de-base component to interact with Firebase.
Service logic
Within VS Code, go to the services folder and open the docs_service.dart file we previously created. With the file open, copy and paste the code from the listing that follows.
Code Listing 7-a: docs_service.dart (Full Code)
import 'dart:async'; import 'package:angular/angular.dart'; import '../model/docs.dart'; // Firebase import 'package:firebase/firebase.dart'; @Injectable() class DocsService { DocsService() { // Firebase initializeApp( apiKey: '<< Your API key goes here >>', authDomain: 'docs-manager-2633e.firebaseapp.com', databaseURL: 'https://docs-manager-2633e.firebaseio.com', projectId: 'docs-manager-2633e', storageBucket: 'docs-manager-2633e.appspot.com'); // Firebase _db = database(); _ref = _db.ref('docs').ref; } // Firebase Database _db; DatabaseReference _ref; // Firebase Future<List<Doc>> getDocs() async { List<Doc> docs = []; final QueryEvent queryEvent = await _ref.once('value'); final DataSnapshot snapshot = queryEvent.snapshot; final dataset = snapshot.val(); if (dataset != null) { dataset.forEach((key, val) { var rec = val as Map<String, dynamic>; docs.add(Doc.fromMap(rec)); }); } return docs; } // Firebase Future addDoc (Doc dc) async { var r = await _ref.push(dc.asMap()); return r.key; } // Firebase Future updateDoc (Doc dc) async { return await _ref.child(dc.ID).set(dc.asMap()); } Future removeDoc (Doc dc) async { return await _ref.child(dc.ID).remove(); } } |
The code for the service provider is very simple, but there are some details we need to be aware of.
Initialization
Remember those Firebase config settings that we previously copied? We need those now. So, before we do anything, let’s make sure we set the Firebase config settings correctly. Let’s have a look.
initializeApp(
apiKey: '<< Your API key goes here >>',
authDomain: 'docs-manager-2633e.firebaseapp.com',
databaseURL: 'https://docs-manager-2633e.firebaseio.com',
projectId: 'docs-manager-2633e',
storageBucket: 'docs-manager-2633e.appspot.com');
From the config details that you copied, paste the apiKey value where it says << Your API key goes here >>. In my case, the authDomain is docs-manager-2633e.firebaseapp.com, but in your case, it might be slightly different, so make sure you use your value (and not mine).
The same applies to the databaseUrl, projectId, and storageBucket properties—make sure you use your values, and not mine.
With the correct values configured, let’s explore the rest of the code to understand what it does. Like with every other code, we start by importing the modules we need.
import 'dart:async';
import 'package:angular/angular.dart';
import '../model/docs.dart';
// Firebase
import 'package:firebase/firebase.dart';
We import the Dart asynchronous module because all Firebase operations are asynchronous, and we also import AngularDart.
We then import the app’s model and the Firebase module—which was installed at the beginning of the project when the pubspec.yaml file was defined—containing the firebase: ^7.3.0 dependency definition.
As you might recall, the Firebase dependency was installed using the pub get command—which is something we did in the first chapter.
Dependency injection
Then, we define the DocsService class and annotate it with the @Injectable attribute, which we can see as follows.
@Injectable()
class DocsService
The reason we add the @Injectable attribute to the DocsService class is that the service provider is “injected” into the DocExpireBase class (found within de_base_component.dart). This is known as dependency injection in AngularDart.
The code highlighted in bold in the following code shows how the service provider (DocsService class) gets injected into the DocExpireBase class (found within de_base_component.dart).
@Component(
selector: 'de-base',
templateUrl: 'de_base_component.html',
directives: [coreDirectives, DocForm],
providers: [ClassProvider(DocsService)]
)
class DocExpireBase implements OnInit
Constructor
Next, we have the constructor of the DocsService class, which, as you can see, invokes the initializeApp method that sets the Firebase config values.
Code Listing 7-b: docs_service.dart (DocsService Constructor)
DocsService() { // Firebase initializeApp( apiKey: '<< Your API key goes here >>', authDomain: 'docs-manager-2633e.firebaseapp.com', databaseURL: 'https://docs-manager-2633e.firebaseio.com', projectId: 'docs-manager-2633e', storageBucket: 'docs-manager-2633e.appspot.com'); // Firebase _db = database(); _ref = _db.ref('docs').ref; } |
The constructor of the DocsService class also creates the Firebase instance, which is done by calling the database method.
With the Firebase database instance created, we create and get a reference to the real-time database, which we call docs. We do this by calling _db.ref('docs').ref.
The Firebase instance and reference to the real-time database are declared as follows.
Database _db;
DatabaseReference _ref;
Retrieving documents
Next, we have the getDocs method, which is used for fetching the list of documents from the real-time database in Firebase. Let’s have a look.
Code Listing 7-c: docs_service.dart (getDocs Method)
Future<List<Doc>> getDocs() async { List<Doc> docs = []; final QueryEvent queryEvent = await _ref.once('value'); final DataSnapshot snapshot = queryEvent.snapshot; final dataset = snapshot.val(); if (dataset != null) { dataset.forEach((key, val) { var rec = val as Map<String, dynamic>; docs.add(Doc.fromMap(rec)); }); } return docs; } |
First, we declare an empty list of documents (List<Doc> docs), which is going to contain the documents retrieved from Firebase.
Then, we declare a QueryEvent instance that returns the value of the reference to the real-time database (_ref.once('value')).
As this operation is asynchronous, the await keyword is used—this is why the getDocs method is marked with the async keyword.
Then, we define a DataSnapshot instance of the real-time database, which is retrieved by invoking queryEvent.snapshot.
Now that we have the snapshot of the real-time database, we need to get its full data content. To do that, we assign to the dataset variable the value returned by invoking the val method from the DataSnapshot instance.
If the dataset retrieved is not null, then for each key-value pair (for each JSON object—each representing a document), we create a record by casting the key-value pair value (val) as a Map<String, dynamic> object.
This Map<String, dynamic> object (rec) is then converted to a Doc instance, by invoking the Doc.fromMap method.
The resultant Doc instance is then added to the list of documents (docs). After all the JSON documents retrieved have been inspected, the list of documents (docs) is returned.
As you can see, the getDocs method returns a Future, which is a promise that the list of documents will be returned, once the asynchronous operation has finalized.
Adding, updating, and removing docs
Now that we know how to retrieve documents from Firebase and have the Firebase instance and reference to the real-time database ready, adding, updating, and removing documents is quite simple. Let’s have a look.
Code Listing 7-d: docs_service.dart (Add, Update, and Remove Method)
Future addDoc (Doc dc) async { var r = await _ref.push(dc.asMap()); return r.key; }
Future updateDoc (Doc dc) async { return await _ref.child(dc.ID).set(dc.asMap()); } Future removeDoc (Doc dc) async { return await _ref.child(dc.ID).remove(); } |
Just like the getDocs method, the addDoc, updateDoc, and removeDoc methods also return a Future (promise) and are marked with the async keyword—as their corresponding Firebase operations are all asynchronous.
The addDoc method can insert a new document into the real-time database by invoking the _ref.push method. The Doc instance (dc object) is converted to JSON by using the asMap method.
Once the document has been added, the response’s key (which represents the document’s Firebase ID) is returned.
Updating a document is also very straightforward—this is what the updateDoc method does. This occurs when calling _ref.child, passing the ID of the document to update (dc.ID), and invoking the set method.
This is done by passing the updated Doc instance (dc object) as JSON using the asMap method.
Removing a document is almost identical to updating one. The removal of the document is done by the removeDoc method. The only difference with the update process is that the remove method is used, instead of set.
Alright, that’s all there is to it—we’ve finalized the app’s service provider and we are now ready to test our application and see how it works.
Running the App
Before executing the application, there’s one final check we need to do. Within VS Code, open the app_component.html file and make sure it contains the following markup.
Code Listing 7-e: app_component.html
<de-base></de-base> |
Executing the application locally on our machine is quite simple. All we need to do is open the built-in terminal within VS Code and run the webdev serve command—as we can see below.

Figure 7-a: Executing the App (webdev serve)
This command will compile and build the application. Once the app has been built and is ready, we will see the following output.

Figure 7-b: The App Running
Notice how on the built-in terminal output, the URL where the app is running locally is mentioned. So, open your browser and enter that URL.
You can also press Ctrl (on Windows) and click on the link—this will also open that URL on the browser. In my case, I already have data within the Firebase real-time database, so when I open the browser, I see the following.
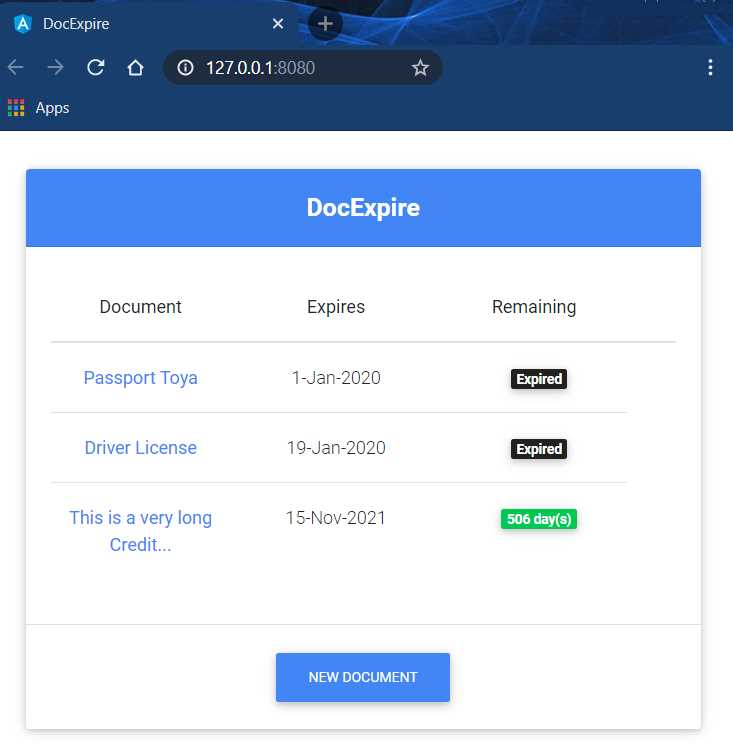
Figure 7-c: The App in the Browser (with Documents)
In your case, if you haven’t added any data manually to the Firebase real-time database, you will see that there are no documents, so you can go ahead and add a new one.
So, in that case, you should see the following screen.
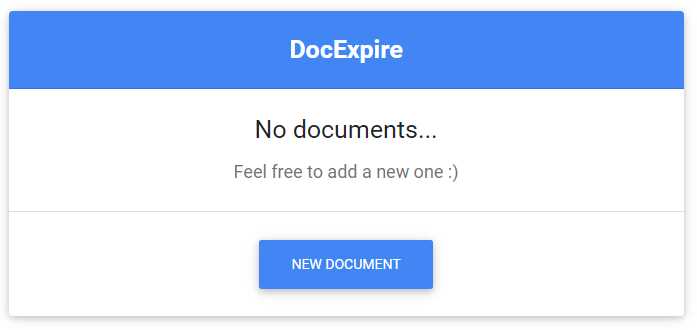
Figure 7-d: The App in the Browser (with No Documents)
Go ahead and add some documents. Once you have added some docs, go to the Firebase console and check out how the data looks within the real-time database. The following is an example of my data.
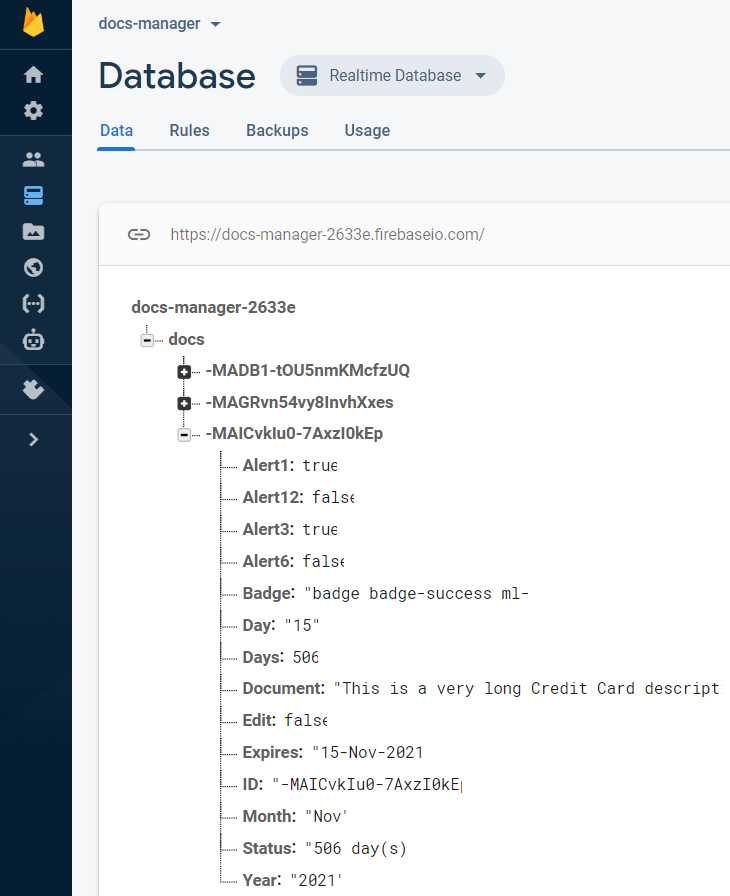
Figure 7-e: Realtime Database Explorer (Firebase)
As you can see from the preceding figure, there are three documents stored in the real-time database within Firebase, and the one expanded corresponds to the document that expires in 506 days (the last one on the app’s document list).
Awesome—we now have a fully working AngularDart app. Well done!
Final thoughts
We’ve covered quite a lot of ground in this book and created a fully functional application using AngularDart. It was quite a journey. Nevertheless, there were a couple of things we didn’t cover, which you can take on board and continue your journey by exploring this technology even further.
One point to look at would be deploying your application to Firebase Hosting, using the firebase-tools commands that were previously installed. The foundations are there, so this is relatively easy and straightforward to do.
Another potential challenge to take on is implementing some server-side code in Firebase that can query the real-time database and send emails or push notifications based on the alerts set for each document by checking its corresponding expiry date. This could be a cool feature to add.
So, I leave you with these two open items, for you to take further and see what your ingenuity and imagination can achieve.
Although AngularDart is not widely used outside of Google, it is a rock-solid web framework built on the pillars of giants, such as the Dart programming language and Angular. Google has used it to build and run many of its mission-critical web apps that generate much of its revenue—and I can see why.
I hope this book has given you some good insights into this amazing technology, and hopefully, the journey has been a fun one.
Thank you for reading and until next time, continue to explore and build amazing things with AngularDart. All the best.
Full source code
You can download the project’s full source code in .rar format (which you can extract using the free 7-Zip utility program) from this URL.
- 80+ high-performance Angular components, including DataGrid, Diagram, and Scheduler.
- Support for AOT compilation and tree shaking.
- Lightweight and user-friendly.