
AngularDart Succinctly®

CHAPTER 6
Firebase
Overview
There’s one important aspect of our application’s logic that is missing, and that’s the service provider that is going to be responsible for interacting with Firebase. But before we write the code for the service provider, let’s get started with Firebase and set it up.
Quick intro
Firebase is an amazing service from Google that provides a comprehensive app development platform encompassing authentication, hosting, storage, cloud functions, and a real-time database. For this application, we’ll be using Firebase’s real-time database.
Project setup
Let’s get started with Firebase. Using your Google or Gmail account, navigate to the Firebase Console. Once you have logged in, you will see a screen similar to the following one.
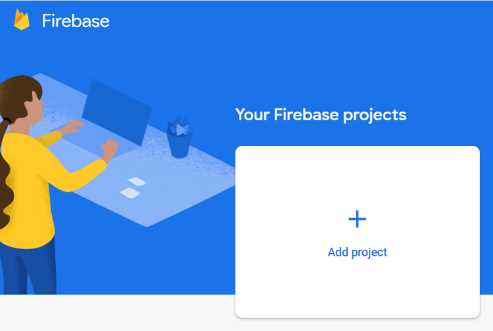
Figure 6-a: The Firebase Console
Click Add project, and we’ll give our project a name. You should see a screen similar to the following one.
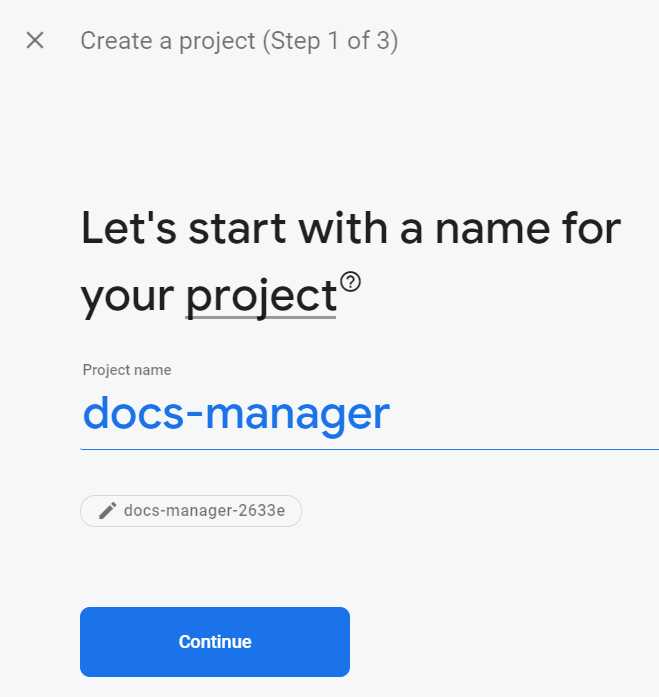
Figure 6-b: Creating a Firebase Project (Step 1 of 3)
Once you have given the project a name, click Continue. In the next step, you’ll choose whether to enable Google Analytics for this project.

Figure 6-c: Creating a Firebase Project (Step 2 of 3)
For this project, it’s not necessary to have Google Analytics enabled, as we will only be using the real-time database feature of Firebase. However, you are free to enable it if you would like to later deploy and host the application to Firebase hosting and be able to gather usage metrics.
Since it’s always a good idea to be prepared for the future, let’s click the Enable Google Analytics for this project option, and then click Continue.
Finally, let’s select the Analytics location (I’ve set mine to the United States) and then click on Create project.
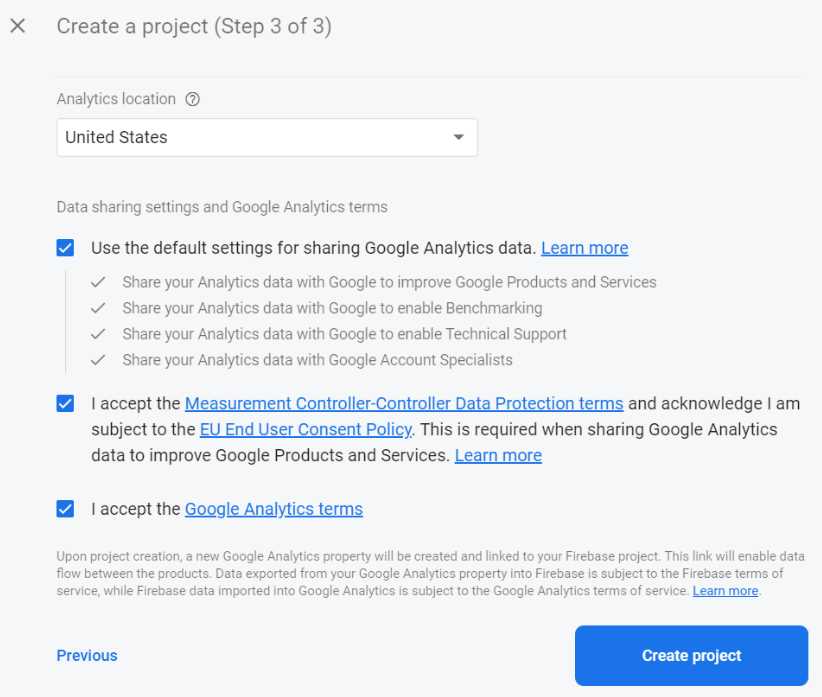
Figure 6-d: Creating a Firebase Project (Step 3 of 3)
Finally, the project will be ready to be used. We’ll see the following confirmation.
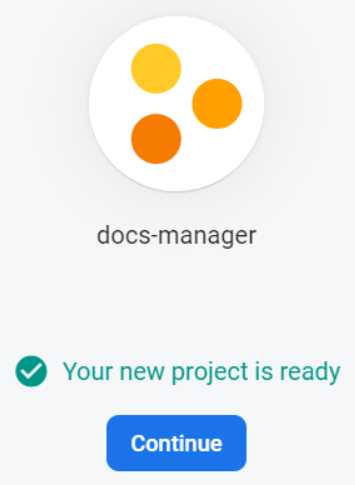
Figure 6-e: Firebase Project Created
Once you click Continue, you can start to work on our project. Let’s do it.
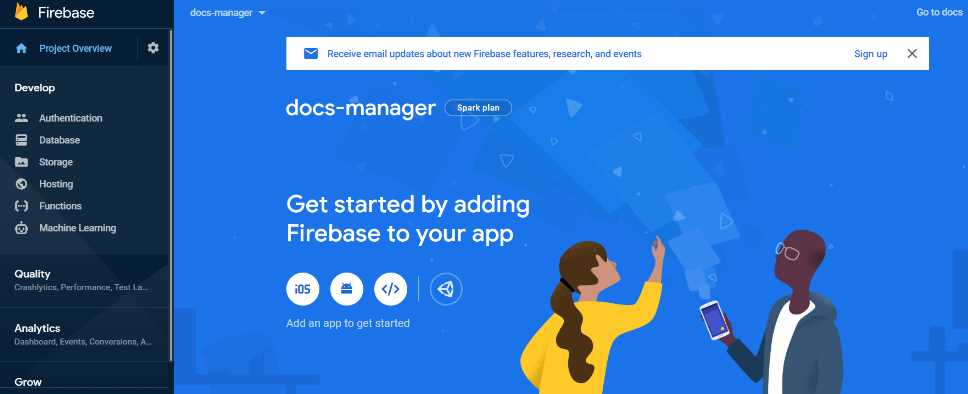
Figure 6-f: Firebase Project Starter Page
We have our Firebase project created, but to be able to use it, we need to add hosting—which we can later use if we want to deploy the application. To do that, click the Project Overview configuration icon, and then the Project settings option.
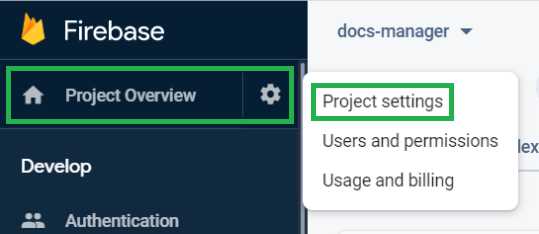
Figure 6-g: Project Overview Options
Once we have done that, a project settings page similar to the following one will be shown.
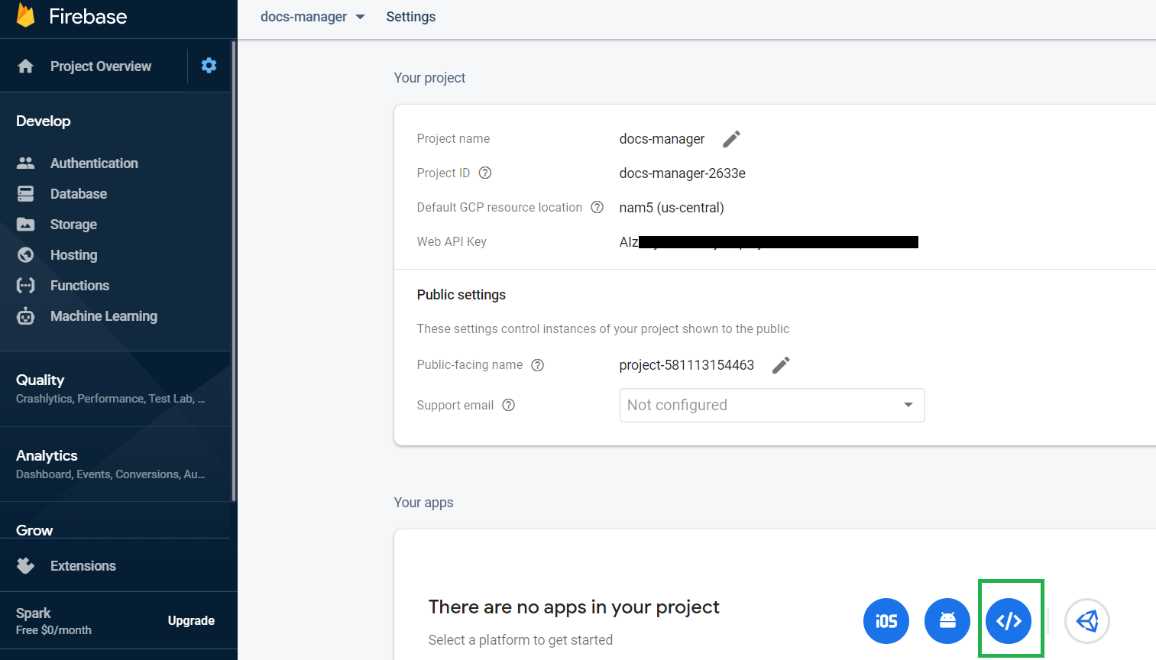
Figure 6-h: Firebase Project Overview
Web app
On this project overview page, in the bottom-right corner, click the icon highlighted in green (as seen in the preceding figure). By doing this, we’ll add database capabilities to our Firebase web app project.
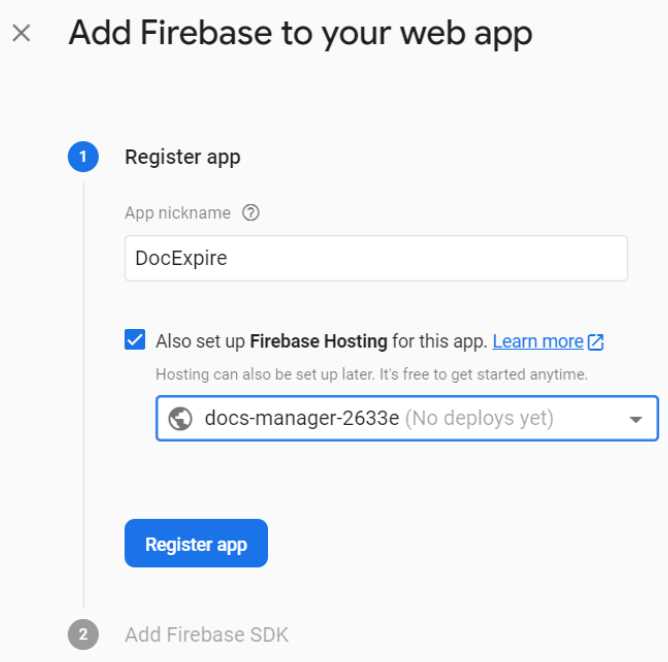
Figure 6-i: Add Firebase to your web app (Register app)
First, let’s give our web app a name—DocExpire. Let’s also set up Firebase Hosting and select our Firebase project. Then, click Register app.
Once we have done that, we’ll be shown the scripts that our application will need. The required script(s) described in this step has already been included in the index.html file of our project—so we can skip this step. Let’s click Next.
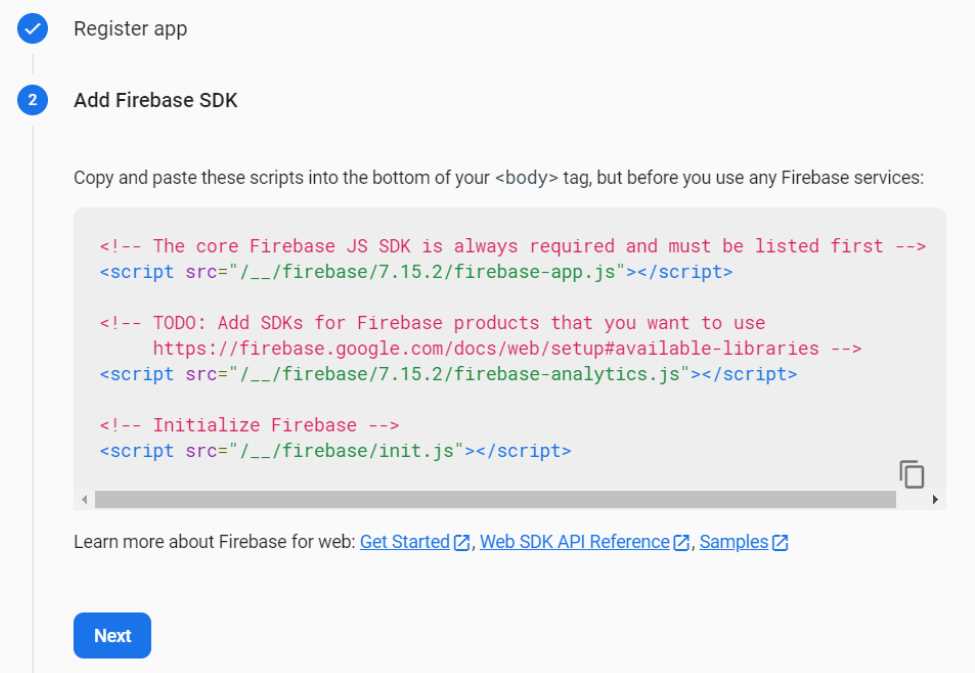
Figure 6-j: Add Firebase to your web app (Add Firebase SDK)
We’ll be presented with a screen similar to the following one.
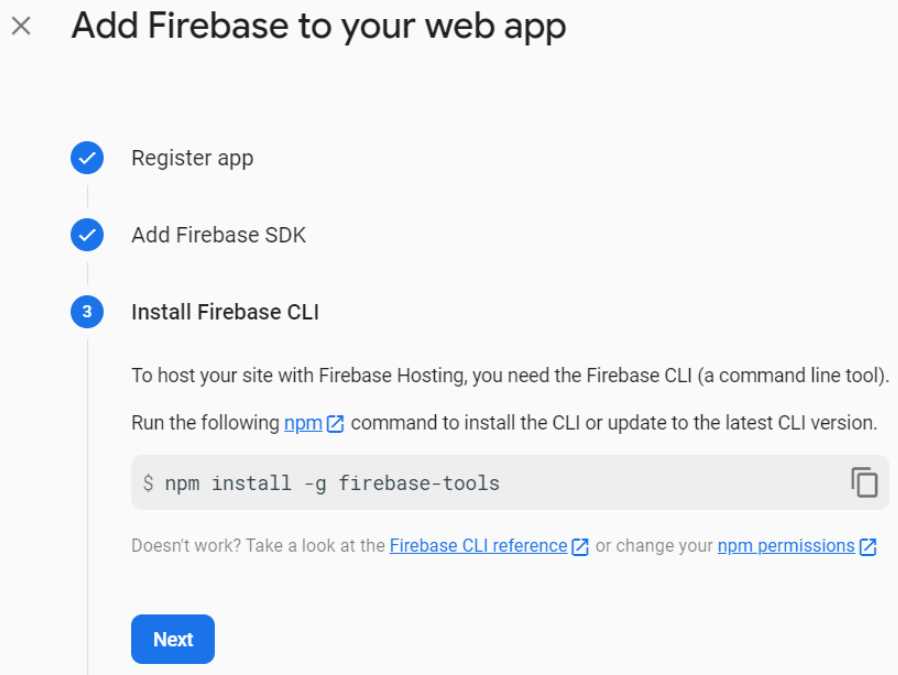
Figure 6-k: Add Firebase to your web app (Install Firebase CLI)
We can choose to install the Firebase CLI, which is necessary if we want to deploy the application later to Firebase hosting.
Installing the Firebase CLI is very easy to do. To do it, open the terminal or command line as an administrator and type in the npm install -g firebase-tools command.
To do that, you’ll need to have the long-term support (LTS) version of Node.js installed. Here’s how it looks when I run this command on my machine.

Figure 6-l: Add Firebase to your web app (Install Firebase CLI)
Once we have these tools installed, we can click Next on the Add Firebase to your web app screen, where we left it. This will bring us to the following screen.
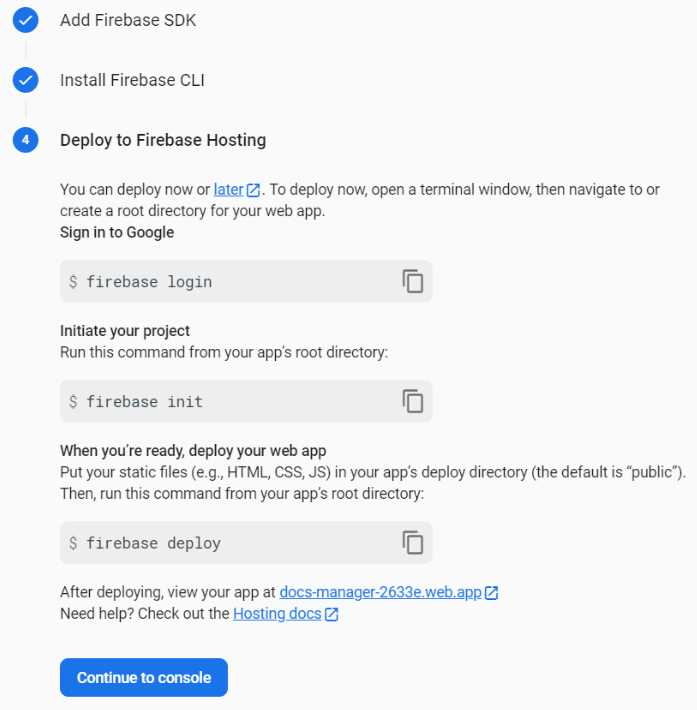
Figure 6-m: Add Firebase to your web app (Deploy to Firebase Hosting)
Here we can see the commands that are available for us to use if we want to deploy our app to Firebase Hosting. Let’s click Continue to console to carry on.
Back at the Firebase console, let’s click on the Project Overview icon, and then the Project settings option. Once there, scroll down to Your apps, highlighted with the green arrow in the following figure.
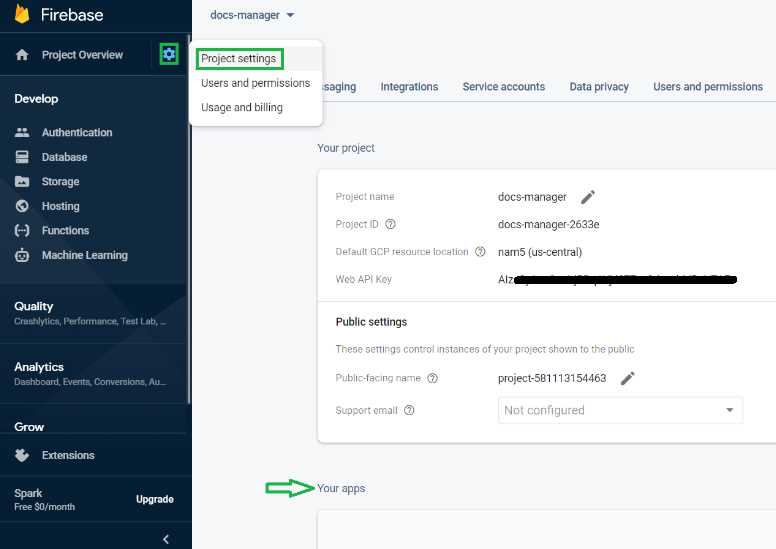
Figure 6-n: Firebase Project Settings (Your apps)
There, you should be able to find the application’s configuration settings we will use within the service provider later to connect to the real-time database within Firebase. Copy those configuration settings to a text file, as we will need them later.
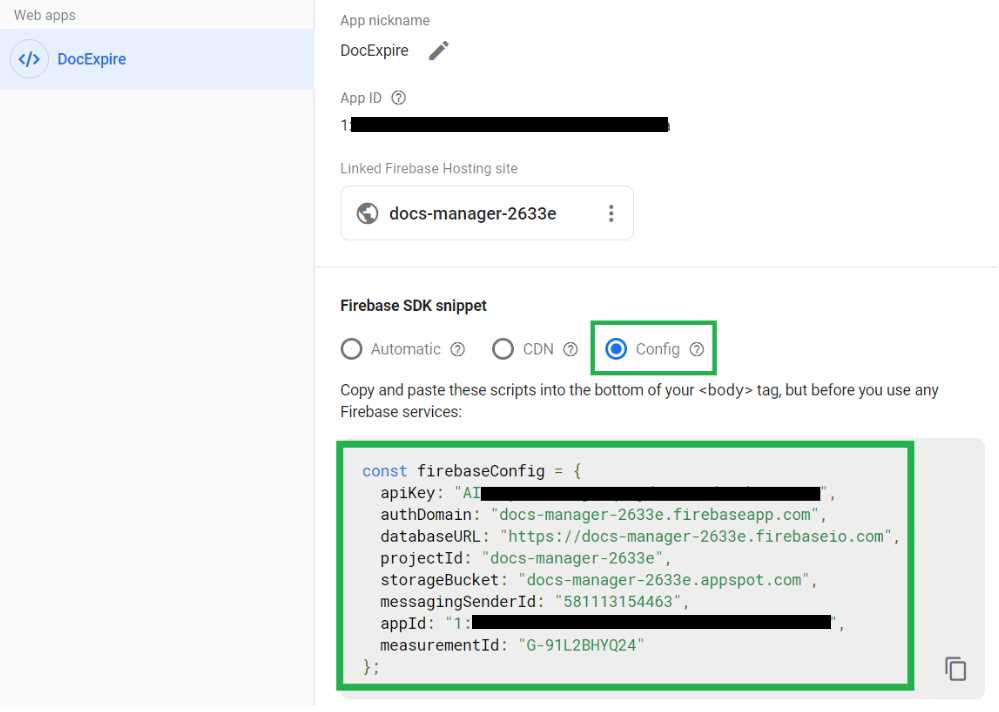
Figure 6-o: DocExpire Config Values in Firebase
Realtime database
Once you have copied these values, scroll up to the top of the page and click the Database option on the left-hand side of the screen. We are going to set up the real-time database.

Figure 6-p: Firebase Console Menu (Database Option)
Once you have clicked this option, you will see the Database screen. There, select the Realtime Database option from the drop-down, and then click Rules.
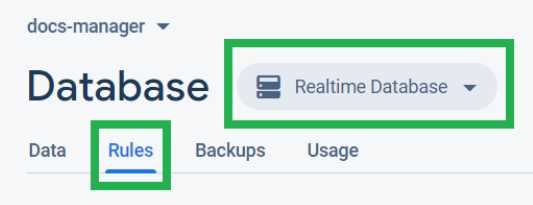
Figure 6-q: Database Screen
You should see a screen that looks similar to the following one.
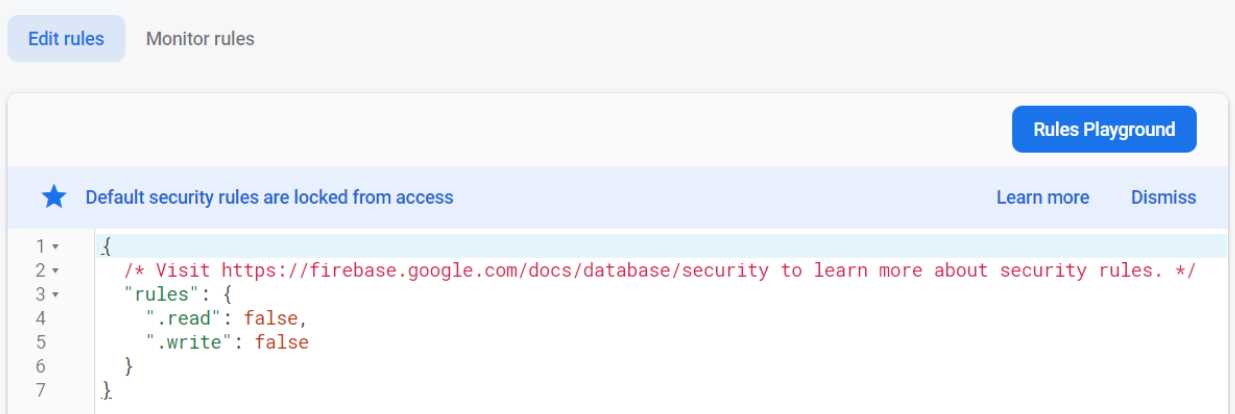
Figure 6-r: Database Rules (Default Values)
Here, click Edit rules. Let’s change the value of the read and write properties from false to true, as shown in the following figure.
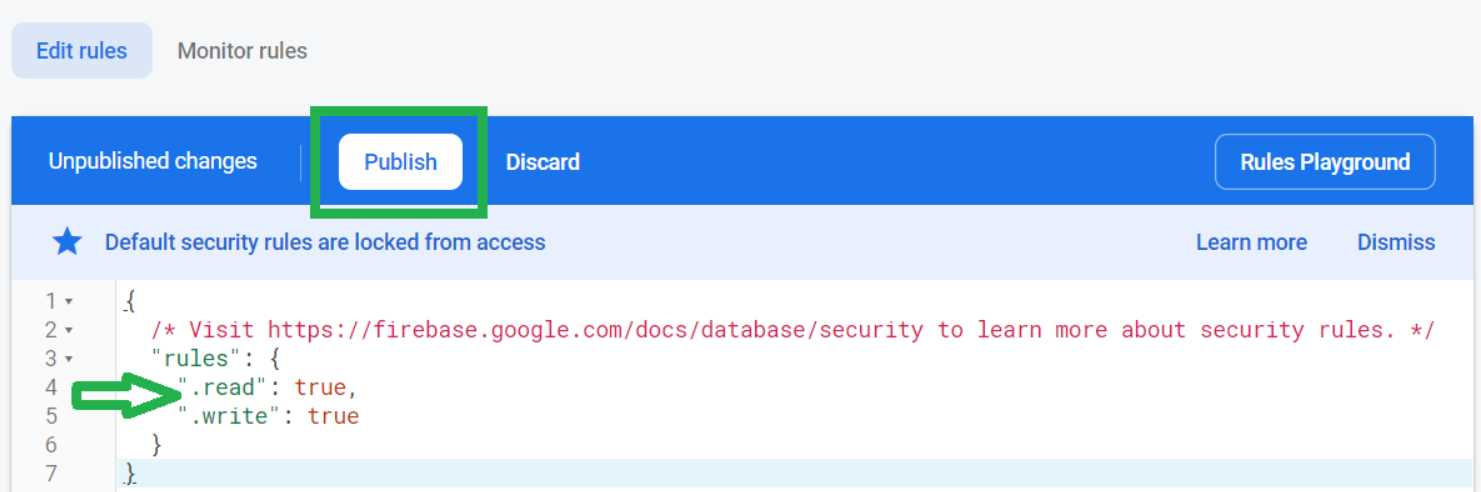
Figure 6-s: Database Rules (Edited Values)
Once you have edited the values, click Publish. Awesome—we have the Firebase real-time database ready.
Authorized domains
There’s one last thing we need to set up with Firebase, and that’s adding our local machine domain. As we are going to be running our application from our local machine, we need to tell Firebase to accept incoming requests from our local machine. This is an essential step for testing the application.
To do that, on the Firebase menu (left-hand side of the Firebase console screen), click Authentication.

Figure 6-t: Firebase Console Menu (Authentication Option)
Once you’re on the Authentication screen, click the Sign-in method tab.
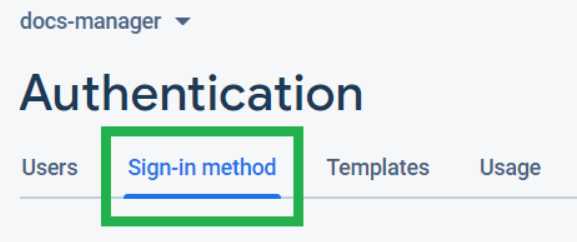
Figure 6-u: Authentication Screen
You should then see a screen similar to the following one. Under Authorized domains, click Add domain.
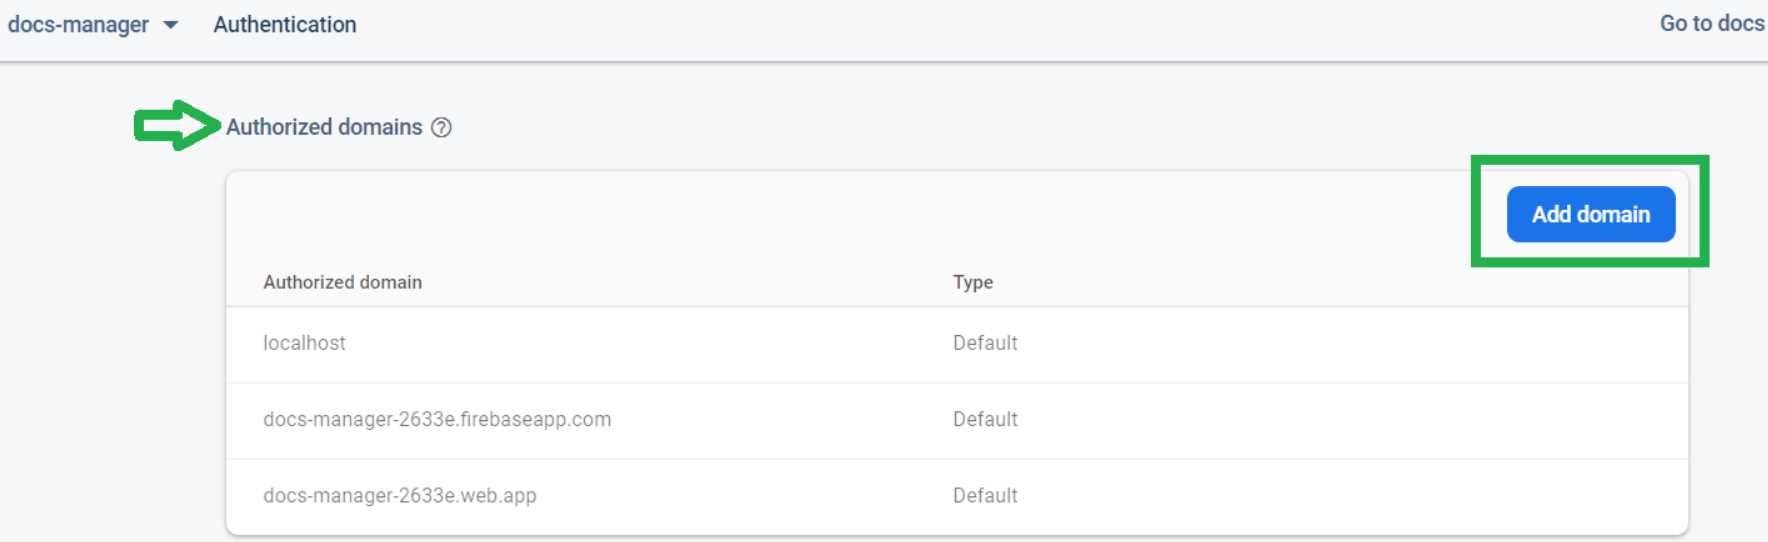
Figure 6-v: Authorized Domains
You will be asked to enter the domain for your local machine—which normally is http://127.0.0.1.

Figure 6-w: Entering the Local Machine Domain
Once you have entered the local machine domain, click Add.
That’s it—we are good to go, and we can proceed by adding the app’s service provider that will work with the Firebase real-time database.
Summary
Throughout this chapter, we have seen how to set up a Firebase project, a web app that can be hosted on Firebase, and a real-time database within Firebase. We also added our local machine domain as an authorized domain, so we can test our application locally.
We have one last step remaining—which is to write the logic for our service provider that is going to allow our application to interact with Firebase. This is what we are going to do next.
- 80+ high-performance Angular components, including DataGrid, Diagram, and Scheduler.
- Support for AOT compilation and tree shaking.
- Lightweight and user-friendly.