
Angular Succinctly®

CHAPTER 4
Files and Folders
When you set up an Angular application using Angular CLI, it populates a folder for your development work. This folder includes node_modules (libraries your application might need), the source code to your application, and some testing tools. In this chapter, we explore these folders and files.
Folder structure
After project creation, Angular applications will have a root folder (for configuration files) and several other common folders:
- src: The main folder for your application’s source code.
- node_modules: The folder where libraries are stored.
- e2e: The end-to-end testing folder.
Here is a look at the structure within Visual Studio Code.

Figure 6: Folder Structure
GitHub files
The default application contains a couple files needed by Git and GitHub. These are the .gitignore and README.md files. If you are interested in learning more about GitHub, you can download my book GitHub Succinctly from the Syncfusion website.
.gitignore
The .gitignore file is the standard file instructing GitHub and Git which files in a folder should be excluded (or ignored) from Git version control. You can specify files or folders not to check into the repository, such as:
- /dist: Ignore files in the distribution folder.
- /tmp: Ignore files in the tmp folder.
- /node_modules: Don’t commit the various Angular or other libraries.
Lines beginning with # are comment lines.
README.md
GitHub projects contain a README.md file that is displayed as part of the GitHub listing. The Angular CLI will include a readme file for you when creating a new project.
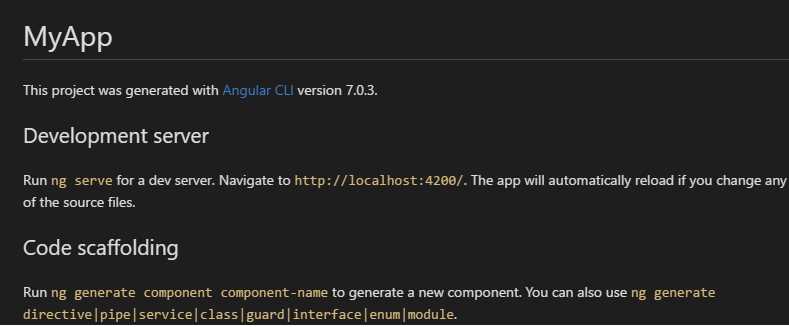
Figure 7: Sample GitHub Readme
If you are not using GitHub, you can ignore these files, but having them generated for you is a nice time-saver.
.editorconfig
This file allows you to provide configuration settings for your editor. You can set various properties, such as indent_style (tab or space) and indent_size (number). Visual Studio Code doesn’t natively support .editorconfig, but you can install a plugin that supports it by pressing Ctrl+Shift+P and entering the following command.
Code Listing 19
ext install .EditorConfig |
Tip: If you try to create a file beginning with a period, Windows will view it as a file extension and ask for a file name. However, if you put a period at the end as well, Windows will create the file.
angular.json
This file allows you to configure the behavior of the Angular CLI tool. There are various properties, such as version, $schema, etc. The primary section is the projects section, which allows you to customize most aspects of your Angular developments and tools.
Settings
The following settings will appear in the root JSON element:
- $schema: Reference to the schema definition of the angular.json file.
- version: Current version number (1) of the schema.
- newProjectRoot: Location where CLI-generated applications and libraries are saved (defaults to a folder called projects).
projects section
This section will contain the defaults of your project and tools used by the CLI. Each project within this collection can have the following properties.
Table 1: Projects Section Properties
Property | Description |
|---|---|
root | Main directory for all project files. Usually an empty string. |
sourceRoot | Directory where the source files are. Usually src. |
projectType | Application or library, depending on project. |
prefix | Custom prefix applied to code generated by Angular CLI. |
architect section
This section allows you to customize the options for building the application, running tests, serving the application, etc. Within this section, you will find child sections for build, serve, extract-i18n (internationalization feature), test, and lint. Within each section are the various options necessary for the particular command.
build section
This section provides the actual name of the builder (@angular-devkit/build-angular:browser) that is invoked by the ng build command. You can customize this by specifying a different NPM package to create the target build.
options section
The options section sets the various options, such as the output path, the main component, the location of the ts.config file, etc. There are three sections within options as well: assets (images, JSON files, etc. needed by the application), styles (comma-delimited list of style sheets), and scripts (comma-delimited list of script files). You can add style sheets and scripts you want included in the application in this section.
serve section
The serve section allows you to override settings in the build section for when you want to run the application. For example, the generated serve section provides a browser target, so the builder knows to serve the application on local host.
While the defaults provided in the generated angular.json file allow you to build and run your Angular application, the configuration file allows you tremendous amounts of control over the processes. You can find out more about the new angular.json configuration file on the Angular website here.
package.json
This file tells NPM which dependencies are needed for your application. While you might not need them all, there is no harm in adding more packages than you use. Your client application will only get the packages you actually use in your code, not the entire list from this file. Since this is a JSON file, the elements described here will be between braces { } in the actual file.
Package information
This section contains information about the package, such as its name and version.
Code Listing 20
"name": "helloworld", "version": "1.0.0", "description": "First Angular application", "author":"Joe Booth", |
The name attribute is required and must be lowercase. The version, description, and author attributes are optional, but should be provided in case another developer wants to find information about your application.
Scripts
The scripts section is used to provide commands to the NPM command-line application.
Code Listing 21
"scripts": { "start": "ng serve", "lint": "ng lint", "test": "ng test", "e2e": "ng e2e" }, |
When you run the NPM start command to launch your application, you are actually running the Angular serve command, which trans-compiles the TypeScript files and opens the server on the local host. You can add additional scripts to compress your JavaScript files, for example.
License
The purpose of the package.json file is to provide information about your application, and if the package is open source, you can specify the license on the package, such as MIT. You can also set the license to UNLICENSED and add the private attribute (set to true). However, once you’ve completed your package, you can publish it to the Node repository for others if you would like. For now, we will keep our project private with the following attributes.
Code Listing 22
"license": "UNLICENSED", "private":true, |
Note: There are a number of additional attributes available for describing the package and adding keywords to make it available as open source to other developers. If you decide to make your package available to the public, explore attributes like repository (location where source is), keywords (to make searching for it easier), and bugs (email address used to report any bugs).
Dependencies
The dependencies section lists all the modules that your package relies on, and will be automatically added when someone installs your package. The list of dependencies you might need for an Angular application is shown in the following code listing.
Code Listing 23
"dependencies": { "@angular/common": "~7.0.0", // Common service, pipes, directives "@angular/compiler": "~7.0.0", // Template compiler "@angular/core": "~7.0.0", // Critical runtime parts "@angular/forms": "~7.0.0", "@angular/http": "~7.0.0", // Angular HTTP client "@angular/platform-browser": "~7.0.0", "@angular/platform-browser-dynamic": "~7.0.0", "@angular/router": "~7.0.0", // Component router "core-js": "^2.5.4", "rxjs": "~6.3.3", "zone.js": "~0.8.26" }, |
When we run the install command, these dependencies will be added to your application folder from the Node repository. You can use the list in Code Listing 23 as a good starting point, but you might start adjusting this as you work more with Angular applications. Comments are actually not supported in a JSON file; the comments in this example are just for indicating what the various modules are for. The configuration files available in the Succinctly series GitHub repo do not have comments.
Note: At the time of this writing, Angular is on version 7.0.3. You might need to update your dependencies as future versions of Angular are released.
devDependencies
This section lists the dependencies that are only needed for development and testing your application. When doing a production release, these dependencies will not be added.
Code Listing 24
"devDependencies": { "@angular-devkit/build-angular": "~0.10.0", "@angular/cli": "~7.0.3", "@angular/compiler-cli": "~7.0.0", "@angular/language-service": "~7.0.0", "@types/node": "~8.9.4", "@types/jasmine": "~2.8.8", "@types/jasminewd2": "~2.0.3", "codelyzer": "~4.5.0", "jasmine-core": "~2.99.1", "jasmine-spec-reporter": "~4.2.1", "karma": "~3.0.0", "karma-chrome-launcher": "~2.2.0", "karma-coverage-istanbul-reporter": "~2.0.1", "karma-jasmine": "~1.1.2", "karma-jasmine-html-reporter": "^0.2.2", "protractor": "~5.4.0", "ts-node": "~7.0.0", "tslint": "~5.11.0", "typescript": "~3.1.1" } |
The package.json file interacts with NPM to install dependencies. Your version numbers might be different from the examples in Code Listing 24, but by keeping this configuration file with the project, you can ensure current production projects stay stable on the same versions, while possibly exploring updated versions for later applications.
tsLint.json
This configuration file lets you set up the options for the codelyzer lint checker. A lint checker is a nice tool (installed as part of Angular CLI), but sometimes your coding style could cause unnecessary warnings. These warnings can clutter your lint checking, and make it hard to see the important warnings. By customizing the file, you can adapt the lint checker to work with your coding style.
For example, the any type in TypeScript is allowed, but somewhat defeats the purpose of a strongly typed language. You can control whether to report usage of any with the following entry in the configuration file.
Code Listing 25
"no-any": true |
Tip: Lint checkers are handy tools for reducing the likelihood of certain errors that will compile, but they may cause problems at runtime. Every rule checked generally has a good reason for it, so be sure to decide whether the rule is actually a nuisance or if you should rethink your coding style.
src folder
The src folder contains the configuration file for the TypeScript compiler and the type specifications.
tsConfig.json
The tsConfig.json file contains the compiler options for TypeScript. It allows us to specify how we want the .ts files to be transpiled into JavaScript files. The options we use for our default are shown in the following code listing.
Code Listing 26
{ "compileOnSave": false, "compilerOptions": { "baseUrl": "./", "target": "es5", "module": "es2015", "moduleResolution": "node", "sourceMap": true, "emitDecoratorMetadata": true, "experimentalDecorators": true, "removeComments": false, "noImplicitAny": false } } |
You do not have to have a tsConfig.json file, but it is included to get the exact behavior we want, including when we want ES5 (ECMAScript 5) rather than the default ECMAScript 3. We’ve also chosen to keep comments in the trans-compiled JavaScript code. You can read Steve Fenton’s book on TypeScript if you want more details on the compiler options.
Summary
There are many configuration files with the project, which provide a great deal of flexibility in how you develop your Angular applications. The most common ones you’ll need in development are the package.json (to get libraries and new versions) and angular-cli.json (for controlling the code generation and execution in the application) files.
- 80+ high-performance Angular components, including DataGrid, Diagram, and Scheduler.
- Support for AOT compilation and tree shaking.
- Lightweight and user-friendly.