
Angular Succinctly®

CHAPTER 7
Exploring Hello World
In this chapter, we are going to look into the default files created by Angular CLI to see how their version of Hello World works.
Start Angular CLI
Let’s begin by creating an application using the Angular CLI tool.
Code Listing 31
ng new HelloWorld |
Once the application has been created, open the src\app folder, and let’s look at the default component (app.component.ts). The component will be very simple, but it will get us started. It should have the following (or similar) code, depending on Angular updates.
Code Listing 32
import { Component } from '@angular/core'; @Component({ selector: 'app-root', templateUrl: './app.component.html', styleUrls: ['./app.component.css'] }) export class AppComponent { title = 'HelloWorld'; } |
Every Angular application needs at least one root component, and by convention, it is named AppComponent. This component is responsible for populating a portion of the screen. (If you remember the Shadow DOM and template tag from the introduction chapter, this will make sense as to what exactly Angular is doing.)
Although simple, this code illustrates a basic component inside Angular. Let’s take a look.
Import statement
The import statement is used to reference the modules we need (similar to the using statement in a C# program). For our simple program, we only need the Component module found in the angular/core library. For actual applications, you will likely have more than one import statement.
Don’t forget to add the Font Awesome module to your imports array in the app.module file.
Tip: When entering an import statement, enter the file name first, so IntelliSense can show you the component names it finds in the file.
@Component statement
The @Component statement is a function that takes an array of metadata and associates it with the component we are defining. For this component, we specify the CSS selector and the template we want to use. When the component is instantiated, the tasks should be familiar.:
- Create a Shadow Root from the selector (Shadow Host).
- Load the selected template into the Shadow Root.
Export statement
The final line of code, the export statement, tells the name of the component that this module will make available to others. The code between the braces {} is where we can store properties and methods of the component class, although we will not need any class details yet for the simple HelloWorld component.
This export statement allows other components and modules to import it, which we will see in our next module.
Modules
The App.module.ts file is the root module that describes how the application elements work together. Every application will have at least one Angular module. The root module for our Hello World application is shown here.
Code Listing 33
import { BrowserModule } from '@angular/platform-browser'; import { NgModule } from '@angular/core'; import { AppRoutingModule } from './app-routing.module'; import { AppComponent } from './app.component'; @NgModule({ declarations: [ AppComponent ], imports: [ BrowserModule, AppRoutingModule ], providers: [], bootstrap: [ AppComponent ] }) export class AppModule { } |
Like our component, we import the components from Angular (NgModule, BrowserModule), as well as our application and routing components (AppComponent,AppRoutingModule).
Note: The default module contains the imports from the Angular library that most applications are likely to need. Your applications might not need these modules, but they are just as likely to need additional modules to be imported.
The @NgModule decorator takes some metadata about how to compile and run the application.
Declarations array
This array contains the components our application might need. In this case, only the app component we created earlier is needed. In other applications, you are likely to have multiple components specified in the array.
Imports array
The imports array lists all modules that the application will need. Every application that runs in a browser will require the BrowserModule. The default module also imports the Forms and Http modules.
Bootstrap array
The bootstrap array contains the name of the component that Angular will create and insert into the index.html host webpage. In this case, it is also our app component.
Our main program
Now that we’ve seen the module and component, we need another program to start the environment—a process known as bootstrapping—to load our component. In our src folder (not the app folder), there is a file called main.ts.
Code Listing 34
import { enableProdMode } from '@angular/core'; import { platformBrowserDynamic } from '@angular/platform-browser-dynamic'; import { environment } from './environments/environment'; import { AppModule } from './app/app.module'; if (environment.production) { enableProdMode(); } platformBrowserDynamic().bootstrapModule(AppModule) .catch(err => console.error(err)); |
The first four lines allow us to load components. The platform browser module allows us to run the application within a browser. However, Angular applications might run on other platforms, so this approach allows the same code to be a bootstrap for the browser, or possibly another platform.
The next statement checks to see whether we are running in production or development mode. Since we are importing the environment module, we can access the production flag and add some additional code if we want (in this example, the enableProdMode() function). If ProdMode is enabled, some development mode features (such as assertion checking) are turned off.
The last line of code calls the bootstrapModule method and passes it our module. We could have made a single file to do the component and bootstrapping, but remember that we do not want to write tightly coupled code. Displaying the view (AppComponent.ts) and bootstrapping the application (main.ts) are two distinct tasks, so having them in separate components is a nice example of loosely coupled component design.
Index.html
The final piece we need is to create the index.html file, which should be very familiar to web developers. Index.html is your starting point, and contains very common statements. You’ll declare the <html>, the title, and some meta tags, as shown in Code Listing 35.
Code Listing 35
<!doctype html> <html lang="en"> <head> <meta charset="utf-8"> <title>Hello World</title> <base href="/"> <meta name="viewport" content="width=device-width, initial-scale=1"> <link rel="icon" type="image/x-icon" href="favicon.ico"> </head> ... |
You can add any tags or other header elements as part of your HTML.
Style sheets
If you want any style sheets, you can load them here as well. Remember that these style sheets will only affect the main DOM and not the components, which live in their own encapsulated world.
Code Listing 36
<link rel="stylesheet" href="styles.css"> ... |
Although you can add style sheets directly in the index file, I would recommend adding them to angular.json and letting them get bundled together as part of the Angular build process.
Body
We can now specify our body content, which for this application is simply going to create a placeholder for the component to be written.
Code Listing 37
<body> <app-root></app-root> </body> </html> |
You can add placeholder text in the app-root section that will appear on the website while the initialization process is completed. If you’ve added Font Awesome to your project, you can display a spinner icon during the load process, as shown in Code Listing 38.
Code Listing 38
<app-root><i class='fa fa-spinner fa-spin'></i>Loading...</app-root> |
Styles.css
You will also find a style sheet (styles.css) that will reside in the same project folder as the index.html file. The default one is empty, but you can add any style rules you want applied to your application.
Code Listing 39
h1 { color: #369; font-family: Arial, Helvetica, sans-serif; font-size: 250%; } body { margin: 2em; background-color: lightgrey; } |
Finally, let’s see what this looks like.
Open a command window, change to the application directory, and enter the following.
Code Listing 40
npm start |
You will see a lot of compilation messages scroll by, and eventually you’ll see a message indicating Compiled successfully. When this message appears, open a browser and navigate to http://localhost:4200. If all goes well, you will see our very impressive Hello World application running in the browser window.
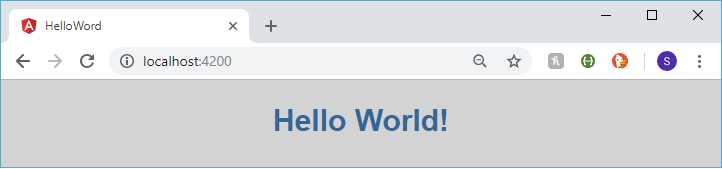
Figure 8: Hello World
Note: The default HTML template code (found in app.component.html) contains the Angular logo and helpful links. For simplicity, I removed that code so the HTML template would only show the title element from the component.
Summary
It might seem like a lot of files and work for a simple Hello World application, but fortunately, Angular CLI does most of the work for you. We now have a component-based application running in the browser. While it might not sound like much, as we explore Angular in more detail, you should come to appreciate how powerful components are in the world of front-end development.
- 80+ high-performance Angular components, including DataGrid, Diagram, and Scheduler.
- Support for AOT compilation and tree shaking.
- Lightweight and user-friendly.