
Vue.js Succinctly®

CHAPTER 1
Setup
Project overview
The application that we’ll be building throughout this book will be a web app that we can use to keep track of important personal documents that have an expiration date, such as passports, driver’s licenses, or credit cards.
This is the same app concept that was explored within Flutter Succinctly—with the difference that before, we created an Android application using Flutter, and now, we’ll create a web app using Vue. Below is what the Flutter app concept looks like.
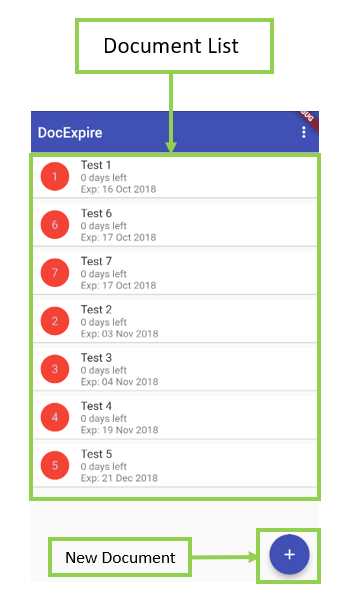
Figure 1-a: The Mobile Version of the Demo App (Flutter)
We’ll use Vue to re-create this same concept, but instead of giving it the same mobile app look and feel, we’ll create a web app with similar functionality.
Sounds awesome—let’s get our engines ready, so we can start setting up our development environment.
Installation
The Vue CLI (command-line interface) requires NPM (Node Package Manager), which needs Node.js to be installed. To install Node.js, simply go to the Node.js website and download the LTS (Long Term Support) or the latest Current version.
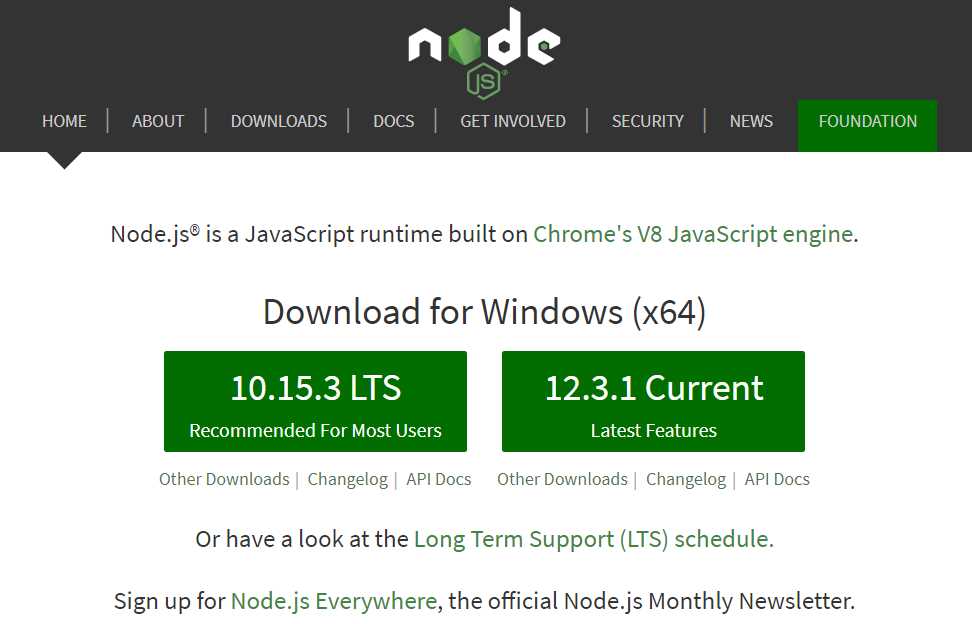
Figure 1-b: Node.js Website
The installation of Node.js is very simple and consists of a few steps that can easily be carried out using an installation step-by-step wizard.
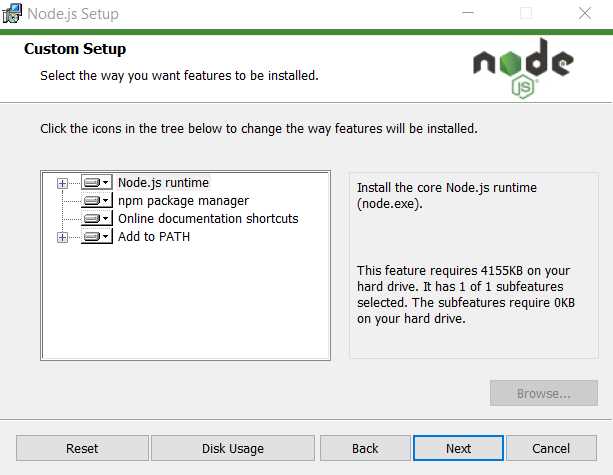
Figure 1-c: Node.js Installation Wizard
Once Node.js has been installed, we need to install the Vue CLI globally on our system—we can do this by opening the command line or terminal and typing in the following command.
Listing 1-a: Install Vue CLI Command
npm install -g @vue/cli |
Once installed, you can run the following command to check which version of the CLI was installed on your machine.
Listing 1-b: Check Vue CLI Version
vue --version |
With the Vue CLI installed, we are ready to create an application.
Creating an app (CLI)
There are two ways to create an application with Vue: one is using the Vue CLI, and the other is using the Vue UI tool. Let’s explore both ways.
Open the command line and type in the following command—this will require us to choose a preset.
Listing 1-c: Creating a Vue App with the Vue CLI
vue create test |
In my case, I’ve chosen the default preset, which includes babel and eslint.
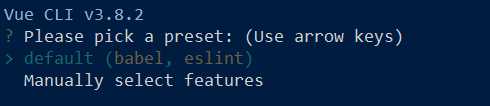
Figure 1-d: Choosing a Preset
Once selected, the CLI installs the required modules—we can see this as follows.

Figure 1-e: CLI Installing Modules
After the process has finished, you’ll see the following information—which describes the commands to run the application we just created.
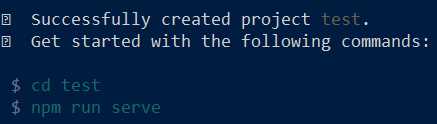
Figure 1-f: App Creation Finalized
Let’s go ahead and test that out. I’ll enter the following commands on the command line.
Listing 1-d: Running the Created App
cd test npm run serve |
This fires up a local development server that supports hot-reloading, which can be found on the following addresses.
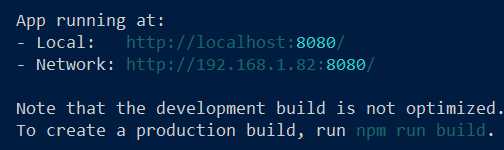
Figure 1-g: App Running CLI Message
Let’s open a browser instance and point it to the local address indicated—in my case: http://localhost:8080.
I then see the following welcome screen on my browser window.
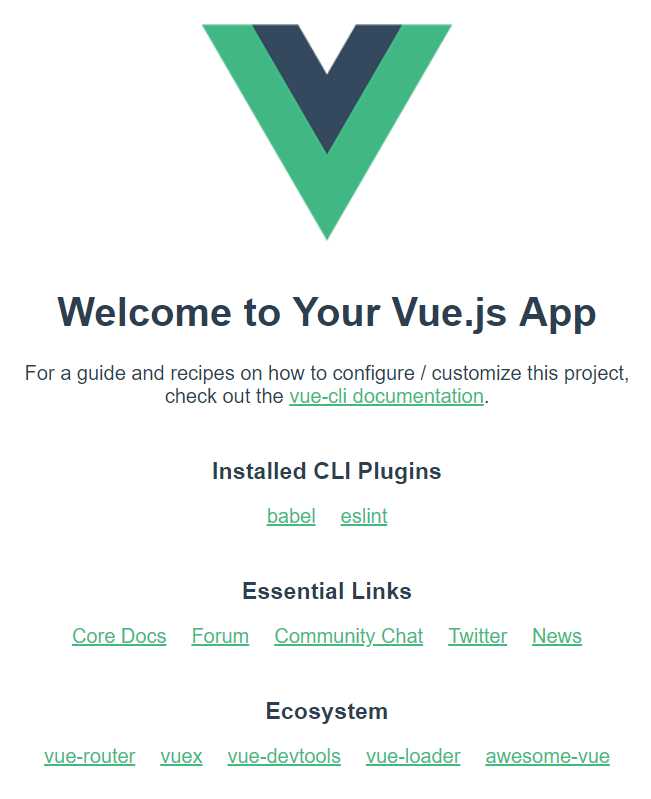
Figure 1-h: App Running on the Browser
Cool—we now have the basic Vue demo application running. Now let’s explore how we can create the same application but using the Vue UI.
Creating an app (Vue UI)
Before we can create the demo app with the Vue UI, we have some cleaning up to do. So, close the browser where the app is running, then within the command line, press Ctrl+C to interrupt the dev server—this will show the following message.
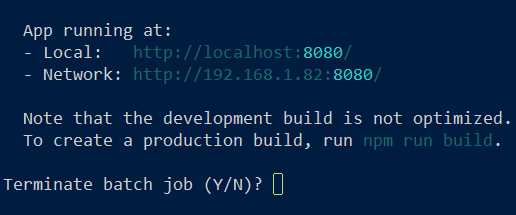
Figure 1-i: Interrupting the Dev Server
Then, type Y (uppercase or lowercase) and press Enter to stop the dev server. Once done, remove all the files and subfolders contained within the test folder that the Vue CLI created.
We are now ready to create the app with the Vue UI tool. To do that, let’s go back to the command line and enter the following command.
Listing 1-e: Starting Vue UI
vue ui |
This will start and open the Vue UI interface on your browser—in my case on the following URL: http://localhost:8000/project/select.
Here’s how the Vue UI looks.
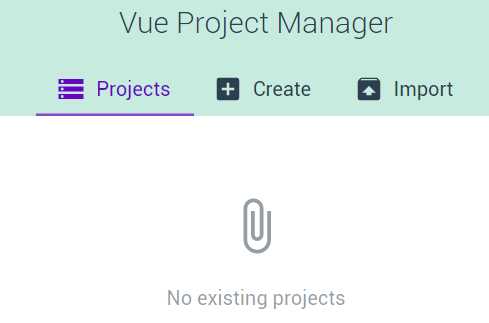
Figure 1-j: Vue UI (Vue Project Manager)
Awesome! Next, let’s click Create, which is just next to the Projects button.
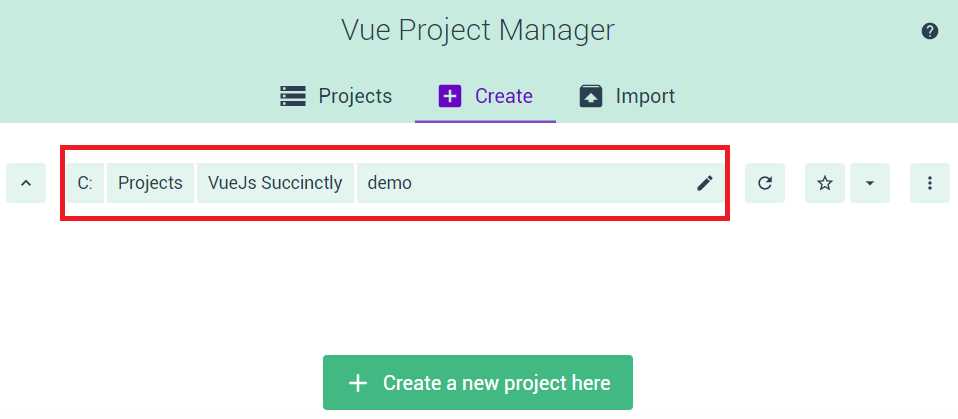
Figure 1-k: Vue UI (Vue Project Manager) after Clicking the Create Button
The Vue Project Manager shows the folder path where the application can be created. This is the same folder path where the vue ui command was executed from.
So, to create the application, let’s click + Create a new project here. Once we’ve done that, we’ll see the following screen.
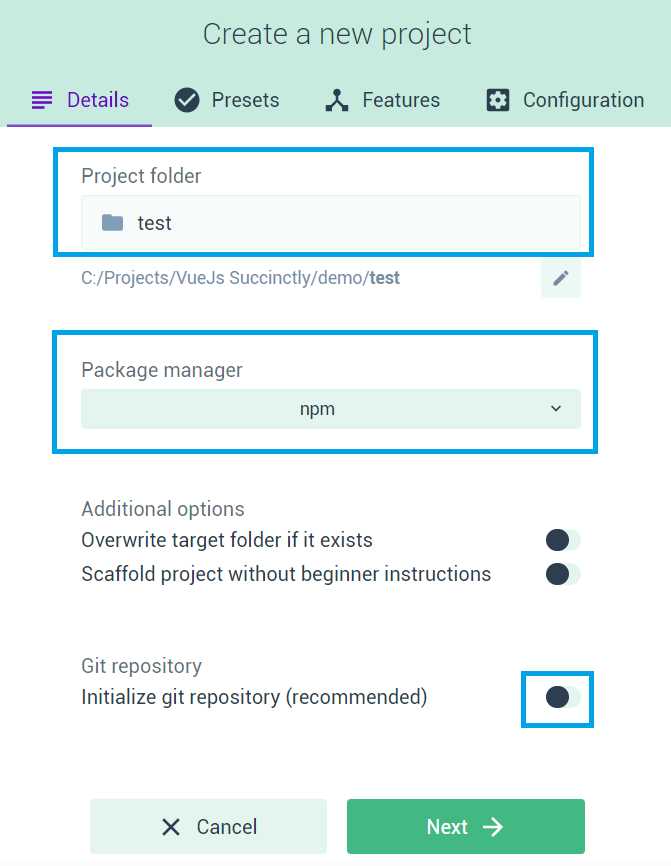
Figure 1-l: Vue Project Manager: Creating a New Project (Step 1)
I’ve set the Project folder value to test and the Package Manager to npm, and disabled the Git repository option—you can choose other options if you wish. Once you’re done, click Next—this will take us to the final creation screen, which we can see as follows.
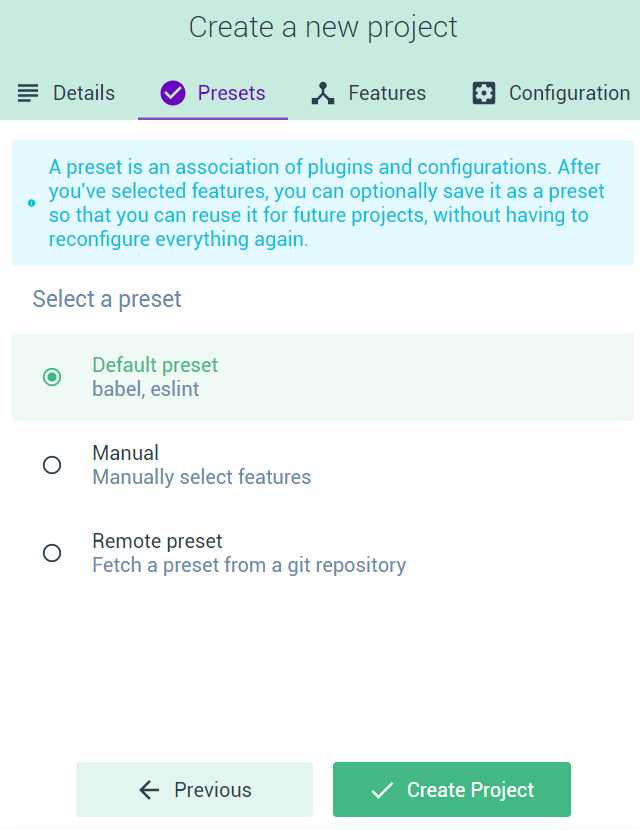
Figure 1-m: Vue Project Manager: Creating a New Project (Step 2)
In this step, we will choose the combination of plugins and configurations to use—this is known as a preset. In my case, I’ve chosen the Default preset, which uses babel and eslint. You may choose another option if you wish. Once you’re done, click Create Project—this will display the following screen.
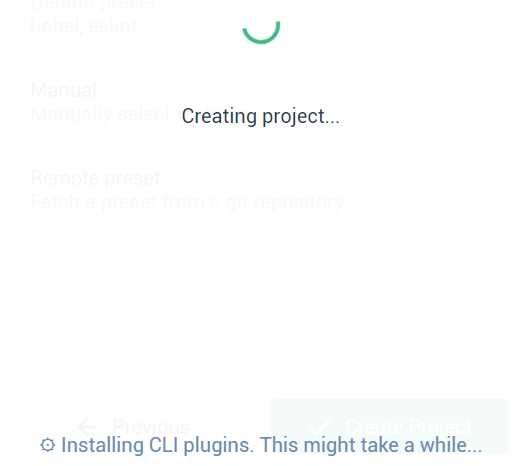
Figure 1-n: Vue Project Manager: New Project Being Created
Once the project has been created, the Vue Project Manager will present a Project dashboard for the project that was just created—which is what we’ll explore next.
Project dashboard: Vue Project Manager
One of the great features about the Vue Project Manager is the ability it gives us to manage multiple Vue projects via a clear and easy-to-use interface. Let’s explore the options it provides us for managing the test project we’ve just created.
The main screen of the Project dashboard is a welcome screen, which by default, contains the Welcome tips and Kill port widgets.
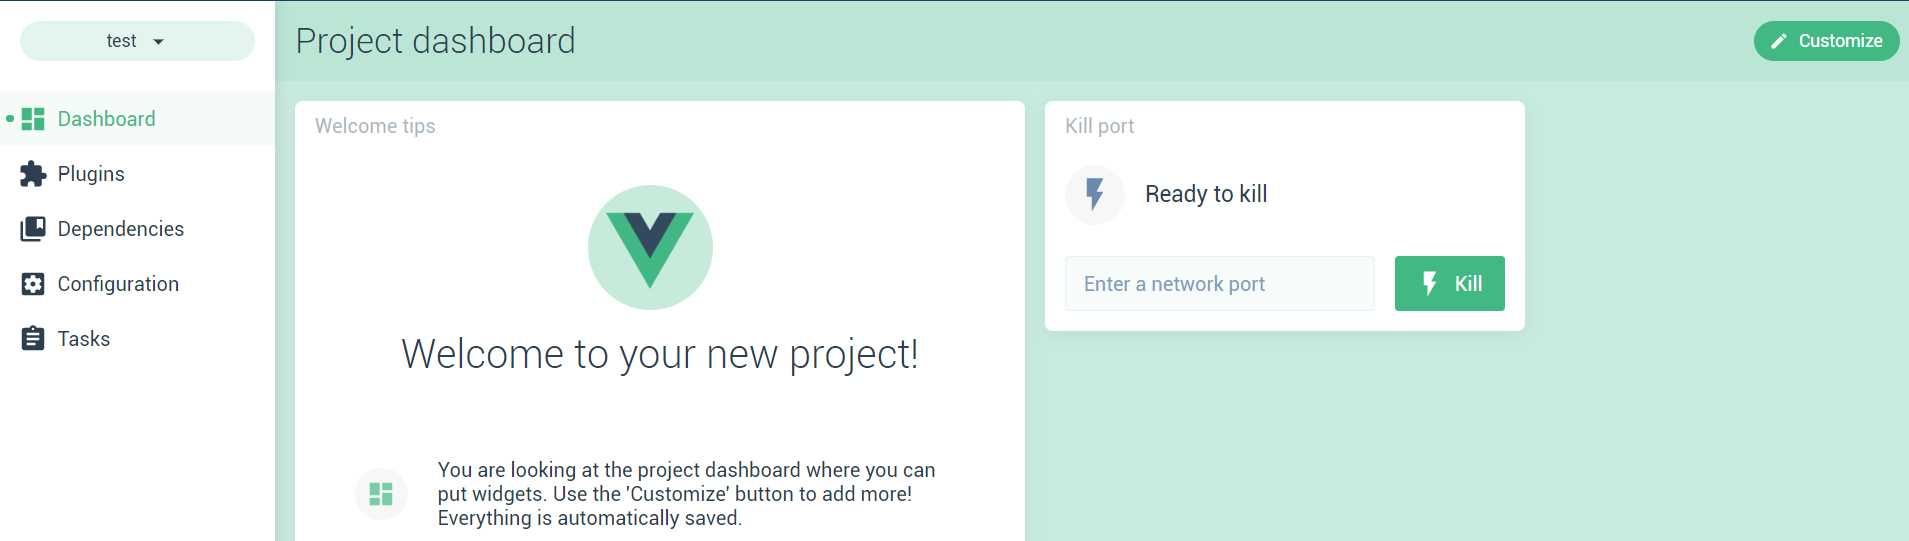
Figure 1-o: Project Dashboard Main Screen
This screen is customizable—you can use it to add or remove widgets.
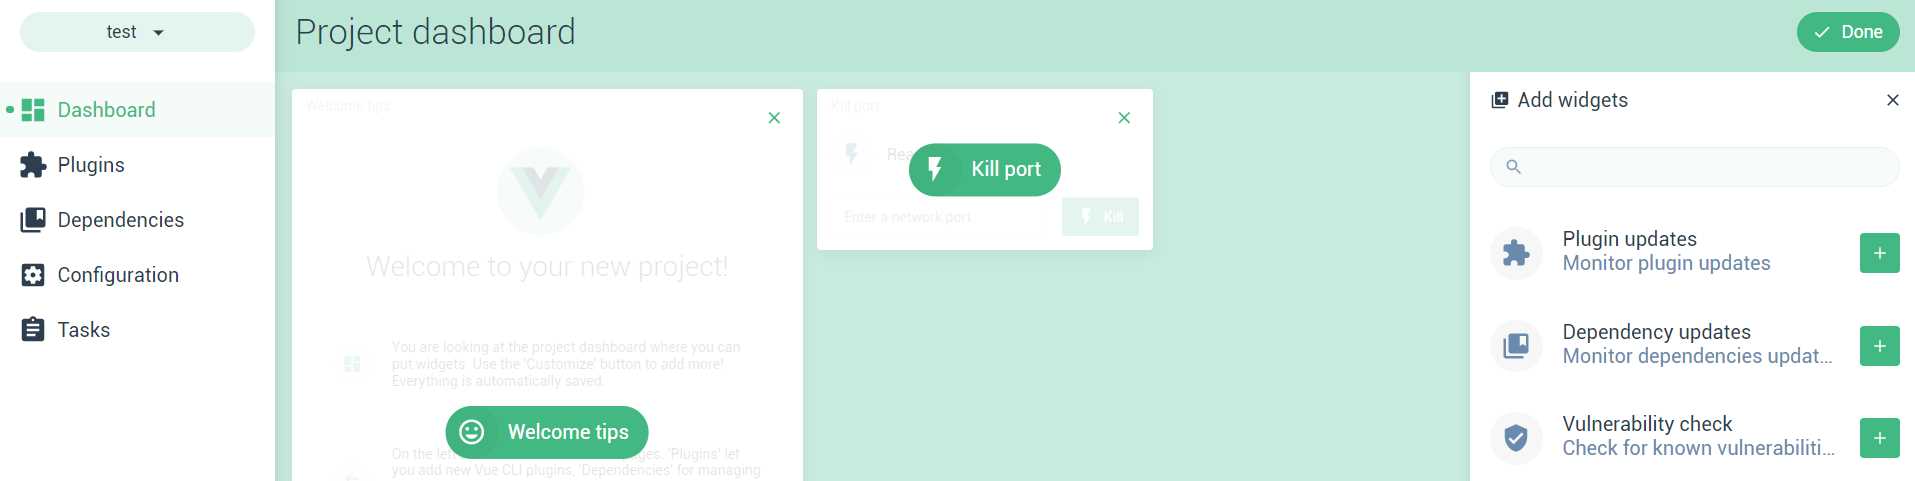
Figure 1-p: Project Dashboard: Main Screen (After clicking the Customize button)
Click Customize, and you will be presented the option to add widgets or remove any of the existing ones.
In my case, I’m going to add the Run task widget, which I would like to use to run a serve task—which will basically allow me to serve (run) my test application from the Vue Project Manager UI, without having to use the command line.
Once you’ve added the Run task widget, click Configure widget as shown in the following figure.

Figure 1-q: Project Dashboard: Main Screen (After adding the Run task widget)
Next, we’ll see the following screen, which we can use to select the task we would like to execute.
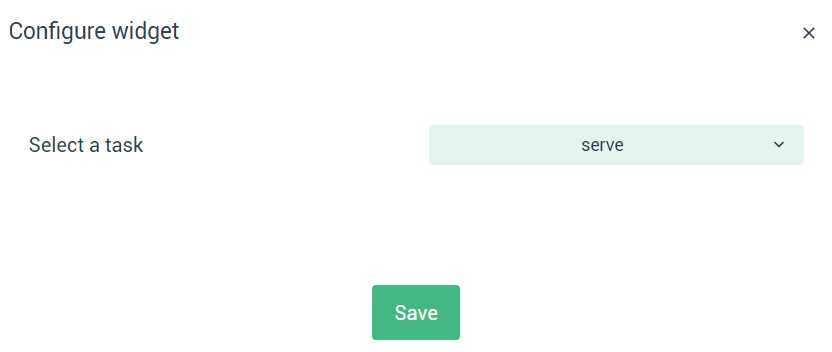
Figure 1-r: Project Dashboard: Run task widget (After adding the Configure widget)
In my case, I’ve chosen the serve task option. Once you have chosen the task, click Save. After that, the Project dashboard screen will look as follows.
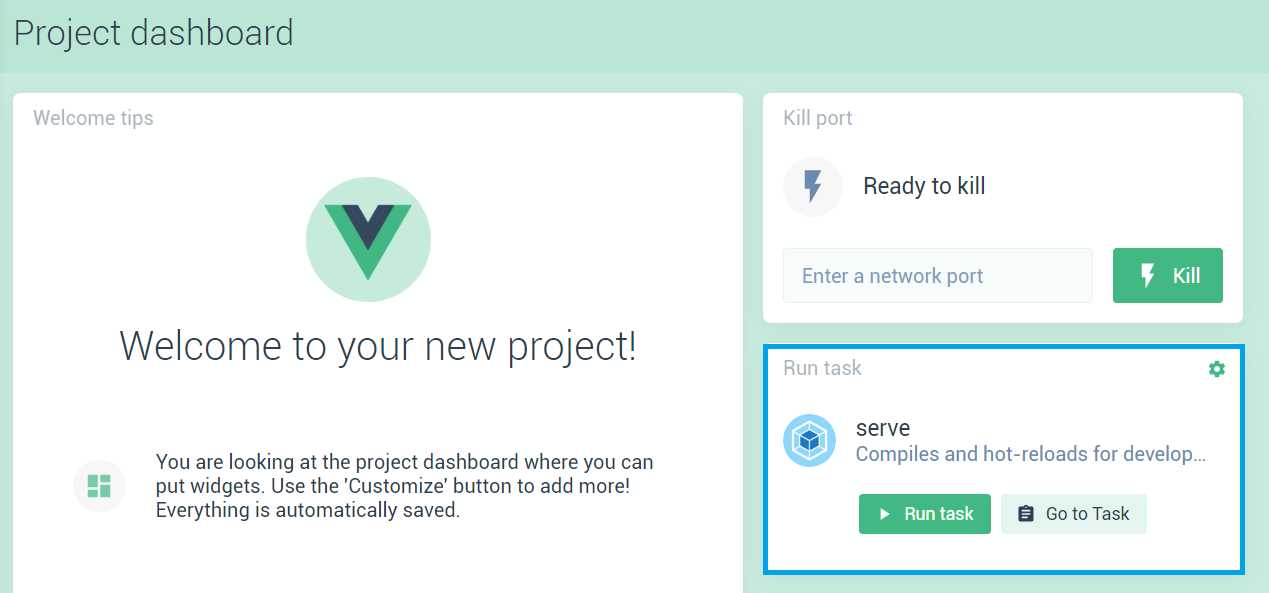
Figure 1-s: Project Dashboard: Run task widget (After the changes)
Notice how the Run task widget has changed, and the serve option has been populated and configured. This can be initiated by clicking Run task.
Let’s explore some of the other options available on the Project dashboard. The next option we have available is the Project plugins screen. Here we can see what plugins our project will use.

Figure 1-t: Project Dashboard: Project plugins
Notice that based on the default preset option that I chose when the test application was created, the following plugins were installed:
- @vue/cli-service (version 3.8.0)
- @vue/cli-plugin-babel (versión 3.8.0)
- @vue/cli-plugin-eslint (versión 3.8.0)
There’s also the option to add additional plugins—let’s click + Add plugin, just to explore which other plugins are available.
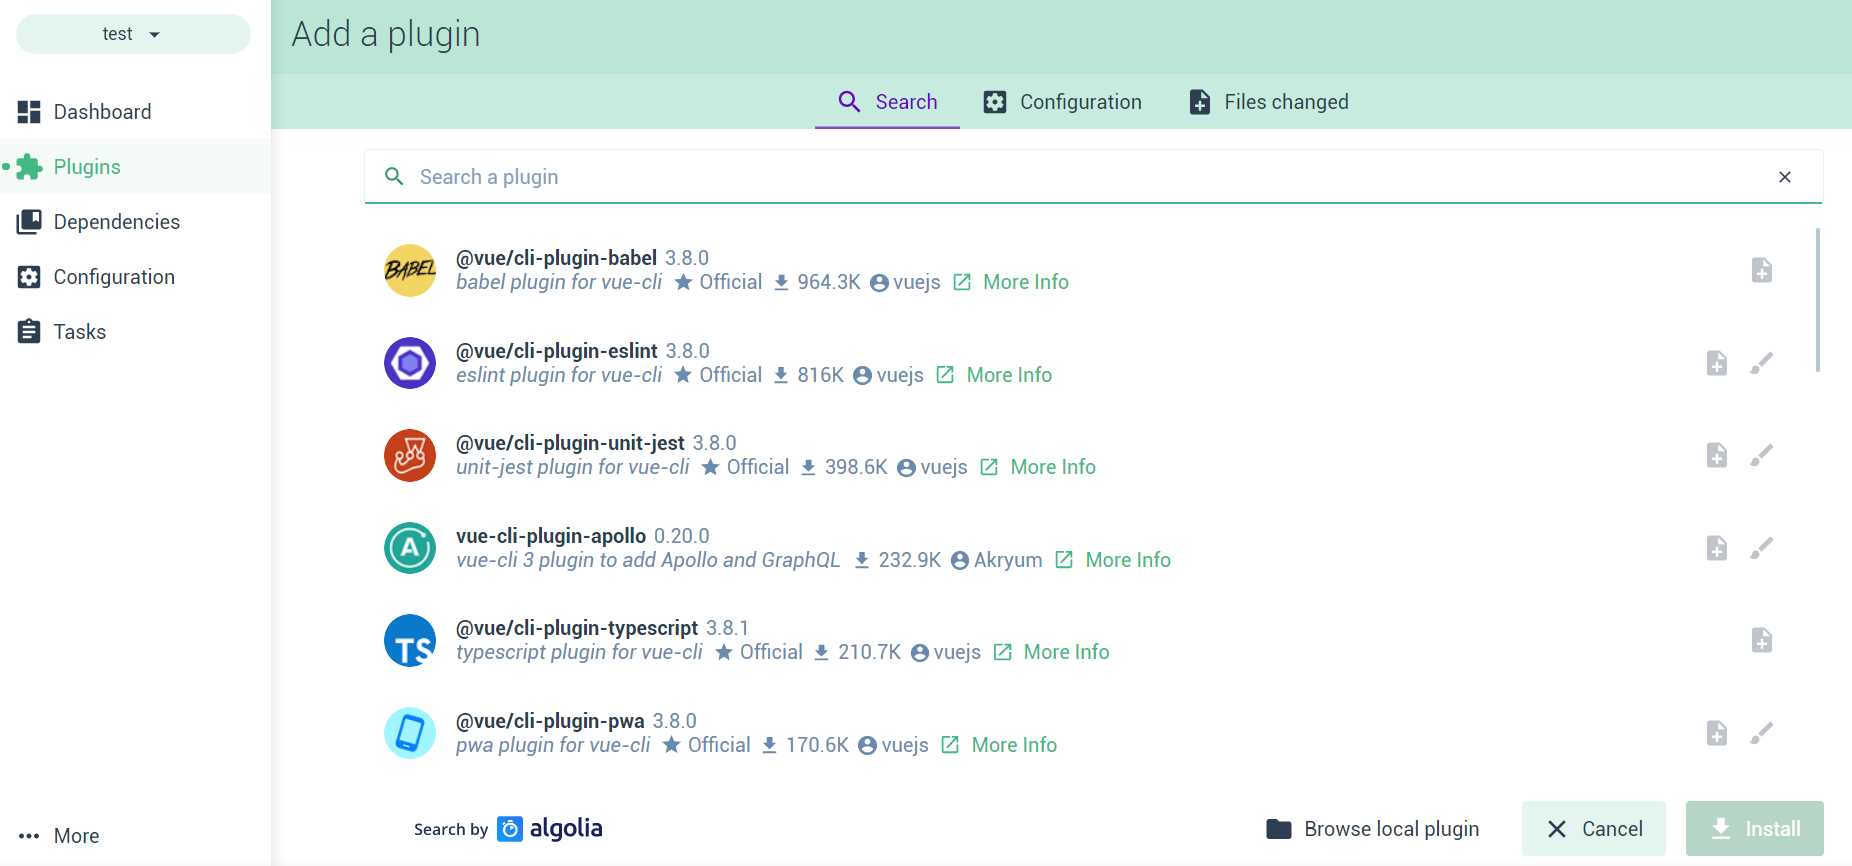
Figure 1-u: Project Dashboard: Other plugins
This is a full list of all the available public published plugins that exist for Vue—basically, Vue’s ecosystem of plugins.
There’s also the option to use local plugins, by clicking on the Browse local plugin button. Now, let’s have a look at the Project dependencies screen.
There are two types of project dependencies: main dependencies and development dependencies.
Main dependencies are those that are required for the execution of the test application—they are needed for the runtime execution of the app.
Development dependencies are required during the development of the application. Once the application is linted (compiled) and served, these dependencies are not essential for the application to run—they are only needed during development.
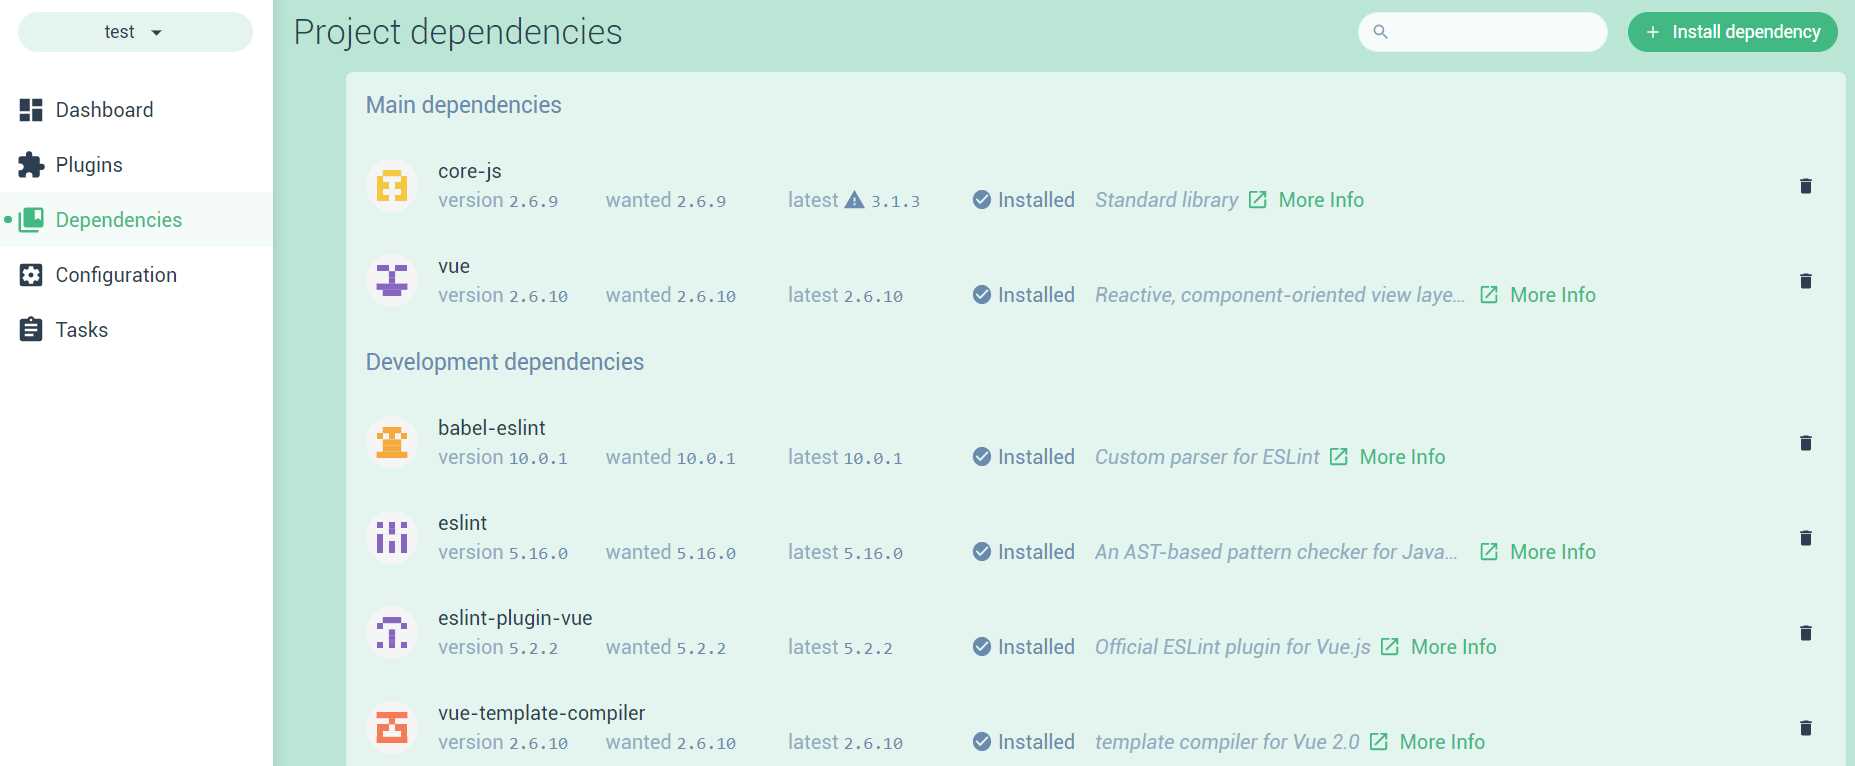
Figure 1-v: Project Dashboard: Project dependencies
There’s also the option to install additional dependencies, either main dependencies or development dependencies, which are publicly available and published on the NPM registry.
The following figure shows the list of available dependencies visible after clicking + Install dependency.
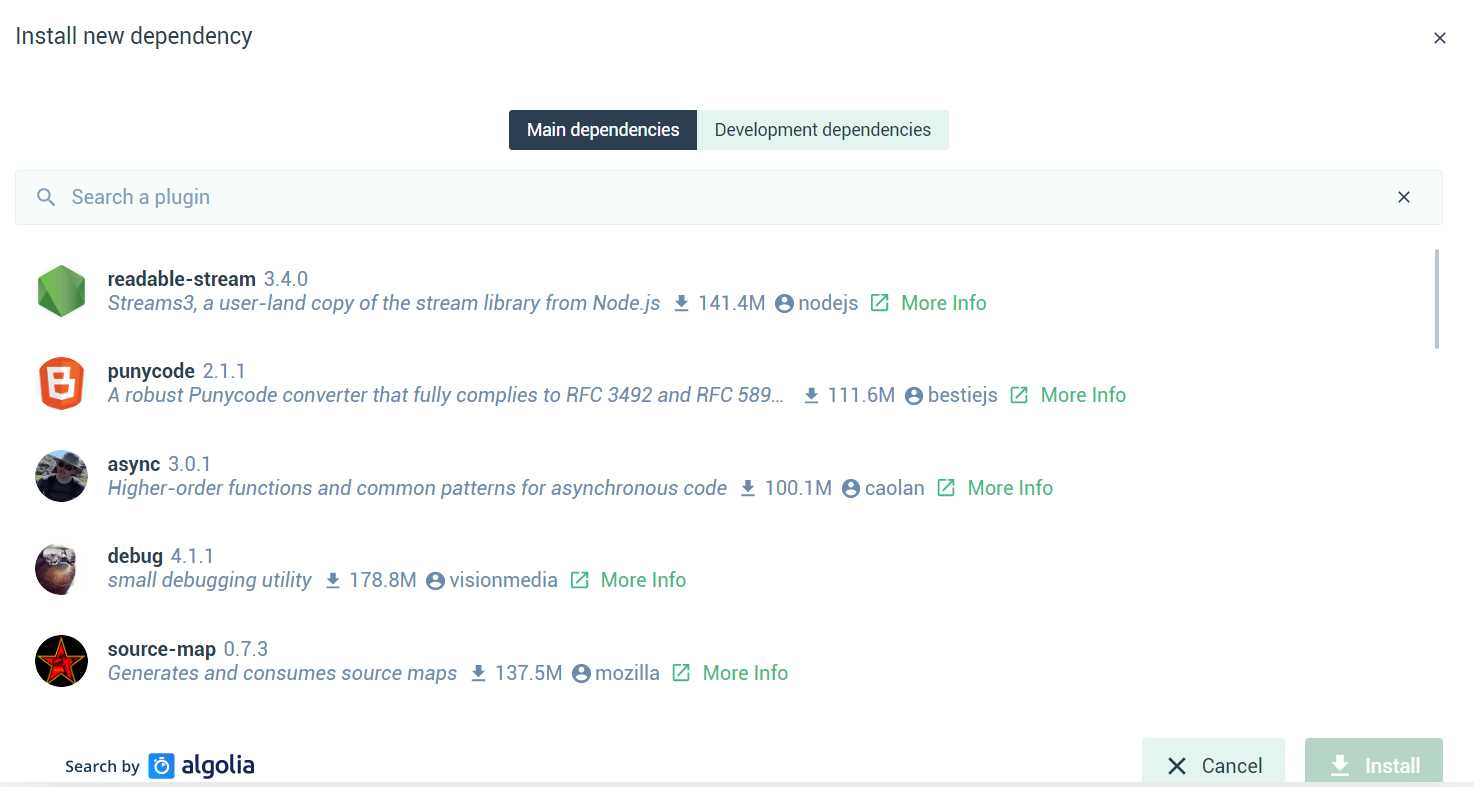
Figure 1-w: Project Dashboard: Install dependencies
The Project dashboard also gives us the possibility to easily configure the plugins installed. This can be done on the Project configuration screen, where each plugin that has configuration options is displayed.
The following figure shows the configuration options for the Vue CLI plugin. Being able to set the options of plugins using a UI such as this is much easier than having to use JSON files or the command line—this is one of the advantages of using the Vue UI.
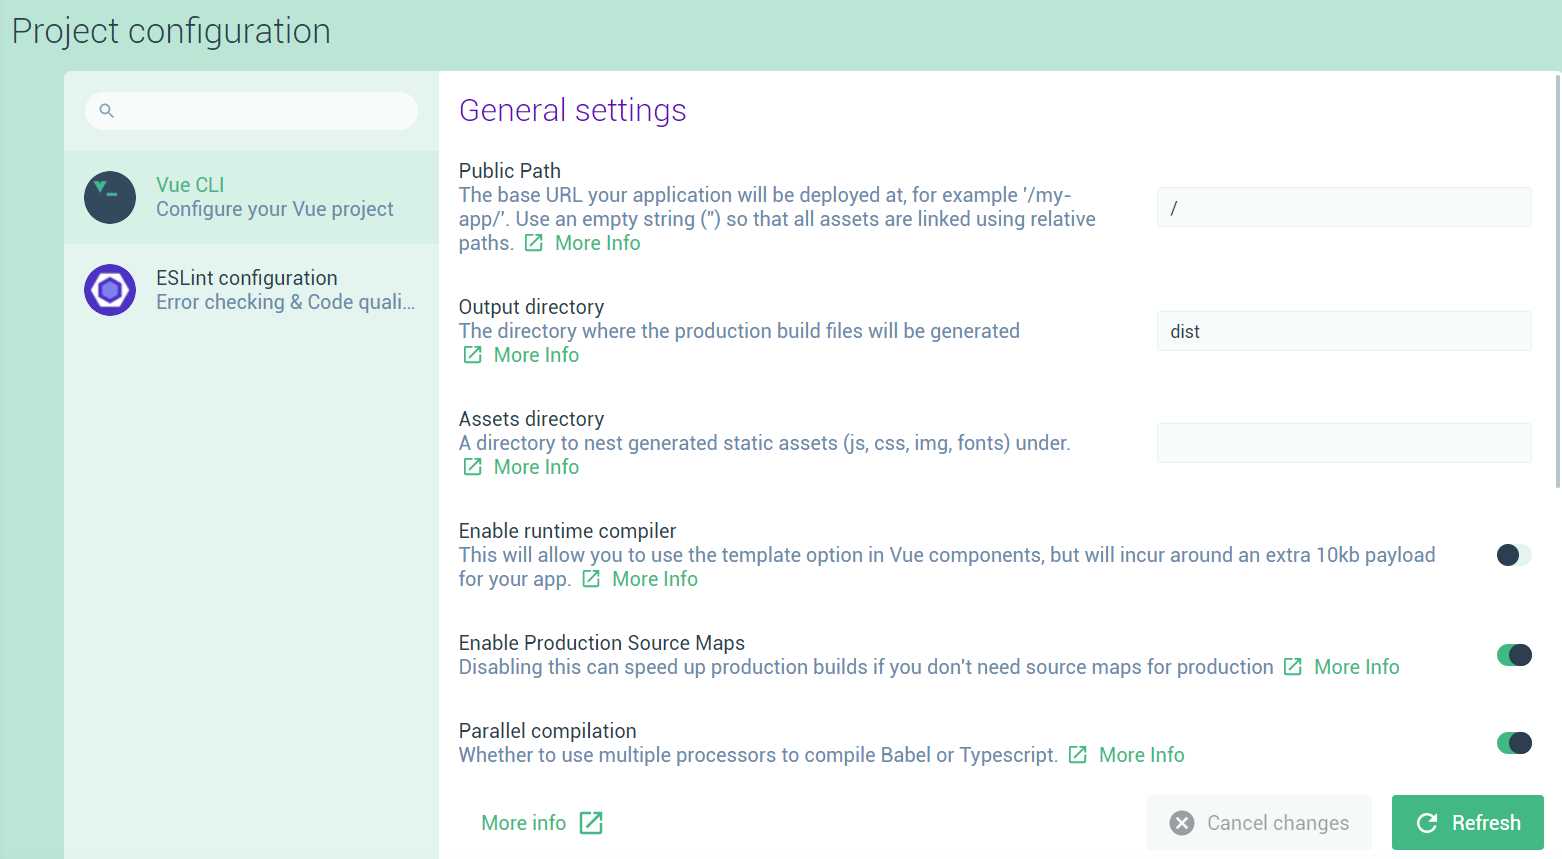
Figure 1-x: Project Dashboard: Vue CLI Plugin Options
The last screen of the Project dashboard is the Project tasks screen. Here’s where we can serve, build, lint, and inspect our application when it is running.
The Project tasks screen is not only useful for executing the serve, build, lint, and inspect tasks, but it’s incredibly valuable given that we can keep track of how the application is running and performing—this is visible through the Output, Dashboard, and Analyzer tabs—which we can see as follows.
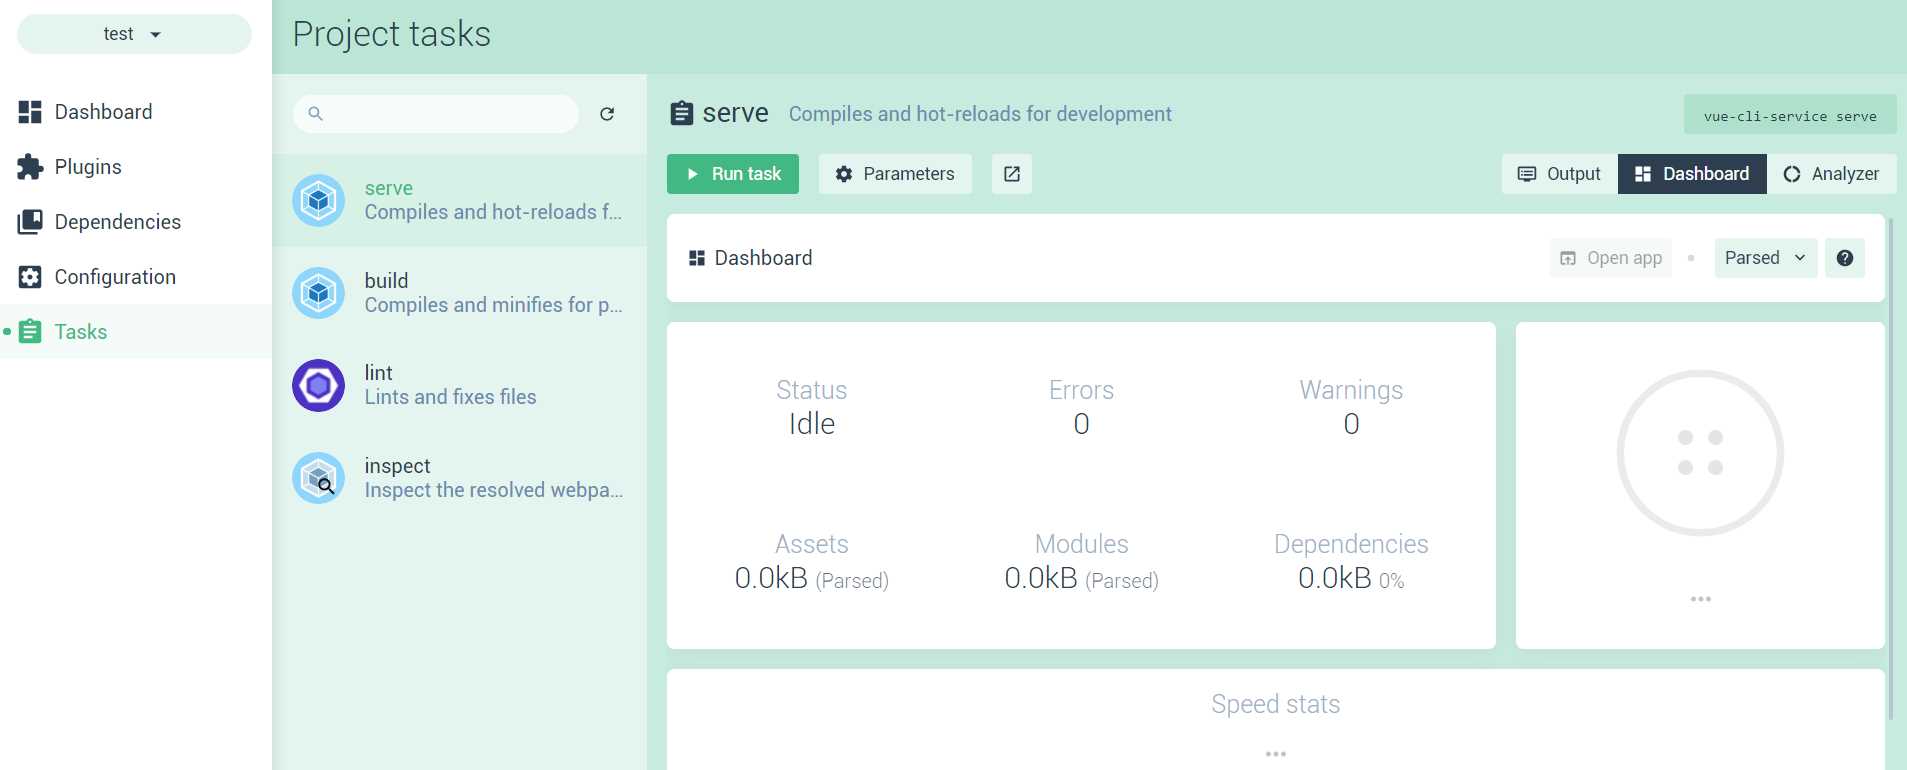
Figure 1-y: Project Dashboard: Project tasks
Notice how we have the option to execute the task by clicking the Run task button, and then monitoring what happens by looking at the Dashboard, which is specific to the task being executed. This feature is not only cool, but extremely powerful—it gives us real-time details of the task running.
The following figure shows how the Dashboard looks a few seconds after the serve task has been executed—notice the speed stats and general status of our running application.
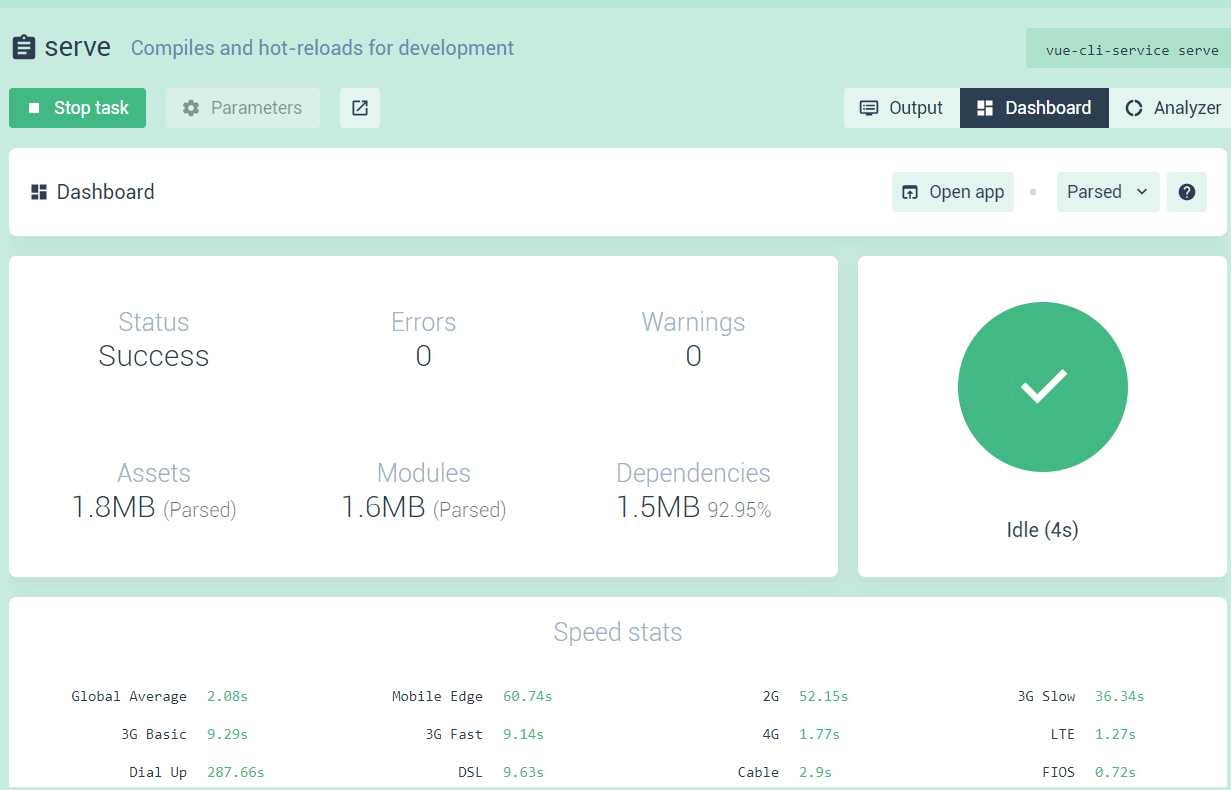
Figure 1-z: Project Dashboard: Serve task execution details
As we have seen, the Vue UI is a very powerful tool that makes the development of our application easier to manage and analyze.
I tend to prefer the Vue UI method for creating apps, but this is mostly a matter of personal taste. Feel free to choose your own method.
Summary
Throughout this chapter, we’ve explored how to get a Vue environment set up and ready. We’ve been able to do this by installing the necessary requirements and then setting up a test application using both the Vue CLI and the Vue UI.
Next, we’ll explore the default project structure and start modifying the test app and lay the foundation for the application we will be building throughout this book.
- 80+ high-performance, modular, and responsive Vue UI components.
- Popular components like Data Grid, Charts, and Diagram.
- Incredibly lightweight and user-friendly.