
Scala Succinctly®

CHAPTER 1
Introduction
Scala is a general-purpose language designed with both object-oriented and functional mechanisms. Scala can be used as a standalone application language, but it can also be used to develop modules for Java-based programs. The language was developed to express paradigms that are difficult to express in Java. The Scala compiler (a program called scalac.exe) uses the Java Virtual Machine (JVM) in order to compile source code to Java bytecode for execution.
If you are not already familiar with Scala, I recommend you first learn the basics of the Java language. The two languages share strong links—all of the Java libraries are available in Scala, and Scala integrates seamlessly into existing Java applications. Figure 1 depicts the close relationship between Java and Scala.
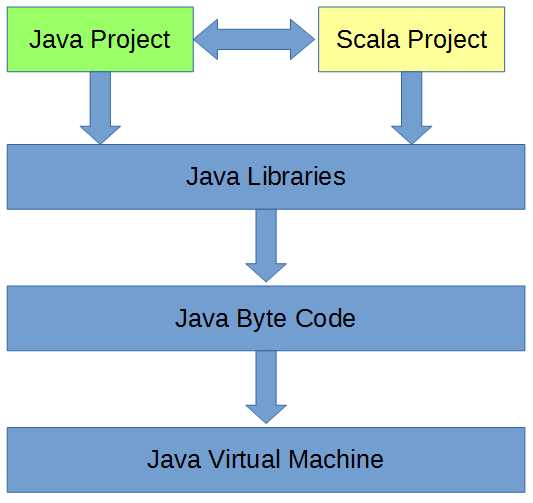
Figure 1: The Relationship between Scala and Java
Installation
Scala can be programmed using the console, but this is not a practical method for programming large-scale projects. The best method for programming useful modules is to install the Eclipse Scala Integrated Development Environment (IDE), which is a set of tools designed to assist development in one or more programming languages.
The Eclipse Scala IDE is available from http://scala-ide.org/. Visit and download the latest version.
Note: In this e-book, I will use the Scala Eclipse IDE exclusively, but there are other options available for developing the Scala application and integrating with existing Java applications. IntelliJ IDEA is another popular Java IDE that can be used to develop Scala modules and projects. You can also use the command line and develop Scala modules without an IDE.
When your download is complete, create or locate the folder in which you would like to store the application—for instance, in C:\Program Files\. Create a new folder called Scala Eclipse, copy the downloaded file to this new folder, and extract the archive’s contents. You should end up with a folder filled with the files and folders depicted in Figure 2.
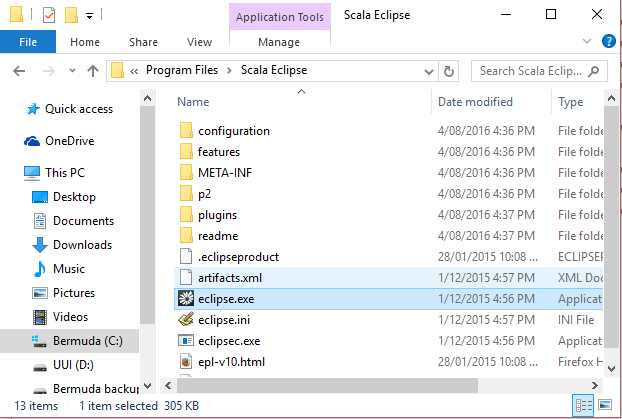
Figure 2: Installing Eclipse Scala IDE
Finally, in order to run the Scala Eclipse IDE conveniently, you might want to create a shortcut. Right-click the file called eclipse.exe and select Create Shortcut. Eclipse.exe is the main executable file for the IDE. Create a shortcut on your desktop or in some other convenient location. In order to run the IDE, double-click clipse.exe (or your newly created shortcut).
Selecting a workspace
When you run Eclipse, the Workspace selection dialog box opens (as per Figure 3). This allows you to specify which workspace you want to work with. A workspace is simply a folder that holds a collection of projects, and you can create a new workspace folder by clicking Browse... For instance, you can place your projects into your Documents folder in a subfolder called Scala Workspace. When you have selected a workspace or decided to use the default, click OK.
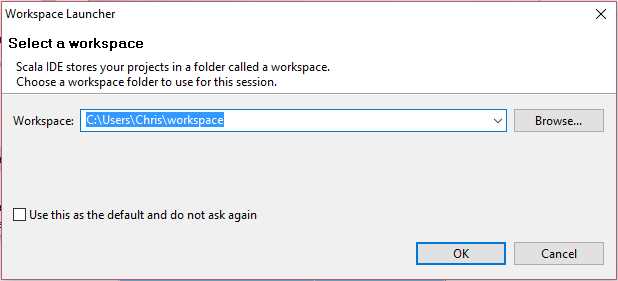
Figure 3: Selecting a Workspace
Hello World
For our first project, we will make a simple Hello World program in order to test that everything has been set up correctly. In order to begin a new project, start the Eclipse Scala IDE. Click File → New in the file menu of Scala Eclipse and select Scala Project from the submenu (as per Figure 4).
Note: Scala requires the Java Runtime Environment to be set up on the machine (JRE for short). This will probably be installed already. The latest version of the machine can be downloaded from Oracle at http://www.oracle.com/technetwork/java/javase/downloads/jre8-downloads-2133155.html. It is best to maintain an up-to-date JRE on your development machine(s) so that your Scala applications gain all of the benefits and optimizations of the latest JVM. Scala also requires the Java SE development kit, which can be downloaded from http://www.oracle.com/technetwork/pt/java/javase/downloads/jdk8-downloads-2133151.html.
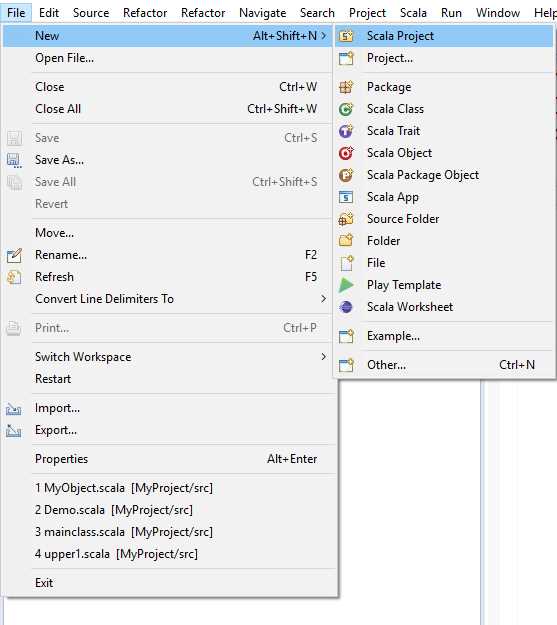
Figure 4: Beginning a New Project
Eclipse will show the New Scala Project window. Type a name for your project in the Project name box and click Finish. In Figure 5, I have called my new project HelloWorld.
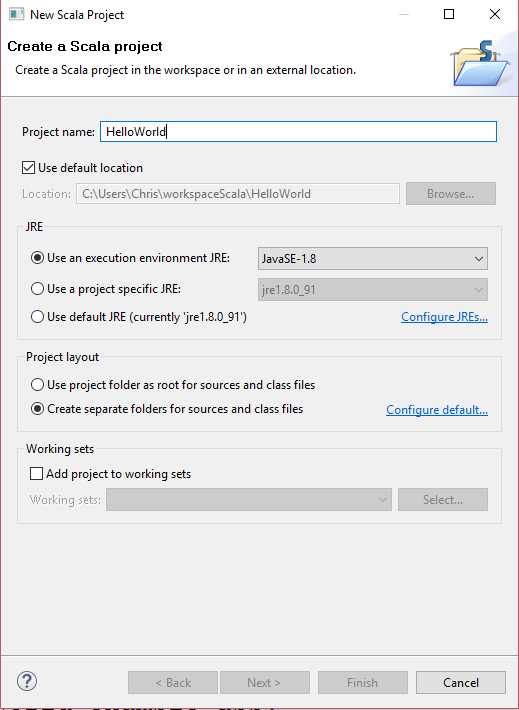
Figure 5: Creating a Project
A project is a collection of classes, objects, files, and resources that will be compiled by the scalac.exe and executed by the JVM. Project names must be unique within the workspace. They must also follow any conventions defined by the operating system. For instance, we should avoid using special symbols in our project names, such as & an $, and stick to letters and digits.
After clicking Finish, the Eclipse Scala IDE will create a simple project for you. Next, we need to add the main object, which will hold a program entry point. Right-click the src folder in the package explorer window. If that window is not visible on the file menu, click Window>Show View>Other>Java>Package Explorer. Next, select New>Scala Object (see Figure 6). Eclipse will open the New File Wizard window, as in Figure 7.
Note: The layout of the windows and panels and the debugging options are all the same between the Scale Eclipse IDE and the Java Eclipse IDE. Read Java Succinctly 1 for an introduction to the basic panels, windows, and debugging tools available in Eclipse.
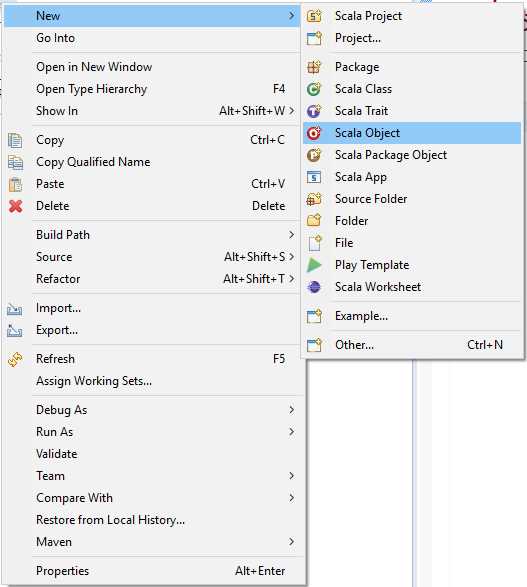
Figure 6: Creating a New Scala Object
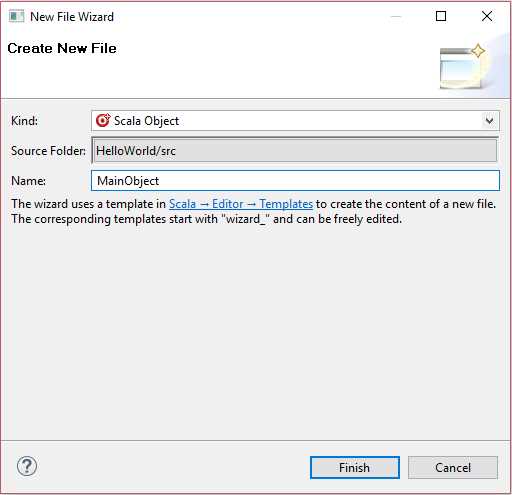
Figure 7: Opening the New File Wizard Window
In the New File Wizard window, give your object a name (I have called mine MainObject) and click Finish. Eclipse will create a new file for you with the code presented in Code Listing 1.
Code Listing 1: MainObject
object MainObject { } |
Scala is an object-oriented language with features similar to C++, C#, and Java. It operates a collection of objects built from classes. But Scala also allows us to define singleton objects. Singleton objects are the only instance built from a class. The object called MainObject in Code Listing 1 is actually a singleton. Instead of defining a blueprint with the keyword class, we define a singleton by using the keyword object.
In order for the JVM to know where to begin executing our new application, we must create an entry point—a main method. The JVM will call our main method once. It will never create more than one object of type MainObject, and this is why we can create the class as a singleton object rather than an inheritable or instantiable class. Code Listing 2 shows the completed code for the HelloWorld application.
Note: We do not have to specify a main method. We can create usable modules without a main method. The main method is only used when we intend to create an executable application.
Code Listing 2: HelloWorld Application
// Main object definition object MainObject { // Main method definition def main(args: Array[String]): Unit = {
// Print greeting: println("Hello world!")
} // Close main method } // Close MainObject |
If you know Java programming, Code Listing 2 might look familiar. For one thing, Scala is a curly-brace language. This means it uses { and } to designate code blocks. Note how each { has a matching }. Also, be aware that there are several conventions used for tabbing that are intended to make reading code easier.
Note: Scala may be a curly-brace language, but it is quite different from other C-family languages. You might notice that there are no semicolons at the ends of the statements. You can put in the semicolons, but they are almost never necessary in Scala. Mostly, we use semicolons when we need to place multiple statements on a single line; in this case the semicolon is used to delimit statements.
In Code Listing 2, we defined a method called main. The method begins with the def keyword and is followed by the name of the method (main in this case). Here the name main is a reserved word, and note that Scala is case sensitive. The inputs to the method are specified in brackets: (args: Array[String]). This particular method expects an Array of type String to be passed as a parameter, while args is the variable name or identifier (we will look at in detail for defining variables and passing arguments). We will ignore the args array in this e-book, but it is actually the optional command-line arguments; we could read the elements of args and respond to any command-line arguments the user passes when running our application from the console, a batch file, or shortcut that supplied arguments.
After we define a function’s parameter list, we place a colon followed by the output type of the function—in this case : Unit. Note that I use the words “function” and “method” more or less interchangeably. The technical differences between a Scala function and a Scala method are quite subtle but, with regards to the examples in this e-book, those differences are important. See the Scala documentation for the gory details. The main method does not return anything to the caller, so we place the keyword Unit as the output (which is equivalent to the void return type in other languages). We then use an equals operator (=) and open the code block for the specification of the method’s body.
Tip: There are often many optional elements in Scala’s syntax. For instance, if a function does not return anything, the “: Unit” is optional. So is the “=” sign. In Code Listing 1 we could have used the line “def main(args: Array[String]) {” to define our main method. Scala is very good at inferring information such as data types.
Inside the method body, we use the println built-in function to print a string of text to the screen. And we close the code blocks for the main method and the MainObject.
Running the application
When we have a Scala project with a main entry point, we can run the application by clicking Scala Application in the file menu, under Run>Debug As—as in Figure 8. You’ll be presented with a Select Preferred Launcher dialog window. Check the Use configuration specific settings option, then select either the JVM or New Debugger option and click OK. You can change this selection later with Run > Debug Configurations > Common > Select Other > (option).
The first time you use Scala Eclipse, you might get a firewall warning. If so, select the option that allows eclipse.exe to run on your network.
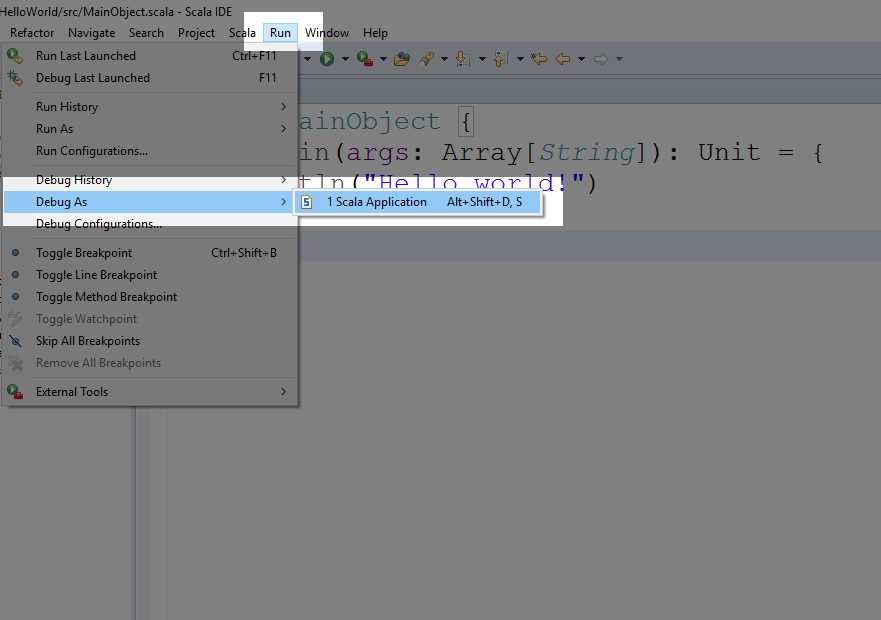
Figure 8: Debugging a Scala Application
When you run the application, it will print the line “Hello world!” to the Console. In Scala Eclipse, the Console is represented by a small window at the lower end of the screen—see Figure 9.
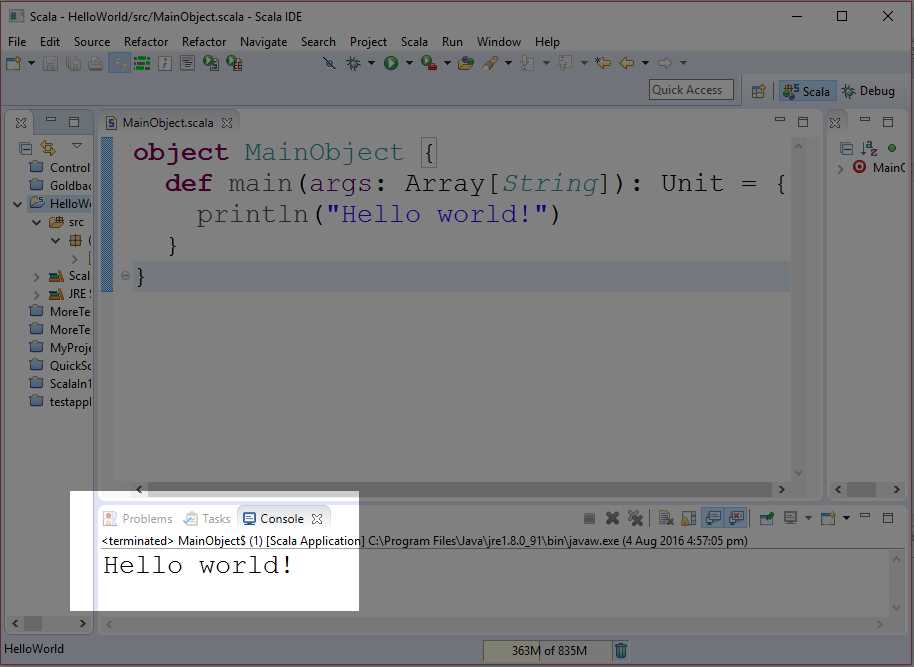
Figure 9: A Console
Note: We will be working entirely with the Console in this e-book, but Scala has the complete Java Library available to it. You can create applications in Java with a Graphical User Interface (GUI), or you can use the Java GUI library of classes to build a GUI in Scala. I will not go into the details of building a GUI here, but I refer you to Java Succinctly 2, in which we look at how to build a GUI using Java.
After you have run your Scala application once using the method described here, Scala Eclipse will create Run Configuration for you. When your project has a run configuration, you can run and debug the application by clicking Debug or Run, as shown in Figure 10.
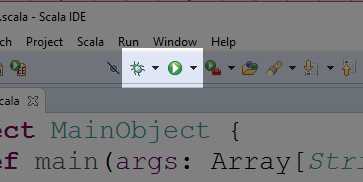
Figure 10: Debug and Run Buttons
Debug and run configurations
The debug and run configurations can be changed by clicking Run → Debug Configurations or Run → Run Configurations. Clicking these options will open up the Debug Configurations box, as per Figure 11. If you need to supply command-line arguments to your programs (which will be passed as the args Array parameter to the main method) or test the project using a different JRE, you can do so with this box. We will use the default configuration throughout this e-book.
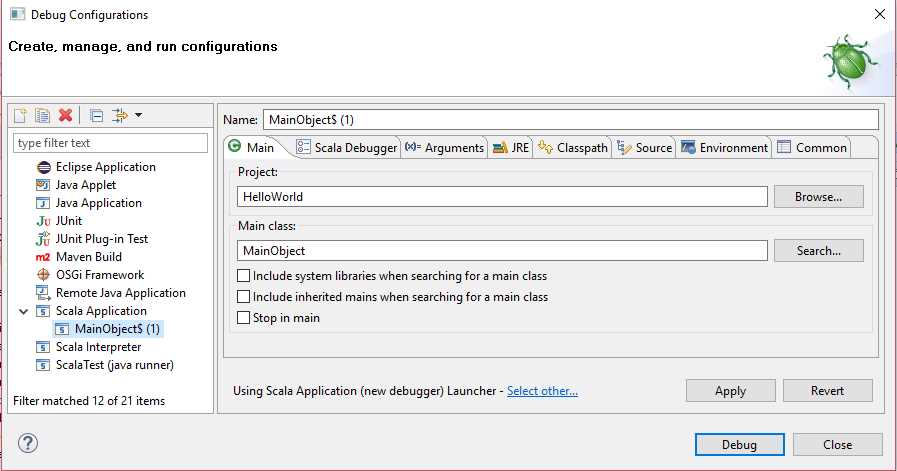
Figure 11: Run and Debug Configurations Box
Problems and errors
Finally, if your project does not run and print “Hello world!” to the console, Eclipse may show an error box. If so, it will ask if you want to Continue with Launch. You should answer No. If you answer Yes, Eclipse will run the last version of the program known to work, and this is not useful for debugging.
When you select No, the error list can be found by clicking the Problems tab at the lower end of the screen, as in Figure 12.
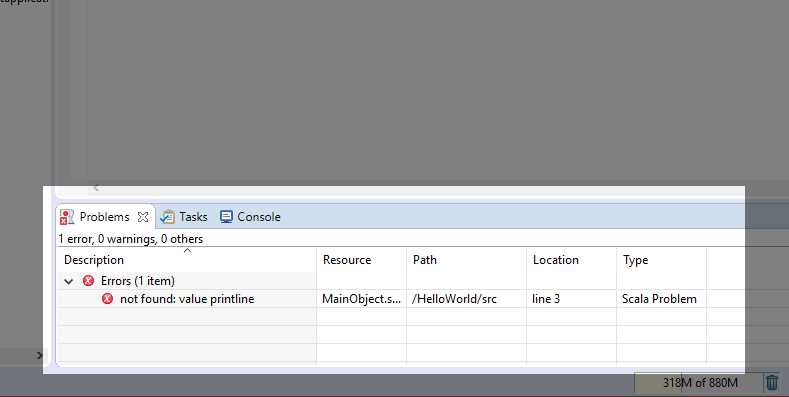
Figure 12: Problems Tab
Note: Many of the debugging techniques in Eclipse Java are also available in Eclipse Scala. I will focus on the main differences between Java and Scala, which means I will not be going into the details of debugging. If you wish to know more about debugging mechanisms and tools, consult Java Succinctly 1.
- 1800+ high-performance UI components.
- Includes popular controls such as Grid, Chart, Scheduler, and more.
- 24x5 unlimited support by developers.