
Gradle Succinctly®

CHAPTER 9
Running Gradle from Visual Studio Code
All code examples of this book were created using Visual Studio Code® (VS Code), a free, open-source code editor from Microsoft Corporation. Besides the Windows platform, the editor is available for Linux and Mac OS X platforms. It’s extensible and customizable by installing extensions for several programming languages, adding debuggers, and connecting to additional services.
This chapter won’t go deep into Visual Studio Code, as it’s out of the scope of this book, but I will give a brief explanation on how Gradle builds can be executed from VS Code.
Loading a Gradle project into VS code
The first thing you should do is create the project’s directory in which the build script will be edited. Then, launch VS Code.
- VS Code main window
Now, the Gradle project’s directory needs to be opened by VS Code. To do so, choose the Open Folder option from the File menu.
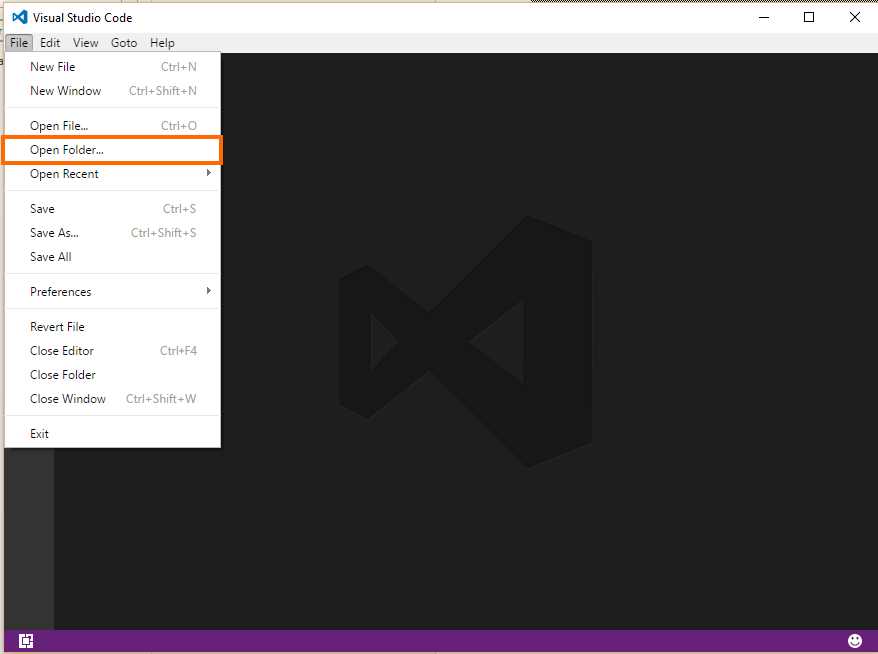
- The Open Folder option
The directory can be located using the Select Folder dialog box and clicking Select Folder. This action will bring up the project structure to the VS Code main window.
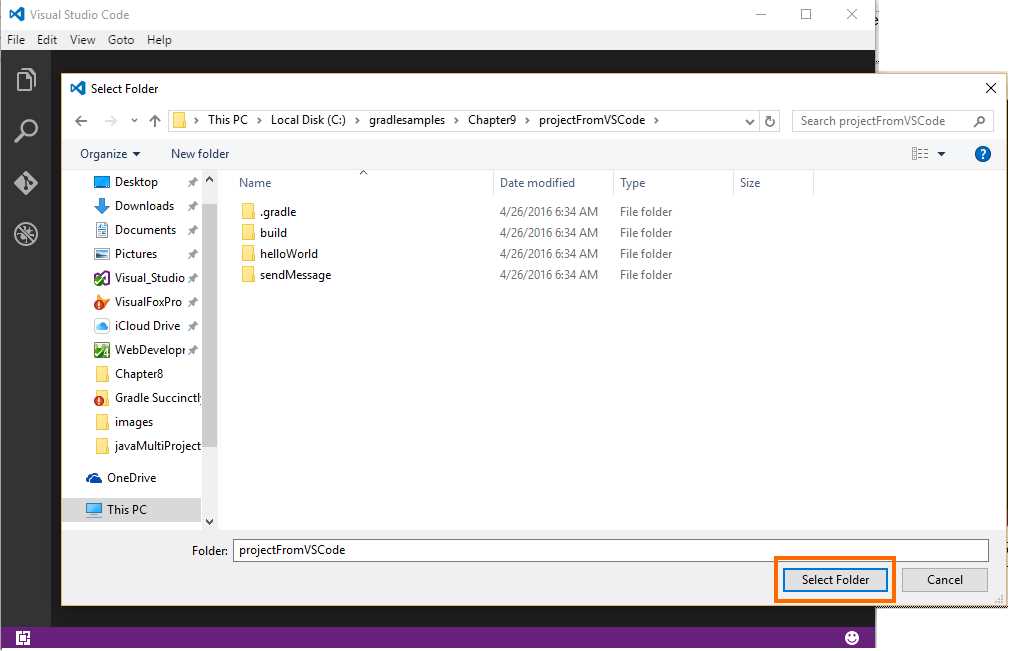
- The Select Folder dialog box
Assuming that the build script and project’s structure have been already edited, the VS Code main window will display all of the project’s content at the left side. The following figure shows VS Code with the project loaded.

- VS Code with the build project loaded
To edit any file contained in the project’s directory, you only need to click over the name of the desired file, and its content will be displayed in the editor window, on the right side of the project’s navigation bar.
Adding a task to VS Code to run Gradle
In order to run Gradle from VS Code, you need to set up a task using a tasks.json file. Press the Ctrl + Shift + P keys combination to bring up the search bar. Then, type task and select Configure Task Runner from the list.

- The Configure Task Runner option
After the Configure Task Runner option is selected, VS Code will ask for the type of Task Runner to be configured. Choose the Others option for Gradle.
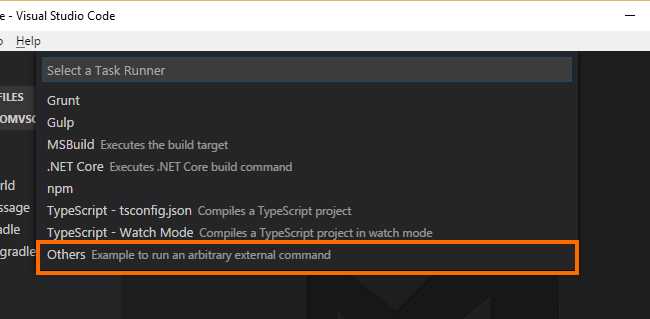
- The “Others” Task Runner type
A folder named .vscode will be created in the project’s directory, and a file called tasks.json will be displayed in the editor window. This file contains five parameters that need to be modified to make Gradle run.
- The tasks.json file
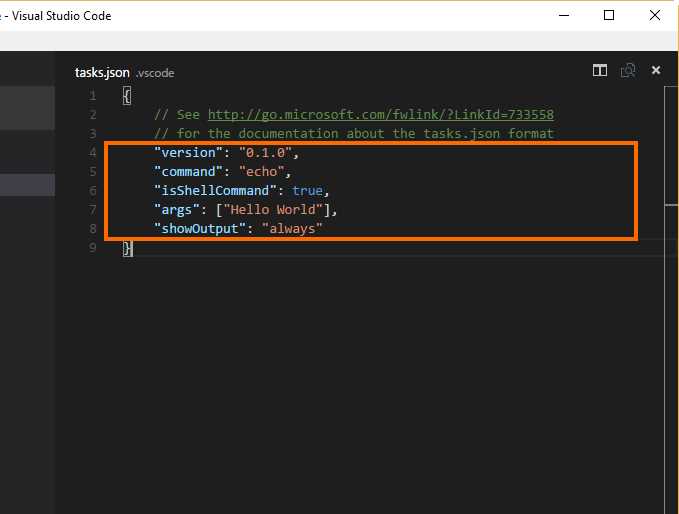
To make Gradle run, the parameters command and args need to be edited. The command parameter’s value needs to be changed to gradle, and the args (arguments) parameter can be an empty string if the build script has a default task defined, or can be the name of the task that will be executed by the build script.
After these changes, the file should look like the following figure.

- Tasks.json after changes made
Now, to run Gradle, close the file and then press the Ctrl + P keys combination to bring up the actions bar. Type task gradle into the actions bar and press the Enter key.
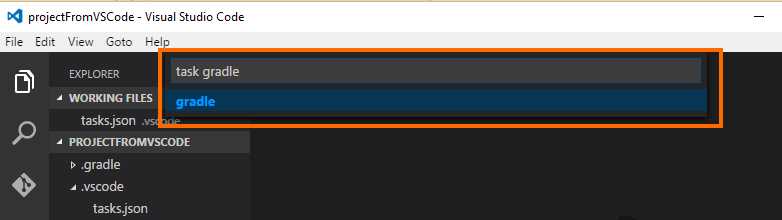
- VS Code actions bar
After a few seconds, the output window will show the results of the build script’s execution.
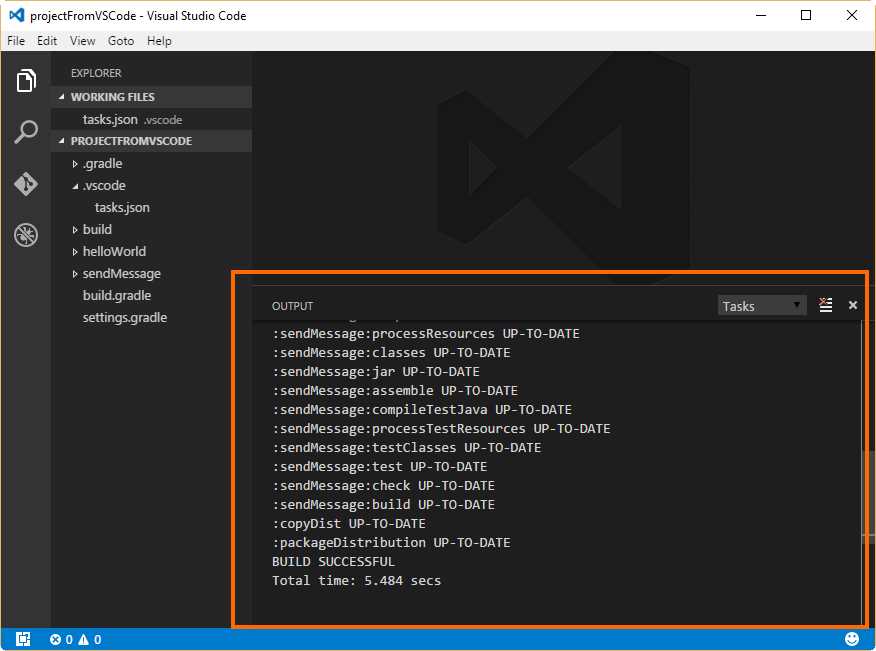
- The results of the build script’s execution
Chapter summary
This chapter explained how to execute build scripts with Gradle from Visual Studio Code, the free, open-source code editor from Microsoft Corporation, available for Windows, Linux, and Mac OS X platforms.
To run Gradle from VS Code, the project’s folder must be opened with VS Code, and a tasks.json file needs to be created in that directory. This file is created with the Configure Task Runner option, which can be located in the search bar by typing task. To show this bar, press the Ctrl + Shift + P keys combination.
The tasks.json file has two parameters that need to be modified: command and args. The command parameter must be set to gradle, and the args parameter could be set to an empty string (if the build script has a default task defined), or to the name of the task that will be executed by Gradle.
To run the build script, you need to save and close the tasks.json file. Then, pressing the Ctrl + P keys combination will bring up the actions bar. After you type task gradle and press the Enter key, Gradle will run. The output window will show the results of the build script’s execution.
- 1800+ high-performance UI components.
- Includes popular controls such as Grid, Chart, Scheduler, and more.
- 24x5 unlimited support by developers.