
In general, redaction means censoring or obscuring confidential parts of a text before publication or distribution. In PDF documents, you may need a tool to obscure some confidential information from them, such as social security numbers, medical information, personal addresses, dates of birth, etc., before sharing the documents with others. The Syncfusion WPF PDF Viewer provides an easy and straightforward way to redact confidential data such as text, graphic elements, and images permanently from PDF pages without altering the remaining contents. In this blog, we will see in detail how to redact data from a PDF document using the WPF PDF Viewer.
Getting started
First things first:
- Create a new WPF project and install the PDF Viewer NuGet package.
- Include the following code in your XAML page to add the PDF Viewer as a child to the window.
<Window x:Class="PdfViewer.MainWindow"
        xmlns:pdfviewer="clr-namespace:Syncfusion.Windows.PdfViewer;assembly=Syncfusion.PdfViewer.WPF">
    <pdfviewer:PdfViewerControl x:Name="pdfViewer"/>
</Window>
Redact sensitive contents in a PDF document
This section explains how to redact data from a PDF document with or without user interaction.
Redact PDF contents interactively
After adding the PDF Viewer in your WPF application, follow these steps to redact the sensitive contents:
- Open the PDF file in the PDF Viewer using the Open button.
- Select the redactor tool in the left toolbar (
 ) to display the redaction toolbar.
 - Click the Mark for Redaction option in the toolbar.
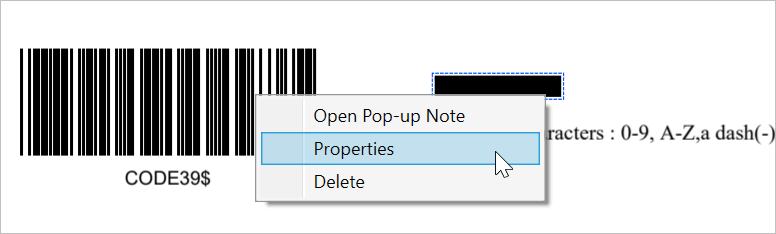
- Then, click and drag to mark regions for redaction by drawing rectangles around the sensitive content. You can mark more than one region on a single page or on different pages. After marking the regions, review and unmark (delete) regions if needed. Delete a marked region by selecting Delete in the pop-up menu that opens after right-clicking over the region.
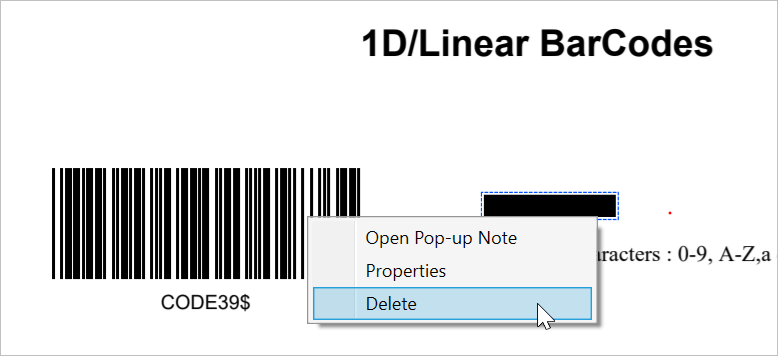
Delete Option to Remove the Redaction Mark
- Once the changes are reviewed, redact the contents permanently from the pages by clicking the Apply option in the toolbar.
Note: After applying the redaction, the marked contents will be redacted permanently. This cannot be undone.
Redact PDF Contents Interactively in WPF PDF Viewer
Redact PDF contents programmatically (without user interaction)
Alternatively, you can mark regions for redaction without user interaction by using the MarkRegions method available in the PDF Viewer. Just pass the page number and a collection of regions to be marked for redaction as parameters.
Refer to the following code example.
/// <summary>
/// Marks the rectangle regions to be redacted in the PDF pages.
/// </summary>
/// <param name="bounds">Has the collection of information about the page index and the bounds of the areas to be redacted</param>
void MarkRegions(Dictionary<int, List<RectangleF>> bounds)
{
    // Iterate the collection and mark regions
    foreach (KeyValuePair<int, List<RectangleF>> textBounds in bounds)
    {
        pdfViewer.PageRedactor.MarkRegions(textBounds.Key, textBounds.Value);
    }
    pdfViewer.PageRedactor.EnableRedactionMode = true;
}
Note: MarkRegions(Int32, List<RectangleF>) will clear the existing marked (unredacted) regions for redaction. Use the clearExisting overload of the MarkRegions(Int32, List<RectangleF>, Boolean) to not clear the existing marked (unredacted) regions.
Similarly, you can also apply the redaction without user interaction, with the help of the ApplyRedaction method. Refer to the following code example to apply redaction in the marked regions.
pdfViewer.PageRedactor.ApplyRedaction();
For more information, refer to this apply redaction without user interaction demo.
Search and redact a particular text
You can search for particular text and redact all of its instances in the PDF document. The ExtractText method of the PDF Viewer can be used to find the regions (bounds) of all instances of specified text in the document.
Refer to the following code example to find the bounds of every instance of particular text in the PDF document.
/// <summary>
/// Gets all the bounds of the text present in the PDF document.
/// </summary>
/// <param name="text">text to be searched</param>
/// <returns>The collection of page index and the bounds collection of the searched text</returns>
private Dictionary<int, List<RectangleF>> GetTextBounds(string text)
{
   text = text.ToLower();

   Dictionary<int, List<RectangleF>> textBounds = new Dictionary<int, List<RectangleF>>();

   for (int i = 0; i < pdfViewer.PageCount; i++)
   {
       List<RectangleF> bounds = new List<RectangleF>();

       // Extract text and its bounds from the PDF document.
       List<TextData> textDataCollection = new List<TextData>();
       string extractedText = pdfViewer.ExtractText(i, out textDataCollection).ToLower();

       int start = 0;
       int indexOfText = 0;
       int end = extractedText.Length;
       int count = 0;

       // Iterate and get all the instance of the given text.
       while ((start <= end) && (indexOfText > -1))
       {
           count = end - start;
           // Get the next index of the text to be searched
           indexOfText = extractedText.IndexOf(text, start, count);
           if (indexOfText == -1)
               break;

           // Holds the bounds of the first character in the text.
           RectangleF startCharacterBounds = textDataCollection[indexOfText].Bounds;

           // Holds the bounds of the last character in the text.
           RectangleF endCharacterBounds = textDataCollection[indexOfText + text.Length - 1].Bounds;

           // Get the bounds of the whole text.
           RectangleF rectangle = new RectangleF(startCharacterBounds.X, startCharacterBounds.Y,
                        endCharacterBounds.X - startCharacterBounds.X + endCharacterBounds.Width,
                        startCharacterBounds.Height > endCharacterBounds.Height ? startCharacterBounds.Height : endCharacterBounds.Height);
                    bounds.Add(rectangle);

                    start = indexOfText + text.Length;
                }
                // Add to the collection if any text is obtained.
                if (bounds.Count > 0)
                    textBounds.Add(i, bounds);
            }
            return textBounds;
        }
Using the bounds, you can easily mark and redact the text by combining the MarkRegions and ApplyRedaction methods as explained earlier.
For more information, refer to this find and redact text in the PDF document example.
How to customize the appearance of redaction marks
Set the default appearance of all marks
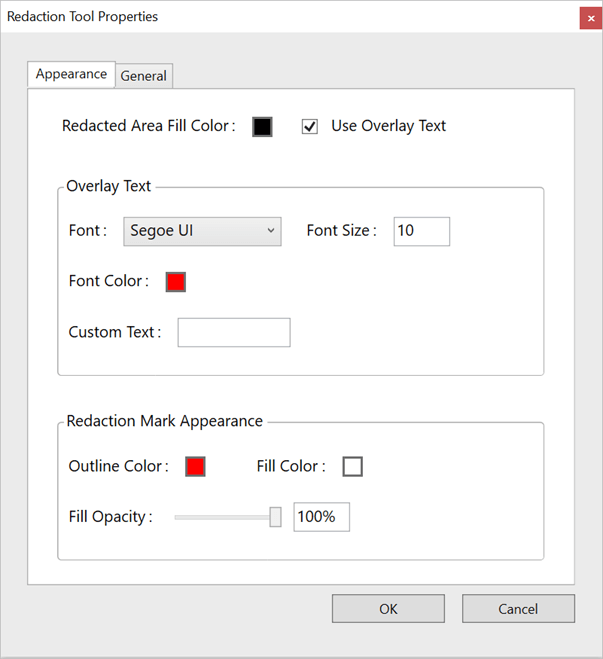
You can customize the appearance (outline color, fill color, and opacity) of redaction marks by clicking the Properties option in the redaction toolbar.

The following properties window will appear, which will allow you to customize the appearance of the redaction marks.
Alternatively, customization can be done programmatically by using RedactionSettings. Refer to the following code example to customize the appearance of the redaction marks.
// Set the default appearance settings for the redaction marks before redaction is applied (preview).
pdfViewer.RedactionSettings.MarkAppearance.FillColor = System.Windows.Media.Colors.Black;
pdfViewer.RedactionSettings.MarkAppearance.OutlineColor = System.Windows.Media.Colors.Yellow;
pdfViewer.RedactionSettings.MarkAppearance.FillOpacity = 0.5f;

// Set the default appearance settings after the redaction is applied.
pdfViewer.RedactionSettings.FillColor = System.Windows.Media.Colors.Red;
Change the appearance of an individual mark
You can also change the appearance of an individual mark by right-clicking the marked region and selecting Properties from the menu.
The properties window shown earlier will appear, and will allow us to customize the appearance of the redaction mark.
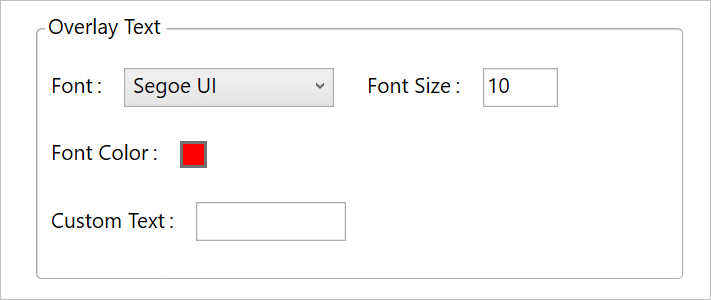
Add overlay text
You can also add overlay text to all redaction marks or to an individual mark. By using the Overlay Text option in the properties window, you can add notes for future use or replaceable text in the redacted area.
You can also set overlay text and its properties programmatically through the RedactionSettings. Refer to the following code example to set the overlay text and its properties.
// Set the default properties of the overlay text.
pdfViewer.RedactionSettings.FontColor = System.Windows.Media.Colors.Yellow;
pdfViewer.RedactionSettings.FontFamily = new System.Windows.Media.FontFamily("Comic Sans MS");
pdfViewer.RedactionSettings.FontSize = 8f;
pdfViewer.RedactionSettings.UseOverlayText = true;
pdfViewer.RedactionSettings.OverlayText = "Redacted region";
GitHub reference
For more information, you can refer to Redact data from a PDF document using WPF PDF Viewer demos.
Conclusion
Thank you for reading this blog. I hope that you enjoyed learning about how to redact data from PDF using the Syncfusion WPF PDF Viewer. Try using our PDF Viewer in your application and let us know what you think in the comment section below.
For existing users, the latest version is available for download from the License and Downloads page. If you are not yet a Syncfusion customer, you can try a 30-day free trial to check out the available features.
You can contact us through our support forums, Direct-Trac or feedback portal. We are always happy to assist you!


 No spam, just valuable updates.