
The Blazor platform provides support for lazy loading assemblies starting with .NET 5 Preview 8. It is a feature that allows you to load a specific set of assemblies on navigating to a particular component’s route path—that means the specified assemblies will be loaded in the browser only when they are required. The loaded assemblies will be cached and reused for future navigation.
The Blazor lazy loading of assemblies works only in Blazor WebAssembly (WASM) applications. It is not suitable for Blazor server-side applications.
As already explained in a previous blog post, Syncfusion provides individual NuGet package support, starting from the 2020 Volume 4 (v18.4.0.30) release. So, we can now utilize the lazy loading Blazor assemblies feature with our Blazor UI components.
Let’s check out this feature in action!
Prerequisites
Create a Blazor WebAssembly application
In this segment, we are going to create a new Blazor WebAssembly application and install the individual Syncfusion Blazor NuGet packages.
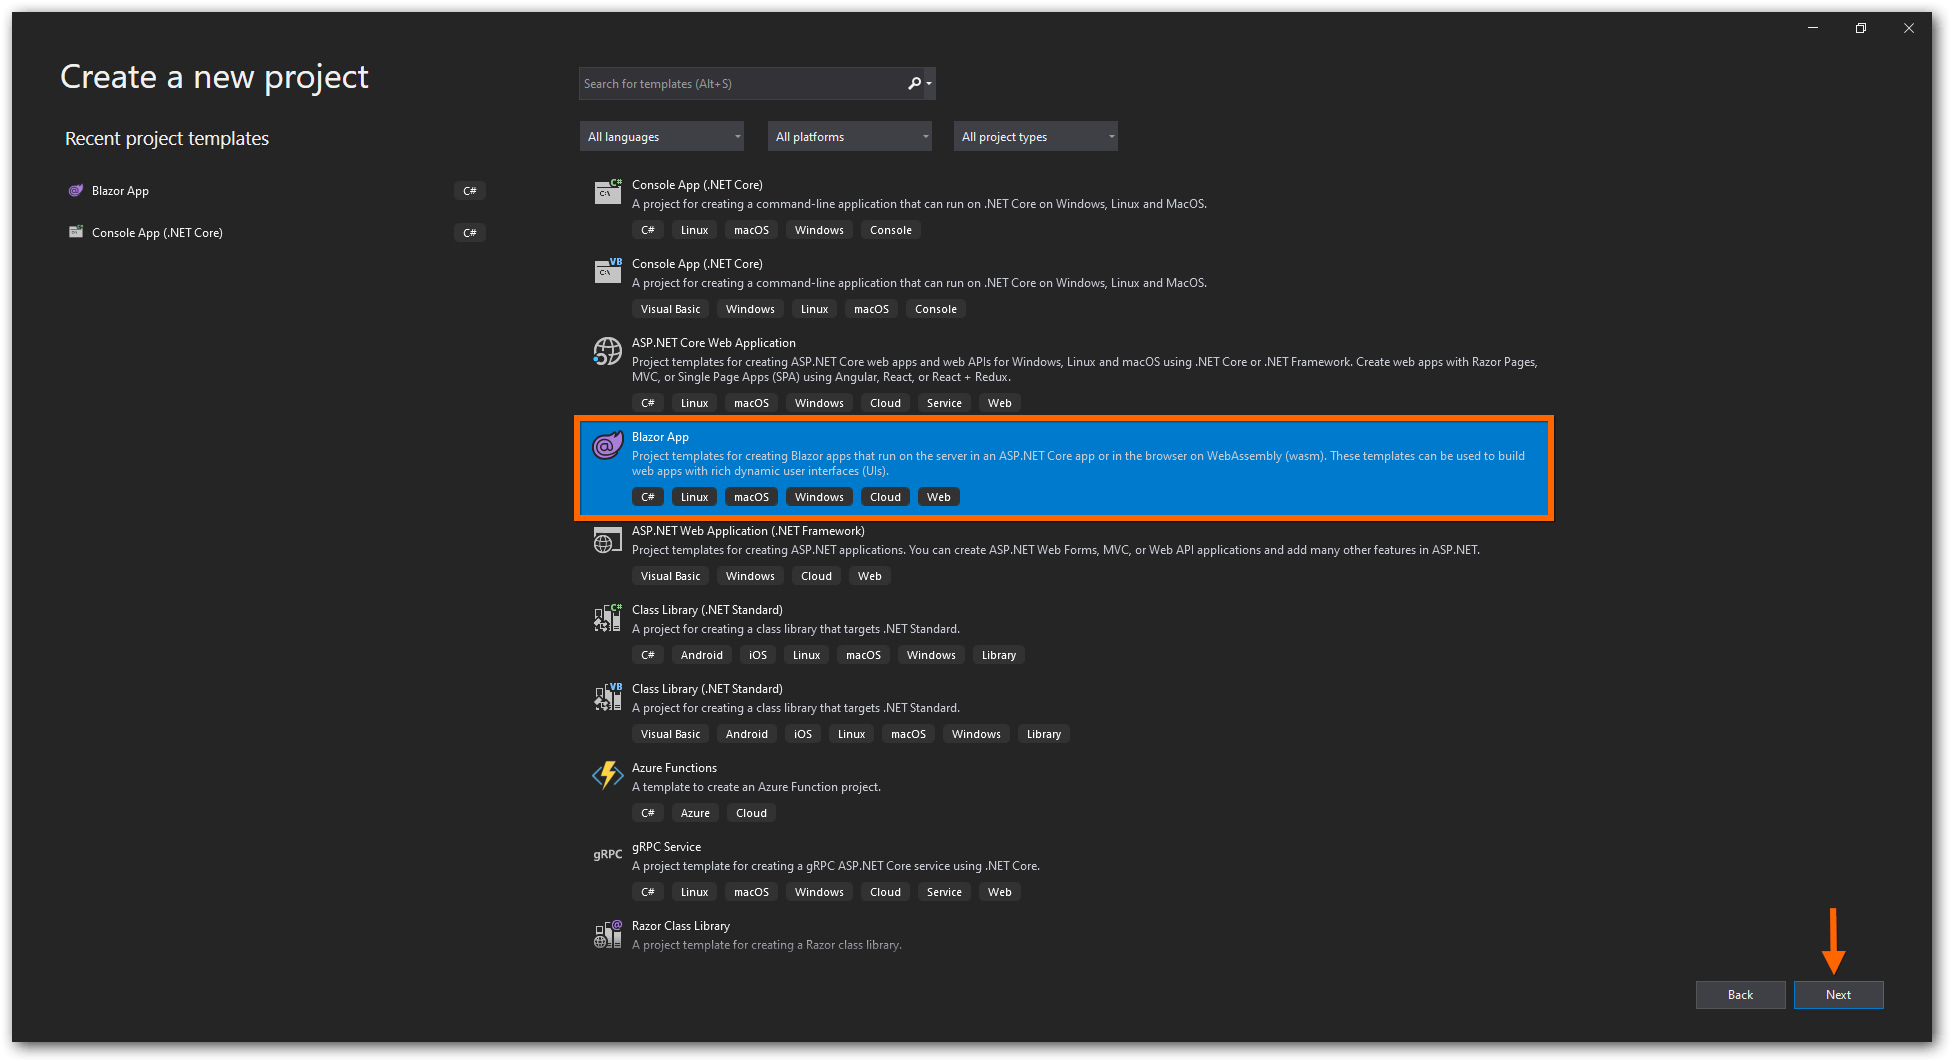
- Open Visual Studio 2019 and Create a new project. Then, select Blazor App and click Next as shown in the following screenshot.
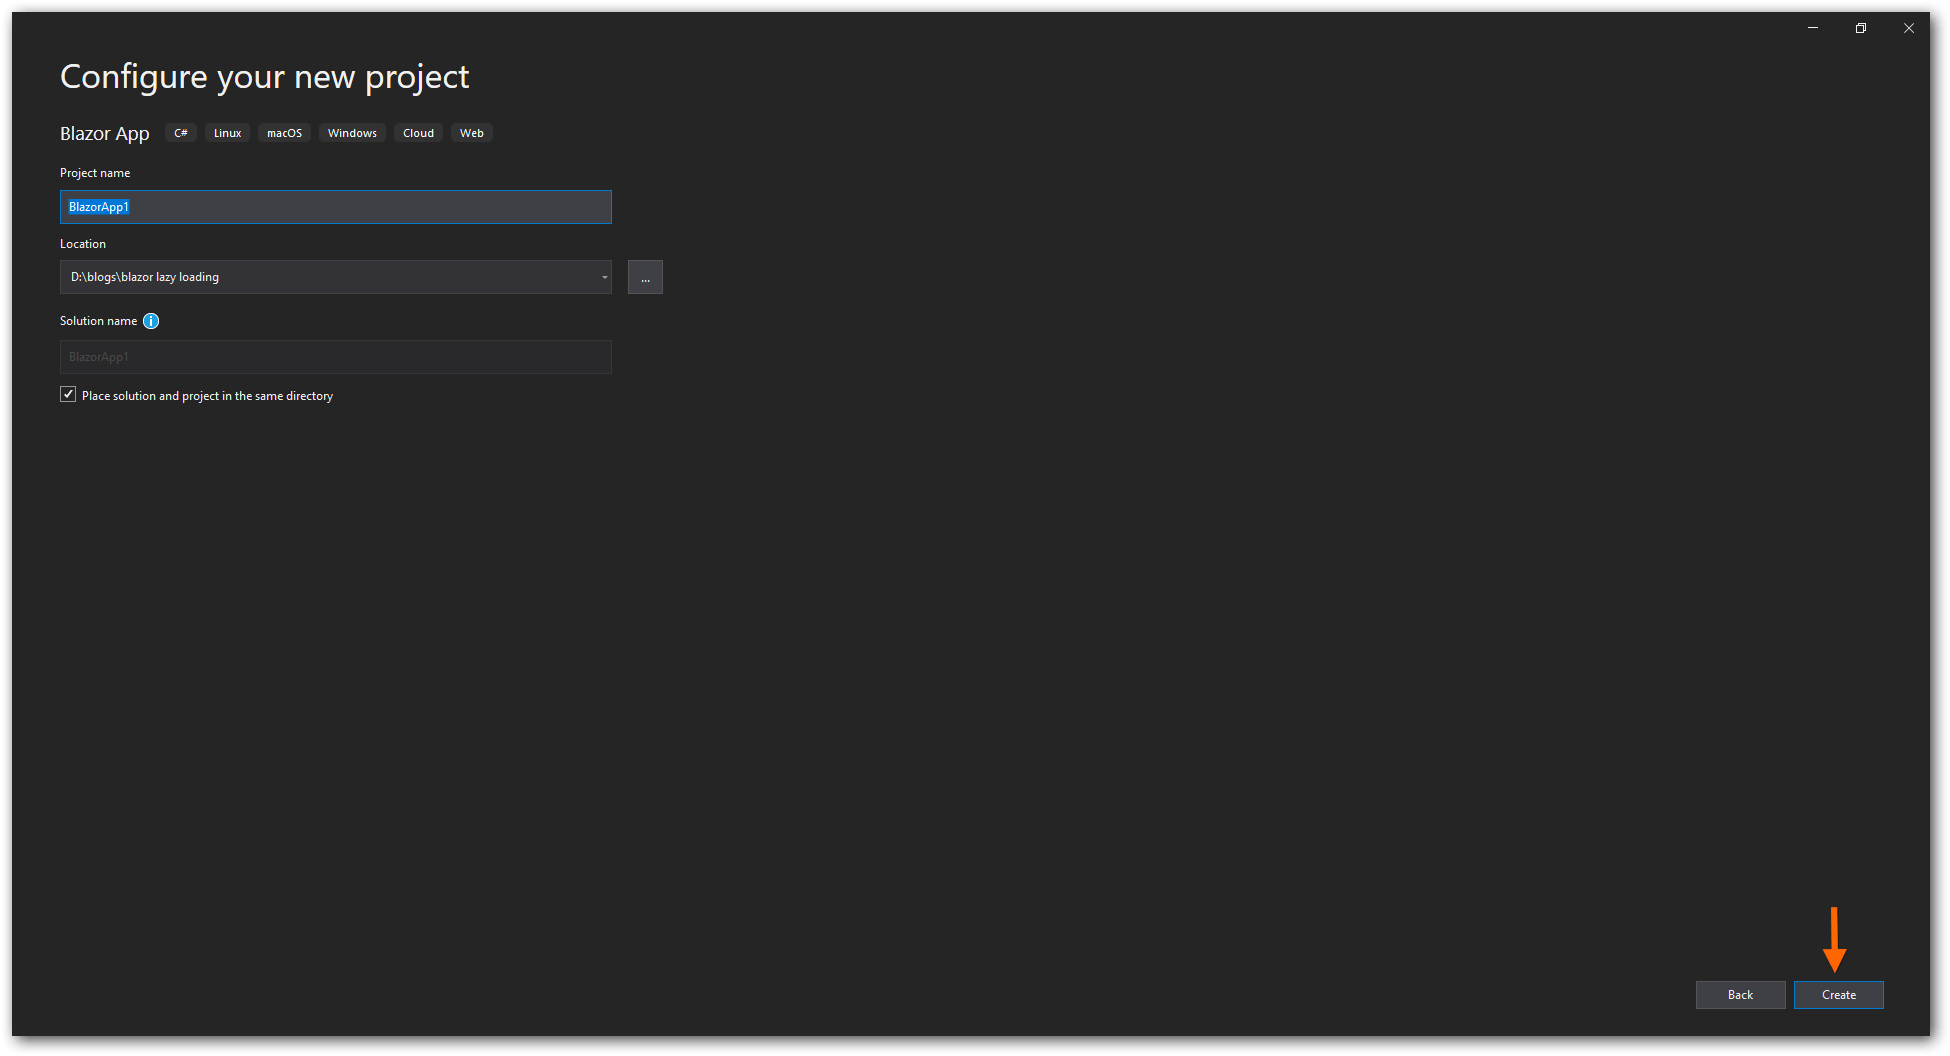
- The Configure your new project window will appear. In it, click Create.
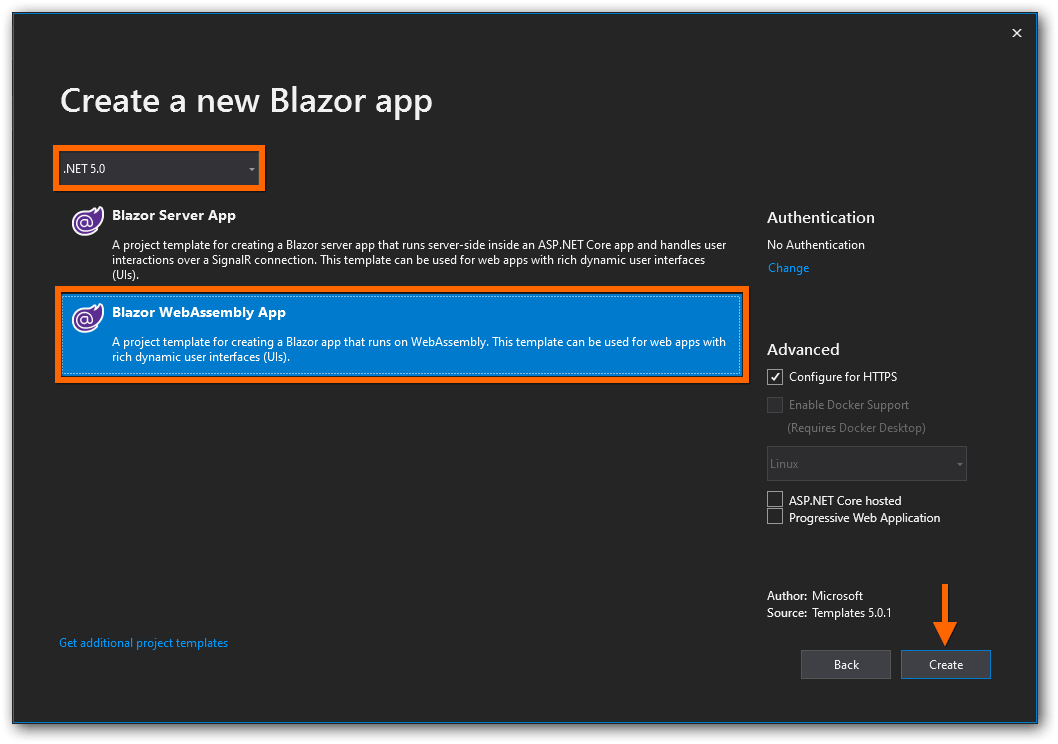
- Next, choose the .NET 5.0 option from the drop-down box and select Blazor WebAssembly App from the list. Then, click Create.
- Right-click on the project and select Manage NuGet Packages.
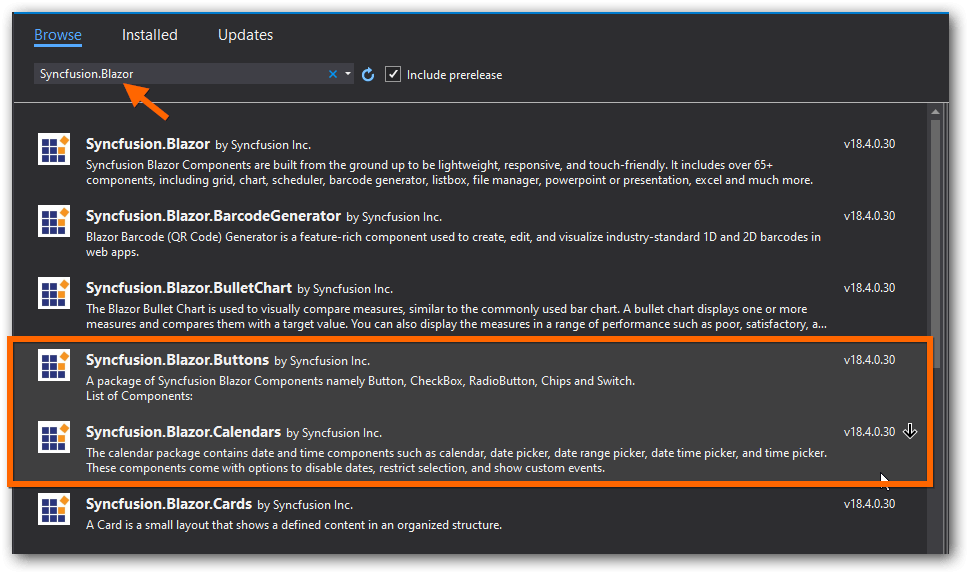
- Then, search for the Syncfusion.Blazor keyword and install the required Syncfusion Blazor NuGet packages.Here, we have installed the Syncfusion.Blazor.Buttons and Syncfusion.Blazor.Calendars NuGet packages in the application. Refer to the following screenshot.
- Now, configure the Syncfusion Blazor service in the ~/Program.cs file like in the following code example.
using Syncfusion.Blazor; public class Program { public static async Task Main(string[] args) { var builder = WebAssemblyHostBuilder.CreateDefault(args); ........ ........ builder.Services.AddSyncfusionBlazor(); await builder.Build().RunAsync(); } } - Then, add the Syncfusion Blazor theme file reference in the ~/wwwroot/index.html file.
<!DOCTYPE html> <html> <head> ........ ........ <link href="BlazorApp1.styles.css" rel="stylesheet" /> <link href="_content/Syncfusion.Blazor.Themes/bootstrap4.css" rel="stylesheet" /> </head> ........ ........ </html> - Now, add the two Razor components (Button.razor and Calendar.razor) in the ~/Pages folder and the following code examples in them.Buttons.razor
@page "/button"

@using Syncfusion.Blazor.Buttons;

<h3>Syncfusion Blazor Button</h3>

<SfButton>Button</SfButton>
<SfButton IsPrimary="true">Primary Button</SfButton>
Calendar.razor
@page "/calendar"

@using Syncfusion.Blazor.Calendars;

<h3>Syncfusion Blazor Calendar</h3>

<SfCalendar TValue="DateTime"></SfCalendar>
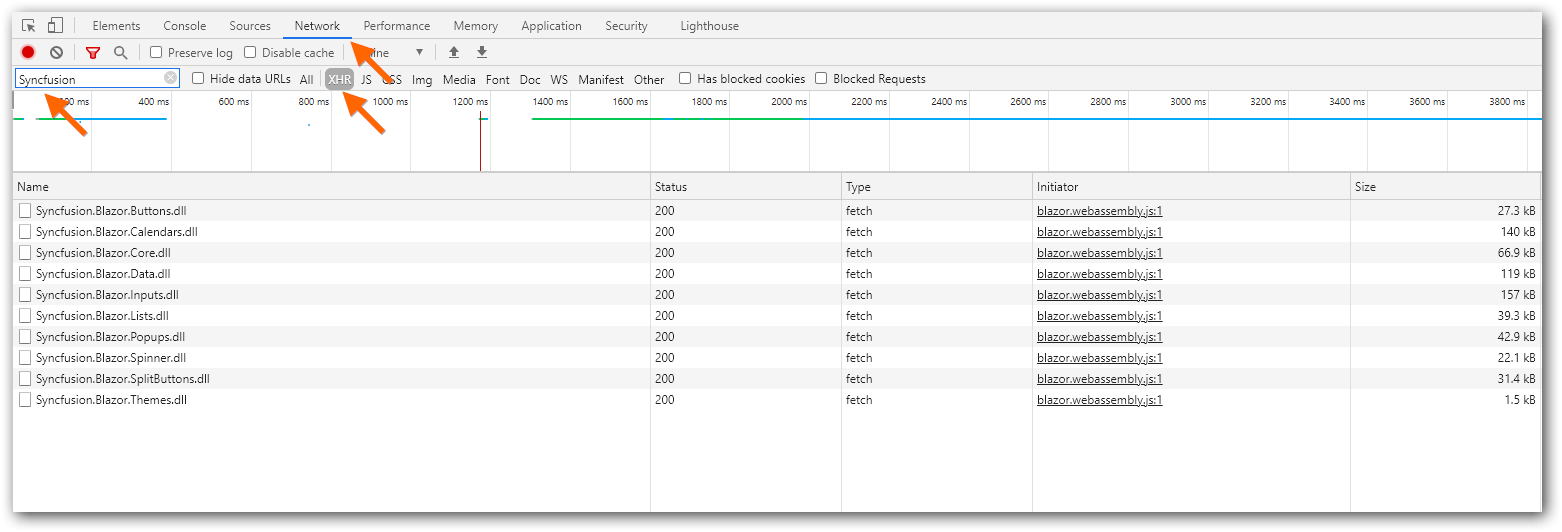
- Finally, run the application and it will load all the assemblies (without lazy loading) in the web browser during initial loading.
Configure lazy loading in the application
Now, let’s configure the lazy loading of assemblies in our application. The process is as follows:
- Include the required Syncfusion Blazor assemblies and their dependencies in your project file (.csproj) by using the BlazorWebAssemblyLazyLoad tag item.Refer to the following code example.
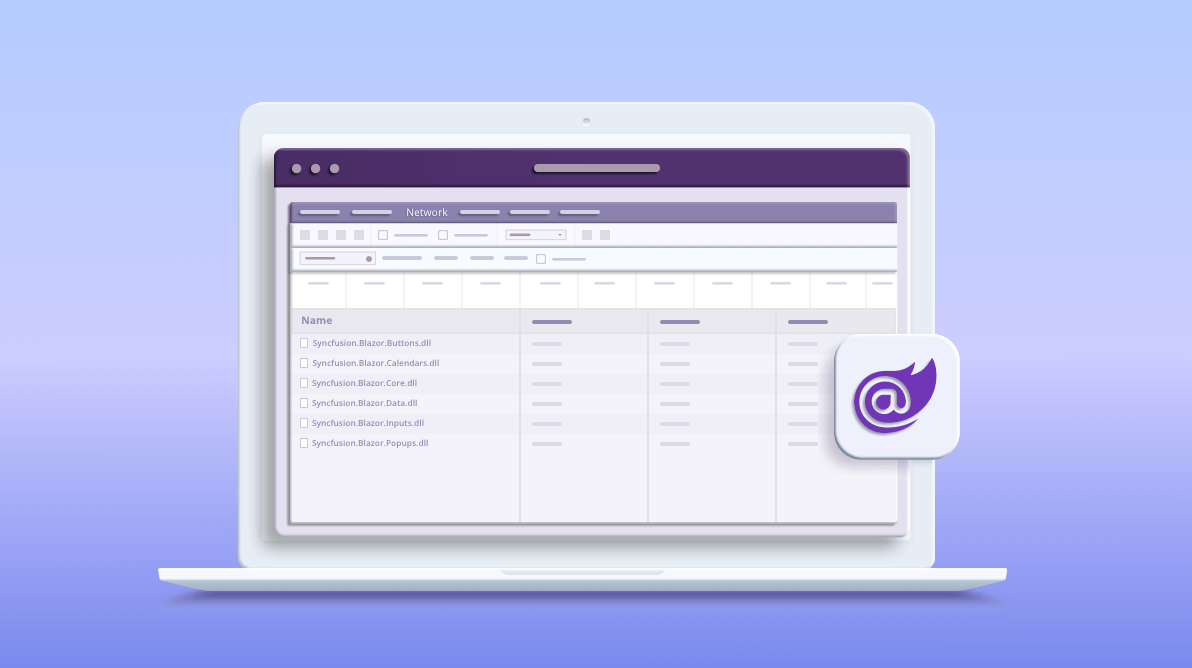
<ItemGroup>
    <BlazorWebAssemblyLazyLoad Include="Syncfusion.Blazor.Buttons.dll" />
    <BlazorWebAssemblyLazyLoad Include="Syncfusion.Blazor.Calendars.dll" />
    <BlazorWebAssemblyLazyLoad Include="Syncfusion.Blazor.Inputs.dll" />
    <BlazorWebAssemblyLazyLoad Include="Syncfusion.Blazor.Lists.dll" />
    <BlazorWebAssemblyLazyLoad Include="Syncfusion.Blazor.Data.dll" />
    <BlazorWebAssemblyLazyLoad Include="Syncfusion.Blazor.Spinner.dll" />
    <BlazorWebAssemblyLazyLoad Include="Syncfusion.Blazor.Popups.dll" />
    <BlazorWebAssemblyLazyLoad Include="Syncfusion.Blazor.SplitButtons.dll" />
</ItemGroup>
Note: Do not include the Syncfusion.Blazor.Core and Syncfusion.Blazor.Themes packages in the BlazorWebAssemblyLazyLoad item. These packages contain common functionalities needed for the application’s initial rendering.
- Open the ~/App.razor file and inject the LazyAssemblyLoader service in it as shown in the following code.
@using Microsoft.AspNetCore.Components.WebAssembly.Services

@inject LazyAssemblyLoader assemblyLoader
- Then, add the AdditionalAssemblies and OnNavigateAsync methods to the Router component.
Note: The OnNavigateAsync is a callback that will be invoked when the user visits a route for the first time by directly navigating in the browser or when using the NavigationManager.NavigateTo method invocation. The argument of this callback contains the navigating route path.
Refer to the following code.
@using System.Reflection; <Router AppAssembly="@typeof(Program).Assembly" PreferExactMatches="@true" AdditionalAssemblies="@lazyLoadedAssemblies" OnNavigateAsync="@OnNavigateAsync"> ........ ........ </Router> @code { private List<Assembly> lazyLoadedAssemblies = new List<Assembly>(); private async Task OnNavigateAsync(NavigationContext args) { } } - Now, add the lazy loaded assemblies to the AdditionalAssemblies property based on the route path in the OnNavigateAsync callback.
Note: Add all the nested dependency assemblies along with the corresponding component assembly which is used in the current route path.
Refer to the following code example.
@code { private List<Assembly> lazyLoadedAssemblies = new List<Assembly>(); private async Task OnNavigateAsync(NavigationContext args) { try { IEnumerable<Assembly> assemblies = null; switch (args.Path) { case "button": assemblies = await assemblyLoader.LoadAssembliesAsync( new List<string>() { "Syncfusion.Blazor.Buttons.dll" }); break; case "calendar": assemblies = await assemblyLoader.LoadAssembliesAsync( new List<string>() { "Syncfusion.Blazor.Calendars.dll" , "Syncfusion.Blazor.Buttons.dll", "Syncfusion.Blazor.Inputs.dll", "Syncfusion.Blazor.Lists.dll", "Syncfusion.Blazor.Data.dll", "Syncfusion.Blazor.Spinner.dll", "Syncfusion.Blazor.Popups.dll", "Syncfusion.Blazor.SplitButtons.dll", }); break; } if (assemblies != null) { lazyLoadedAssemblies.AddRange(assemblies); } } catch (Exception ex) { } - While using the lazy loading feature, the assembly downloading time can take several seconds for each new route navigation.You can notify the user about this by using the Navigating component and displaying a custom message (e.g., “The requested page is loading…”) like in the following code example.
@using Microsoft.AspNetCore.Components.Routing; <Router AppAssembly="@typeof(Program).Assembly" PreferExactMatches="@true" AdditionalAssemblies="@lazyLoadedAssemblies" OnNavigateAsync="@OnNavigateAsync"> <Navigating> <div class="nav-banner"> <p>The requested page is loading...</p> </div> </Navigating> ...... ...... </Router> - The following example code demonstrates loading the Syncfusion Blazor assemblies dynamically when the user navigates to the specific route path.
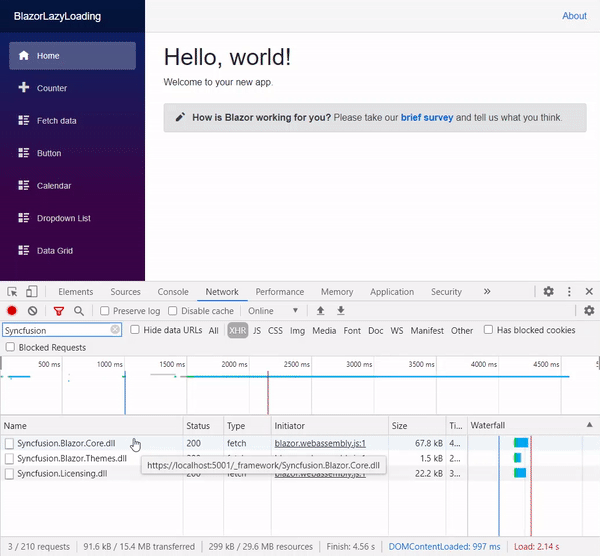
@using System.Reflection; @using Microsoft.AspNetCore.Components.Routing; @using Microsoft.AspNetCore.Components.WebAssembly.Services; @inject LazyAssemblyLoader assemblyLoader; <Router AppAssembly="@typeof(Program).Assembly" PreferExactMatches="@true" AdditionalAssemblies="@lazyLoadedAssemblies" OnNavigateAsync="@OnNavigateAsync"> <Navigating> <div class="nav-banner"> <p>The requested page is loading...</p> </div> </Navigating> ...... ...... </Router> @code { private List<Assembly> lazyLoadedAssemblies = new List<Assembly>(); private async Task OnNavigateAsync(NavigationContext args) { try { IEnumerable<Assembly> assemblies = null; switch (args.Path) { case "button": assemblies = await assemblyLoader.LoadAssembliesAsync( new List<string>() { "Syncfusion.Blazor.Buttons.dll" }); break; case "calendar": assemblies = await assemblyLoader.LoadAssembliesAsync( new List<string>() { "Syncfusion.Blazor.Calendars.dll" , "Syncfusion.Blazor.Buttons.dll", "Syncfusion.Blazor.Inputs.dll", "Syncfusion.Blazor.Lists.dll", "Syncfusion.Blazor.Data.dll", "Syncfusion.Blazor.Spinner.dll", "Syncfusion.Blazor.Popups.dll", "Syncfusion.Blazor.SplitButtons.dll", }); break; } if (assemblies != null) { lazyLoadedAssemblies.AddRange(assemblies); } } catch (Exception ex) { } } } - Finally, run the application and the Syncfusion Blazor assemblies will be lazy loaded while navigating to the various route paths.Refer to the following GIF image.
In the above GIF image, we can see that:
- When you navigate through various route paths, only the corresponding component assemblies and their dependencies will be loaded.
- If a component’s dependent assembly is already loaded in the previous route path, then it will not be loaded again.
- If you navigate to the same page again, the assemblies will be reused from the cache to render the components.
GitHub reference
You can get the complete working sample from this GitHub repository.
Summary
In this blog post, we covered the procedure to create a Blazor WebAssembly application with individual Syncfusion Blazor NuGet packages, and the procedure to enable lazy loading of assemblies. Refer to this documentation for the Syncfusion Blazor NuGet packages and their assembly names. This feature is available in the 2020 Volume 4 release.
Try out the steps discussed in this blog and share your feedback in the comments section below!
You can contact us through our support forums, Direct-Trac, or feedback portal. We are always happy to assist you!


 No spam, just valuable updates.
Comments (2)
In lazy loading mode, using @ref=”ToggleButton”, we get the following error. How to solve it?
Could not load file or assembly ‘Syncfusion.Blazor.Buttons, Version=18.4.0.30, Culture=neutral, PublicKeyToken=null’ or one of its dependencies.
The reported issue can reproduce in the Blazor framework itself and it is not specific with our Syncfusion Blazor components. We have reported this in Blazor GitHub issues and you can follow-up on it in the below link.
https://github.com/dotnet/aspnetcore/issues/29342