

Well-formatted content conveys important information better than unformatted content. Nowadays, it’s hard to find rich text in mobile applications since most editors don’t support it. We at Syncfusion understand the need for this simple but essential function; that’s why we are happy to introduce the Xamarin.Forms Rich Text Editor component in Essential Studio® 2019 Vol. 3.
This WYSIWYG editor provides a simple, yet powerful editing interface to compose richly formatted text with common formatting options such as bold, italic, and so on. The Rich Text Editor is widely used to create messaging applications, email composers, blogs, forum posts, feedback and review sections, note sections, and more. It has a variety of tools to edit and format rich text, and it returns valid HTML markup.
This blog post showcases some key features of the Rich Text Editor.
Seamless Formatting
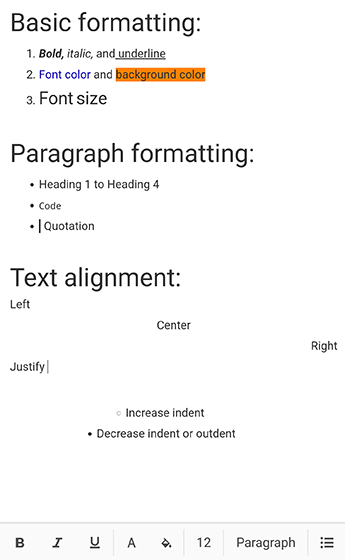
The Rich Text Editor provides formatting options frequently used in mobile applications. Formatting can be applied to selected content, a whole paragraph, specific words, or a selected character. Available options include:
- Bolding, italicizing, and underlining.
- Custom font and background colors.
- Formatting for headings, quotations, code, paragraphs, etc.
- Increasing or decreasing paragraph indentation.
- Text alignment.
Text formatting
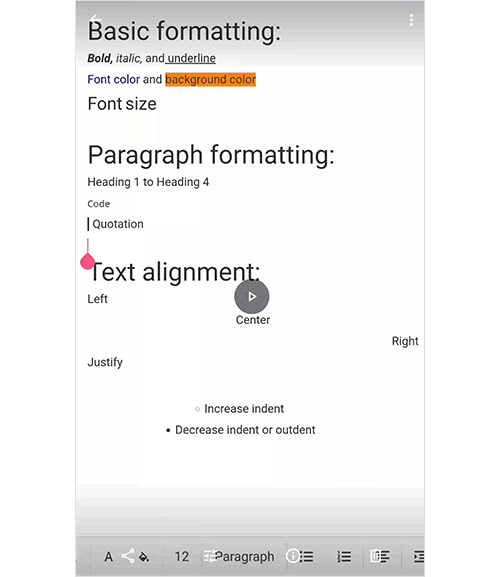
Sequencing content as a list
Organize content by applying ordered (numbered) or unordered (bulleted) lists.
Clipboard
Cut, copy, and paste formatted content within the same application or to an external application.
Toolbar customization
The Rich Text Editor provides a highly customizable toolbar. Customization options include:
- Changing the toolbar’s background color, text color, as well as the background color of toolbar items.
- Showing or hiding the entire built-in toolbar or a specific toolbar item.
You can also design your own toolbar that has the same functionalities using our comprehensive APIs.
Creating a Xamarin.Forms application containing the Rich Text Editor
This section explains, step-by-step, the procedure for implementing the Rich Text Editor control in a Xamarin.Forms application using Visual Studio.
- Create a blank Xamarin.Forms application.
- In the application, refer to the Xamarin.SfRichTextEditor NuGet package from nuget.org. To learn more about SfRichTextEditor, refer to “Adding SfRichTextEditor reference” in Syncfusion’s documentation.
- When deploying the application in UWP and iOS, please follow the steps provided in “Launching the application on each platform with Rich Text Editor” in Syncfusion’s documentation.
- Import the rich text editor namespace in your respective page and initialize SfRichTextEditor as demonstrated in the following code sample.
<?xml version="1.0" encoding="utf-8" ?>
<ContentPage xmlns="http://xamarin.com/schemas/2014/forms"
xmlns:x="http://schemas.microsoft.com/winfx/2009/xaml"
xmlns:d="http://xamarin.com/schemas/2014/forms/design"
xmlns:mc="http://schemas.openxmlformats.org/markup-compatibility/2006"
mc:Ignorable="d"
x:Class="GettingStarted.MainPage"
xmlns:richtexteditor ="clr-namespace:Syncfusion.XForms.RichTextEditor;assembly=Syncfusion.SfRichTextEditor.XForms">
<StackLayout>
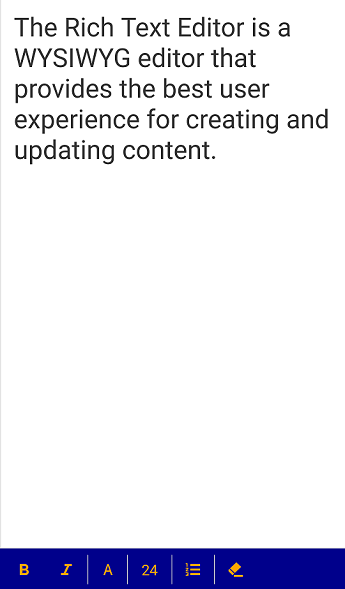
<richtexteditor:SfRichTextEditor HeightRequest="150" Text= "The Rich Text Editor is a WYSIWYG editor that provides the best user experience for creating and updating content." />
</StackLayout>
</ContentPage>
That’s how you add the Rich Text Editor control to an application.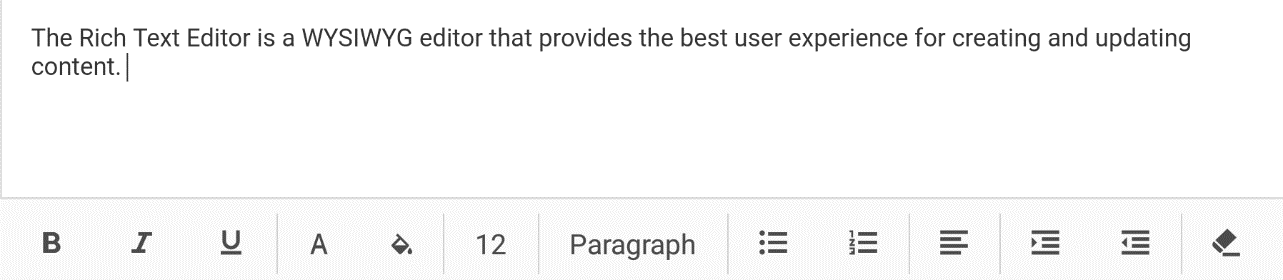
You can download a basic sample from the “Getting Started” section of our Rich Text Editor control documentation.
Conclusion
I hope you have a clear picture of how the new Rich Text Editor control works, and how to use it in a Xamarin.Forms application. Give it a try in our 2019 Volume 3 release.
We also invite you to check out all our Xamarin.Forms controls. You can always download our free evaluation to see all our controls in action or explore our samples on Google Play and the Microsoft Store. To learn more about the advanced features of our Xamarin.Forms controls, refer to our documentation.
If you have any questions or require clarification regarding this control, please let us know in the comments section of this blog post. You can always contact us through our support forum, Direct-Trac support system, or feedback portal. We are always happy to assist.
 No spam, just valuable updates.
Comments (15)
Great work!
Can we save it as PDF?
Hi Ankush,
Yes, it is possible to save the formatted text in Rich Text Editor as Word/PDF document using Syncfusion.Xamarin.DocIORenderer NuGet. Please find the code example and sample for the mentioned requirement in below mentioned KB link.
KB link: https://www.syncfusion.com/kb/10825/how-to-export-a-rich-text-editor-text-to-word-and-pdf-document-in-xamarin-forms
Regards,
Dilli babu.
Can a word document be convereted to Rich Text document format as well?
Hi Amir,
We regret for the delay.
Xamarin RichTextEditor doesn’t have direct import support of Word document. Instead, you can use our Essential DocIO to export the Word document as HTML. Please refer the following documentation for exporting Word document to HTML file.
UG documentation : https://help.syncfusion.com/file-formats/docio/html?cs-save-lang=1&cs-lang=xamarin
Then, the HTML string need to set to the HtmlText property of SfRichTextEditor to view the content in Rich Text Control.
HtmlText API : https://help.syncfusion.com/cr/xamarin/Syncfusion.SfRichTextEditor.XForms~Syncfusion.XForms.RichTextEditor.SfRichTextEditor~HtmlText.html
Regards,
Dilli babu.
Hi there, I would like to subscribe for this web site to obtain most
recent updates, therefore where can i do it please assist.
Hi Jared,
Thank you for showing up interest in reading our blog posts.
You either subscribe to our mail update or subscribe our RSS feed to get updates of the new posts in our site. You can find both these options in the right pane of the blog post, above the Popular Now blog list.
Thanks,
Suresh
Can we create custom menus or buttons for other operation
Hi Vikas,
Thank you for contacting Syncfusion support.
Currently, SfRichTextEditor doesn’t provide support to add a custom menus or buttons to the toolbar. We have already logged a feature report in feedback portal. We will implement this feature in any of upcoming release. The status of this feature can be tracked using the following feedback portal link.
https://www.syncfusion.com/feedback/9135/customize-richtexteditor-toolbar
Regards,
Dilli babu.
Hi i want to use syncfusion richtext editior for unoplatform. is it possible?
Hi Hedelin,
Thank you for your interest in Syncfusion controls.
At present, we do not have Rich Text Editor for UNO platform. We will consider your request and will implement the control in any of our future release.
Thanks,
Suresh
Where can I subscribe to get the update when this control is released.
SFRichTextEditor is working great in my app! I like the results very much! However, when I paste formatted text from an email that includes hyperlinks, the links do not work. I tap on the link, and then tap on the pop-out button to navigate to the link’s address, but nothing happens. I grabbed the HtmlText (see code below) from the editor and pasted it in my browser and everything work s, and looks, good. So the HTML is formatted correctly and the links are set properly.
I created a link using the add link button in the SFRichTextEdit control and that works just fine.
How do I get the pasted links to work?
Thanks,
Ben
“`
The writers Kurt Vonnegut (
Slaughterhouse Five
) and Joseph Heller (
Catch-22
) were at a glamorous party outside New
“`
Hi Ben,
We were able to see the behavior you mentioned above. We have created a new ticket under your account. We suggest you follow up with the ticket for further updates.
Regards,
Mohana Priya R
Thank you for this great blog. This is very helpful for users.