

The Xamarin.Forms resource view is a discrete view integrated into our Scheduler control to display events in all types of schedule views. This feature became available in our 2019 Volume 2 release. Through this feature, you can select single or multiple resources to view their events. You can also assign a unique color to each resource to easily identify its associated appointment. This rich feature set includes data binding, customization, globalization, and localization.
In this blog post, I will explain the key features of the multiple resource view in the Scheduler control. If you are new to the Scheduler control, please read the Getting Started article in the Scheduler documentation before proceeding.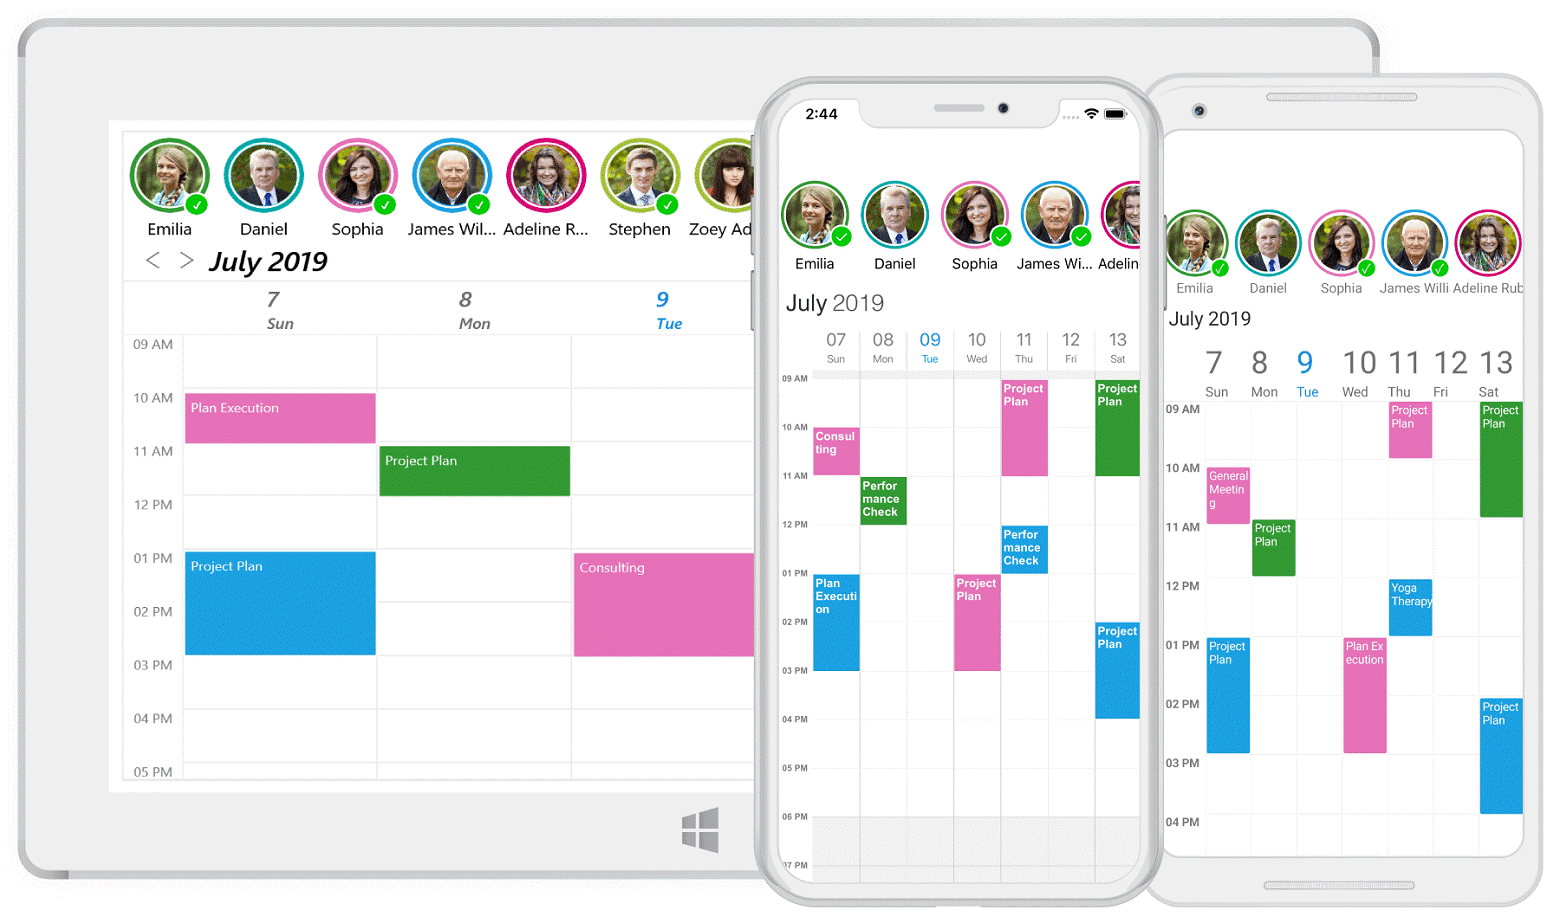
Scheduler Resource View in a Xamarin.Forms Application
Data binding
The resource view is an MVVM-friendly feature with complete data-binding support. This allows you to bind data from services and databases in order to add resources in the Scheduler control. You can bind custom resource data to the scheduler using a mapping technique.
The following code listing shows how to create a custom resource.
    /// <summary>
    /// Represents custom data properties.
    /// </summary>
    public class Employee
    {
        public string Name { get; set; }
        public object Id { get; set; }
        public Color Color { get; set; }
        public string DisplayPicture { get; set; }
    }
This is how you map a custom resource to the Scheduler control.
 <syncfusion:SfSchedule ScheduleView="WeekView" ShowResourceView="True">
            <syncfusion:SfSchedule.ResourceMapping>
                <syncfusion:ResourceMapping Name="Name"
                                          Id="Id"
                                          Color="Color"
                                          Image="DisplayPicture"/>
            </syncfusion:SfSchedule.ResourceMapping>
 </syncfusion :SfSchedule>
public ObservableCollection<object> Employees { get; set; }
….
// Creating instance for collection of custom resources
Employees = new ObservableCollection<object>();

// Creating instance for custom appointment class
Employee employee = new Employee();

employee.Name = "Kinsley Elena";
employee.Id = 5601;
employee.Color = Color.FromHex("#FFE671B8");
employee.DisplayPicture = "KinsleyElena.png";

// Adding a custom resource in custom resource collection
Employees.Add(employee);
And this is how you bind a custom resource to the Scheduler control.
<syncfusion:SfSchedule x:Name="schedule"
                               ScheduleView="WeekView"
                               ShowResourceView="true"
                               ScheduleResources="{Binding Employees}"/>
Filtering appointments based on resource selection
You can enable multiple resources by setting the value Multiple to SelectionMode. The SelectionMode property is available in ResourceViewSettings of the Schedule control instance.
This supports single and multiple selections by tapping resources and filtered appointments associated with a resource. In addition, the multiple resource view provides a single deselect mode, which lets you deselect a selected resource by tapping it again.
        <syncfusion:SfSchedule ScheduleView="WeekView" ShowResourceView="True">
            <syncfusion:SfSchedule.ResourceViewSettings>
                <syncfusion:ResourceViewSettings SelectionMode="Multiple"/>
            </syncfusion:SfSchedule.ResourceViewSettings>
        </syncfusion:SfSchedule>
You can also programmatically select resources.
// Creating instance for collection of selected resources
ObservableCollection<object> selectedEmployees = new ObservableCollection<object>();

//Adding selected resource in resource collection from the resources
selectedEmployees.Add(resources.FirstOrDefault(resource => (resource as ScheduleResource).Id.ToString() == "5601"));
selectedEmployees.Add(resources.FirstOrDefault(resource => (resource as ScheduleResource).Id.ToString() == "5604"));

//Adding selected resource collection to selected resources of SfSchedule
schedule.SelectedResources = selectedEmployees;
And you can programmatically deselect resources.
var selectedEmployee = selectedEmployees.FirstOrDefault(resource => (resource as ScheduleResource).Id.ToString() == "5604");

//Removing selected resource in selected resources of SfSchedule
schedule.SelectedResources.Remove(selectedEmployee);
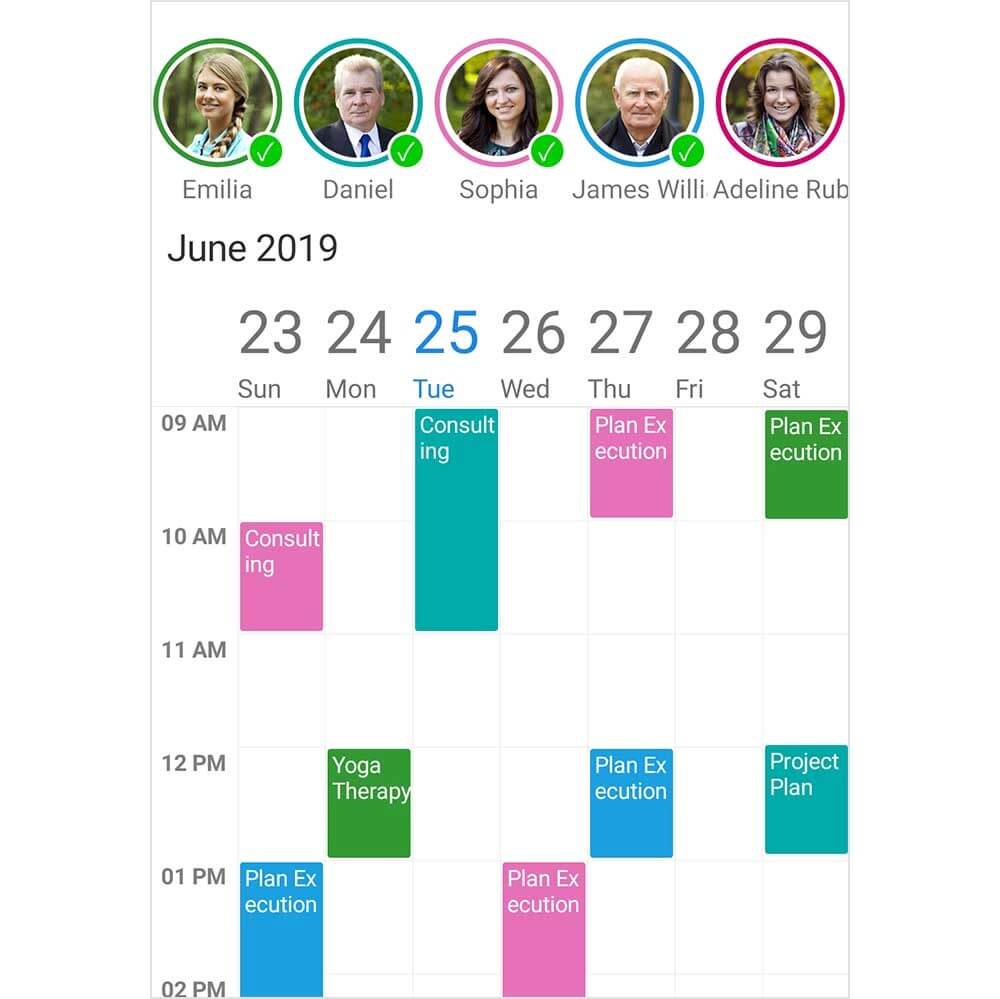
Appointments Filtered Based on Resource Selection
Date-based resources
You can dynamically change a collection of resources for each day, week, or month based on application-specific use-cases that efficiently and effectively utilize the resources. It is even possible to dynamically change the appearance of each resource name, color, and image.
     this.schedule.VisibleDatesChangedEvent += OnVisibleDatesChangedEvent;
        …
        private void OnVisibleDatesChangedEvent(object sender, VisibleDatesChangedEventArgs e)
        {
            var currentMonth = e.visibleDates[e.visibleDates.Count / 2].Month;
            var intern = schedule.ScheduleResources.FirstOrDefault(emp => (emp as Employee).Id.ToString() == "8600");
            if (currentMonth == 2 || currentMonth == 7)
            {
                if (intern != null)
                    return;

                Employee employee = new Employee();
                employee.Name = "Sophiya";
                employee.Id = "8600";
                employee.Color = Color.FromHex("#FFE671B8");
                employee.DisplayPicture = "schedule-resource-4.png";

                schedule.ScheduleResources.Add(employee);
            }
            else
            {
                if (intern == null)
                    return;

                schedule.ScheduleResources.Remove(intern);
            }
        }
You can also easily filter and manage unallocated events for resources by using a dummy resource.
            // Adding dummy resource for unallocated events
            Employee employee = new Employee();

            employee.Name = "Unallocated";
            employee.Id = 4731;
            employee.Color = Color.FromHex("#FFE671B8");
            employee.DisplayPicture = "schedule-unallocated-resource.png";

            // Adding a custom resource in custom resource collection
            Employees.Add(employee);
Visible resource count
You can display only a certain number of resources in the viewable area based on the requirements and size of the application. By default, the resource count will be adjusted based on the size of the resource layout.
        <syncfusion:SfSchedule ScheduleView="WeekView" ShowResourceView="True">
            <syncfusion:SfSchedule.ResourceViewSettings>
                <syncfusion:ResourceViewSettings>
                    <syncfusion:ResourceViewSettings.VisibleResourceCount>
                        <OnPlatform x:TypeArguments="x:Int32"
                                    iOS="5"
                                    Android="4"
                                    WinPhone="10" />
                    </syncfusion:ResourceViewSettings.VisibleResourceCount>
                </syncfusion:ResourceViewSettings>
            </syncfusion:SfSchedule.ResourceViewSettings>
        </syncfusion:SfSchedule>
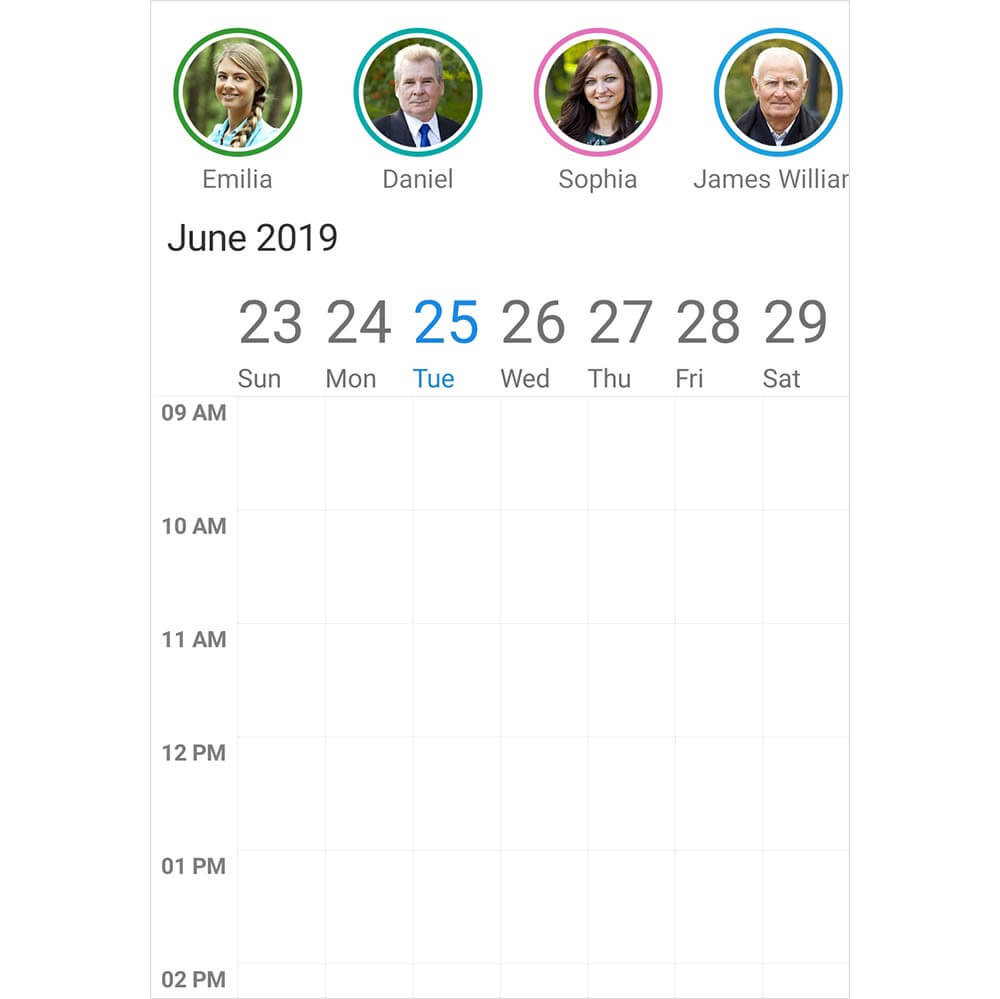
Display of Resources in the Viewable Area
View customization
By using data templates, the multiple resource view can host any view or control to customize resource items. To provide a consistent look, you can also customize each item through the dynamic selection of the UI using a data-template selector.
You can use different templates to differentiate available and unavailable resources in an organization.
    <ContentPage.Resources>
        <ResourceDictionary>
            <local:ResourceTemplateSelector x:Key="resourceDataTemplateSelector"/>
        </ResourceDictionary>
    </ContentPage.Resources>
        <syncfusion:SfSchedule x:Name="schedule"
                             ScheduleView="WeekView"
                             ShowResourceView="True"
                  ResourceItemTemplate="{StaticResource resourceDataTemplateSelector}"/>
This is how you create DataTemplateSelector.
public class ResourceTemplateSelector : DataTemplateSelector
    {
        public DataTemplate AvailableResourceTemplate { get; set; }
        public DataTemplate UnavailableResourceTemplate { get; set; }

        public ResourceTemplateSelector()
        {
            AvailableResourceTemplate = new DataTemplate(typeof(AvailableResourceTemplate));
            UnavailableResourceTemplate = new DataTemplate(typeof(UnavailableResourceTemplate));
        }

        protected override DataTemplate OnSelectTemplate(object item, BindableObject container)
        {
            if ((item as Employee).IsAvailable)
                return AvailableResourceTemplate;
            else
                return UnavailableResourceTemplate;
        }
    }
This is how you use a button to display the resources.
<?xml version="1.0" encoding="utf-8" ?>
<Button xmlns="http://xamarin.com/schemas/2014/forms"
        xmlns:x="http://schemas.microsoft.com/winfx/2009/xaml"
        x:Class="TemplatedResourceView.AvailableResourceTemplate"
        Text="{Binding Name}"
        InputTransparent="true"
        TextColor="White"
        BackgroundColor="{Binding Color}"
        FontSize="10"
        BorderColor="Black"
        BorderWidth="2">
</Button>
.......

<?xml version="1.0" encoding="utf-8" ?>
<Button xmlns="http://xamarin.com/schemas/2014/forms"
        xmlns:x="http://schemas.microsoft.com/winfx/2009/xaml"
        x:Class="TemplatedResourceView.UnavailableResourceTemplate"
        Text="{Binding Name, StringFormat= '\{0\}  (unavaiable)'}}"
        InputTransparent="true"
        TextColor="White"
        BackgroundColor="{Binding Color}"
        FontSize="10"
        BorderColor="Black"
        BorderWidth="2">
</Button>
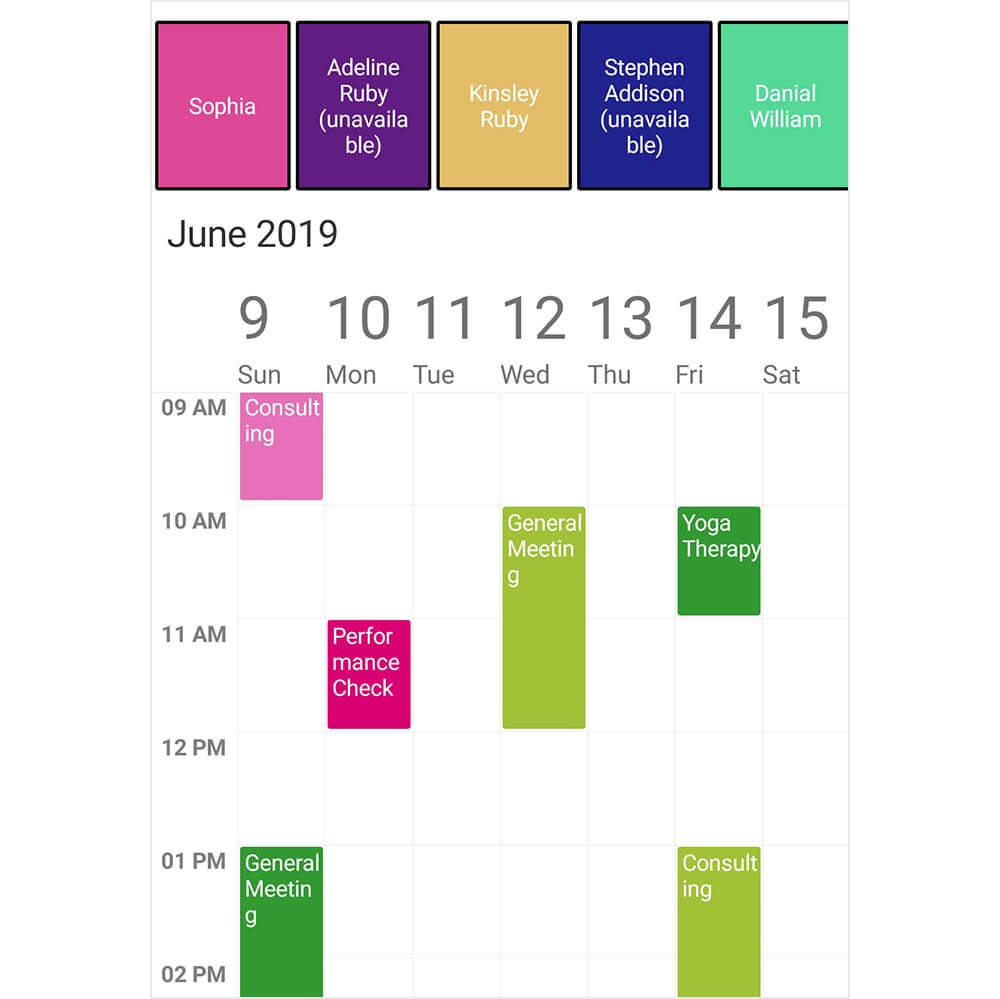
Customized Multiple Resource View
Conclusion
In this blog post, we had a quick overview of the resource view’s key features introduced in Essential Studio® 2019, Volume 2 release. You can explore other features in the Scheduler control’s documentation, where you can find detailed explanations of each feature with code examples.
Please feel free to try out the samples available in our GitHub location, and share your feedback or ask questions in the comments section. You can also contact us through our support forum, Direct-Trac, or feedback portal. We are happy to assist you.
 No spam, just valuable updates.
Comments (2)
Hi Njamudeen,
Thank you for the blog post. We are very interested in using this Xamarin control.
Is it possible to customize the Syncfusion Xamarin Scheduler to show Resources as columns and the Time as rows.
If not, is it possible to get the code to be able to create this customization that is required for our application?
Thanks,
Ming
Hi Ming,
Based on the provided information, we have checked and your requirement is “Resource grouping support in Schedule”. We have already logged the feature request. We will implement this feature in any of our upcoming releases.
At the planning stage for every release cycle, we review all open features and identify features for implementation based on specific parameters including product vision, technological feasibility, and customer interest. We will let you know when this feature is implemented. We appreciate your patience until then.
Thank you for requesting this feature and helping us define it. We are always trying to make our products better and feature requests like yours are a key part of our product growth efforts.
Feedback link: https://www.syncfusion.com/feedback/7835/schedule-view-for-each-resource-and-grouping-resources
If you have any more specifications/suggestions for the feature request, you can add it as a comment in the portal and cast your vote to make it count.