
Single sign-on (SSO) is one of the widely used user authentications in modern web applications. Google, Facebook, LinkedIn are some of the most popular SSO services available, and they allow users to register and login in no time.
In this article, we will focus on implementing single sign-on for Angular applications using AWS Cognito and Amplify.
Step 1: Creating a new Angular application.
First, we need an Angular application. If you have already installed Angular CLI, you can simply create a new application with the following command.
ng new |
If not, you need to install Angular CLI using the following command.
npm install -g @angular/cli |
After creating the application, navigate to the application folder and run the following command to ensure that the application is working.
ng serve |

Step 2: Installing Amplify.
Next, you need to install the Amplify CLI and configure it with your AWS account. You can use NPM to install the Amplify CLI as shown in the following snippet.
npm install -g @aws-amplify/cli |
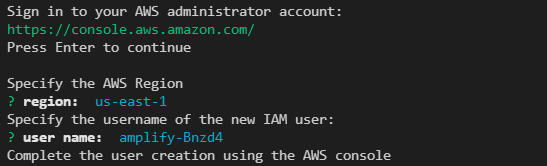
After installation, enter the command amplify configure to start AWS account configuration. Then, you will be redirected to the AWS login window in the browser, and you need to log into your AWS account.
Then, go back to the terminal and press Enter to continue the wizard. There, you will be prompted to select a region and a username for a new IAM user.
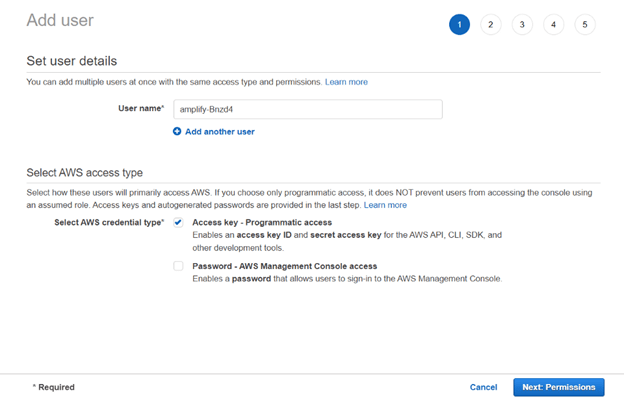
 After entering the requested details, you will be redirected to the AWS IAM user creation wizard to complete the user creation process. There, you need to enter the relevant details and make sure to assign programmatic access and administrator access.
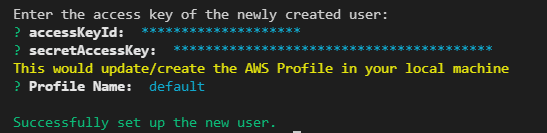
 Finally, you will receive a .csv file with an accessKeyId and secretAccessKey. Make sure to save these secrets, since you need to enter them in the terminal to complete the configuration.
Step 3: Integrating Amplify with Angular.
Now, start to integrate your Angular app with Amplify. For that, you need to install the aws-amplify-angular library.
npm install aws-amplify-angular |
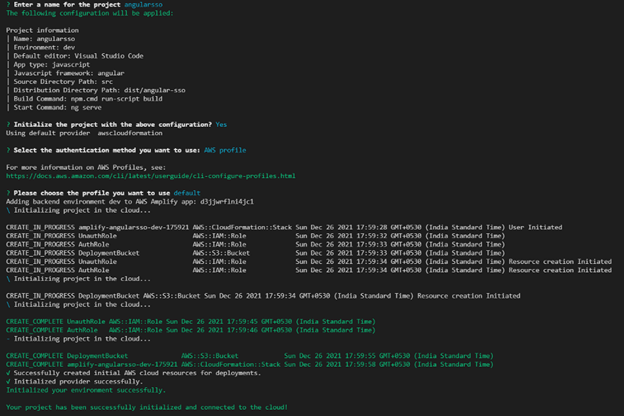
After installation, configure the Angular application with Amplify by executing the amplify init command. It will ask you for several settings, and you can use the previously created IAM user profile as the AWS profile.
 If you are using Angular version 6+, add the following code to the src/polyfill.ts file.
(window as any).global = window;
(window as any).process = {
  env: { DEBUG: undefined },
};Step 4: Configuring AWS Cognito user pool.
AWS amplify provides a variety of services. In this example, we are using Amplify Auth to implement user authentication. You can install Amplify Auth in your application by running the amplify auth add command.
You will see all the available user pools there, and you need to select the newly created user pool from that list.
 Once you are done with the configurations, it will create an AWS Cognito user pool in your AWS account. So, go to your AWS dashboard, select Cognito service, change the region to your IAM users’ region, and select Manage User Pools.
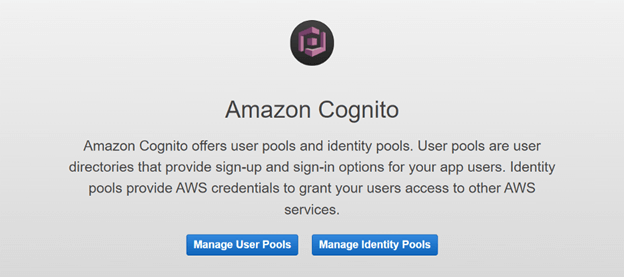 You will see all the available user pools. You need to select the newly created user pool from that list.
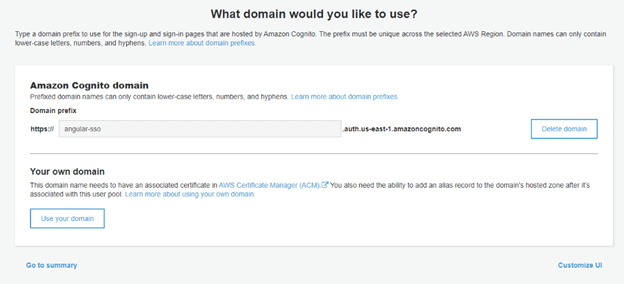
 Cognito user pool settings allow you to change multiple authentication options like password strength, signup options, social media, and SAML login integrations. But before that, you need to register a domain for the hosted UI for user login.
For that, navigate to Domain name under App integration and enter a suitable name for your domain.
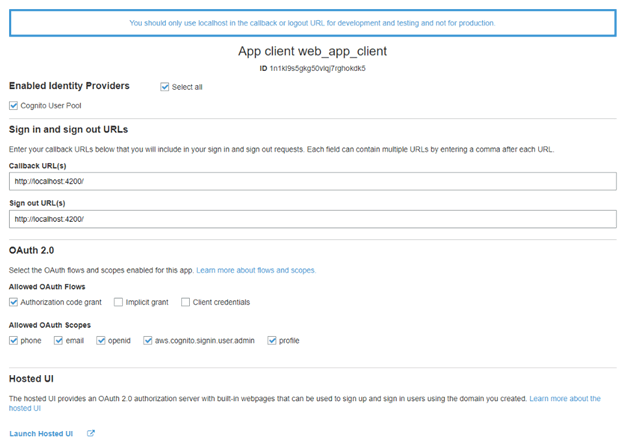
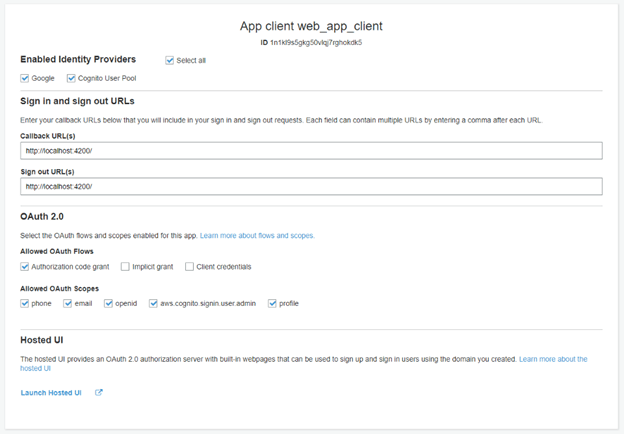
 Then, navigate to App client settings and enter the callback URLs and other necessary details in the clientWeb section.
 Now, click Launch Hosted UI and open the current login window if you want. However, there won’t be any single sign-on option since we haven’t configured it yet in our Angular app. So, let’s see how to enable Google login.
Step 5: Enabling Google login.
First, you need to enable federated identity providers. For that, navigate to the Identity providers tab under Federations. There, select Google and enter the relevant details.
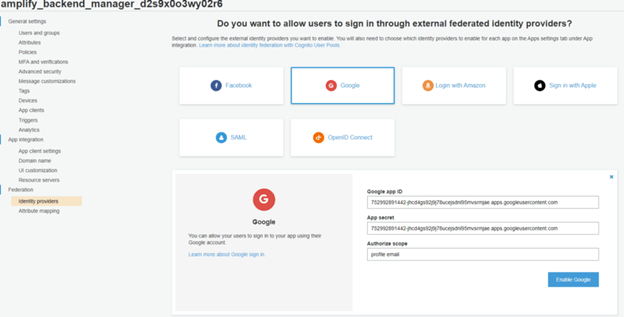 But you need to have a Google App for your application to get these details. You can easily create a Google App using a Google Developer account by following Google documentation.
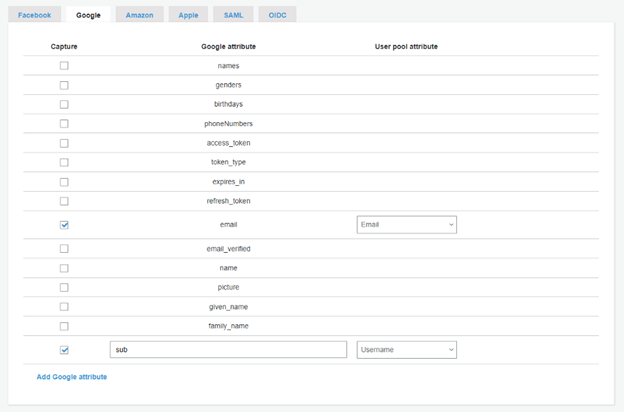
Step 6: Attribute mapping.
Now, you need to map identity provider attributes to user pool attributes. For that, navigate to Attribute mapping and select the email option under the Google tab.
 After that, go back to App Client Settings and enable Google as an identity provider.
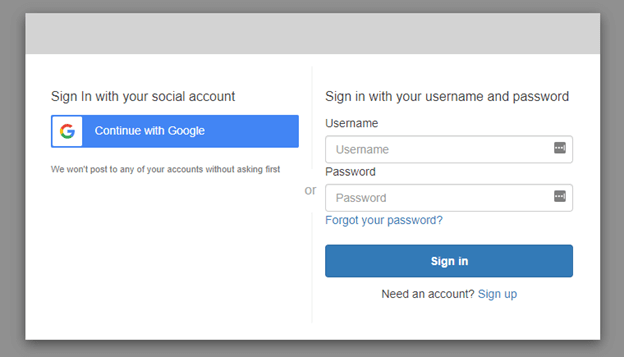
 Now, you can launch the hosted UI. You will see a new option to log in with your Google account.
 Once you log in, you will be redirected to the application URL you provided. In this case, http://localhost:4200/.
That’s it. You have successfully enabled single sign-on with Google in your Angular application.
Conclusion
Single sign-on provides an easy and secure method to handle user authentication for applications.
In this article, I walked you through the steps of enabling single sign-on for Google login in an Angular application using AWS Cognito and Amplify. You can easily enable SSO with other federated identity providers like Facebook, LinkedIn, or Amazon.
I hope you have found this useful. Thank you for reading.
Syncfusion’s Angular UI component library is the only suite that you will ever need to build an application, containing over 65 high-performance, lightweight, modular, and responsive UI components in a single package.
For existing customers, the newest Essential Studio® version is available for download from the License and Downloads page. If you are not yet a Syncfusion customer, you can try our 30-day free trial to check out the available features. Also, check out our demos on GitHub.
You can contact us through our support forums, support portal, or feedback portal. We are always happy to assist you!
 No spam, just valuable updates.
Comments (2)
Hi. Can you please share the angular source of Git.
Need one more help for the below scenario.
Created Cognito pool, then included identity provider under “Sign in experience” tab.
Using Amplify authenticator, how can enable/view the identity provider for sign in from angular and amplify authenticator.
Can u pls share the git angular source.